how to check if laptop speaker is working

Title: Stereo Test - LeftRight Audio Test for HeadphonesSpeakers
Channel: Gabe's Hacks
Stereo Test - LeftRight Audio Test for HeadphonesSpeakers by Gabe's Hacks
how to check if laptop speaker is working, how to check whether laptop speaker is working or not, how to check speaker is working or not in laptop, how to check if computer speakers are working
Laptop Speakers Dead? This ONE Trick Will SHOCK You!
Revive Your Laptop Sound: The Unexpected Fix That Works!
Have your laptop speakers gone silent? It is a frustrating problem. You are not alone. Many of us have faced this audio adversity. It impacts movie nights and video calls. Prepare to be amazed. There is a surprising solution.
The Sound of Silence: Recognizing the Problem
First, consider the signs. Are your speakers completely dead? Maybe you get faint sounds. Sometimes, the audio cuts in and out. These issues are common. Several factors cause speaker problems. Software glitches could be to blame. Perhaps, the hardware has a defect. It is essential to pinpoint the issue.
Is It Hardware or Software? A Quick Diagnostic
Before we move further, let's diagnose. We need to rule things out. The process doesn't have to be complex. Start with something simple. Ensure the volume is turned up. Double-check the mute button. Also, verify the audio settings. Ensure your laptop is connected to the correct output. In some cases, the issue is a simple oversight.
The Hidden Power of Driver Updates (And Why They Matter!)
Then, let's check the drivers. Drivers are crucial software components. They tell your computer how to control hardware. Outdated drivers cause audio issues. Therefore, you must update them. It is a straightforward process. Go to your device manager. Find your sound card or audio device. Right-click on it. Choose "Update driver." Follow the prompts. As a result, new drivers install automatically. Consequently, your sound might return.
The Magic of the Windows Troubleshooter: Your Secret Weapon
Windows has a built-in troubleshooter. It is like your personal audio wizard. It is ready to identify and fix problems. Access the troubleshooter quite easily. Type "troubleshoot settings" in the search bar. Select "Troubleshoot". Then, choose "Playing Audio". Follow the instructions on the screen. The automated process should resolve many audio problems. Moreover, it's quite useful.
The Unexpected Savior: Reinstalling Audio Drivers
If updating does not work, consider reinstalling. Uninstall your current audio drivers. Reboot your laptop. Windows will automatically reinstall them. This action often fixes more complex problems. Go back to the device. The driver will offer a fresh start. Therefore, it is worth a try. It is extremely effective.
Cleaning Up Your Audio: Checking for Conflicts
Sometimes other programs cause interference. These programs might conflict with audio drivers. Assess any recently installed software. Try uninstalling suspect apps one by one. Then, restart your laptop after each removal. This step helps isolate the culprit. Moreover it is also helpful.
External Speakers: A Temporary (or Permanent) Solution
If none of these steps work, consider other options. External speakers or headphones may be used. They can bypass the laptop's internal speakers. This will confirm if the actual laptop speakers are faulty. External devices will offer a quick test. Additionally, they may provide a better audio experience.
The Nuclear Option: System Restore (Use with Caution!)
Be very cautious with this option. A system restore recovers your system to a prior date. It can rectify driver issues. Choose a restore point that occurred before the problem began. System restores delete recent updates. They might also impact software installation. Therefore, back up your data first.
Preventive Measures: Keeping Your Audio Happy
You can take some preventive steps. Therefore, be proactive in addressing the problem. Regularly update your operating system. Ensure your drivers stay updated. Also, avoid downloading untrusted software. These steps will keep your audio running smoothly.
When to Call in the Experts
Sometimes, you need professional help. If all else fails, it is time for tech support. There could be a hardware problem. You may need a specialist to replace the speakers. Don't hesitate to seek assistance.
Conclusion: Bringing Your Laptop's Sound Back to Life
Losing your laptop's audio is annoying. But you are not helpless. There are several solutions available. From simple volume checks, to driver updates, you have options. You now possess several strategies. Therefore, you can confidently troubleshoot. Bring the sound back to life. Enjoy your audio once more.
Acer Aspire E15 Backlit Keyboard FAIL! (Easy Fix!)Laptop Speakers Dead? This ONE Trick Will SHOCK You!
Alright, let's be honest, there's nothing more frustrating than a silent laptop when you're geared up for that movie night, virtual meeting, or just vibing to your favorite playlist. We've all been there – that moment of panic when your laptop speakers decide to stage a walkout. Fear not, fellow tech enthusiasts! Today, we're diving headfirst into the digital trenches to uncover the secrets to resurrecting those sound-challenged speakers. We're not just talking about basic troubleshooting here; we're talking about that one trick that might just restore your audio sanity. And trust me, it’s simpler than you think.
1. The Silent Symphony: Recognizing the Problem
Before we unleash the magic, let's make sure we actually have a problem. Is it definitive that your laptop speakers are dead, or is there just a momentary hush? Check the obvious stuff first. Make sure the volume isn't muted (it happens to the best of us!). Look at the volume icon in the system tray; is it crossed out? Also, double-check to see if you’ve accidentally plugged in headphones, which could reroute the audio.
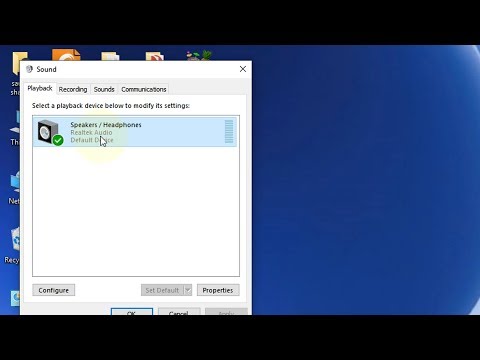
2. The Software Whisperer: Checking Your Sound Settings
Think of your operating system as the conductor of your audio orchestra. If the conductor's not paying attention, the music ain't playing. We need to check the settings. Navigate to your sound settings (the exact location varies slightly depending on your operating system – Windows, macOS, ChromeOS – but it's usually easily accessible through the system tray or control panel). Look for your laptop speakers and make sure they're selected as the default playback device. If they’re not, select them.
3. The Driver Detective: Hunting Down the Culprit
Drivers are the unsung heroes of your digital world. They're the software that allows your hardware (like your speakers) to communicate with your operating system. If your sound drivers are outdated, corrupted, or missing, it's like trying to speak a language that the other person doesn't understand. The solution? Update or reinstall those drivers. Here’s how, from what I've picked up from my own tech escapades: Go to the Device Manager (search for it in Windows, search "Device Manager" on Mac, and look for it in the settings). Locate "Sound, video and game controllers," right-click on your audio device (your laptop speakers), and select "Update driver." Follow the instructions. If that doesn't work, try uninstalling and reinstalling the driver. Be prepared to restart your computer.
4. The Audio Enhancement Abyss: Disabling Sound Enhancements
Sometimes, the cure is worse than the disease. Your operating system might have built-in audio enhancements designed to improve sound quality. But, sometimes, these enhancements can actually hinder it. We’re moving into what I affectionately call the "abyss." Go back to your sound settings. Look for an option like "enhancements" or "effects." If it's enabled, try disabling it. It might be your speakers' silent saviour.
5. The Physical Checkup: Inspecting Hardware
Okay, let's get a little more hands-on (but still gentle!). Sometimes, the problem isn't software-related. It might be a hardware gremlin. If you’re comfortable, and your laptop allows it, take a peek inside or around at the physical speakers. Check for any loose connections, particularly if your laptop has taken a tumble recently. However, be extremely cautious; opening a laptop can void its warranty and lead to further damage if you're not careful. For the less technically inclined, consider taking it to a professional.
6. The Shocking Trick: The "Power Cycle" Reset
This is the one. The secret weapon. The trick that might just blow your mind (or at least, get your speakers working). We're talking about a very specific type of power cycle, a mini-reboot for your audio system. Here's the drill:
- Completely shut down your laptop: Not just sleep or hibernate. A full, proper shutdown.
- Unplug the power adapter: Crucial! Remove the charger if you have one plugged in.
- Press and hold the power button for at least 30-60 seconds: This discharges any residual power in the circuits. This is the key. This is the one trick!
- Plug the power adapter back in (if applicable):
- Power on your laptop: And cross your fingers.
Why does this work? It's like a digital defibrillator. It can sometimes reset the audio hardware and software, clearing out any temporary glitches that might be causing the silence. It's surprisingly often, and I'd be lying if I said it always worked. But when it does. It feels like magic.
7. The External Speakers Escape: Checking for Hardware Issues
If the power cycle doesn't work, and you have a set of external speakers or headphones, try plugging them in. If the external speakers/headphones work, then the problem is more than likely your internal laptop speakers. This suggests the speaker hardware or connections inside your laptop might be the issue.
8. The BIOS Bonanza: Checking for BIOS Audio Settings
For the tech-savvy amongst us, sometimes the BIOS settings can play a role. Accessing the BIOS requires hitting a specific key (often Del, F2, or Esc) right after you power on your laptop. Once in the BIOS, look for audio-related settings. Make sure the audio is enabled and not muted.
9. The System Restore Salvation: Rolling Back to a Previous State
If you know your sound worked fine a few days ago, and if you did system updates, a system restore might be your ticket to audio bliss. This is essentially rewinding your computer to a previous state when everything was working properly. Search for "create a restore point." And, if your system has restore points, use them.
10. The Malware Menace: Scanning for Viruses
Believe it or not, malware can sometimes interfere with your audio drivers and settings. Run a full scan with your antivirus software to rule out any malicious software causing the issues.
11. The Volume Mixer Mystery: Making Sure Nothing is Soft-Muted
The volume mixer, hidden away in your system tray, is another sneaky culprit. Check the mixer to ensure the individual apps aren't muted. If a specific application is muted, even if your system volume is up, you won't hear any sound from that app.
12. The Sound Troubleshooter Triumph: Leveraging Built-In Tools
Both Windows and macOS have built-in troubleshooters designed to diagnose and fix sound problems. These tools are surprisingly effective at detecting and resolving common audio issues. Give them a shot! Search "troubleshoot sound problems" in the settings.
13. The Audio Codec Conundrum: Updating or Reinstalling Codecs
Codecs are the translators of your audio files. They decode the audio data so your computer can understand it. If your codecs are outdated or corrupted, you might struggle with audio playback. Try updating or reinstalling your audio codecs.
14. The Laptop Temperature Test: Overheating Concerns
Believe it or not, excessive heat can sometimes impact your laptop's hardware, including the audio components. Ensure your laptop isn't overheating and that the vents are clear. Give it a rest if it’s been working hard.
15. The Ultimate Solution: Seeking Professional Help
If you've tried everything, and still no sound, it might be time to face reality and seek professional help. A technician can diagnose the problem and replace any faulty hardware components. Sometimes, the speakers simply give up the ghost. But don’t despair.
Conclusion: Unleashing the Sound!
So there you have it! We've tackled the troubleshooting of dead laptop speakers, from simple checks to the shocking one trick. We've walked through software adjustments, hardware inspections, and even the dreaded "professional intervention." Remember, not every problem is a lost cause. By methodically working through these steps, you're giving yourself the best chance of restoring audio to your digital life. Don't give up! Your symphony awaits.
Frequently Asked Questions (FAQs)
Q: What if my laptop speakers work sometimes but not others? A: This could indicate a driver issue, a temporary glitch, or a loose connection. Try updating your drivers, performing the power cycle trick, and checking for loose connections. Remember to run a system scan, too!
Q: Do I need to open up my laptop to fix the speakers? A: Only if you're comfortable and have experience. You should be very careful when opening your laptop. Improper handling can cause permanent damage. If you’re unsure, seek professional help.
Q: Can a virus cause my laptop speakers to stop working? A: Potentially. A virus can corrupt drivers or interfere with system processes. Run a full scan with your antivirus software.
Q: What do I do if none of these tricks work? A: It might be a hardware problem. If you've exhausted all software troubleshooting steps, consider taking your laptop to a professional technician for repair.
Q: Will replacing my laptop speakers be expensive? A: The cost varies. Replacement speakers themselves
All Laptop Sound Audio Problem HP Elite Book Series Laptop Audio Soundmacniteshkeyboardtricks

By Mac Nitesh All Laptop Sound Audio Problem HP Elite Book Series Laptop Audio Soundmacniteshkeyboardtricks by Mac Nitesh
Bluetooth is Not Working Connecting to MobileHeadphoneSpeaker - How to Solve Bluetooth Issues
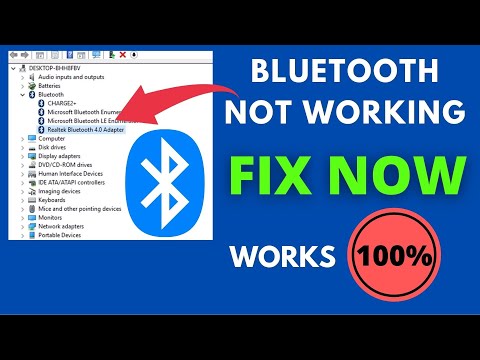
By FIXsage Bluetooth is Not Working Connecting to MobileHeadphoneSpeaker - How to Solve Bluetooth Issues by FIXsage
FIX100 Sound Audio Problem ON Your PCLaptopmacniteshaudio2023new

By Mac Nitesh FIX100 Sound Audio Problem ON Your PCLaptopmacniteshaudio2023new by Mac Nitesh
Title: How to fix No Sound on Windows 10
Channel: The Geek Page
How to fix No Sound on Windows 10 by The Geek Page
My Laptop Work
Title: The Definitive Guide to Mastering the Art of Sourdough Bread: From Starter to Slice
We've all witnessed it: the captivating dance of flour and water, the patient wait, the promise of that first, crisp-crusted bite. Sourdough bread, more than a mere staple, is a testament to the power of natural fermentation, a journey into the heart of culinary tradition. We, in this comprehensive guide, shall embark on that journey together, equipping ourselves with the knowledge and techniques necessary to create sourdough masterpieces that will grace our tables and delight our palates. Forget the fleeting fads; this is an immersion into the enduring craft, a guide crafted to elevate your baking from the mundane to the truly extraordinary.
Cultivating Your Sourdough Starter: The Foundation of Excellence
The soul of any exceptional sourdough loaf resides in its starter, a living culture of wild yeasts and lactic acid bacteria that transform simple ingredients into something truly magnificent. The creation of a thriving starter is not a Herculean task but rather a commitment to patience and observation.
- The Initial Flour and Water Blend: Begin with equal parts by weight of unchlorinated water (filtered is ideal) and unbleached all-purpose or bread flour. A ratio of, say, 50 grams of each provides a manageable starting point. Combine these in a clean, glass jar, ensuring thorough mixing until a smooth, slightly thick slurry is achieved. Loosely cover the jar (cheesecloth secured with a rubber band works well) allowing air circulation while preventing contamination.
- The First Days of Development: For the initial 4-7 days, discard half of the mixture daily and replenish with fresh flour and water in the same proportions. Observe the signs of early activity, such as slight bubbling and a subtle sour aroma. The temperature of your environment will influence the pace; warmer temperatures generally accelerate fermentation.
- Feeding and Maintenance: Once activity becomes more pronounced (consistent bubbling, a noticeable rise, and a distinctive, tangy aroma), transition to a feeding schedule tailored to your needs. A twice-daily feeding is typical in the early stages. Discard a portion of the starter (usually around half) before each feeding and add fresh flour and water in a 1:1:1 ratio (e.g., 50 grams starter, 50 grams flour, 50 grams water).
- Recognizing a Healthy Starter: A mature, healthy starter doubles or even triples in size within a few hours after feeding, displays numerous air bubbles throughout, and possesses a pleasant, slightly acidic aroma. Storing the starter in the refrigerator slows down its activity; however, it still needs regular feeding (once a week) to stay active.
- Troubleshooting Your Starter: If your starter fails to rise, or develops undesirable odors (like acetone or mold), there are a couple of solutions. Don't immediately discard. First, make sure to use a clean jar and clean utensils, for your starter. Second, it can be "revived" by repeated feedings with high-quality flour. If mold appears, the starter will need to be discarded.
Mastering the Sourdough Dough: The Alchemy of Breadmaking
With a robust starter in hand, we can proceed to the actual bread-making process, where flour, water, salt, and time converge to create something truly special.
- The Autolyse: This often-overlooked step is crucial for developing gluten structure and flavor in the dough. Mix your flour and water (the desired amount for your recipe) in a bowl, ensuring all the flour is hydrated. Let this mixture rest, covered, for 30 minutes to an hour, allowing the flour to absorb the water fully.
- The Addition of the Starter and Salt: Incorporate your active starter into the autolysed dough. Mix thoroughly until the starter is evenly distributed. Then, add the salt (typically 2-3% of the flour weight) and incorporate it, allowing it to dissolve into the dough.
- Bulk Fermentation: Unveiling the Flavor: Bulk fermentation is where the dough develops its characteristic sourness and texture. Cover the dough and allow it to rise at room temperature. This is where the magic truly begins. The duration of bulk fermentation varies depending on the temperature, the activity of your starter, and the type of flour used.
- Folding Technique: Encouraging Strength: During bulk fermentation, fold the dough at regular intervals (every 30-60 minutes for the first few hours). This strengthens the gluten network, creating a dough that can retain gas. Gently stretch a portion of the dough upwards, then fold it over onto itself. Repeat this process around the entire dough mass.
- Assessing Readiness: The dough is ready for the next stage when it has increased in volume (typically by 20-50%), shows bubbles throughout, and feels airy yet strong.
- Shaping: Crafting the Perfect Form: Gently turn the dough out onto a lightly floured surface. Shape the dough into the desired form— a boule (round loaf), a batard (oval loaf), or a baguette.
- Boule Shaping Tutorial: Gently flatten the dough into a rectangle. Fold the top third down towards the center, then the bottom third up over the top. Turn the dough 90 degrees and fold the top portion of the dough down towards the center again. Repeat with the bottom portion of the dough. Then, gently roll the dough into a tightly shaped round.
- Batard Shaping Tutorial: Following the same principles as shaping a Boule, fold the dough over to create a long loaf, gently shaping the ends to create an oval.
- Proofing: The Final Rise: Place the shaped dough in a well-floured banneton basket (a proofing basket) or a floured bowl lined with a clean kitchen towel. Cover the dough (or the basket) and refrigerate it overnight, or for a shorter period (2-4 hours in a warm room) to slow down fermentation. A cold proof develops complex flavors.
Baking Sourdough: Achieving that Perfect Crust
Baking sourdough demands careful attention to detail to unlock its full potential – especially in regards to the crust.
- Preheating the Oven: Preheat your oven with a Dutch oven inside to a temperature of 450-500°F (232-260°C) for at least 30 minutes before baking. The Dutch oven provides a steamy environment crucial for crust development.
- Scoring the Dough: Carefully remove the hot Dutch oven from the oven. Gently place the proofed dough (from the banneton or bowl) into the hot Dutch oven. Use a sharp lame or a razor blade to score the top of the loaf. Scoring controls the expansion of the bread during baking (oven spring) and creates decorative patterns.
- Baking with Steam: Cover the Dutch oven, and bake for 20 minutes. This creates a steamy environment which allows the bread to expand and creates the crust. Then, remove the lid and continue baking for another 20-30 minutes, or until the crust is deeply golden brown.
- Checking for Doneness: The internal temperature of the loaf should reach 200-210°F (93-99°C) when fully baked. A gentle tap on the bottom of the loaf should produce a hollow sound.
- Cooling: Patience is a Virtue: Transfer the baked loaf to a wire rack and cool completely before slicing (at least 1 hour). This allows the internal structure to set, preventing a gummy texture. Enjoy!
Variations and Troubleshooting: Expanding Your Sourdough Horizons
The world of sourdough baking is expansive, offering countless variations and opportunities for experimentation.
- Flour Varieties: Experiment with different flours to influence the flavor and texture of your bread. Whole wheat flour adds a nutty flavor and a chewier crumb, rye flour contributes a distinctive tang and a slightly darker crust, and bread flour provides great strength.
- Add-ins: Incorporate seeds (sunflower, poppy), nuts (walnuts, pecans), dried fruits (cranberries, raisins), herbs (rosemary, thyme), olives, and cheeses (cheddar, parmesan) for enhanced flavor and texture.
- Troubleshooting Common Issues:
- Dense Bread: The dough may have been under-proofed, or the starter wasn't active enough, or you under-kneaded.
- Flat Bread: The dough may have been over-proofed or over-fermented.
- Lack of Oven Spring: The oven wasn't hot enough, or the dough may have been under-proofed.
- Sourness is too high: You used too much starter, or your bulk fermentation period was too long.
Sourdough: A Lifelong Journey of Discovery
Baking sourdough is a journey, not a destination. It's a continuous process of learning, adapting, and savoring the fruits of your labor. Don't be afraid to experiment, make mistakes, and refine your techniques. Each loaf is an opportunity to grow, to understand the subtle dance between flour, water, and time, and to create something truly extraordinary. With each success, you'll find that the simple act of baking becomes a source of immense satisfaction, a connection to a rich culinary heritage, and a way to nourish not just your body, but your soul. Embrace the process, enjoy the results, and let the magic of sourdough transform your kitchen into a haven of warmth, aroma, and deliciousness.
