spilled wine on laptop keyboard doesn't work

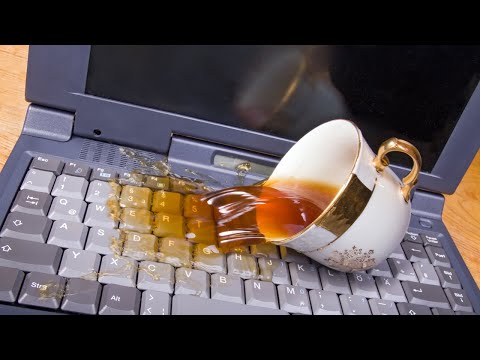
Title: Spilled Coffee on Laptop, Liquid Damage
Channel: R3DLIN3S
Spilled Coffee on Laptop, Liquid Damage by R3DLIN3S
spilled wine on laptop keyboard doesn't work, spilled wine on laptop keyboard
Laptop Keyboard Drowned in Wine? Don't Panic! This Will Fix It!
Oh No! Spilled Wine on Your Laptop Keyboard? Rescue Mission Begins!
That sinking feeling. You know the one. A joyous evening, perhaps a virtual movie night, suddenly turns into a potential tech catastrophe. Crimson tide, or a bubbly white flood, has invaded your laptop's keyboard. Before you spiral into despair, breathe. Because, trust me, I've been there. And, thankfully, recovery is often possible. So, let's bypass the panic and jump directly into action!
Immediate Actions Are Critical: The Golden Minutes
Time is of the essence. The faster you react, the better your chances of a successful resurrection. Therefore, every second counts! Firstly, unplug your laptop immediately. This is crucial to prevent short circuits and potential further damage. Next, disconnect the power adapter. Because, electricity and liquids are a disastrous combination. Then, if possible, gently turn the laptop upside down. Do this to allow the liquid to drain. Also, carefully open your laptop as much as the hinges allow. Avoid bending the screen too far. This will prevent additional damage.
Drying Techniques: Your Arsenal Against Liquid Intrusion
Once you've removed the immediate threats, the drying process begins. So, grab some absorbent materials. A clean, lint-free cloth or paper towels are your best friends. Gently blot away as much of the liquid as possible. Avoid rubbing, since this can spread the liquid further. Moreover, if you have keyboard key removal tools, consider carefully removing the keys. This offers access to the internal components for more thorough cleaning. After removing any keys, allow them to air dry separately. Similarly, create a drying station. This includes placing the laptop (still upside down) in a well-ventilated area. Using a fan to circulate air can significantly speed up the drying process. Do not use a hairdryer. Because, the heat can cause damage.
Deep Cleaning: Eradicating the Sticky Residue
Once the initial drying phase is complete, now it’s time to consider a deep clean. Therefore, if you removed any keys, now is the time to thoroughly clean the keyboard's interior. Firstly, isopropyl alcohol (at least 70% concentration) is your go-to cleaning agent. Moreover, it evaporates quickly and won’t cause corrosion. Pour a small amount onto a clean cloth or cotton swab. Now, very gently, wipe down the affected areas. Then, tackle the keys you removed. Ensure that you wipe them thoroughly using the same approach. Because, any dried residue will impede function. Allow everything to air dry completely before reassembling.
Reassembly and Testing: The Moment of Truth
After your meticulous cleaning and drying efforts, it’s time for reassembly. So, once everything is impeccably dry, carefully replace the keyboard keys. Furthermore, ensure each key is properly seated and aligned. Then, plug in the power adapter. Next, power on your laptop. Cross your fingers and hope for the best. Finally, test every single key! Check the functionality of each key. Test them. If everything works as expected, celebrate your victory. In case there are some non-functional keys, repeat the cleaning process. However, if the problem persists, it is important to seek professional help.
When to Seek Professional Help: Knowing Your Limits
Even with the right tools and determination, certain situations demand expert intervention. Because, some laptop components are very delicate. If you notice extensive damage, like liquid reaching the internal components, call for professional assistance. Similarly, if the keyboard shows persistent malfunction after cleaning, consult a technician. In addition, if you are uncomfortable disassembling and reassembling your laptop, don't hesitate! The cost of professional repair pales in comparison to replacing the entire laptop.
Preventative Measures: Safeguarding Your Tech Fortress
Prevention is always the best medicine. Therefore, consider taking proactive steps to guard your laptop against spills. For instance, use spill-proof keyboard covers. Also, be mindful of where you place your laptop. Keep it away from potential hazards, like drinks and food. Finally, and most importantly, remember that quick action and a calm approach are your best allies. Thus, a wine-soaked keyboard doesn’t necessarily spell disaster. Because, with the right knowledge, you can take matters into your own hands. Ultimately, armed with the knowledge from this guide, you’re well-equipped to tackle this common tech challenge. Good luck!
Dell Laptop DVD Player Dead? 😱 FIX IT NOW!Laptop Keyboard Drowned in Wine? Don't Panic! This Will Fix It!
We’ve all been there. In a moment of convivial bliss, or perhaps clumsy distraction, disaster strikes. That beautiful Cabernet Sauvignon, that crisp Pinot Grigio, or even that innocent glass of water… finds a new home on your laptop keyboard. Your heart leaps into your throat. It’s like watching a slow-motion car crash – you know it’s happening, you’re helpless to stop it. But before you resign yourself to a premature laptop funeral, take a deep breath. We’re going to navigate this treacherous terrain together. Don't worry; we've got you. Think of it as a slightly messy, and potentially expensive, emergency room visit for your beloved tech companion.
1. The Initial Shock: "Oh, Crap! My Keyboard Is Drenched!"
The first few seconds are a blur. Denial, panic, and a frantic assessment of the damage. The wine spreads like a crimson tide across the keys, or the water beads and reflects the despair in your eyes. You might instinctively reach for a paper towel, a napkin, anything to staunch the flow. But let's be honest, initial reactions are rarely the most effective. Remember that feeling of helplessness? That’s where we start.
2. Immediate Actions: Time is of the Essence – Act Fast!
Time is absolutely of the essence. This isn't a leisurely stroll through the vineyard; it's a high-speed chase against corrosion. The longer the liquid lingers, the more damage it can inflict.
- Unplug Immediately: The absolute FIRST thing you do. Unplug the power cord. You don't want a short circuit causing even more problems, maybe even damaging the internal components, or worse.
- Power Down, Then Power Down: Immediately turn off your laptop. Force a shutdown if necessary. Hold the power button until it dies. Every second counts.
- Flip It Over ASAP: Gently (and I mean gently!) flip your laptop upside down. The goal is to let gravity do its job and get as much liquid out as possible. We want the liquid flowing AWAY from the system board, not toward it.
Essentially, you are performing a Heimlich maneuver on your laptop, trying to force the offending liquid out.
3. Assessing the Damage: What Kind of Liquid Was It?
This is not just about the volume; it's about the nature of the liquid. Plain water is obviously different from sugary soda or, let's be honest, something like a sticky liqueur.
- Water: Relatively benign, though still potentially damaging.
- Wine: Acidic and contains sugar, which can cause corrosion and stickiness.
- Soda/Juice: High in sugar, leading to sticky residue and potential short circuits.
- Coffee/Tea: Similar to soda, with the added bonus of potential staining.
The substance that soaked the keyboard directly influences the cleaning approach and the likelihood of complete recovery. It is not just a matter of quantity; it's also about the quality of the liquid.
4. Disassembly: Taking Apart Your Laptop (Proceed Cautiously)
Okay, this is where things get a little more technical. If you are not comfortable with opening your laptop, it's time to consult a professional. Think of it like performing surgery – you don’t want to make things worse!
- Gather Your Supplies: Small Phillips head screwdriver, a soft brush (like a paintbrush), isopropyl alcohol (90% or higher), microfiber cloths, and a well-lit workspace.
- Consult Your Manual: Every laptop is slightly different. Find the service manual for your model online. This will show you how to remove the keyboard safely.
- Unscrew with Precision: Carefully unscrew any screws holding the keyboard in place. Remember where each screw goes. Consider taking photos as you go - a great way to remember things later.
- Detach the Keyboard Cable: This is usually a delicate ribbon cable. Handle it gently!
5. The Keyboard's Baptism: Cleaning the Keys
Once the keyboard is out, it's time for the cleaning ritual.
- Remove the Keycaps (Optional but Recommended): Use a keycap puller (or a small flathead screwdriver, with extreme care) to remove the individual keycaps. This allows you to clean thoroughly.
- Rinse and Repeat: Rinse the keycaps with warm water and mild soap if they're particularly sticky, and allow them to dry completely.
- Brush Away the Grime: Use the soft brush and isopropyl alcohol (dabbed on your brush, not directly on the components!) to clean the keyboard's internal components. Work gently to remove any residue.
6. Drying Time: The Patience Game
Now comes the waiting game. This is the most crucial, and often most overlooked, stage.
- Air Dry Thoroughly: Allow all the components to air dry completely. This can take anywhere from 24 to 72 hours, depending on how wet it was. Patience is key!
- Avoid Heat Sources: Do NOT use a hairdryer or put your laptop in the sun. This can damage the delicate components.
This is like giving your laptop a spa day, letting it rejuvenate and recuperate.
7. Reassembly: The Moment of Truth
Once everything is dry, it's time to put your laptop back together.
- Carefully Reattach the Keyboard: Reconnect the ribbon cable and screw the keyboard back in place.
- Reconnect the Keycaps: Snap the keycaps back onto the keyboard.
- Close Up Shop: Close the laptop and re-insert all the screws.
8. The Power-Up Test: Fingers Crossed!
Take a deep breath, plug in the power cord, and press the power button.
- First Impressions: Does it power on? Does the screen come to life?
- Keyboard Test: Open a text editor and test all the keys. Do they all work? Are there any sticky keys?
- Troubleshooting: If some keys don't work, you might need to repeat the cleaning process or, in severe cases, replace the keyboard.
9. When to Call in the Professionals: Know Your Limits
Sometimes, the damage is beyond what you can handle.
- Persistent Problems: Even after cleaning, the keyboard doesn't work correctly.
- Internal Damage: Liquid has penetrated the motherboard.
- Lack of Confidence: If you're not comfortable with these steps, don't hesitate to seek professional help.
10. Keyboard Replacement: The Final Solution
Sometimes, the keyboard is beyond repair.
- Cost-Benefit Analysis: Replacing the keyboard might be cheaper than replacing the entire laptop.
- Finding a Replacement: Search online for a replacement keyboard for your specific laptop model.
- Professional Installation (Optional): Consider having a professional install the new keyboard.
11. Prevention is Key: The Ultimate Defense
Let's be honest, accidents happen. But we can minimize the risk.
- Keep Liquids Away: The simplest solution.
- Use a Waterproof Keyboard Cover: An inexpensive and effective solution.
- Be Mindful: Pay attention!
12. Data Recovery: Salvaging Your Precious Files
Even if your laptop itself is beyond saving, your data might not be.
- External Hard Drive: If possible, connect your hard drive to another computer to recover your files.
- Data Recovery Services: Professionals can often recover data from damaged hard drives.
13. Don't Give Up Hope: Positivity and Persistence
It's frustrating. It's annoying. But don't let a spill ruin your day. Approach it as a challenge. A learning experience.
14. The Silver Linings: Learning and Growth
Every tech mishap is also an opportunity. An opportunity to learn about your machine. An opportunity to improve your technical skills.
15. You Did It! The Triumph of Recovery (Hopefully!)
You've persevered. You've cleaned, you've dried, you've reassembled. The moment you see those keys working again, you can declare victory! You've conquered the wine-soaked keyboard and emerged victorious.
Closing Thoughts
We've journeyed through the treacherous waters of a laptop keyboard drowning. And while the situation might seem dire initially, with the right steps, patience, and a dash of luck, you can often bring your beloved machine back from the brink. Remember, even if things don’t go as planned, it's a learning experience. You're more knowledgeable about your laptop, and you can face the next tech challenge with newfound confidence. Now, go forth and conquer the keyboard!
Frequently Asked Questions (FAQs)
1. What should I do if the liquid reaches the screen?
Unfortunately, screen damage is often more severe. Immediately power down, unplug, and flip the laptop. Seek professional help immediately. The screen is a very sensitive, often expensive, component.
2. Can I use a vacuum cleaner to dry the laptop?
Absolutely not! The static electricity from a vacuum cleaner can damage the sensitive electronics. We're aiming for gentleness, not a technological hurricane.
3. My keyboard is sticky, even after cleaning. What do I do?
You might have missed some residue. Disassemble the keyboard again, carefully
HP Laptop WiFi Nightmare: Only Works Near Router? FIX THIS NOW!How To Fix a Water Damaged Laptop
By HowToBasic How To Fix a Water Damaged Laptop by HowToBasic
Water Spilled on Laptop - What To Do

By A-Plus IT Group, Inc. Water Spilled on Laptop - What To Do by A-Plus IT Group, Inc.
Spilled Wine on Macbook Pro Keyboard and Logic Board
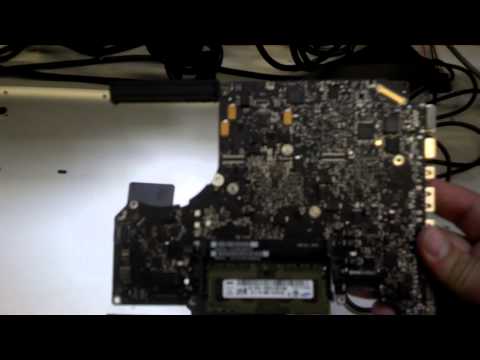
By Stephen Dingwall Spilled Wine on Macbook Pro Keyboard and Logic Board by Stephen Dingwall

Title: I spilled something on my Laptop
Channel: TheThorns TheThorns
I spilled something on my Laptop by TheThorns TheThorns
Wifi On Laptop
Laptop Keyboard Drowned in Wine? Don't Panic! This Will Fix It!
The crimson tide has receded, leaving behind a sticky, potentially disastrous scene: your laptop keyboard, awash in the remnants of a spilled glass of wine. The immediate panic is understandable. Images of a permanently defunct machine flash before your eyes. Fear not! While the situation demands swift action, it's frequently salvageable. We offer a comprehensive guide -- a meticulously crafted rescue plan -- to address the crisis. Following these steps will significantly increase your chances of resurrecting that vital piece of technology.
Immediate Actions: The Critical First Moments
Time is of the essence. Every second counts against the corrosive power of wine. Delay only exacerbates the potential damage.
- Instant Power-Down: The most critical first step. Immediately disconnect the power adapter and, if possible, remove the battery. This prevents any short circuits that could obliterate vital internal components. The electricity and the sugary substance mixed together can create havoc.
- Invert and Drain: Carefully flip your laptop upside down, preferably over a clean surface like a sink or a large towel. This allows the wine to drain away from the keyboard and, hopefully, prevents further penetration into the delicate circuitry below. Angle the laptop strategically to encourage maximal drainage. Every drop removed is a victory.
- External Peripherals: Disconnect any external devices such as a mouse, USB drives, or an external monitor. You don’t want to introduce more possible things to be damaged by the wine and to further confuse the situation.
Disassembly and Cleaning: A Deep Dive into Recovery
Once the immediate threat has been neutralized, a more thorough cleaning is required. This process can be tedious, but it's crucial for a successful recovery.
Step-by-Step Keyboard Removal
The procedures vary slightly depending on the laptop’s make and model. Refer to your laptop's service manual or search online for model-specific disassembly guides. Be patient, work methodically, and take pictures as you proceed. These pictures will be invaluable as a guide when it comes to reassembly.
- Power Down (Again): Ensure the laptop is completely powered off and the battery is removed.
- Identify Screws: Many laptops have screws hidden beneath rubber feet or decorative covers. Locate and carefully remove all screws securing the keyboard to the laptop chassis. Consult your laptop's manual to spot the correct screws.
- Pry Carefully: Using a thin, non-metallic tool (like a plastic spudger or guitar pick), gently pry the keyboard free from its housing. Be careful not to break any plastic tabs or clips. Patience is key here.
- Disconnect the Ribbon Cable: Once the keyboard is partially lifted, you’ll likely see a ribbon cable connecting it to the motherboard, connecting the keyboard. This cable is extremely delicate. It will have some sort of locking mechanism. Carefully open the connector and gently detach the ribbon cable, being careful not to damage the connector or the cable itself.
- Keyboard Removal: With the ribbon cable disconnected, you can now completely remove the keyboard.
Detailed Keyboard Cleaning
Now, with the keyboard removed, the real cleaning begins.
- The Initial Rinse: Gently run lukewarm (not hot) water over the keyboard, focusing on areas with visible wine residue. Avoid excessive pressure to prevent forcing the wine deeper into the keys.
- Gentle Scrubbing: Prepare a solution of isopropyl alcohol (at least 70% concentration) and distilled water (in a 1:1 ratio). Using a soft-bristled brush (like a toothbrush), carefully scrub each key, paying particular attention to the spaces between them. The isopropyl alcohol will help dissolve the sugars and other components of the wine.
- Rinse and Repeat: After scrubbing, rinse the keyboard again with lukewarm water. Repeat the scrubbing and rinsing process until all traces of wine residue are removed. Several iterations may be necessary.
- Key Removal (Optional, but Recommended): For a truly thorough cleaning, remove individual keys. This allows you to clean the key wells and the underside of the keys of any lingering residue. Use a keycap puller, if available, to remove the keys without damage. The removal and replacement method varies depending on the keyboard design. Research your model; some keys are simpler to remove than others.
- Air Drying: Thoroughly dry the keyboard. Use a microfiber cloth to absorb excess water. Then, set the keyboard aside to air dry completely for at least 24-48 hours. A fan can help accelerate the drying process. Ensure every component is completely dry to prevent short circuits upon reassembly.
Internal Component Inspection and Cleaning
The spilled wine may have seeped beyond the keyboard. Take appropriate actions to address this possibility.
Motherboard Examination
- Visual Inspection: With the keyboard removed, examine the motherboard directly below the keyboard for any visible wine residue.
- Gentle Cleaning (If necessary): If any wine is detected, gently clean the affected area with isopropyl alcohol (70% or higher concentration) and a cotton swab. Be cautious of delicate components like capacitors and resistors. Use the cotton swab to carefully dab and soak up residue. Don’t pour alcohol directly on the board.
Other Internal Components
- Logic Board: After the cleaning, scrutinize the logic board. Check for any sign of the wine spill.
- Connections: Use cotton swabs or a soft brush to clean areas around connectors.
Reassembly and Testing: The Moment of Truth
Once everything is completely dry and cleaned, it’s time to reassemble the laptop.
Keyboard Reinstallation
- Reconnect the Ribbon Cable: Carefully re-attach the ribbon cable to the motherboard connector. Ensure it’s securely seated.
- Keyboard Placement: Carefully align the keyboard and gently press it back into its housing.
- Screw Replacement: Replace all the screws to secure the keyboard to the computer case.
Power-On and Testing
- Battery Insertion (If applicable): Reinsert the battery into the laptop.
- Connect the Power Adapter: Plug in the power adapter.
- Power Up: Turn on the laptop.
- Keyboard Test: Immediately test the keyboard functionality. Open a text editor and type a variety of characters, numbers, and symbols. Ensure all keys respond correctly. Test for any stuck or non-functional keys.
- Further Testing: If the keyboard appears fully functional, test other laptop features (e.g., trackpad, Wi-Fi, sound) to verify that the spill hasn’t caused any other damage.
Preventative Measures and Long-Term Care
Preventing future wine-related keyboard crises is as important as knowing how to handle them.
Protective Measures
- Keyboard Covers: Use a silicone or plastic keyboard cover, such as a skin. This adds a substantial layer of protection against spills.
- Placement Awareness: Be mindful of where you place drinks around your laptop. Always create a safe distance.
- Regular Cleaning: Regularly clean your keyboard to remove dust and debris. This will help to prevent buildup that could potentially worsen the outcome of any future spills.
Professional Assistance: Knowing When to Call for Help
The steps outlined above are designed for most mild to moderate wine spills. However, there are times when professional help is indispensable.
- Extensive Spills: If the spill was massive, involving significant immersion of the laptop's internal components, it’s best to seek professional assistance as early as possible.
- Internal Damage: If the laptop exhibits signs of damage (e.g., failure to power on, screen flickering, or unusual noises) after cleaning and drying, consult a reputable laptop repair technician.
- Complex Electronics: If you’re unfamiliar with electronics repair or are uncomfortable with the disassembly process, or if you are uncertain about the integrity of the cleaning actions, do not hesitate to seek expert help. Trying to do the work yourself may make the damage worse.
Ultimately, a wine-soaked laptop keyboard represents a challenge, not necessarily a tragedy. By following these detailed steps and exercising patience, you can dramatically increase your chances of a successful resurrection. Remember, swift action, thorough cleaning, and a bit of luck can often turn a potential equipment loss into a triumphant comeback.
