windows laptop touch screen not working

Title: Laptop Touch Screen Stopped Working shorts pc pcrepair laptoprepair computerrepair
Channel: Matt's Computer Services
Laptop Touch Screen Stopped Working shorts pc pcrepair laptoprepair computerrepair by Matt's Computer Services
windows laptop touch screen not working, microsoft laptop touch screen not working, windows 11 laptop touch screen not working, hp laptop touch screen not working windows 11, lenovo laptop touch screen not working windows 11, dell laptop touch screen not working windows 11, hp laptop touch screen not working windows 10, windows touch screen laptop keyboard not working, dell laptop touch screen not working windows 10, lenovo laptop touch screen not working windows 10
Is Your Windows Laptop Touchscreen DEAD? (Fix It NOW!)
My Windows Laptop Touchscreen Isn't Working! (Don't Panic, Here's What To Do!)
Have you found yourself staring at a seemingly lifeless touchscreen on your Windows laptop recently? Suddenly, your ability to swipe, tap, and interact intuitively with your device feels… gone. The good news? In most cases, your touchscreen's demise isn't permanent. You can often revive it with a few simple troubleshooting steps. Let's get your device back to its touch-friendly glory!
Is Your Touchscreen Really Gone? A Quick Check
Before you jump to conclusions, ensure the problem is, in fact, the touchscreen. Therefore, sometimes, the issue might stem from an unexpected software glitch. Consequently, perform a few quick checks. First, restart your laptop. Rebooting often clears minor software hiccups. Then, try using the touchscreen after the restart. If it works, great; you’re back in business! Second, verify that your touchscreen is enabled in Windows settings. Navigate to the "Device Manager" and then "Human Interface Devices." Look for "HID-compliant touch screen."
Troubleshooting Touchscreen Woes: The Initial Steps
If a simple restart wasn't the magic bullet, don't fret. So let's dive into more detailed troubleshooting. Firstly, consider a driver issue. Corrupted or outdated drivers can cause touchscreen malfunctions. Consequently, you can update your touchscreen drivers. Again, visit "Device Manager" (search for it in the Windows search bar). Locate your touch screen device under "Human Interface Devices." Right-click and choose "Update driver." Furthermore, select "Search automatically for drivers." Allow Windows to search for and install any available updates.
Advanced Touchscreen Fixes: Digging Deeper
Still no luck? Okay, let's explore more advanced solutions. Sometimes, the touchscreen calibration needs adjustment. Moreover, this can resolve inaccurate touch responses. Search for "Calibrate the screen for pen or touch input" in the Windows search bar. Follow the on-screen instructions to recalibrate your touchscreen. Now, assess the touchscreen's response. If the problem persists, there might be a hardware issue. The touchscreen itself, or the components that support it, could be damaged.
Hardware Considerations: When It Gets Serious
Now, let's consider some more serious scenarios. Damage to the touchscreen's physical components can lead to failure. Obviously, this will prevent function. Inspect the screen for cracks or other visible damage. Check for dust or debris that may be trapped. If you find any physical damage, you will likely need a hardware repair. Consider contacting a qualified technician or the manufacturer.
Software Conflicts: Identifying the Culprit
Software conflicts can also cause touchscreen problems. This is where things get tricky. Some programs or applications might interfere with touchscreen functionality. Try booting Windows in "Safe Mode." This loads a bare-bones version of Windows. Subsequently, if the touchscreen works in Safe Mode, a third-party program is likely the cause. You may need to uninstall recently installed applications. Now, methodically test the touchscreen after each uninstallation.
The Power of Updates: Don't Forget Windows
Keeping your Windows operating system up-to-date is essential. Indeed, Microsoft frequently releases updates that fix bugs and improve device compatibility. Therefore, ensure your Windows installation is current. Navigate to "Settings" and then "Windows Update." Check for and install any available updates. Restart your laptop after installing updates.
Contacting Support: When to Seek Help
If you have exhausted all these troubleshooting steps and your touchscreen remains unresponsive, it’s time to seek professional help. So contact your laptop's manufacturer's technical support. They can offer further guidance and potential repair options. Alternatively, find a reputable computer repair shop near you.
Preventative Measures: Keeping Your Touch in Touch
Finally, let's discuss some preventative measures. Protecting your touchscreen can prevent future problems. Use a screen protector to guard against scratches. Avoid placing heavy objects on your laptop. Also, clean your touchscreen regularly with a soft, microfiber cloth. Avoid using harsh chemicals or abrasive cleaners.
Hopefully, these steps have helped you get your touchscreen back on track. Remember, technology can be unpredictable. Yet, with a little troubleshooting, you can often resolve these issues. Ultimately, be patient, and be thorough. In the end, you'll be reunited with your touch-friendly laptop! Happy tapping!
Jabra Bluetooth: Laptop Compatibility SHOCKER! (Works Better Than You Think!)Is Your Windows Laptop Touchscreen DEAD? (Fix It NOW!)
Hey there, fellow tech travelers! Let's be honest, a touchscreen laptop is a beautiful thing, right? You're chilling on your couch, sipping your coffee (carefully, of course!), and scrolling through your favorite websites with a simple tap. It's the future, they said! But then… silence. The screen goes dark. No response. Your fingers are furiously tapping, but your laptop is giving you the digital equivalent of the cold shoulder. Is your Windows laptop touchscreen actually dead? Don't panic! We've all been there, and we're here to help you resurrect that touchscreen magic. Consider this article your digital defibrillator.
1. The Dreaded Diagnosis: Is It Really Dead?
Before you start mourning your touchscreen, let's play detective. Think of this as the initial investigation. First step: Is it definitely the touchscreen? We've all jumped to conclusions, haven't we? Perhaps it's a driver issue, a glitch, or a simple software hiccup. Rule out the obvious first.
- Try the Basics: Restarting your laptop is always the best place to start. It's the IT equivalent of "Have you tried turning it off and on again?" Often, that's all it takes.
- External Mouse and Keyboard: Does your mouse cursor still move? Can you navigate using the keyboard? If so, that points (pun intended!) towards a touchscreen-specific problem.
- Clean the Screen: Sounds simple, but smudges and grime can sometimes interfere with touch sensitivity. Give it a good wipe-down with a microfiber cloth.
If, after these initial checks, your screen remains stubbornly unresponsive, then we can officially declare a potential touchscreen casualty. Now, onto the battlefield!
2. Driver Dilemmas: The Touchscreen's Achilles Heel
Drivers, those tiny but mighty software building blocks, are often the culprits behind touchscreen woes. Think of them as the essential plumbing that connects your screen to the rest of your laptop's brain. If the plumbing's clogged, nothing works!
- Check Device Manager: This is your central nervous system for hardware. Hit the Windows key, type "Device Manager," and open it. Look for "Human Interface Devices" (HID). Expand this section.
- Touchscreen Entry: Do you see an entry related to your touchscreen? If so, right-click it.
- "Enable Device": Is it disabled? If so, enable it. Problem solved (fingers crossed!).
- "Update Driver": Right-click and select "Update driver." Let Windows automatically search for updates. Often, the latest driver can magically fix things.
- "Uninstall Device": If updating doesn't work, and you are comfortable with the process, uninstall the driver, and then restart your laptop. Windows will usually reinstall it automatically upon restart.
- Troubleshooting: If there is an error, make sure you check for errors.
3. The Calibration Conundrum: Fine-Tuning Your Touch
Sometimes, it's not a dead touchscreen, but a misaligned one. Think of it like trying to hit a moving target. The touch might be registered, but it's not accurate. Calibration is your aiming tool!
- Access Calibration: In Windows 10 and 11, search for "Calibrate the screen for pen or touch input." Click on it.
- Calibration Setup: Follow the on-screen instructions. You'll be prompted to tap on crosses that appear on the screen. This process helps Windows understand where your finger is actually touching.
- Restart After: After calibration, restart your laptop to ensure the changes are applied.
4. Power Settings and Touchscreen Sleep: The Energy Vampire
Believe it or not, your power settings can sometimes play a crucial role in touchscreen functionality. Think of your laptop as a plant; if it doesn't have enough "sunlight" (power), it may stop functioning the way it should.
- Check Power Plan: Go to "Control Panel" and then "Power Options." Choose your current power plan.
- Advanced Settings: Click "Change plan settings" then "Change advanced power settings."
- USB Selective Suspend: Look for "USB selective suspend setting." Set this to "Disabled." This can sometimes prevent the touchscreen from entering a low-power state and becoming unresponsive. While it impacts the power usage, it could fix the touchscreen.
5. Hardware Hiccups: Are We Looking at a Screen Swap? (Gulp!)
Okay, let's face it—sometimes, the problem isn't software. Sometimes, it's the hardware itself. This is the scary scenario, the one where a screen replacement might be the only solution.
- Obvious Damage: Any visible cracks, dents, or liquid damage? This is a clear indication of a physical hardware issue.
- External Monitor Test: Connect your laptop to an external monitor. If the display works fine on the external monitor, it strongly suggests a problem with the laptop's screen.
- Professional Diagnosis: If you suspect a hardware problem, it's time to consult the experts. Take your laptop to a qualified repair technician. They can diagnose the issue and provide you with repair options.
6. The Windows Update Waltz: Keeping Things in Sync
Regular Windows updates are a double-edged sword. They often fix bugs, but they can sometimes introduce new ones. The good news? They also often include driver updates, which could miraculously fix your touchscreen.
- Check for Updates: Go to "Settings" > "Update & Security" > "Windows Update." Click "Check for updates."
- Install All Updates: Make sure all available updates are installed, including optional driver updates.
- Restart After: After installing updates, restart your laptop.
7. Compatibility Crusaders: The Software Showdown
Can the software you're using contribute to touchscreen glitches? Absolutely! Some applications are simply not optimized for touch input, potentially causing conflicts.
- Test Different Apps: Try using different apps. Does the touchscreen work better in one application than another? This could indicate a compatibility issue.
- Software Updates: Make sure the apps you're using are updated to their latest versions. Developers often release updates that improve touch support.
- Run Compatibility Troubleshooter: Right-click the app's icon, select "Properties," and then go to the "Compatibility" tab. Try running the "Compatibility troubleshooter."
8. The Tablet Mode Tango: Switch It Up
Windows has a "Tablet Mode" designed for touch-friendly navigation. It can sometimes help reignite a sluggish touchscreen experience.
- Enable Tablet Mode: Click the notification icon (typically in the bottom-right corner of your screen). Then tap the "Tablet mode" button.
- Test Touch Functionality: Test your touchscreen in Tablet Mode. Does it respond more smoothly? If so, it might be a temporary workaround.
- Disable Tablet Mode: After testing, disable tablet mode, and see if your touchscreen continues to function.
9. The Registry Rescue: Advanced Tweaks (Use with Caution!)
The Windows Registry controls many behind-the-scenes settings. Making changes here can sometimes fix touchscreen problems, but always back up your registry before making any changes!
- Open Registry Editor: Press the Windows key + R, type "regedit," and press Enter.
- Backup (Critical!): Go to "File" > "Export" to back up your registry!
- Navigate to Key (Do Your Own Research): Navigate to specific registry keys related to touch input (Google is your friend here).
- Modify Values (Do Your Own Research): Adjust the values within those keys. Be very careful here! Incorrect changes can break your system.
10. Uninstalling Recent Software: A Digital Detox
Sometimes, a recent software installation can cause conflicts with your touchscreen. Think of it like a bad roommate moving in and causing chaos.
- Check Installed Apps: Go to "Settings" > "Apps" > "Apps & features."
- Sort by Date: Sort the apps by installation date.
- Uninstall Suspicious Apps: If you installed any new software around the time your touchscreen stopped working, try uninstalling it. Restart your laptop afterward.
11. The System Restore Strategy: Roll Back Time
If a recent system change (like a software installation or driver update) caused problems, try using System Restore to revert your system to a previous state.
- Open System Restore: Search for "Create a restore point" and open the "System Properties" window. Click "System Restore."
- Choose a Restore Point: Select a restore point from before your touchscreen issue started.
- Follow the Prompts: Follow the on-screen instructions to restore your system to the chosen point.
12. Hardware Diagnostics: Running a Checkup
Some laptops have built-in hardware diagnostics that can test your touchscreen. It's like a digital doctor's visit for your device.
- Consult Your Manual: Consult your laptop's manual or the manufacturer's website for instructions on how to access the hardware diagnostics.
- Run the Touchscreen Test: Look for a specific test for your touchscreen.
- Interpret the Results: The diagnostic tool will provide a report that
Surface touchscreen not working Microsoft

By Microsoft Helps Surface touchscreen not working Microsoft by Microsoft Helps
5 Fixes - 2024 HID Compliant Touch Screen Driver is missing Device Manager In Windows 1110

By How To Fix Tech 5 Fixes - 2024 HID Compliant Touch Screen Driver is missing Device Manager In Windows 1110 by How To Fix Tech
Windows 11s touchscreen not working Heres what to do
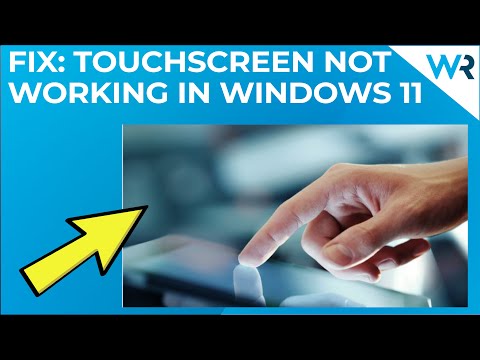
By Windows Report Windows 11s touchscreen not working Heres what to do by Windows Report

Title: Fix a Touchscreen that does not Respond to Touch or Responds Intermittently HP Support
Channel: HP Support
Fix a Touchscreen that does not Respond to Touch or Responds Intermittently HP Support by HP Support
Wifi Not Found
Here's the title: The Ultimate Guide to Mastering Homemade Sourdough Bread
The Ultimate Guide to Mastering Homemade Sourdough Bread
The aroma, a symphony of tangy fermentation and warm baking, the textural interplay of crisp crust and airy crumb—sourdough bread, truly a timeless staple, is far more than just a loaf; it's a culinary journey. Embarking on this adventure, however, can feel daunting. This guide, designed for the novice and the seasoned baker alike, will illuminate the path to crafting exceptional homemade sourdough, providing you with the knowledge and the confidence to unlock the secrets held within your own kitchen.
Understanding the Foundation: The Sourdough Starter
The heart and soul of any sourdough masterpiece is the starter, a living culture of wild yeasts and lactic acid bacteria. This 'mother' is not merely an ingredient but a partner in the bread-making process, a dynamic entity that requires care and attention.
Nurturing Your Starter: The Feeding Ritual
The feeding regimen is crucial. Typically, a starter is fed a mixture of equal parts by weight of flour and water. For example, you might use 50 grams of flour and 50 grams of water, along with a small amount of your existing starter (the discard should be 50 grams). The flour choice significantly impacts the starter's character. While all-purpose flour can be used, whole wheat flour, rye flour, or a blend thereof often produce more robust and flavorful starters.
The temperature of the water also matters. Room-temperature water (around 70-75°F / 21-24°C) is usually suitable. After mixing, cover the starter loosely. A clean jar with a lid lightly placed on top works perfectly.
The frequency of feeding depends on the ambient temperature. In warmer environments, the starter will likely require feeding more frequently. Observe the starter carefully. It will tell you what it needs. When the starter has doubled in size, with visible bubbles throughout, and exhibits a slightly sour, pleasant aroma, it is ready for baking. If your starter isn't doubling within a few hours, consider switching to a new type of flour. This can have a significant influence on its performance.
Troubleshooting the Starter: Common Challenges
- Sluggish Activity: If your starter isn’t actively bubbling or rising, it may be too cold. Try moving it to a warmer location, like near a radiator (without drying it out) or a sunny window (again, without overheating). You can also feed it more frequently. It could also be that the water you're using is chlorinated. If this is the case, you will need to use bottled water or dechlorinated tap water.
- Weak Flavor: A weak flavor can indicate that the starter needs more time or a different flour composition. Experiment with feeding ratios and flour blends.
- Mold and Off-Colors: If you see pink, orange, black, or mold on your starter, discard the entire portion of the starter. It is not salvageable. Start from scratch. Small amounts of hooch can be drained off or stirred back in.
Crafting the Perfect Sourdough Dough
Once your starter is established, it is time to make the dough. The formula for sourdough is fundamentally simple: flour, water, starter, and salt. Yet, the subtle nuances determine the final result.
Ingredients: Precision and Quality
- Flour: The type of flour dramatically influences the outcome. Bread flour, with its higher protein content, generally yields a better rise and a chewier crumb. Experimenting with whole wheat, rye, or spelt flour in the mix adds complexity and depth of flavor.
- Water: Filtered water is preferred. Remember that the water temperature influences the rate of fermentation. Cold water slows it down. Warm water speeds it up.
- Starter: Use a vigorous, ripe starter, as described above.
- Salt: Sea salt or kosher salt is generally recommended. Salt strengthens the gluten network and controls the fermentation process.
The Recipe: A Detailed Guide
Autolyse (Optional, but Recommended): Begin by combining the flour and water in a large bowl, mixing until roughly combined. Cover and let it rest for 30 minutes to an hour. This process allows the flour to fully hydrate, leading to better gluten development and a more tender crumb.
Mixing the Dough: Add the ripe starter and salt to the autolysed dough. Mix by hand or using a stand mixer (with the dough hook attachment).
First Rise (Bulk Fermentation): Transfer the dough to a lightly oiled bowl. Cover and let it rise. This stage is crucial for flavor development. Bulk fermentation time varies based on the environment temperature and the starter's activity, but typically, it falls between 4 to 6 hours, or until nearly doubled in size. During this period, perform "stretch and folds" every 30-60 minutes for the first 2-3 hours. This strengthens the gluten structure.
Shaping: Gently turn the dough out onto a lightly floured surface. Shape the dough into a round (boule) or an oval (batard), depending on your preference.
Second Rise (Proofing): Place the shaped dough in a banneton basket or a bowl lined with a floured kitchen towel. Cover it to prevent drying. This final rise, or proofing, can be done at room temperature (for a shorter time) or in the refrigerator (for a longer time, which develops more complex flavors). Proofing times vary, but generally, anywhere from 2 to 24 hours will work, depending on the temperature and the recipe.
Baking: Preheat your oven to 450-500°F (232-260°C) with the Dutch oven inside (if using). Carefully score the loaf. This crucial step controls the expansion of the loaf during baking. Lower the temperature to 450°F (232°C) once the loaf is placed inside. Bake covered for 20 minutes. Remove the lid and bake for another 20-30 minutes, or until the crust is deeply golden brown and the internal temperature reaches 200-210°F (93-99°C).
Cooling: Let the bread cool completely on a wire rack before slicing. This allows the crumb to set and prevents a gummy texture.
The Importance of Scoring: Artistic Expression and Structural Control
Scoring is not merely decorative; it's an essential technique. The score, made with a sharp lame or a razor blade, dictates where the bread will expand during baking. Experimenting with different scoring patterns (e.g., simple slashes, intricate designs) allows for artistic flair and controls the final shape.
Tips for Optimal Results:
Hydration: Higher hydration (more water relative to flour) yields a more open crumb. However, it also makes the dough stickier and more challenging to handle. Start with a hydration level of around 70% and adjust based on your experience.
Temperature Control: Consistent temperature is crucial for fermentation. Too hot, and the dough will rise too quickly, leading to a sour flavor. Too cold, and the process will slow down. This is where a proofing box can come in handy.
Patience: Sourdough baking requires patience. Resist the urge to rush the process. The time allows the flavors to develop.
Listen to Your Dough: Pay attention to the dough's behavior. It will tell you when it's ready. If it feels bubbly and airy, it's ready.
Experiment: Don't be afraid to experiment with different flours, hydration levels, and scoring techniques. Every loaf is a learning opportunity.
Troubleshooting Common Baking Issues:
- Flat Loaf: Undercorrected, overproofed, or insufficient oven temperature.
- Dense Crumb: Insufficient fermentation, underproofed dough, or too little starter.
- Burnt Crust: Oven too hot, or baking for too long.
- Soggy Crumb: Underbaked, or the loaf was sliced too early.
Expanding Your Sourdough Repertoire:
Once you've mastered the basic sourdough, explore variations.
- Adding Flavor: Incorporate seeds, nuts, dried fruits, herbs, or spices into the dough.
- Experimenting with Flour Types: Try using different flour blends to alter the taste, texture, and nutritional value.
- Shaping Variations: Consider using your imagination and try different shapes, from round and oval loaves to rolls or baguettes.
- Sourdough Pizza: Sourdough makes an incredible pizza crust.
- Sourdough Pancakes and Crepes: Convert your discard for a delicious breakfast.
Conclusion: The Everlasting Allure of Sourdough
Mastering homemade sourdough is a rewarding journey. It is a craft that blends art and science, patience and precision. The process, from nurturing a small starter to enjoying the fruits of your labor, is a connection to a tradition and to the pure joy of hand-crafted bread. Embrace the process, accept its challenges, and savor the delicious results. The perfect sourdough loaf is within your reach. Happy baking!
