f2 key not working in lotus on my hp laptop

Title: If Function keys do not work on the Laptop F1 - F12
Channel: Simple Tech
If Function keys do not work on the Laptop F1 - F12 by Simple Tech
HP Laptop F2 Disaster! Fix Your Lotus 1-2-3 Key NOW!
HP Laptop F2 Fiasco: Rescuing Your Lotus 1-2-3 Key!
Let's be candid. Few things in the world are more frustrating than a malfunctioning keyboard key. Especially when that malfunctioning key is crucial! For those of you wrestling with an HP laptop and a stubbornly unresponsive F2 key, this one's for you. We're diving deep to rescue your Lotus 1-2-3 productivity. Let's get started.
The F2 Frustration: A Common HP Laptop Conundrum
It's a familiar scenario. You're diligently working. Suddenly, the F2 key decides to vanish into thin air. This is more than a minor inconvenience. It's a productivity killer. HP laptop users, unfortunately, frequently experience this very problem. The F2 key is essential for many functions. It's used for everything from renaming files to accessing BIOS settings. This can quickly escalate into a crisis. Rest assured, you are not alone. Let's explore.
Diving Into the Depths of the Issue: Pinpointing the Culprit
First, we need to understand what is causing this. Hardware issues are the primary suspect. It could be a simple dust buildup underneath the key. Perhaps a liquid spill caused damage. In other situations, the problem could be more complex. Another possibility is a driver conflict. Occasionally, software glitches can also wreak havoc. So, let's begin our troubleshooting process.
Initial Troubleshooting Steps: Your First Defense
Always start with simplicity. Try a basic reboot of your laptop. Sometimes, a system restart can magically solve problems. Also, clean your keyboard carefully. Use compressed air to dislodge any debris. This is a basic step. If the key remains unresponsive, proceed. Check your keyboard settings next. Ensure the F keys are not disabled. Also, make sure the "Function Lock" key isn't engaged. This is another common culprit.
Delving Deeper: Examining Software and Drivers
If the basic troubleshooting doesn't work, let's move on. Driver issues are a frequent cause. Search for any recent driver updates. Update your keyboard drivers. You can accomplish this through your device manager. It's also smart to roll back to previous drivers if recent updates are the cause. Remember to check for any installed software that may be interfering with your keys. Sometimes, third-party applications can conflict.
The BIOS Connection: Navigating the System's Core
Now, let's explore the BIOS settings. Reboot your laptop and enter the BIOS setup. The specific key for entry varies by model. Check your manual. Look for keyboard settings within the BIOS. Ensure nothing is hindering the Function keys. If settings appear correct, consider a BIOS update. However, proceed with caution. Always back up your data before doing this.
Hardware Heroes: When the Problem Demands Physical Attention
If software solutions fail, the problem may be hardware-related. Examine the physical key itself. Does it feel sticky or loose? If you suspect a keyboard problem, consider professional help. Contact a local computer repair shop. They can diagnose the issue. Keyboard replacements are often necessary.
Lotus 1-2-3 and the F2 Key: Reconnecting with Productivity
The F2 key plays a critical role in Lotus 1-2-3. It lets you edit cells. Thus, its failure can cripple your workflow. You must understand the significance of this key. Without it, you're essentially dead in the water. Consequently, we must prioritize a solution. The steps mentioned earlier will help you fix the issue.
Alternative Solutions: Workarounds for a Temporary Fix
Let’s discuss some alternatives. Consider using an on-screen keyboard. This allows you to access lost functionality. Alternatively, try remapping the F2 key to another key. This is achievable with certain software. Using a USB keyboard is also a simple solution. This is especially if your laptop keyboard is beyond repair. These are not permanent fixes, remember!
Preventative Measures: Safeguarding Your F2 Key and Beyond
Preventative measures are crucial. Keep your keyboard clean. Avoid eating and drinking near your laptop. These habits can prevent future issues. Install a keyboard protector. This is an inexpensive but worthy investment. Regularly back up your data, too. This includes when the F2 key doesn't function.
The Final Verdict: Regaining Control
You are now equipped with the tools to tackle the HP Laptop F2 key problem. Remember, patience and persistence are key. Employ the steps outlined meticulously. With a bit of effort, you can restore your productivity. You can overcome this hurdle. So, go forth and conquer!
Minecraft on Mac: The Ultimate Guide (Runs Smoothly!)HP Laptop F2 Disaster! Fix Your Lotus 1-2-3 Key NOW!
Hey there, fellow laptop warriors! Ever felt that gut-wrenching sensation when your trusty HP laptop throws a curveball your way? Yeah, we've all been there. Today, we're diving headfirst into a specific digital headache: the dreaded F2 key malfunction, particularly when it wreaks havoc on your Lotus 1-2-3 experience. Let's face it, for those of us who still appreciate the beauty of a spreadsheet, this can be a total productivity killer. So, grab a coffee (or your beverage of choice) and let’s get this sorted.
1. The F2 Fiasco: Why Is My HP Laptop Acting Up?
First things first, let's identify the problem and then talk about solutions. The F2 key on your HP laptop is usually your ticket to the BIOS setup utility, which is vital for booting your system. However, in Lotus 1-2-3, it frequently acts as your edit key. If it's not working correctly, then you can’t edit your cells, and can’t access the BIOS. This could be a hardware issue, a software conflict, or even a simple setting gone awry. Sometimes, it's as easy as a stuck key (a bit like having a crumb fall into your keyboard!), other times, it's more complicated. Let's explore the common culprits.
2. Sticky Situation: Is Your F2 Key Physically Stuck?
This is the most obvious, but often overlooked, cause. Take a close look at your F2 key. Is it a bit…sticky? Maybe you spilled a sugary drink in the past, or there’s some dust or debris wedged underneath. Think of it like a clogged drain – you need to clear the blockage.
- Visual Inspection: Grab a magnifying glass and check for any visible gunk.
- Gentle Cleaning: You can try using compressed air to dislodge anything. Turn off your laptop and blow the air around the key.
- The Rubbing Alcohol Route (Proceed with Caution!): If the gunk persists, dampen a cotton swab with isopropyl alcohol (make sure it's completely dry before you start!). Gently dab around the key and try to loosen any residue.
3. Software Hiccups: The Role of Drivers and Applications
Sometimes, the culprit isn't physical at all. Driver conflicts, especially those related to keyboard functionality, could be the reason. Also, certain software, especially those designed to remap keys, can interfere. It's like having a party where the DJ keeps changing the music to something you don't like as much.
- Driver Updates: Go to your laptop's device manager and ensure your keyboard drivers are up-to-date. You can search for "Device Manager" in the Windows search bar. Expand the "Keyboards" category, right-click your keyboard, and select "Update driver."
- Check for Key Re-mapping Software: Ensure all keyboard remapping software is disabled or uninstalled.
- Compatibility Mode (Maybe): While less likely, running Lotus 1-2-3 in compatibility mode for an older version of Windows might help. (Right-click on the Lotus 1-2-3 executable, then select "Properties," and then "Compatibility.")
4. BIOS Blues: How BIOS Settings Can Disrupt Keyboard Functions
The BIOS (Basic Input/Output System) is the heart of your laptop's startup process. Incorrect settings can impact your keyboard's basic functions. Accessing and changing BIOS settings can be tricky, but we’ll break it down. It’s a bit like fine-tuning a car engine.
- Accessing the BIOS: Typically, you'll need to press a specific key (often F2, F10, Delete, or Esc) repeatedly during startup to enter the BIOS setup. The exact key varies based on your laptop model. Check your HP laptop's manual for the correct key.
- Keyboard Settings in BIOS: Once in the BIOS, look for sections relating to keyboard settings. Ensure USB keyboard support is enabled (even if you're using a built-in keyboard).
- Resetting BIOS to Defaults: If you're unsure of other settings, consider resetting the BIOS to its factory defaults. There is usually an option in the BIOS menu to do this. Be cautious when doing so, as this will reset other settings.
5. Testing, Testing: How to Diagnose the F2 Key Issue
Before you start making any major changes, let's confirm the problem. Testing is key, like conducting a thorough medical examination before prescribing a treatment.
- External Keyboard Test: Plug in an external keyboard and see if the F2 key works correctly. If it does, this points to a problem with your laptop's keyboard.
- On-Screen Keyboard (OSK): Use the Windows on-screen keyboard. Does the F2 key on the OSK function as expected? (Type "osk" in the Windows search bar to open it.)
- Different Applications: Does the F2 key not work in all applications, or just in Lotus 1-2-3? This will help to narrow down the scope of the issue.
6. Lotus 1-2-3 Specific Troubleshooting: When The Problem Is Confined
If the problem is solely within Lotus 1-2-3, we need to focus our attention. Sometimes, the issue is a simple conflict within the software itself.
- Check Lotus 1-2-3 Settings: Make sure that there's not a software-level key remapping within Lotus 1-2-3 itself.
- Reinstall Lotus 1-2-3: A fresh install can often resolve compatibility issues. It’s like starting a new chapter.
- Lotus 1-2-3 Help Forums: Search Lotus 1-2-3 specific forums or support groups for solutions to similar issues.
7. Hardware Failure: The Grim Reality (But Don't Panic!)
Realistically, a hardware failure is always on the cards. If you've tried everything mentioned above and your F2 key still doesn’t work, you might have a faulty keyboard. Think of it as an ailment that requires professional treatment.
- Keyboard Replacement: Fortunately, laptop keyboards are often replaceable. You can find replacement keyboards online, though the process can be tricky.
- Professional Repair: Consider taking your laptop to a qualified repair shop. They can diagnose the issue definitively and recommend the best course of action.
8. Preventing Future F2 Disasters: Proactive Measures!
Prevention is better than cure, so let's focus on protecting your precious F2 key. It’s like putting on sunscreen before going to the beach.
- Regular Cleaning: Clean your keyboard regularly.
- Avoid Spills: Keep liquids away from your laptop.
- Software Updates: Keep your drivers and software updated.
9. Re-mapping: A Temporary Workaround (If Needed)
If you're in a pinch and absolutely need to use the F2 key in the short term, you could remap it to a different key using software like AutoHotkey (free and powerful). It's a bit like using a detour when a road is blocked.
10. Advanced Diagnostics: Beyond the Basics
If you’re feeling up for the challenge, there are some advanced diagnostic steps you can take, but they are not for the faint of heart.
- Boot to a Live Linux Environment: Boot your laptop from a USB drive with a Linux distribution. If the F2 key works in Linux, it's highly likely to be a software issue within your primary Windows installation.
- Run Hardware Diagnostics: Some HP laptops have built-in hardware diagnostics. Access these through the BIOS or during startup.
11. Software Conflicts: Unraveling the Mystery
Software conflicts can be sneaky. It’s like having two people arguing where neither will concede.
- Safe Mode: Try booting Windows in Safe Mode. This loads a minimal set of drivers and software. If the F2 key works in Safe Mode, this tells that one of the installed programs is the issue.
- Clean Boot: Perform a clean boot to disable non-essential startup programs. This step is similar to Safe Mode but is less restrictive.
12. Power Cycle and the Art of Restarting
Sometimes the simplest solutions are the best. Give your laptop a good old-fashioned power cycle.
- Shutdown: Turn off your laptop completely.
- Unplug (If Possible): Disconnect the power cord.
- Hold the Power button: Hold the power button for about 30 seconds to drain any residual power.
- Restart: Plug the power cord back in and turn your laptop back on.
13. The Importance of Backups: Shielding Your Data
Before you start any troubleshooting, always back up your essential files. Data loss is not fun. Imagine losing your priceless collection of photos.
- Regular Backups: Create regular data backups onto external hard drives or cloud storage.
- System Restore Points: Set up system restore points. This way, you can revert to a previous working state of your system if something goes wrong.
14. When to Call for Help: Knowing Your Limits
There is definitely a moment to draw the
Graphic Design DREAM MACHINE 2018: The Laptop You NEED!How to Lock or Unlock the Fn Function Key on an HP Notebook HP Support
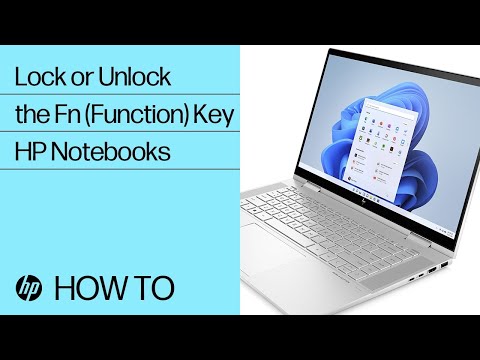
By HP Support How to Lock or Unlock the Fn Function Key on an HP Notebook HP Support by HP Support
Unlock FN key on HP

By Teacher Man Unlock FN key on HP by Teacher Man
Volume Button Not Working - Reverse Function Keys and Multimedia Keys F1-F12

By Filip Tech Volume Button Not Working - Reverse Function Keys and Multimedia Keys F1-F12 by Filip Tech

Title: How To Unlock Keyboard on Laptop & PC Windows
Channel: Your Fix Guide
How To Unlock Keyboard on Laptop & PC Windows by Your Fix Guide
Wifi On Laptop
Here is the title: The Definitive Guide to Mastering the Art of Bread Baking at Home
The Definitive Guide to Mastering the Art of Bread Baking at Home
The aroma of freshly baked bread, a scent that conjures images of warmth, comfort, and home. For centuries, bread has been a staple, a fundamental part of cultures worldwide. The craft of transforming simple ingredients – flour, water, yeast, and salt – into a crusty loaf of perfection is a skill, and one that, with patience and practice, you can master within the walls of your own kitchen. This comprehensive guide will serve as your compass, navigating the intricate world of bread baking, providing you with the knowledge and techniques needed to create world-class loaves every single time. Forget those grocery store alternatives; prepare to embark on a journey that will transform your relationship with food and elevate your culinary prowess.
Understanding the Fundamentals: Ingredients and Their Roles
The cornerstone of exceptional bread lies in understanding the ingredients. Each element plays a crucial role, and appreciating these dynamics will ultimately lead to baking success.
Flour: The backbone of any bread recipe is the flour. All-purpose flour is a versatile starting point, perfect for beginner bakers. However, exploring different flours can unlock a world of flavor and texture. Bread flour, with its higher protein content, develops stronger gluten, resulting in a chewier crumb and a more robust structure. Whole wheat flour lends a nutty flavor and heartier texture, while rye flour contributes a unique tang. Experimenting with different flours will tailor a bread creation to a precise liking.
Water: Water activates the gluten in the flour and hydrates the starch, leading to the structural integrity of the bread. The temperature of the water can significantly influence the outcome. Lukewarm water (around 105-115°F/40-46°C) is ideal for activating yeast quickly. Cold water can slow down the proofing process, allowing the flavor to develop more slowly. The amount of water required will vary depending on the type of flour used and the humidity of your environment.
Yeast: The living organism responsible for fermentation, yeast produces carbon dioxide, which is what causes the bread to rise. There are several types of yeast available: active dry yeast, instant yeast, and fresh yeast. Active dry yeast must be activated in water before use, while instant yeast can be added directly to the dry ingredients. Fresh yeast requires slightly different handling and storage. The selection of yeast will depend on individual preference and recipe.
Salt: More than just a flavor enhancer, salt regulates yeast activity and strengthens the gluten network. It slows down fermentation, preventing the dough from over-proofing. Without salt, the bread would likely be flat and bland. The type and amount of salt should be measured accurately. Depending on the recipe, some experts suggest options like kosher salt or sea salt.
Essential Techniques: The Baker's Toolkit
Mastering bread baking involves developing a solid understanding of fundamental techniques, each of which contributes directly to the final product.
Mixing and Kneading: The process of combining ingredients is crucial in the bread-making journey. Mixing ensures that all ingredients are evenly distributed. Kneading develops the gluten, giving the dough its structure and elasticity. Kneading by hand requires a rhythmic motion, stretching and folding the dough until it becomes smooth and supple. A stand mixer, equipped with a dough hook, can significantly reduce the effort required. The perfect dough will pass the "windowpane test," meaning a small piece of dough can be stretched thin enough to see light through it without tearing.
First Proof (Bulk Fermentation): After kneading, the dough needs to rest and rise, allowing the yeast to do its work. This initial rise, often referred to as bulk fermentation, is typically done in a lightly oiled bowl, covered with plastic wrap or a damp cloth. The duration of this proof can vary depending on the recipe, the type of yeast, and the environmental temperature. A well-proofed dough will have doubled in size. It will also pass the "poke test," meaning when a finger gently pokes the dough, the indentation will slowly spring back.
Shaping: Once the dough has proofed, it's time to shape it into the desired form. This process removes excess gas and reorganizes the gluten structure, contributing to the bread's final aesthetic and texture. The shaping technique will vary depending on the type of bread being made. Whether it's a simple loaf or a more complex shape, proper shaping ensures an even rise and a beautiful appearance.
Second Proof (Proofing/Final Rise): After shaping, the bread needs a final rest. This second proof allows the yeast to continue its work and develop the final rise. The temperature during this stage is critical. Over-proofing can result in a collapsed loaf, while under-proofing can result in a dense bread. Proofing in a warm environment typically speeds up the process, while proofing in a cooler environment slows it down.
Baking: The moment of truth. Baking transforms the dough into a crusty, flavorful loaf. Preheat the oven to the specified temperature, and place the shaped dough in the oven. The duration of baking will depend on the type of bread and the size of the loaf. During the baking process, the heat causes the yeast to die and the gluten to set, forming the structure of the bread.
Troubleshooting Common Bread Baking Challenges
Even experienced bakers encounter challenges. Here's how to address some of the most common bread-baking problems:
Dense Bread: This can be the result of under-proofing, over-mixing, or using too much flour. Ensure your dough has proofed sufficiently, knead it for the appropriate amount of time, and measure the flour accurately. Under-kneading or not developing enough gluten will also lead to a dense loaf.
Flat Bread: This can be caused by old or inactive yeast, too much water, or over-proofing. Check the yeast's expiration date, ensure the water is the correct temperature, and proof your dough in a controlled environment. Proofing too long allows all the gases to escape before the dough has a chance to bake.
Crumbly Bread: This is often the result of not enough gluten development, too much flour, or not enough water. Make sure you knead the dough for the full amount of time, and measure your ingredients accurately using a kitchen scale.
Uneven Rise: Temperature fluctuations during proofing or baking can lead to an uneven rise. Keep the proofing environment consistent and ensure the oven is preheated to the correct temperature.
Dry Bread: Baking your bread for too long will dry it out. Monitor baking times carefully, and consider adding steam to the oven to create a moister environment.
Recipes to Get You Started: A Beginner's Journey
Here is a selection of recipes for absolute beginners to try:
Simple White Bread
Ingredients:
- 3 cups bread flour
- 1 1/4 teaspoons salt
- 1 teaspoon sugar
- 1 packet (2 1/4 teaspoons) active dry yeast
- 1 1/4 cups warm water (105-115°F)
- 2 tablespoons olive oil
Instructions:
- In a large bowl, whisk together the flour, salt, and sugar.
- In a separate bowl, activate the yeast in warm water for 5 minutes.
- Add the yeast mixture and olive oil to the flour mixture. Mix until a shaggy dough forms.
- Turn the dough out onto a lightly floured surface and knead for 8-10 minutes, or until smooth and elastic.
- Place the dough in a lightly oiled bowl, cover, and let rise for 1 hour, or until doubled in size.
- Punch down the dough, shape it into a loaf, and place it in a greased loaf pan.
- Let rise for 30-45 minutes, or until puffy.
- Preheat the oven to 375°F (190°C) and bake for 30-40 minutes, or until golden brown.
Basic Sourdough
Ingredients:
- 1 cup active sourdough starter
- 3 cups bread flour
- 1 1/2 teaspoons salt
- 1 1/4 cups warm water
Instructions:
- In a large bowl, mix together the starter and water.
- Add the flour and salt. Mix until a shaggy dough forms.
- Let the dough rest for 30 minutes (autolyse).
- Perform four sets of stretch and folds every 30 minutes.
- Let the dough rise in a lightly oiled bowl for 4-6 hours, or until nearly doubled.
- Shape the dough and place it in a banneton basket.
- Refrigerate overnight (proof in the refrigerator).
- Preheat the oven to 450°F (230°C) with a Dutch oven inside.
- Remove the Dutch oven, place the dough inside, score the top, and bake with the lid on for 20 minutes.
- Remove the lid and bake for another 25-30 minutes, or until golden brown.
