my camera on my hp laptop is not working
Title: How To Fix HP Laptop Camera Not Working In Windows 10
Channel: Cap Trong Nam - How To
How To Fix HP Laptop Camera Not Working In Windows 10 by Cap Trong Nam - How To
my camera on my hp laptop is not working, my camera stopped working on my hp laptop, my camera is not working on my hp envy laptop, my built in camera is not working on my hp laptop, why isn't my camera working on hp laptop, why is my camera on my hp not working
HP Laptop Camera Nightmare? FIX IT NOW!
HP Laptop Camera Troubles: Your Ultimate Troubleshooting Guide
Listen, we've all been there. That heart-stopping moment during a video call when your HP laptop camera decides to go rogue. Suddenly, you're staring at a black screen. Or worse, a blurry mess. It's stressful, but don't panic. This guide will walk you through fixes. We'll get that camera working again. So, let's dive in.
Is Your Camera Truly Broken? The First Check
Before you start tearing your hair out, confirm the issue. Before anything else, perform a quick diagnostic. Try a different app. Open Zoom, Microsoft Teams, or even the built-in Camera app. If the camera works in one app but not another, the problem lies within the app, not the camera itself. You should also attempt a simple restart. Sometimes, that’s all it takes. Then, double-check your physical privacy shutter. Some HP laptops have a physical switch. Make absolutely sure it’s not covering the lens.
Software Conflicts and Driver Dramas
Now, let’s explore more complex scenarios. Many camera failures stem from software conflicts. Your drivers are critical. Drivers are software that tells your computer hardware how to function. Therefore, outdated or corrupted drivers are a common culprit. The good news is, they are usually quite simple to fix.
Updating Your Camera Driver
The simplest fix is updating the driver. First, open Device Manager. You can search for it in the Windows search bar. Then, expand the "Cameras" or "Imaging devices" section. Right-click your camera device. Choose "Update driver." Select "Search automatically for drivers." Windows will then try to find the latest version. If this doesn't work, you can try to download the most appropriate driver from the HP support website.
Uninstalling and Reinstalling the Driver
If updating doesn’t work, try uninstalling and reinstalling. Return to Device Manager. Find your camera device. Right-click it. Choose "Uninstall device." Restart your laptop. Windows should automatically reinstall the driver when it restarts. After that, check if the camera functions.
Troubleshooting Software Issues
Beyond drivers, software conflicts might be happening. Third-party applications or malware could interfere. To check, close all unnecessary apps. Then, test the camera again. If it works, one of the closed apps caused the problem. Identify it by opening apps one by one. Test between each opening until the camera stops working.
Privacy Settings: The Hidden Culprit
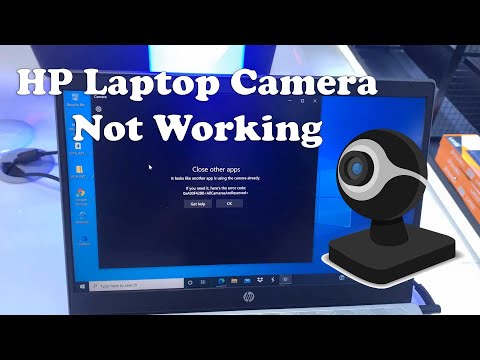
Windows privacy settings control camera access. In fact, this is a frequent source of problems. Check these settings. Go to Settings > Privacy > Camera. Ensure “Camera access” is turned on. Also, make sure that specific apps can access the camera. If an app isn't listed, it cannot use the camera.
BIOS Updates and Firmware Fiascos
Rarely, the issue lies in the BIOS. The BIOS is the basic input/output system. It's crucial to your computer. Sometimes, a BIOS update provides a fix. However, proceed cautiously. Incorrect BIOS updates can cause serious issues. If you're comfortable, visit the HP support website. Find your laptop model. Look for BIOS updates. Follow their instructions.
Hardware Headaches: Potential Camera Failures
While less common, hardware issues can arise. The camera itself could be faulty. Or, the cable connecting it might be loose. In this case, contact HP support for professional diagnostic. They'll guide you through repair options. Do not attempt to disassemble your laptop. This will void your warranty.
Beyond the Basics: Additional Tips
Here are some additional troubleshooting tips. Run the Windows troubleshooter. It can automatically detect and fix camera problems. Also, ensure your Windows is up to date. Sometimes software updates include camera fixes. Check for malware. Malware can interfere with camera functionality. Use a reliable antivirus program.
When to Seek Professional Help
If you've tried everything, but the camera still refuses to cooperate, seek professional help. Contact HP support. Or, take your laptop to a reputable repair shop. There may be a major hardware issue in this case.
Wrapping Up: Camera Control Restored!
Therefore, camera troubles are frustrating. However, most issues are straightforward. Try these solutions. Hopefully, you've restored your camera's functionality. With patience and these steps, you should be zooming again. Good luck, and happy video calling!
Unbreakable Beast: The ULTIMATE Rugged Work Laptop You NEED!HP Laptop Camera Nightmare? FIX IT NOW!
Hey there, fellow tech travelers! Ever feel like your HP laptop camera is playing hide-and-seek? One minute it's there, beaming your beautiful face into the digital ether, and the next… poof…gone. It's a frustrating experience, to say the least. We've all been there – mid-video call, important presentation, or even just trying to show off your new haircut – and BAM! Black screen. But before you chuck your laptop out the window (tempting, I know!), let's dive into this common HP laptop camera conundrum and get that camera working like a charm again. We’re going to unleash the inner tech wizard within you. Consider this your personal tech rescue mission.
1. The Case of the Vanishing Camera: What's Going On?
Think of your HP laptop camera as a tiny, temperamental actor. Sometimes, it just doesn't want to perform. This can be due to a variety of culprits, from simple software glitches to more complex hardware hiccups. Let’s break it down. We might be dealing with driver issues, privacy settings gone rogue, or perhaps even a physical glitch. It’s like trying to solve a mystery, but instead of a detective, we are the investigators.
2. Blame the Drivers: The Usual Suspect
Drivers are the unsung heroes of your laptop, acting as the intermediaries between your hardware and the operating system. If your camera driver is outdated, corrupt, or simply missing, you're in for a world of trouble. It's like having a translator who speaks gibberish; the camera can't communicate with the system.
2.1 Updating Your Camera Driver: The Easy Fix
Thankfully, updating your camera driver is usually a straightforward process. Here's how we'll do it, step by step:
- Step 1: Open Device Manager. (Search 'Device Manager' in your Windows search bar). Think of this as your digital control panel for all your hardware.
- Step 2: Find Your Camera. Look for "Cameras," "Imaging devices," or something similar. You might have to expand these categories to find your camera (it's often labeled as "HP TrueVision HD Camera" or something similar).
- Step 3: Right-click on the Camera. Select "Update driver."
- Step 4: Choose "Search automatically for drivers." Windows will then scour the internet (or your system files) for the latest driver.
- Step 5: Restart Your Laptop: After the update, it's essential to reboot your laptop. This gives the driver a chance to take effect.
If Windows can't find a driver, you may need to search on the HP support website using your laptop's model number. Downloading and installing the driver manually is often the solution.
3. Privacy Settings: The Silent Saboteur
Your HP laptop's privacy settings can sometimes be the sneaky culprit behind your camera woes. We live in a world where privacy is paramount, but sometimes, our own security measures can backfire.
3.1 Camera Permissions: Checking the Gatekeepers
Your operating system has camera permissions that need to be enabled to let various applications use the camera. Here’s a quick way to verify everything is playing nice:
- Step 1: Navigate to Settings. (Click the gear icon in the Start menu or search for 'Settings').
- Step 2: Click on "Privacy & Security."
- Step 3: Select "Camera."
- Step 4: Make Sure Camera Access is Enabled: See if the "Camera access" toggle is set to "On." If it's off, turn it on.
- Step 5: Check App Permissions: Scroll down and ensure that the apps you want to use your camera with (Zoom, Teams, Skype, etc.) have individual camera access toggles turned ON.
4. Hardware Woes: When Things Get Physical
Sometimes, the issue isn't software; the problem might be hardware-related. It’s a less common cause, but it’s still a possibility.
4.1 The Camera's Physical Switch
A lot of HP laptops have a physical switch or a button to disable the camera. It's a great privacy feature, but it can also be easily overlooked! Check the top of your laptop’s lid (usually near the camera) for a sliding switch or a button with a camera icon. Make sure this switch is set to the "on" position.
4.2 The Camera Lens: A Clear View
Sometimes the lens itself is the problem. Smudges, dust, or even a cracked lens can make your camera look like it's off or give you a distorted image. Give the lens a gentle wipe with a microfiber cloth.
5. Reinstalling the Camera Driver: The Deep Clean
If updating the driver doesn't work, a fresh install might be what you need. Think of it like giving your camera a clean slate.
- Step 1: Open Device Manager. (See instructions in Section 2.1)
- Step 2: Find Your Camera. (Same as Section 2.1)
- Step 3: Right-click on the Camera. Select "Uninstall device."
- Step 4: Restart Your Laptop. This will prompt Windows to automatically reinstall the driver when it boots back up.
- Step 5: If No Luck, a Manual Reinstall: If it doesn’t automatically reinstall, you’ll need to go to the HP support website (using your model number) and download the driver.
6. Run the HP Support Assistant: Your Built-in Tech Guru
HP laptops often come with the HP Support Assistant. This handy tool can automatically diagnose and fix various hardware and software issues.
- Step 1: Open HP Support Assistant. (Search in the Windows search bar).
- Step 2: Run a Diagnostic Test. Look for a "Camera" or "Hardware" diagnostic test. Let the tool run and follow its recommendations.
- Step 3: Update Software and Drivers: The HP Support Assistant may also suggest driver updates or other software fixes.
7. Check for Malware: The Digital Intruder
Though less common, malware can sometimes interfere with your camera functionality. Run a full system scan with your antivirus software to rule this out. Like checking the locks on your digital front door, it's good to stay vigilant.
8. BIOS Update: The System's Core
Outdated BIOS (Basic Input/Output System) can sometimes be the hidden cause behind hardware conflicts.
- Step 1: Visit the HP Support Website: Using your HP laptop's specific model number, find the latest BIOS update for your device.
- Step 2: Follow HP's Instructions: BIOS updates can be tricky, so carefully follow the instructions provided by HP to avoid any potential issues.
9. Test the Camera in Different Apps: Isolation is key
Sometimes the problem is specific to a single app – Zoom, for example. Try testing your camera in other apps (like the Windows Camera app, Skype, or Microsoft Teams) to see if the issue persists. This helps narrow down the problem.
10. Factory Reset: The Nuclear Option (Use with Caution)
If everything else fails, a factory reset might be your last resort. This wipes your laptop clean and restores it to its original state. Be sure to back up all your important files before doing this!
- Step 1: Back Up Your Data: This is critical! Back up all your important files, photos, documents, etc., to an external hard drive or cloud storage.
- Step 2: Go to Settings > Update & Security > Recovery.
- Step 3: Click "Get Started" under "Reset this PC," and follow the on-screen prompts.
11. Contact HP Support: Expert Assistance
If you've tried everything and your camera still isn't working, don't hesitate to contact HP support. They have the expertise and resources to troubleshoot hardware issues.
12. External Webcam: An Alternative (and Sometimes Better) Solution
If your built-in camera is consistently problematic, consider using an external webcam. These are usually much higher quality than built-in cameras and offer a simple plug-and-play solution. They're the digital equivalent of an upgrade.
13. Software Conflicts: The App Antagonists
Sometimes, other software on your system can interfere with the camera’s function.
- Step 1: Close Unnecessary Apps: Try closing down programs that might be using the camera, such as video editing software or other video-conferencing applications.
- Step 2: Check Background Processes: Some apps run in the background and might be using the camera. Check your Task Manager (Ctrl + Shift + Esc) for anything suspicious.
14. Windows Updates: Keeping Things in Sync
Make sure your operating system is up-to-date. Windows updates often include driver updates and bug fixes that can resolve camera issues.
- Step 1: Go to Settings > Update & Security > Windows Update.
- Step 2: Check for Updates: Run any available updates and restart your laptop when prompted.
15. Test, Test, and Test Again: Persistence Pays Off
This Laptop's 2060 Will SHOCK You (Work Beast!)FIXED - Camera Not Working in Windows 11 Laptop or PC

By Techie Leopard FIXED - Camera Not Working in Windows 11 Laptop or PC by Techie Leopard
100 SOLVED NEW 2024 - We cant find your camera ERROR CODE 0xA00F4244 in Windows 1011- NEW 2024

By How To Fix Tech 100 SOLVED NEW 2024 - We cant find your camera ERROR CODE 0xA00F4244 in Windows 1011- NEW 2024 by How To Fix Tech
How To Fix HP Laptop Camera Not Working In Windows 10 and Windows 11

By TechFixIT How To Fix HP Laptop Camera Not Working In Windows 10 and Windows 11 by TechFixIT

Title: SOLVED We can't find your camera windows 1011 Error code 0xA00F42440xC00D36D5 - 2025
Channel: How To Fix Tech
SOLVED We can't find your camera windows 1011 Error code 0xA00F42440xC00D36D5 - 2025 by How To Fix Tech
Change Wifi Settings
Here is the title for the article: "The Ultimate Guide to Crafting the Perfect Sales Email"
The Ultimate Guide to Crafting the Perfect Sales Email
Embark on a journey to master the art of the sales email, transforming your outreach from generic blasts into compelling conversations that drive revenue. This comprehensive guide unveils the secrets to crafting emails that not only capture attention but also convert prospects into loyal customers. Forget the tired templates; we'll delve into the nuances of personalization, the power of compelling storytelling, and the strategic deployment of calls to action that ignite action. Prepare to witness a paradigm shift in your sales strategy.
Understanding the Anatomy of a High-Converting Sales Email
The foundation of any exceptional sales email lies in its structure. It's not merely about stringing together words; it's about meticulously constructing a narrative that resonates with the recipient's needs and aspirations. Every element, from the subject line to the final call to action, must work in concert to achieve a singular objective: to secure a response and propel the sales process forward.
The Subject Line: Your First Impression
The subject line is the gatekeeper, the first point of contact, and the ultimate determinant of whether your email even gets opened. Crafting a subject line that sparks curiosity, offers value, or poses a compelling question is paramount. Avoid generic phrases like "Checking in" or "Following up." Instead, aim for specificity and relevance. Consider these strategies:
- Intrigue: "Unlocking [Benefit] for You: A Quick Glance"
- Personalization: "[Recipient's Name], Have You Considered [Your Product/Service]?"
- Value-Driven: "How [Your Product/Service] Can Save You [Specific Quantity] Dollars"
- Urgency: "Last Chance: Special Offer Ending Soon"
- Question-Based: "Are You Facing Challenges with [Problem]?"
Testing different subject lines is non-negotiable. Utilize A/B testing to identify which variations yield the highest open rates. Analyze the results and refine your approach based on data-driven insights.
The Opening: Capturing Attention Instantly
Once the email is opened, the first few sentences are critical. They must immediately engage the reader and establish a connection. Avoid generic greetings like "Dear Sir/Madam." Instead, begin with a personalized touch:
- Refer to a recent interaction: "Following up on our conversation at [Event Name]…"
- Acknowledge a pain point: "I understand you're currently facing challenges with [Problem]…"
- Offer a solution: "I've been researching ways to help businesses like yours [achieve a goal]…"
- Share a compelling statistic: "Did you know that businesses using [Your Product/Service] see a [percentage]% increase in [metric]?"
The opening paragraph should be concise, focused, and designed to pique the reader's interest. It sets the tone for the entire email.
The Body: Delivering Value and Building Trust
The body of your sales email is where you make your case. It's not about bombarding the reader with features; it's about highlighting the benefits of your product or service and demonstrating how it solves their problems.
- Focus on Benefits, Not Features: Translate technical specifications into tangible advantages. Instead of stating "Our software offers advanced analytics," say "Our software provides actionable insights that help you increase sales by 15%."
- Use Storytelling: Humans are wired to connect with stories. Incorporate anecdotes, case studies, or customer testimonials to illustrate the impact of your product or service. "Consider how [Client Name] saw a [quantifiable result] after implementing our solution…"
- Address Objections: Anticipate potential concerns and address them proactively. "You might be wondering about [Concern]. We understand, and that's why [Your Solution]…"
- Maintain a Conversational Tone: Write as if you're having a one-on-one conversation. Avoid overly formal language and jargon.
The Call to Action: Prompting the Desired Response
The call to action (CTA) is the pivotal moment. It's your explicit instruction on what you want the recipient to do next. The CTA should be clear, concise, and compelling.
- Use Action-Oriented Verbs: Instead of "Click here," try "Schedule a Demo," "Get a Free Trial," or "Download the Brochure."
- Create a Sense of Urgency: "Limited-Time Offer," "Offer Expires Soon," or "Spaces are Filling Up Fast."
- Make it Easy to Respond: Provide specific instructions and direct links.
- Place it Strategically: Include the CTA at least once in the body and again at the end of the email.
Personalization: The Key to Connecting with Your Audience
Generic sales emails are easily ignored. Personalization is no longer a nicety; it's a necessity. The more you tailor your email to the individual recipient, the greater the likelihood of a positive response.
Research is Your Best Friend
Before writing a single word, research your prospect. Understand their role, their company, their challenges, and their goals. Utilize resources like LinkedIn, their company website, industry publications, and news articles. This information allows you to personalize your email, demonstrating that you've taken the time to learn about them.
Tailor Your Message
Avoid sending mass emails. Instead, segment your audience and craft distinct messages for each segment. Consider factors like industry, company size, job title, and previous interactions.
Leverage Data
Use email marketing platforms with personalization features. These tools allow you to dynamically insert the recipient's name, company name, industry, and other relevant data into your email content.
Go Beyond the Basics
Beyond name and company, incorporate more advanced personalization:
- Reference a shared connection: "I noticed we both attended the [Event] last year…"
- Comment on a blog post or social media activity: "I enjoyed your recent post on [Topic]…"
- Reference a specific product or service they've shown interest in: "Based on your interest in [Product], I thought you might find [Benefit] valuable…"
Formatting and Design: Presenting Your Email Professionally
Even the most compelling content can fall flat if poorly presented. The visual appeal of your email is just as important as the words themselves.
Keep it Concise
Long, rambling emails are off-putting. Aim for brevity. Get to the point quickly and make your message easy to digest. Break up large blocks of text with short paragraphs, bullet points, and headings.
Use White Space Effectively
White space is your friend. It creates visual breathing room and makes your email easier to read. Avoid overcrowding your email with text and images.
Choose a Clean Design
Select a clean, uncluttered email template. Avoid flashy colors, excessive images, and distracting fonts. Focus on readability and clarity.
Optimize for Mobile
A significant portion of emails are now opened on mobile devices. Ensure your email is responsive and displays correctly on all screen sizes.
Use Images Sparingly
Images can enhance your message, but use them judiciously. Make sure images are relevant, high-quality, and optimized for quick loading times.
Testing, Analysis, and Iteration: Continuous Improvement
Crafting the perfect sales email is not a one-time event; it's an ongoing process. Continuous testing, analysis, and iteration are essential for maximizing your results.
A/B Testing is Crucial
Regularly conduct A/B tests to compare different variations of your email. Test different subject lines, opening paragraphs, CTAs, and email layouts.
Track Key Metrics
Monitor key metrics, including:
- Open Rate: The percentage of recipients who open your email.
- Click-Through Rate (CTR): The percentage of recipients who click on a link in your email.
- Conversion Rate: The percentage of recipients who take the desired action (e.g., schedule a demo, download a brochure).
- Bounce Rate: The percentage of emails that fail to be delivered.
- Unsubscribe Rate: The percentage of recipients who unsubscribe from your email list.
Analyze Your Results
Carefully analyze your test results to identify what's working and what's not. Look for patterns and trends.
Refine Your Approach
Based on your analysis, refine your email content, design, and targeting strategy. Continuously improve your approach to optimize your results.
Avoiding Common Sales Email Mistakes
Several common mistakes can sabotage your sales email efforts. Avoid these pitfalls:
- Sending Generic Emails: As discussed, personalize your emails as much as possible.
- Using Overly Aggressive Language: Avoid pushy or salesy language. Focus on building relationships and providing value.
- Neglecting the Subject Line: A compelling subject line is essential for getting your email opened.
- Failing to Proofread: Typos and grammatical errors can damage your credibility. Proofread your email carefully before sending it.
- Sending Emails at the Wrong Time: Test different send times to determine when your audience is most likely to engage with your email.
- Ignoring the Call to Action: Make sure your CTA is clear, concise, and easy to find.
- Not Following Up: Most sales require multiple touchpoints. Follow up with prospects who haven't responded to your initial email.
- Not Segmenting Your List:
