how to get hdmi to work on laptop

Title: How to connect HDMI cable from PC to TV
Channel: Learning Fun
How to connect HDMI cable from PC to TV by Learning Fun
how to get hdmi to work on laptop, how to get hdmi to work on hp laptop, how to get hdmi to work on dell laptop, how to get hdmi to work on acer laptop, how to get hdmi to work from laptop to tv, how to get to hdmi on laptop, how to get hdmi to display on laptop, how to get hdmi to show on laptop, how to get hdmi to show up on laptop, how to get to hdmi settings on laptop
HDMI on Laptop? This ONE Weird Trick Works!
HDMI on Your Laptop: Unlock the Secret You've Been Missing!
Ever wished you could easily connect your laptop to a bigger screen? Perhaps you've struggled to get a crisp picture on your TV. Consequently, you might be missing out on a world of possibilities. Let's face it, many of us have grappled with this issue. Today, we'll dive into a solution that’s simpler than you think.
The HDMI Enigma: Decoding the Connection Conundrum
The dream of seamless integration often hits a snag. You might find yourself staring at your laptop, frustrated. After that, the realization dawns – you need HDMI. But what do you do if your laptop doesn't cooperate? Many models lack a direct HDMI port. Therefore, you might feel defeated. However, don't give up just yet! There’s a sneaky trick that works.
Unveiling the "Weird Trick": A Pathway to Big-Screen Bliss
The secret to success lies in adapting. In other words, you need the right tool. This transformative device is a simple adapter. This little marvel bridges the gap. It seamlessly connects your laptop to your display. First of all, consider the ports available on your laptop. For instance, a USB-C port is quite common. Fortunately, it offers a powerful connection.
USB-C to HDMI: The Modern Marvel for a Seamless Experience
USB-C technology is incredibly versatile. Hence, it can transmit video and audio signals. This is a fantastic advantage. The connection process is straightforward. You simply plug the adapter into your laptop. After that, connect the HDMI cable to your display. Finally, you're ready to go. Furthermore, USB-C cables and adapters are widely available. As a result, they are very accessible.
Beyond the Basics: Exploring Alternative Connection Strategies
While USB-C is popular, it's not your only option. For example, Mini DisplayPort may be present on your laptop. This port also supports video output. Consequently, you can find Mini DisplayPort to HDMI adapters. Similarly, many laptops come equipped with a Thunderbolt port. Thunderbolt offers high-speed data transfer. Furthermore, it supports video output.
Troubleshooting: Resolving Display Dilemmas
Sometimes, things don't go as planned. Therefore, it’s crucial to troubleshoot. Firstly, check your cable connections. Ensure everything is firmly plugged in. Secondly, confirm your display is set to the correct input. Thirdly, restart your laptop. Subsequently, your display settings might need adjustment. Access your display settings. You can usually find these in your operating system.
Software Solutions: Configuring Your Display
Sometimes, you might require software intervention. Go to your display settings. From there, you can adjust parameters. You will have the option to duplicate or extend your display. Mirroring will display the same image on both screens. Extending allows you to use both displays. In other words, it expands your workspace.
The Verdict: Enjoying a Bigger, Better World
So, if you've been struggling, now you have a solution. Connecting your laptop to an HDMI enabled TV or projector should be easy. It doesn't require complex technical knowledge. You merely need the right adapter and a little patience. As a result, you can enhance your viewing experience. This extends beyond movies. You can also do work, give presentations, and more.
Final Thoughts: Reclaiming Your Viewing Experience
There you have it! Moreover, connecting your laptop to a bigger screen is achievable. It's less complex than most think. Additionally, the right adapter is key. So, embrace the possibilities! Start watching movies, working on presentations, and playing games. Furthermore, do note that adapter prices vary. Therefore, research before you purchase. Now, enjoy your newly expanded visual world.
Dish Anywhere App: Laptop Crash? FIX IT NOW!HDMI on Laptop? This ONE Weird Trick Works!
Have you ever felt that pang of frustration when trying to connect your laptop to a projector, TV, or monitor, only to be met with a blank screen or a glitchy display via HDMI? We've all been there, haven't we? That sinking feeling – the presentation is about to start, the movie night is ruined, or the epic gaming session is DOA. But fear not, fellow tech enthusiasts! Today, we're diving headfirst into the world of HDMI on laptops and, more importantly, uncovering that one weird trick guaranteed to solve most of your HDMI connection woes. This isn't some shady online secret; it's a common-sense approach combined with a touch of troubleshooting magic.
1. The HDMI Headache: Why Aren't They Playing Nice?
Let’s face it, HDMI connections on laptops can be temperamental. It’s like convincing two toddlers to share a toy – sometimes it just doesn't work. The reasons for this digital tug-of-war are varied, ranging from simple cable issues to complex software conflicts. We'll unravel these mysteries, turning you from a frustrated user into an HDMI guru.
2. Grasping the HDMI Basics
Think of HDMI as a superhighway for audio and video data. It’s the digital equivalent of a fast lane, carrying high-definition signals between your laptop and external displays. It’s crucial to understand the basics, so we can properly diagnose any hiccups along the way. We’ll keep it simple – no tech jargon overload here!
3. The Culprit: Are Your Cables Giving You Grief?
Before we get into any tech wizardry, let’s start with the obvious – is your HDMI cable actually working? This is usually the first place to start, I myself have been caught out by a dodgy cable more times than I care to admit. A frayed, loose, or damaged cable is the number one reason for HDMI connection failures. If you're using an older or low-quality cable, it might not support the resolutions or features of your devices.
- Test it out: Try a different HDMI cable. Borrow one from a friend, grab one from your home entertainment setup, if you have one, to rule out this simple fix.
- Cable Quality Matters: Invest in a good quality cable if you don't already have one. Look for cables with high bandwidth ratings to support 4K and HDR displays, even if you don't need them right now – future-proofing!
4. Powering Up the HDMI connection: The Hidden Power Dynamics
Did you know that the power supply of your laptop can affect the HDMI output? Similar to a car struggling on hills with insufficient power, your laptop may have a power-related problem. When working on battery power, some laptops might throttle the HDMI output to conserve energy.
- Plug It In: Always try connecting your laptop to a power outlet when using HDMI. This ensures the laptop has enough juice to push the signal.
- Check Power Settings: Dive into your laptop's power settings. Make sure the display settings are prioritized when on AC power.
5. Software & Driver Drama: The Silent Saboteurs
Now, let's move into the digital realm. Sometimes, the problem lies not in the hardware but in the software. Outdated or corrupt graphics drivers are frequently the villains in this HDMI saga.
- Update Your Drivers: The most common solution. Navigate to your graphics card manufacturer's website (NVIDIA, AMD, or Intel) and download the latest drivers for your laptop model. It's often a simple, yet effective fix.
- Driver Rollback: If a recent driver update created the problem, roll back to a previous version.
6. Display Settings Decoding: The Secret Configurations
Your laptop's display settings are the control room for your external display. Misconfigured settings can cause all sorts of display issues.
- Extend vs. Duplicate: Decide how you want the external display to function. "Duplicate" mirrors your laptop's screen, while "Extend" gives you extra screen real estate. Choose the right one for your needs.
- Resolution and Refresh Rate: Ensure that the resolution and refresh rate of your external display are supported by your laptop and that the settings are not set to a format that is incompatible.
7. The ONE WEIRD TRICK Revealed: Detecting & Forcing the Connection
Here’s the moment you’ve all been waiting for – the one weird trick! This is the secret weapon that often resolves the HDMI connection issue.
- Detecting the Display: Many laptops have a keyboard shortcut (usually Fn + function key) to detect external displays. Try this first. It's like hitting the "find the TV" button on your remote.
- Force the Connection: If detection fails, head to your display settings (right-click on your desktop, or search for "Display settings" in Windows). You should hopefully see an option that says "Detect," or "Identify." Click this. It's a way to force the laptop to search for the external display.
- The Reboot Ritual: This may feel a little "old school" but is still a good trick to apply if your laptop is displaying issues. Don't underestimate a good, old-fashioned reboot. Sometimes, that is all that's needed to reset and establish a clean connection.
8. HDMI Ports And Compatibility
Let's also make sure the physical port on your laptop is functional.
- Check the Physical Port: Inspect the HDMI port on your laptop for any lint, debris, or damage. Sometimes, this is the basic issue.
- USB-C to HDMI Adapters: If your laptop doesn’t have a standard HDMI port, you'll need a USB-C to HDMI adapter. Make sure the adapter is compatible with your laptop’s USB-C port and supports video output.
9. Sound Issues Persisting? The Audio Side of HDMI
HDMI doesn't just handle video; it also transmits audio. Sometimes, the audio settings get a little confused.
- Check the Output Device: In your sound settings, ensure that your external display or TV is selected as the default audio output device.
- Driver Updates: Once again, update your sound drivers, as they can also cause issues.
10. Windows 10/11 Specific Tricks: Navigating The Software Maze
Windows has its own quirks. Here are some tips specific to this operating system.
- Troubleshooter: Use Windows' built-in troubleshooters. These are surprisingly good at identifying and fixing common HDMI problems.
- Display Adapters: Go into the Device Manager (search for it in Windows) and check if your display adapters (graphics cards) are functioning correctly.
11. Projector Problems: Projecting Beyond Resolution
HDMI with projectors presents some unique challenges.
- Resolution and Aspect Ratio: Ensure your projector's resolution and aspect ratio are compatible with your laptop.
- Focus and Keystone Correction: Adjust the focus and keystone correction settings on your projector to get a perfect image.
12. TV Titans: Conquering the Big Screen
Connecting to TVs requires a slightly different approach.
- HDMI Ports: Make sure you're using the correct HDMI port on your TV (some TVs have multiple HDMI ports).
- Input Selection: Select the correct HDMI input on your TV using the TV's remote.
13. Troubleshooting Techniques: Putting The Pieces Together
Sometimes, you need to troubleshoot methodically.
- Isolate the Problem: Try connecting a different device to the external display to rule out display issues.
- Eliminate Variables: If possible, test different HDMI cables and ports.
14. When to Call For Reinforcements: Knowing When to Get Help
We're all about DIY, but sometimes, professional help is needed.
- Laptop Repair Shop: If your HDMI port is physically damaged, you may need to take your laptop to a repair shop.
- Manufacturer Support: For software-related issues, contact your laptop's manufacturer support.
15. Keeping Your HDMI Game Strong: Prevention and Maintenance
Now that you've solved the problem, how do you prevent it from reappearing?
- Regular Driver Updates: Keep your graphics drivers up-to-date.
- Gentle Handling: Avoid yanking or bending HDMI cables excessively.
Wrapping It Up: Conquering HDMI, One Trick at a Time
So, there you have it! You are now equipped with the knowledge and secret weapon to tackle those pesky HDMI connection issues. From the basics to drivers, and that one weird trick, we've covered everything you need to ensure a smooth connection. Remember, patience, persistence, and these tips will turn those HDMI headaches into success stories. Now go forth and enjoy that movie, presentation, or gaming session, without the tech drama!
FAQs: Your Burning HDMI Questions Answered
Q1: My laptop detects the external display, but the screen is blank. What's wrong?
- A1: Check the HDMI cable, ensure the correct input is selected on the display, and try adjusting the resolution or refresh rate settings.
Q2: Why does the audio not play through my TV?
- A2: Make sure the external display is selected as the default audio output in your system sound
Connect two laptops via HDMI to get a second screen for your primary laptop Windows or Mac
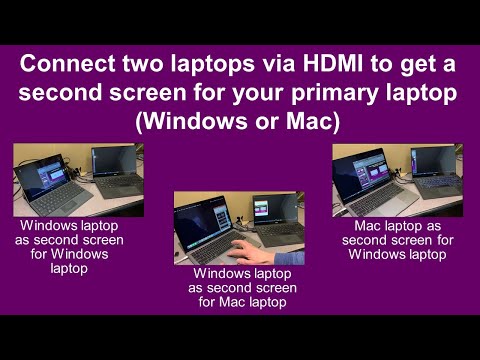
By ThinkOutsideTheSlide.com Connect two laptops via HDMI to get a second screen for your primary laptop Windows or Mac by ThinkOutsideTheSlide.com
How To Connect Laptop To TV With VGA Cable Audio & Video No HDMI Full Tutorial

By The Tech Guru How To Connect Laptop To TV With VGA Cable Audio & Video No HDMI Full Tutorial by The Tech Guru
Hdmi not working on laptop Laptop to tv hdmi connection problem fix Windows 10 hdmi no signal

By Trending Fun and Technology Hdmi not working on laptop Laptop to tv hdmi connection problem fix Windows 10 hdmi no signal by Trending Fun and Technology

Title: How to connect projector to Windows laptop through HDMI cable
Channel: An Wang
How to connect projector to Windows laptop through HDMI cable by An Wang
Wifi Not Found
HDMI on Laptop? This ONE Weird Trick Works!
We've all been there. You've got your laptop, a fantastic piece of technology, and you want to connect it to something bigger, something grander—like a television or a projector. You reach for that familiar HDMI cable, plug it in, and… nothing. A black screen. Or perhaps the dreaded "No Signal" message mocks you from the display. Frustration mounts. But before you throw your hands up in defeat and resign yourself to squinting at your laptop screen, let us share a secret. It's not a trick, per se, but a strategic process that might just be the solution you've been searching for.
Understanding the HDMI Connection: A Primer
First, it's crucial to grasp the basics. HDMI (High-Definition Multimedia Interface) is the standard for transmitting both high-definition video and audio over a single cable. Your laptop, assuming it’s relatively modern, likely has an HDMI port. This port is usually found on the side or back of your laptop, and it's easily identifiable by its distinctive trapezoidal shape. The receiving end, be it a TV, monitor, or projector, also needs an HDMI port. A standard HDMI cable connects these two, essentially acting as a digital highway for your laptop's visual and auditory data. The concept is simple, the execution, however, can sometimes prove to be less so.
Troubleshooting the Obvious: Cables, Ports, and Power
Before delving into the less obvious solutions, let's eliminate the obvious culprits. The HDMI cable itself is the first place to start. Is it functioning correctly? A loose or damaged cable is a common source of connection failures. Try a different HDMI cable—borrow one from a friend or a spare you might have lying around. This simple test can often reveal the problem instantly. Next, inspect the HDMI ports on both your laptop and the external display. Look for any bent pins, debris, or other obstructions that might be preventing a solid connection. Sometimes, a gentle puff of compressed air can clear away dust and debris, restoring the connection.
Power is another crucial factor. Make sure both your laptop and the external display are powered on. A seemingly innocuous oversight, but easily rectified. Ensure the external display is set to the correct input. Most TVs and projectors have multiple input options (HDMI 1, HDMI 2, etc.), and you need to select the one corresponding to the port your laptop is connected to. Use the TV's remote to navigate through these inputs until you find the correct one. Additionally, check the power settings on your laptop. Ensure your laptop isn't set to turn off the display after a short period of inactivity. This can sometimes interfere with HDMI output.
The "Weird Trick" Begins: Drivers and Display Settings
Now, let's get to the meat of the matter — a focus on the software and settings on your laptop. This is where the "weird trick" begins to unfold.
Updating Graphics Drivers: The Gateway to Compatibility
The most critical step is to ensure your laptop's graphics drivers are up to date. These drivers are software programs that allow your operating system to communicate with your graphics card. Outdated or corrupted drivers are a common cause of HDMI connection problems. Here's how to update them:
- Identify Your Graphics Card: Before you can update the drivers, you need to know what graphics card your laptop has. The easiest way is to right-click on the Start Menu (Windows) and select "Device Manager." Alternatively, type "Device Manager" into the Windows search bar and select it from the results. Expand the "Display adapters" section. You'll see the name of your graphics card listed there (e.g., Intel HD Graphics, NVIDIA GeForce, AMD Radeon).
- Update Through Device Manager: In the Device Manager, right-click on your graphics card and select "Update driver." Choose "Search automatically for drivers." Windows will then search for and install the latest drivers.
- Manual Download from Manufacturer: If updating through Device Manager doesn't work, or if you prefer to have more control, visit the manufacturer's website (Intel, NVIDIA, or AMD). Search for the drivers specifically for your laptop model and your operating system (Windows 10, Windows 11, etc.). Download and install the drivers from their website. This method offers the most up-to-date drivers, often with performance enhancements.
Configuring Display Settings: Mirroring, Extending, and Beyond
Once your drivers are updated, it's time to configure your display settings. Windows offers several display modes for using an external monitor or TV with HDMI.
- Access the Display Settings: Right-click on your desktop and select "Display settings." Alternatively, search for "Display settings" in the Windows search bar.
- Multiple Displays Section: Within the Display settings, locate the "Multiple displays" section. This section provides options for how your laptop and the external display should interact.
- Duplicate these displays (Mirror): This mode mirrors your laptop's screen onto the external display, a simple and immediately functional option. Everything you see on your laptop will appear on the external display.
- Extend these displays: This mode is the most versatile. It treats the external display as a second screen, allowing you to drag windows and applications between your laptop and the external display. This is ideal for multitasking and boosting productivity.
- Show only on 1/2: This option deactivates one of the displays. In specific cases, this may be required to resolve compatibility issues.
- Identifying Your Displays: The options will now indicate the number of screens connected (sometimes even without a successful connection if the system detects an invalid configuration). Your laptop's screen is usually designated as "1." If your display isn't recognized, click the 'Detect' button. If it is still undiscovered, click on "Multiple Displays." Select the option "Detect" or "Try to connect anyway on…".
- Advanced Display Settings: Within the Display settings, there is a place for advanced display settings. Here you will find other options, such as the refresh rate, which could have a bearing on the HDMI connection. If possible, change the refresh rate to match your display’s capabilities.
Considerations for Mac Users
If you're using a Mac laptop (MacBook, etc.), the process is slightly different.
- Check the Port: Ensure your Mac has an HDMI port or a Thunderbolt/USB-C port that supports HDMI output. If you have a Thunderbolt/USB-C port, you may need a USB-C to HDMI adapter.
- System Preferences: Go to "System Preferences" (or "System Settings" on newer macOS versions) and select "Displays."
- Arrangement and Mirror Display: Your connected external display should appear in the "Displays" settings. You can mirror your display by checking the "Mirror Displays" box. Unchecking it will extend your display.
- Troubleshooting: If the external display isn't detected, try unplugging and replugging the HDMI cable or restarting your Mac. Check for any software updates.
Beyond the Basics: Advanced Troubleshooting and Solutions
Sometimes, even after going through the essential steps, your laptop and external display still refuse to cooperate. Don't give up yet. Here are some advanced troubleshooting techniques.
- Resolution and Refresh Rate: Experiment with different resolution and refresh rate settings in your display settings. Sometimes, an incorrect resolution or refresh rate can cause display issues. Try setting your display to a lower resolution and refresh rate, and see if that resolves the problem.
- EDID Override (Advanced): EDID (Extended Display Identification Data) is data that the external display sends to your laptop, containing information about its capabilities (resolution, refresh rate, etc.). In rare cases, the EDID data can be corrupted or inaccurate. This can be addressed to edit the EDID through a specialist software. This is only recommended for experienced users, as incorrect editing can make it impossible to use the display.
- External HDMI Adapters/Docking Stations: If your laptop's HDMI port is damaged or if you need more connectivity options, consider using an external HDMI adapter or docking station. These devices plug into your laptop's USB-C or Thunderbolt port and provide an HDMI port, along with other ports like USB, Ethernet, etc.
- Contact the Manufacturer: If, after trying all the above solutions, you still can't get the HDMI connection to work, there may be a hardware problem with your laptop or the external display. In such cases, it's best to contact the manufacturer for assistance or service.
The "Weird Trick" in Reverse
Now, a peculiar twist to the method that will help you outsmart most users. If you are dealing with a specific application that is not working on the HDMI connection, but is working fine on your laptop display, close the application and reopen it. If the application is still not displayed on the external monitor, try shutting down the computer, disconnecting everything, and then rebooting. The simple act of restarting the computer often resolves conflicts that may be preventing a certain application from appearing on the display.
The world of technology is constantly evolving, and problems can arise. But by understanding the basics of HDMI connections, troubleshooting systematically, and knowing a few advanced techniques – you are now more equipped to tackle the challenges of getting your laptop connected to an external display. Go forth, connect, and enjoy the enhanced experience.
