dell laptop hdmi to vga adapter not working

Title: vga to hdmi cable
Channel: Unique Electro UA
vga to hdmi cable by Unique Electro UA
Dell Laptop HDMI to VGA: FIX This Annoying Problem NOW!
Dell Laptop HDMI to VGA: Conquering Connection Chaos!
Have you ever encountered the frustrating scenario? You prepare a presentation. You connect your Dell laptop to the projector. Then, utter silence (or a blue screen of despair) greets you. This situation is incredibly common. It's an HDMI to VGA connection issue. Don't worry; you're not alone. We're going to troubleshoot it together. Let's get your display working smoothly.
Understanding the HDMI to VGA Puzzle
First, comprehending the inherent challenges is crucial. HDMI (High-Definition Multimedia Interface) transmits digital signals. VGA (Video Graphics Array) uses analog signals. The difference forms the initial hurdle. Your Dell laptop likely outputs digital. Many older displays and projectors still rely on analog. Consequently, a simple cable won’t work. You need a converter. However, simply plugging it in doesn't guarantee success. So, the problem is often deeper.
Troubleshooting Steps: A Practical Guide
Are you ready to dive into fixing it? We’ll explore the steps. Start by examining the physical connections. Ensure both the HDMI cable and VGA cable are securely attached. Check the adapter itself. Next, inspect your Dell laptop's display settings. Right-click your desktop. Then select "Display Settings."
Now, identify your external display. Windows should detect it. If not, click "Detect." If still unsuccessful, try a different HDMI cable. Sometimes, a faulty cable causes the problem. Try a different VGA cable. Sometimes, these cables might fail too.
The Adapter: Your Key to Success
The adapter is a critical component of this connection. It needs power. Make sure your adapter is powered. It usually involves a USB cable. Plug it into a power source (or the laptop). Verify the adapter's specifications. Confirm it’s compatible with your devices. A bidirectional adapter is essential. Many are not.
Software Solutions: Beyond the Hardware
Sometimes, the issue is software-related. Check your display drivers. Outdated drivers can cause compatibility problems. Go to Device Manager on your Dell laptop. Look for "Display adapters." Right-click your graphics card. Select "Update driver." Choose "Search automatically for drivers." Allow the system to update.
If the driver update doesn't work, try a rollback. Go back to an earlier driver version. This approach might fix recent glitches.
Resolving Display Resolution Riddles
Another common issue is resolution. Your external display might not support your laptop's default settings. Adjust the resolution. In "Display Settings," find "Scale and layout." Change the resolution. Experiment with different settings until it works.
Furthermore, ensure your laptop isn't extending your display. This is separate from the primary display. Select "Duplicate these displays" or "Show only on 2" (or the external display number). This ensures the signal reaches your projector.
Audio Issues: Addressing Sound Silences
Besides video, audio could be an issue. Sometimes the audio doesn't transfer. Even if the video works, the presentation loses impact. Set your audio output. Go to "Sound settings." Select your external display as the output device. Ensure the volume is turned up. Also, check your presentation software audio settings.
Advanced Tactics: Power User Tips
Are you finding the solution elusive? Consider a different approach. Try a different HDMI port on your laptop. Your laptop may have multiple ports. Try each one individually. Reset your laptop's display settings to default. Sometimes, these adjustments are the perfect solution.
When All Else Fails: Seeking Expert Help
Have you tried everything? Sometimes, the problem persists. It's okay to seek professional help. Contact Dell support. They can provide tailored assistance. Consider contacting a local computer repair shop. Technicians have specialized equipment. They can identify potential hardware failures.
Prevention is Key: Avoiding Future Headaches
Want to prevent this from happening again? There are a couple of preventative measures. Regularly update your drivers. Keeping your laptop updated is crucial. Test your setup before important presentations. Connect everything. Make sure it functions smoothly. Invest in a good quality adapter. Avoid cheap, unreliable alternatives. Good quality often pays off.
Concluding with Clarity: Your Display Is Now Ready!
In conclusion, tackling the Dell laptop HDMI to VGA problem shouldn't intimidate you. By following these steps, you can diagnose and fix the issue. The key is systematic troubleshooting. Now you are ready to connect with confidence! You have the knowledge. So, you can face the next presentation with peace of mind. Get your Dell laptop and external display working together seamlessly! Enjoy your presentations!
IPVanish Laptop Failure? This SHOCKING Fix WORKS!Dell Laptop HDMI to VGA: FIX This Annoying Problem NOW!
Hey there, fellow tech travelers! Ever found yourself staring at a blank screen, a frustrating silence echoing where your presentation, your movie night, or just your life was supposed to be? If you're nodding, then you've likely encountered the dreaded HDMI to VGA incompatibility on your Dell laptop. It's a problem that can make you want to chuck your laptop out the window (metaphorically, of course!). But fear not, because we're going to dive deep, untangle this mess, and get you back to projecting that sweet, sweet content!
1. The HDMI to VGA Headache: A Universal Truth (and a Dell Specific One?)
Let's face it: the world of technology isn't always plug-and-play bliss. And the HDMI to VGA crossover is a prime example. It's like trying to force a square peg into a round hole. You've got your shiny, digital HDMI output on your Dell, ready to transmit crisp audio and video, and then you've got your trusty, analog VGA input on your projector or older monitor, happily awaiting its signal. The issue? They speak different languages. While this incompatibility is universal, Dell laptops sometimes seem to amplify the frustration. We'll explore why and how to overcome this hurdle.
2. Understanding the Culprits: Why Doesn’t It Just Work?!
The heart of the problem lies in the differences between the two technologies. VGA is, shall we say, a bit of an "old school" friend. It's analog, meaning it transmits information as a continuous signal. HDMI, on the other hand, is a digital diva, sending information in a series of ones and zeros. You need a translator, a converter, a magic box – or the right settings – to make them understand each other.
Here are the main culprits:
- Signal Conversion: The primary issue is the need to convert the digital HDMI signal to an analog VGA signal. This requires an active adapter or a dedicated converter. A passive adapter might work, but often only if your HDMI source is also sending an analog signal (which, increasingly, it doesn't).
- Audio: HDMI carries audio, VGA doesn't. So, if you want sound, you’ll need a separate audio cable (usually a 3.5mm aux cable) to connect your Dell to your projector or monitor's speakers.
- HDCP: High-bandwidth Digital Content Protection (HDCP) is a form of digital copy protection. Sometimes, if the content you're trying to display is protected by HDCP, it won't play through a VGA connection because VGA doesn't support HDCP. This is a sneaky one!
- Driver Issues: Less common, but possible, outdated or corrupted graphics drivers on your Dell laptop can sometimes interfere with the HDMI output.
3. The Right Tools for the Job: Choosing Your Adapter and Cables
Think of this as assembling your superhero kit. You'll need the right tools to combat the HDMI-to-VGA villain.
- Active Adapter vs. Passive Adapter: Crucially important! As mentioned, a passive adapter is a simple cable or adapter that doesn't convert the signal. An active adapter does convert the signal. Always lean towards active adapters. They're usually marked as such and typically have a chip inside them to perform the conversion.
- HDMI Cable: Make sure you've got a good HDMI cable. Cheap ones can cause signal issues.
- VGA Cable: Same applies: a quality VGA cable with sturdy connectors is essential.
- Audio Cable (if needed): An audio cable (3.5mm to 3.5mm or 3.5mm to RCA, depending on your projector/monitor) to carry the sound.
4. Hardware Hookup: Connecting the Dots (and Cables)
Okay, let's get physical! Connecting everything is generally straightforward.
- Plug the HDMI end of the adapter into your Dell laptop's HDMI port.
- Connect the VGA cable from the adapter to your projector or monitor's VGA port.
- (If you need audio) Connect the audio cable from your Dell's headphone jack to the audio input on your projector or monitor.
- Turn on your projector/monitor and your Dell laptop.
5. Software Setup: Tweaking Your Display Settings
This is where things get a little more technical, but don't sweat it. We'll guide you through it.
- Detecting the Display: Windows should automatically detect your external display. If it doesn't, right-click on your desktop and select "Display settings." Alternatively, press the Windows key + P to open the "Project" menu.
- Choosing Your Display Mode: You'll likely have a few options:
- PC Screen Only: This will show the display only on your laptop screen.
- Duplicate: This will show the same content on both your laptop screen and your external display. Perfect for presentations!
- Extend: This treats your external display as a second screen, giving you double the workspace (my personal fave!).
- Second Screen Only: This will display only on the external display.
- Resolution and Refresh Rate: Check the "Display settings" again and make sure the resolution and refresh rate are appropriate for your projector or monitor. You might need to experiment a bit to find the settings that work best. A too-high resolution can lead to a blurry or out-of-range signal.
6. Troubleshooting Time: When Things Go Wrong (and They Sometimes Do!)
Even with the best setup, things might not always go smoothly. Here's a troubleshooting roadmap:
- No Picture:
- Double-check all your connections. Are the cables securely plugged in?
- Make sure your projector or monitor is turned on and set to the correct input.
- Try a different HDMI cable or a different VGA cable.
- Restart your laptop.
- Try updating your graphics drivers (see section 7).
- Test with a different monitor or projector to rule out a device issue.
- Blurry Picture:
- Adjust the resolution settings in your display settings. Try lower resolutions.
- Make sure your projector or monitor is correctly configured for your input signal.
- Check the VGA cable – a poor-quality cable can cause blurring.
- No Sound:
- Double-check the connection of your audio cable.
- Make sure the volume on your laptop and your projector/monitor is turned up.
- Check your audio output settings in Windows (right-click the speaker icon in the system tray and select "Open Sound settings"). Ensure the correct audio output device is selected.
- Display Flickering:
- This can indicate a signal instability. Try a different HDMI cable, a different VGA cable, or a different refresh rate.
- Ensure the power adapter is securely connected to your Dell laptop.
- "No Signal" Message:
- This usually means the projector/monitor isn't receiving a signal. Goes back to the "No Picture" troubleshooting steps.
7. Driver Updates: Keeping Your Graphics Card Happy
Outdated or corrupted graphics drivers can definitely cause HDMI problems. Thankfully, updating them is usually a breeze.
- Open Device Manager: Type "Device Manager" into the Windows search bar and select it.
- Expand "Display adapters."
- Right-click on your graphics card (e.g., Intel HD Graphics, NVIDIA GeForce) and select "Update driver."
- Choose "Search automatically for drivers." Windows will search for and install the latest drivers.
- Restart your laptop after the update is complete.
8. BIOS Updates: A Sometimes Useful Step
While less common, updating your BIOS (Basic Input/Output System) can sometimes resolve compatibility issues. However, this is a more advanced step and should be approached with caution. Refer to your Dell laptop's manual or Dell's support website for instructions. Proceed with caution, and always back up your data before a BIOS update!
9. Power Considerations: Making Sure Everything is Powered Right
Believe it or not, power issues can sometimes be subtly involved.
- Laptop Power: Ensure your Dell laptop is plugged into a power outlet, especially for demanding tasks like video playback. Battery life can be affected, leading to signal inconsistencies.
- Projector Power: Make sure your projector is also plugged in and receiving power.
10. Dealing With HDCP: The Content Protection Conundrum
If you’re trying to watch protected content (like Blu-ray movies or streaming services) and you're getting a black screen or an error message, HDCP might be to blame.
- Try a Different Source: See if the content plays fine on a different device connected to your projector/monitor.
- Consider a Different Connection: If possible, use an HDMI connection directly to your projector or monitor.
- HDCP Strippers (Use with Caution): There are devices that can, in theory, strip the HDCP protection. **However, using these devices may violate copyright laws and could potentially be
HDMI To VGA Adapter Big Problem
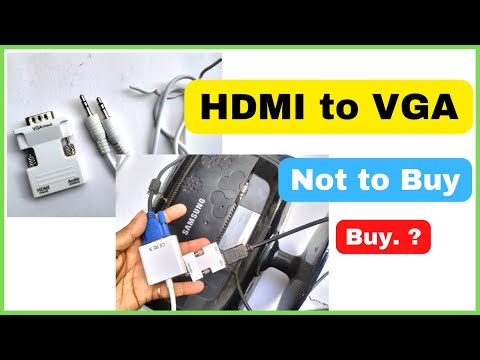
By Learning Something BRaju HDMI To VGA Adapter Big Problem by Learning Something BRaju
Mix-up VGA cable with HDMi VGA connects to HDMI without adaptor

By Umair Creatives Mix-up VGA cable with HDMi VGA connects to HDMI without adaptor by Umair Creatives
HDMI to VGA adapter fix having trouble with your HDMI to VGA adapter MUST WATCH THIS
By Nick Leffakis HDMI to VGA adapter fix having trouble with your HDMI to VGA adapter MUST WATCH THIS by Nick Leffakis
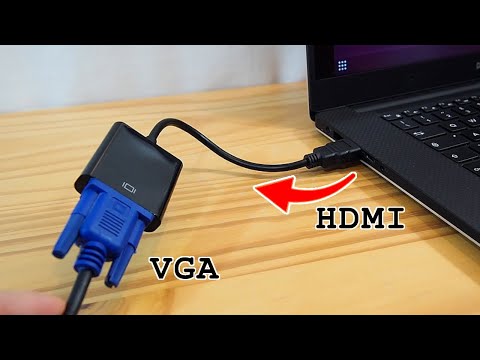
Title: HDMI to VGA adapter Setup with laptop and old VGA monitor
Channel: Trafegon
HDMI to VGA adapter Setup with laptop and old VGA monitor by Trafegon
Wifi On Laptop
Dell Laptop HDMI to VGA: Conquer the Connection Conundrum
Are you grappling with the frustrating issue of connecting your Dell laptop to a VGA monitor or projector? The transition from HDMI, the modern digital interface, to the older analog VGA can be a source of headaches. Fear not! We have compiled a comprehensive guide to help you diagnose, troubleshoot, and ultimately, fix the problem. This article serves as your ultimate resource: a detailed, step-by-step companion to achieve seamless display connectivity, allowing you to use your Dell laptop with virtually any display technology.
Understanding the HDMI to VGA Challenge
The core challenge lies in the fundamental difference between HDMI and VGA. HDMI (High-Definition Multimedia Interface) is a digital signal transmission method, carrying both video and audio. VGA (Video Graphics Array), on the other hand, is an analog signal format purely for video. Converting from digital to analog requires a specialized adapter, and this conversion process can introduce compatibility issues. Incorrect or faulty adapters, driver problems, and outdated display settings can all contribute to display failure, leading to a blank screen or distorted image.
Essential Tools for Success: The HDMI to VGA Adapter
The most crucial component in this process is a high-quality HDMI to VGA adapter. Not all adapters are created equal. Cheap, generic adapters are often unreliable and can lead to signal degradation or complete failure. Choose an adapter from a reputable manufacturer that specifically states its compatibility with Dell laptops. Look for adapters that state active conversion, often including a built-in chipset. This chipset is vital for converting the digital HDMI signal to the analog VGA signal. Ensure the adapter supports the resolution and refresh rate of your display; otherwise, you'll encounter resolution issues. Consider an adapter with an integrated audio output if you need to transmit audio in addition to a video signal.
Step-by-Step Connection Guide: A Clear Path to Success
Power Down and Disconnect: Begin by completely powering off your Dell laptop. Also, disconnect any existing cables connected to your VGA monitor or projector. This initial step prevents potential electrical issues during the connection process. It also ensures that the system can detect the new display properly.
Connect the Adapter: Plug the HDMI connector of your adapter firmly into the HDMI port on your Dell laptop. Ensure it is securely seated to prevent signal interruptions. Double-check the connection to ensure it is snug; a loose connection is a common cause of display problems.
Connect the VGA Cable: Attach the VGA cable from your monitor or projector to the VGA port on the adapter. Again, ensure a secure connection on both ends of the cable. Carefully inspect the ports and connectors for any signs of damage or debris that could obstruct the signal.
Secure Data Transfer: This step often involves the use of a USB cable to supplement the power offered by the HDMI port. This means that additional power will then be supplied to the HDMI converter, which will then deliver a stable signal.
Power On and Detect: Power on your monitor or projector first, and then power on your Dell laptop. Once the laptop has booted, it should automatically detect the connected display. This detection process may take a few moments.
Configure Display Settings (If Necessary): If your laptop doesn't automatically display the image on the external monitor, you may need to configure your display settings. Right-click on your desktop and select “Display settings" (Windows 10 and 11). Alternatively, right-click your desktop and select "Screen Resolution" (older Windows versions). Here, you should see that your external display appears. If it does not, click the "Detect" button.
Choose Display Mode: Within the display settings, you'll have a few options for how your laptop and external display interact:
- Duplicate these displays: This option clones your laptop's display on the external monitor. This is useful for presentations or mirroring content.
- Extend these displays: This option allows you to treat the external monitor as an extension of your laptop's screen, providing more screen real estate. You can move windows between the two displays, making multitasking easier.
- Show only on 1: This displays the image only on your laptop screen.
- Show only on 2: This displays the image only on your external monitor.
Adjust Resolution and Refresh Rate: Select the external display (usually designated as "2") in the display settings and verify the resolution and refresh rate. Choose the highest resolution your monitor or projector supports for optimal image quality. A refresh rate of 60Hz is standard. Incorrect settings can result in a degraded image and/or flickering.
Troubleshooting Common Display Issues
- No Signal: If you see a "No Signal" message on your external monitor, double-check the following: the power connection to both your laptop and the monitor/projector, the integrity of the HDMI-to-VGA adapter and VGA cable, and the input selection on your monitor/projector. Ensure your settings are set to the appropriate source.
- Blank Screen: A blank screen can indicate a compatibility issue. Try a different adapter, update the drivers on your Dell laptop (see below), or try a different VGA cable. A faulty connection between the adapter and the laptop can also cause a blank screen.
- Distorted Image: This can manifest as blurry text, stretched images, or flickering. Check the display resolution and refresh rate settings on your laptop and monitor to ensure they are compatible. Ensure your components are in good working order.
- No Audio: Some HDMI-to-VGA adapters do not pass audio. If your adapter has an audio output, connect a separate audio cable (3.5mm jack) from the adapter to your monitor or external speakers. Ensure your audio settings (as mentioned above) are configured appropriately in your PC settings.
Driver Updates: A Critical Step
Outdated or corrupted graphics drivers can cause display problems. Regularly updating the graphics drivers on your Dell laptop can resolve compatibility issues and improve performance.
Identify Your Graphics Card: Determine the make and model of your graphics card. Dell laptops often use Intel, NVIDIA, or AMD graphics cards. You can typically find this information in the Device Manager in Windows (search for "Device Manager" in the Windows search bar and select "Display adapters").
Update Drivers: Visit the website of your graphics card manufacturer (Intel, NVIDIA, or AMD) or the Dell support website and download the latest drivers for your specific laptop model and operating system. Follow the installation instructions on the website. You can also update your drivers directly through Windows Update.
Restart Your Laptop: After installing the new drivers, restart your laptop to ensure that the changes are applied correctly.
Advanced Troubleshooting Techniques
- BIOS Settings: Check the BIOS settings of your Dell laptop for any display-related options. These settings can sometimes affect external display functionality. Refer to your Dell laptop's manual for specific instructions.
- Try a Different VGA Cable: The VGA cable can be a source of problems. Test with a known-good VGA cable to rule out cable failure.
- Test on Another Dell Laptop: If possible, try connecting a known-good HDMI-to-VGA adapter and VGA cable to a different Dell laptop. This helps isolate whether the problem lies with your laptop or the adapter/cable.
- External Monitor Compatibility : Try the HDMI-to-VGA adapter with the laptop in a different external monitor. This helps determine if the problem is in the adapter and the laptop, or with the external monitor.
Resolving Potential Conflicts: Software and Hardware
Certain software programs, such as screen recorders or screen mirroring apps, can sometimes interfere with external display connections. Close any unnecessary programs before connecting. Similarly, ensure there are no hardware conflicts. Disconnect any other external devices (printers, USB hubs, etc.) that might be interfering with the display signal.
Care and Maintenance: Ensuring Longevity
- Handle Cables with Care: Avoid bending or kinking the HDMI and VGA cables. This can damage the internal wires and lead to signal degradation.
- Store Cables Properly: When not in use, store the cables neatly and securely to prevent damage.
- Clean the Connectors: Regularly clean the HDMI and VGA connectors with a soft, dry cloth to remove dust and debris.
- Adapter Protection: Protect your HDMI-to-VGA adapter from physical damage. Avoid dropping it or exposing it to extreme temperatures or moisture.
Conclusion: Reclaiming Your Display Connectivity
By following the steps outlined in this guide, you can effectively diagnose and resolve the common issues preventing your Dell laptop from connecting to a VGA monitor or projector. Ensure you have the right tools, a reliable HDMI-to-VGA adapter, up-to-date drivers, and carefully configured display settings. With a methodical approach, you will successfully navigate the HDMI to VGA conversion process and enjoy seamless connectivity between your Dell laptop and your preferred display technology. Remember to always prioritize quality components and regular maintenance. Enjoy the benefits of clear and reliable display output!
