dell laptop arrow keys not working

Title: Fix Arrow keys are not working in Windows 1110 laptop keyboard
Channel: TheWindowsClub
Fix Arrow keys are not working in Windows 1110 laptop keyboard by TheWindowsClub
dell laptop arrow keys not working, dell laptop arrow keys not working in excel, dell laptop cursor keys not working, dell inspiron arrow keys not working, my dell laptop arrow keys not working, dell laptop keyboard arrows not working, keyboard arrow keys not working dell laptop, arrow keys not working in excel on dell laptop windows 10, dell arrow keys not working
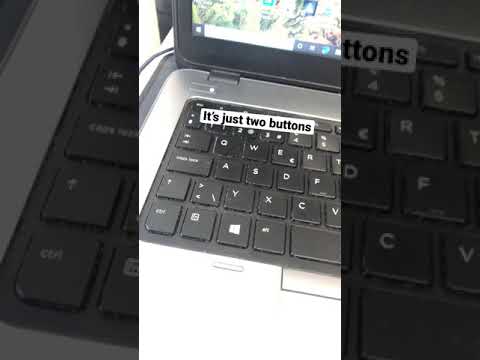
Dell Laptop Arrow Keys DEAD? FIX This NOW!
Dell Laptop Arrow Keys: When Navigation Goes Nowhere - And How to Get Back on Track!
Have you ever experienced the sudden, frustrating silence from your Dell laptop's arrow keys? You're typing away, navigating documents, or gaming, and then—nothing. Those tiny, indispensable buttons, your digital compass, have seemingly deserted you. Don’t panic! Firstly, try to remain calm; we can absolutely sort this out. This guide, crafted with the expertise of countless resurrected arrow keys, offers a lifeline. It's designed to get your Dell back to tip-top shape.
The Silent Treatment: Why Your Arrow Keys Might Be M.I.A.
The arrow keys, those unsung heroes of everyday computing, can go rogue for various reasons. Initially, it could be a simple glitch. Sometimes, a minor software conflict can do it. Furthermore, physical issues are also a possibility. You have to diagnose the problem correctly to find the right solution. It’s like being a detective, but for your laptop. Think of it as troubleshooting 101. The first steps are the most crucial.
Software Shenanigans: Hunting Down the Invisible Culprits
Let's explore the software side of things. Firstly, a simple restart can often work wonders. This forces your operating system to refresh. Because of this, it often resolves minor hiccups. Also, ensure your drivers are up to date. Outdated drivers are a common cause of keyboard woes. To check, go to the Device Manager. Locate your keyboard device and see if there's an exclamation mark. Consequently, it means an outdated driver needs a refresh. Right-click on your keyboard and choose "Update driver." You should select "Search automatically for drivers." Hopefully, that solves the issue. Furthermore, consider if any recently installed software might be interfering. Sometimes, new installations can conflict with existing components. If you installed something just before the arrow keys failed, consider uninstalling it to test.
Hardware Hurdles: Investigating the Physical Realm
Now, let's move to the physical. Is there anything physically obstructing the keys? Check for debris. Dust, crumbs, or even a sticky residue can prevent the keys from registering. Gently blow compressed air around the arrow keys. Consider also cleaning them with a soft brush. However, be careful not to use harsh chemicals. Next, examine the keyboard itself. Does it feel "mushy" or unresponsive? This could indicate a problem with the key switches. In that case, it might be time for professional repair. Before that though, it's important to check your keyboard's settings.
Keyboard Settings: Unveiling Hidden Configurations
Your Dell laptop has settings that can impact keyboard functionality. These can sometimes be overlooked. Check your Ease of Access settings. Windows has features designed to assist users. Sometimes, these features can inadvertently affect keyboard input. Check if "Sticky Keys" or "Filter Keys" are enabled. These features can interfere with how the arrow keys behave. Navigate to Control Panel (or Settings), then Ease of Access. From there, explore the keyboard options. If either feature is turned on, try disabling it. See if your arrow keys start cooperating again.
External Keyboard Connection: A Temporary Lifeline
In the meantime, you might need a workaround. Since you are experiencing a problem with your integrated keyboard, consider using an external keyboard. This is especially helpful if you need to continue working. Connect an external keyboard to your Dell. It offers a quick and easy solution. This will help you determine whether the issue is in the laptop's built-in keyboard or elsewhere. Consequently, if the external keyboard works, you know the problem lies within your laptop itself.
Dell Support: Reaching Out for Expert Assistance
If you've tried all the above steps, and your arrow keys are still silent, it’s time to contact Dell support. They have specialized technicians to assist. They possess the tools and expertise to diagnose and repair hardware problems. You can find their contact information online. Make sure you have your laptop’s service tag (serial number) ready. This will help them provide faster and more accurate assistance. You can also explore the Dell support forums. Many users share solutions. Often, you can find helpful advice from other Dell owners who have had similar experiences.
Prevention is Key: Maintaining Keyboard Longevity
Once you’ve (hopefully) fixed your arrow keys, it's wise to think about prevention. Here are some practices that can help. First of all, keep your laptop clean. Regularly wipe down your keyboard with a microfiber cloth. Additionally, avoid eating or drinking near your laptop. Spills and crumbs are the enemy. Also, consider using a keyboard cover. It adds an extra layer of protection against dust and spills. Finally, handle your laptop carefully. Avoid dropping it or putting heavy objects on the keyboard.
Conclusion: Back to Navigating with Ease
Losing your arrow keys is a frustrating experience. After implementing these steps, you should be back in action. By systematically troubleshooting the problem—exploring both software and hardware—you've increased your chances of success. Remember to stay calm, be patient, and follow these steps. Now, go forth and navigate your digital world with confidence! Hopefully, this guide has provided the answers.
Laptop Sound DEAD? FIX This NOW!Dell Laptop Arrow Keys DEAD? FIX This NOW!
Hey there, fellow Dell laptop users! Ever stared at your screen, fingers poised to navigate a document, game, or spreadsheet, only to be met with… nothing? Those pesky arrow keys, the unsung heroes of digital navigation, are suddenly… dead. We’ve all been there. It's like your trusty steed suddenly refuses to gallop. Frustrating, right? But before you chuck your laptop out the window in a fit of keyboard rage (don't worry, we've been tempted!), let's breathe, take a deep dive, and figure out why those arrow keys are giving you the silent treatment and, more importantly, how to breathe some life back into them.
1. The Silent Treatment: Recognizing the Problem
First things first: are your arrow keys really dead? Or are they just taking a very extended coffee break? Let's be sure. Try these simple tests:
- Restart the laptop: This is the tech-support equivalent of "have you turned it off and on again?" but it's surprising how often it works. A simple restart can clear up temporary glitches.
- Test in multiple applications: Do the arrow keys work in Word but not in your game? Or vice versa? This can point to a software-specific issue.
- Check your physical environment: Are there any crumbs, dust bunnies, or anything else obstructing the keys? A quick clean with compressed air (more on that later!) could be the solution.
If you've tried these basic troubleshooting steps and still have no response, chances are your arrow keys are indeed non-responsive. Now we dig deeper.
2. The Usual Suspects: What Could Be Going Wrong?
Think of your laptop as a complex web of interconnected systems. When something goes wrong, pinpointing the source can feel like navigating a maze. But don't worry, we'll break it down into the most common culprits:
- Keyboard Driver Issues: Drivers are the software that allows your operating system to communicate with your hardware. Corrupted, outdated, or simply missing drivers can wreak havoc on your keyboard's functionality.
- Sticky Keys & Filter Keys: Windows has accessibility features that can sometimes interfere with your keyboard input. We’ll check these out.
- Hardware Failures: Yep, sometimes things break. Keys can become physically damaged, circuit boards can fail, and the whole keyboard might need replacing.
- Software Conflicts: Other programs running in the background can occasionally interfere with keyboard input. Especially those with keyboard shortcuts of their own.
Sounds complex? It can be! But we'll walk through each of these potential issues like it’s a stroll in the park (a park with particularly finicky tech).
3. Driver Deep Dive: Fixing the Software Connection
Alright, let's get our hands dirty (figuratively speaking, of course) and explore driver-related solutions.
- Updating Drivers in Device Manager: This is usually the first place to start.
- Right-click the Windows Start button and select "Device Manager."
- Expand the "Keyboards" section.
- Right-click on your keyboard entry (it might just say "Standard PS/2 Keyboard" or something similar, depending on your Dell model) and select "Update driver."
- Follow the prompts. Windows will search for updated drivers online.
- Uninstalling and Reinstalling Drivers: Sometimes a fresh install is what’s needed. In Device Manager, right-click on your keyboard and select "Uninstall device." Restart your laptop, and Windows should automatically reinstall the driver.
- Downloading Drivers from Dell: Go directly to the Dell support website, enter your laptop's service tag (often on a sticker on the bottom of your laptop), and download the latest keyboard drivers specifically for your model.
Think of drivers like the messenger pigeons that deliver your keystrokes to the computer. If the pigeons are lost, sick, or just plain lazy, your commands aren't getting through. We're getting the pigeons back on track!
4. Accessibility Antics: Deactivating Annoying Settings
Windows has accessibility features designed to help users with certain needs. However, sometimes these settings can unintentionally interfere with your keyboard:
- Sticky Keys: This feature allows you to press shortcut keys (like Ctrl, Alt, or Shift) one at a time instead of simultaneously. If it's enabled, it might be causing issues. Go to "Settings" -> "Ease of Access" -> "Keyboard" and make sure "Sticky Keys" is turned off.
- Filter Keys: Filter Keys ignores brief or repeated keystrokes. Find this setting in the same "Keyboard" section of "Ease of Access" and ensure it is disabled.
These accessibility settings can be like having your car's cruise control engaged when you want to accelerate. Sometimes, they need to be turned off.
5. The Physical Realm: Cleaning and Examining
Sometimes, the solution is simpler than you think. A little cleaning can work wonders.
- Compressed Air Power: Use a can of compressed air to blast away any dust, crumbs, or debris that might be lodged under the arrow keys. Be gentle, and don't spray too close to the keyboard.
- Key Cap Removal (Proceed with Caution!): If you feel comfortable, you can carefully remove the key caps (the plastic tops of the keys) to clean underneath. Be extremely careful and take pictures beforehand so you know how to put them back! Use a keycap puller (available at most computer stores) or a small, flat tool like a plastic spudger.
- Check for Physical Damage: Inspect the arrow keys themselves for any signs of damage, like cracks or loose connections.
Imagine your keyboard is a tiny, intricate garden, and the arrow keys are delicate flowers. You need to gently remove any weeds and ensure the flowers have enough space to bloom!
6. Software Showdowns: Conflicts and Contradictions
Even if your drivers are in order and your keyboard is squeaky clean, other software can still be the problem.
- Close Unnecessary Programs: Close any programs that might be using keyboard shortcuts or that could potentially interfere with keyboard input. This is especially true for programs that you just installed, or that relate to gaming.
- Check for Keyboard Mapping Software: Do you use any software that is designed to remap your keyboard keys? If so, make sure it's configured correctly, or temporarily disable it to see if it's the culprit.
Sometimes, different programs fight for control of the keyboard, like two kids fighting over the last cookie. We need to get them to play nice together.
7. Windows Updates and the Keyboard Connection
Sometimes, a recent Windows Update can introduce bugs that affect your keyboard.
- Check for Recent Updates: Go to "Settings" -> "Windows Update" and check if any updates were recently installed.
- Consider Rolling Back Updates (If Possible): If you suspect a recent update is the problem, you can sometimes "uninstall" it in the Windows Update settings.
Think of Windows updates like house renovations. Sometimes they make things better, and sometimes they take a while to settle in.
8. Safe Mode Salvation: Testing the System
Booting your laptop into Safe Mode can help you determine if the problem lies with a third-party program or a core system file.
- Boot into Safe Mode: Restart your laptop and repeatedly press the F8 key (or Shift + F8, depending on your Dell model) during startup. Select "Safe Mode" from the boot menu.
- Test the Arrow Keys in Safe Mode: If the arrow keys work in Safe Mode, it indicates that a third-party program or driver is likely the issue.
Safe Mode is like a doctor's office for your laptop. It strips away all the unnecessary programs and allows you to isolate the problem.
9. Hardware Hacking: The Internal Investigation (For Advanced Users)
Disclaimer: This section involves potentially opening your laptop, which could void your warranty and cause further damage if done incorrectly. Proceed with extreme caution and only if you are comfortable working with electronics.
If you're tech-savvy, you could consider checking the keyboard's internal connections. This involves removing the keyboard (usually held in place with small screws) and checking the ribbon cable that connects it to the motherboard. Again, this is not for the faint of heart.
10. External Keyboard Experiment: A Quick Test
Plug in an external USB keyboard.
- Test with an external keyboard: Does your external keyboard work? If it does, it could mean the issue is definitely with the internal laptop keyboard.
This is like swapping out a car's tire to check if that's the source of the problem. If the external keyboard responds, then the internal one is likely the key culprit.
11. System File Scan: Checking for Corruption
Sometimes, system files can become corrupted, which can lead to all sorts of problems.
- Run the System File Checker (SFC) Scan: Type "cmd" in the Windows search bar, right-click on "Command Prompt," and select "Run as administrator." Then, type
sfc /scannowand press Enter. Let the scan run and see if it identifies and fixes any corrupted files.
This is like running a health check on your laptop's operating system.
12.
HP Laptop Security: Stealproof Your Work Data Now!HP LAPTOP KEYBOARD KEY REPAIR GUIDE 450 455 470 G5 G6 745 846 840 How to Install Fix keys DIY

By Laptopkey.eu HP LAPTOP KEYBOARD KEY REPAIR GUIDE 450 455 470 G5 G6 745 846 840 How to Install Fix keys DIY by Laptopkey.eu
How to Fix Some Keys Not Working on Laptop Keyboard Keyboard Not Working on Windows 10 & 11

By Real Insight How to Fix Some Keys Not Working on Laptop Keyboard Keyboard Not Working on Windows 10 & 11 by Real Insight
How to fix Laptop mouse touchpad not working Dell Laptop Touchpad Not Working Updated 2024

By Learning Earning Fun How to fix Laptop mouse touchpad not working Dell Laptop Touchpad Not Working Updated 2024 by Learning Earning Fun
Title: Shift Windows ctrl f5 shorts
Channel: jaywaddap
Shift Windows ctrl f5 shorts by jaywaddap
Laptop Wifi Hotspot
Here is the title: The Ultimate Guide to Mastering the Art of Sourdough Bread Baking at Home
The Ultimate Guide to Mastering the Art of Sourdough Bread Baking at Home
For centuries, the aroma of freshly baked sourdough has filled homes and kitchens, a testament to the enduring allure of this ancient bread. More than just a food staple, sourdough represents a connection to tradition, a practice of patience, and a celebration of flavor. Embark on a journey of discovery as we delve into the captivating world of sourdough, equipping you with the knowledge and skills to craft exceptional loaves in your own kitchen. This comprehensive guide will transform you from a novice into a confident sourdough baker, capable of creating crusty, flavorful, and undeniably delicious bread.
Understanding the Essence of Sourdough: The Starter
The heart and soul of sourdough lies in its starter, a living culture of wild yeasts and beneficial bacteria. Cultivating a healthy starter is the cornerstone of successful sourdough baking. It’s akin to nurturing a pet; it demands regular attention and care.
Creating Your Starter: Begin with equal parts by weight of unbleached, all-purpose flour and filtered, non-chlorinated water. Combine these in a clean glass jar, stirring well until a smooth, pancake-batter-like consistency is achieved. Cover the jar loosely with a lid or cheesecloth secured with a rubber band, allowing air to circulate. Place the jar in a warm environment, ideally between 70-75°F (21-24°C).
Feeding Your Starter: Over the next 7-14 days, consistently feed your starter. Remove all but 1-2 tablespoons of the existing starter. Then, feed it with equal parts flour and water, maintaining the same ratio as the initial mixing. Discarded starter can be used in pancakes, waffles, or even crackers, minimizing waste and enhancing flavor. Observe the activity: bubbles forming, the volume increasing, and a sour, slightly fruity aroma developing are positive signs of a thriving starter.
Maturing Your Starter: The first few days will likely show some bubbling. The amount of feeding is contingent on the rate of growth, and it may take up to two weeks to fully mature. A fully mature starter doubles in size within 4-8 hours after feeding, is bubbly and active, and has a pleasant sour smell. When this happens, your starter is ready to bake. It is often said that a properly working starter will rise and fall by the action of yeast and bacteria.
Maintaining Your Starter: Once your starter is active, feeding frequency depends on storage conditions. At room temperature, feed your starter daily. In the refrigerator, feed it once a week. Before using refrigerated starter, bring it to room temperature and feed it at least once or twice to revive it.
Selecting the Right Ingredients: The Foundation of Flavor
The quality of ingredients significantly impacts the final product. While seemingly simple, sourdough bread offers remarkable opportunities for experimentation.
Flour Selection: Unbleached, all-purpose flour is an excellent starting point. For a more complex flavor profile, consider bread flour, which has a higher protein content, resulting in a chewier crumb and a better rise. Experiment with different types of flour, such as whole wheat, rye, or spelt, to add distinctive flavors and textures. Ensure that the flour is of good quality.
Water Matters: Filtered, non-chlorinated water is crucial. Chlorine can inhibit the growth of the wild yeasts in your starter.
Salt's Role: Sea salt or kosher salt plays a vital role in sourdough. Salt controls yeast activity, strengthens the gluten structure, and enhances flavor. The typical proportion is 2% of the flour weight.
Mastering the Sourdough Baking Process: A Step-by-Step Guide
The sourdough baking process involves several key stages, each contributing to the bread's final characteristics.
Autolyse: This initial step involves mixing the flour and water, allowing the flour to fully hydrate. The autolyse stage enhances gluten development, resulting in a more extensible dough. Let the mixture rest, covered, typically for 30-60 minutes. The flour will have absorbed all the water and start to thicken.
Mixing and Dough Development: Add the sourdough starter and salt to the autolysed dough. Mix by hand or using a stand mixer. Extensive gluten development is not needed; a shaggy dough is acceptable.
Bulk Fermentation: After mixing, the dough undergoes its bulk fermentation stage. This is where the yeast and bacteria in the starter work their magic. Place the dough in a lightly oiled bowl and cover it. During bulk fermentation, perform stretch and folds every 30-60 minutes for the first 2-3 hours. This strengthens the gluten structure and evenly distributes the gases produced by the fermentation process. The total length of bulk fermentation can vary depending on the ambient temperature. A good benchmark is to look for the dough to increase in volume by about 50-75%.
Shaping: Once the dough has sufficiently bulk fermented, gently turn it out onto a lightly floured surface. Shape the dough into your desired form - a boule (round loaf), a batard (oval loaf), or another shape. Ensure the final shaping is tight to build good structure.
Proofing: After shaping, the loaf needs to proof, which is the final rise. Place the shaped loaf in a banneton basket (a proofing basket) lined with floured cloth, or into a bowl lined with floured cloth, seam-side up. Proofing time in the fridge is typically around 12-18 hours. This slow, cold proofing contributes to flavor development and the characteristic sourdough tang.
Baking: Preheat your oven with a Dutch oven or baking stone inside to a high temperature, generally 450-500°F (232-260°C). Carefully remove the hot Dutch oven or the baking stone. Gently transfer the proofed loaf into the Dutch oven or onto the baking stone. Score the top of the loaf using a lame or a sharp knife. Scoring controls the bread's expansion, creating beautiful patterns. Bake the proofed bread, covered, for a specified amount of time (usually 20-25 minutes) and then uncover and bake until golden brown and the internal temperature reaches 200-210°F (93-99°C). Cool completely on a wire rack before slicing.
Troubleshooting Common Sourdough Challenges
Even experienced bakers encounter occasional challenges. Here's how to address some prevalent issues.
Flat Loaves: This can be caused by an inactive starter, under-proofing, or over-proofing. Ensure your starter is doubling in size within a reasonable time after feeding. Be mindful of the proofing process.
Dense Crumb: Over-mixing the dough or insufficient fermentation can lead to a dense crumb. During stretch and folds, be gentle and do not over-work the dough.
Sour Taste Is Missing: The flavor will evolve over time. A longer proofing time in the fridge will develop the sourness, particularly if the starter is young.
Uneven Crumb: Over-proofing, under-proofing, and uneven shaping can contribute to an uneven crumb structure.
Expanding Your Sourdough Repertoire: Beyond the Basic Loaf
Sourdough baking is an art that continually evolves. Once you've mastered the basics, explore a wider range of possibilities.
- Flavor Infusions: Incorporate ingredients such as roasted garlic, herbs, olives, sun-dried tomatoes, or seeds into your dough for added flavor and texture.
- Variations: Start to experiment with different flours. Start by adding a small percentage of whole wheat, rye, or spelt flour to your recipe and gradually adjust the proportions.
- Sourdough Discard Recipes: Utilize your discard to create pancakes, waffles, crackers, pizza dough, or even cakes, minimizing waste and maximizing the potential of your starter.
Embracing the Joy of Sourdough: A Culinary Legacy
Sourdough baking is like an amazing gift. It takes patience, dedication, and a willingness to learn from each loaf. But the rewards - the aroma, the taste, and the satisfaction of creating something so simple yet so extraordinary – are immeasurable. Embrace the journey, celebrate your successes, and don't be discouraged by the occasional challenge. With each loaf, you'll become more skilled, confident, and passionate about the art of sourdough. The world of sourdough is waiting to be explored.
