why headphones are not working on laptop

Title: Fix Earphones Headphone Not Working On Windows 11
Channel: ITGuy360
Fix Earphones Headphone Not Working On Windows 11 by ITGuy360
why headphones are not working on laptop, why headphones not working on laptop windows 11, why are headphones not working on dell laptop, why headset not working on laptop, why bluetooth headphones not working on laptop, why headphones not working on hp laptop, why headset mic not working on laptop, why is headphone jack not working on laptop, why my earbuds not working on laptop, why my earphones not working on laptop windows 10
Laptop Headphones Not Working? This SHOCKING Fix Will BLOW Your Mind!
Laptop Headphones Not Working? Prepare to Be Astonished!
Have you ever felt that surge of frustration? Your favorite song is ready to play, a video call is about to start, but… silence. Your laptop headphones refuse to cooperate. It's a common tech woe, but the solutions often seem shrouded in mystery. Today, we're diving into the unexpected realm of headphone troubleshooting. Prepare for a journey that will redefine your approach to audio woes. The Unseen Culprit: More Than Meets the Ear
Often, the problem isn’t what you initially think. It's not always a physical defect in your headphones. Instead, it's a nuanced interplay of software, settings, and connectivity. Therefore, before you even consider replacing your headphones, let's embark on a digital detective mission. First, consider the operating system. It's the foundation upon which your audio experience rests. Many times, a simple reboot can work wonders. It's truly the low-hanging fruit of tech support. Now, let's venture deeper. Unmasking the Digital Ghosts: Software Sabotage
Beyond the hardware, the digital world is brimming with potential problems. To start, check your audio drivers. They are essentially the interpreters between your headphones and your laptop. Consequently, outdated or corrupted drivers are frequent saboteurs. You should update them directly from your laptop manufacturer’s website. Doing this will ensure compatibility and optimized performance. Moreover, software conflicts can also wreak havoc. Sometimes, other applications interfere with your audio output. The Hidden Settings Game
Next, we'll explore the often-overlooked realm of sound settings. Your laptop’s sound settings are a treasure trove of potential fixes. You can access them in your operating system's control panel or settings menu. First, verify the correct playback device. This seems basic, but it’s a surprisingly common culprit. Make sure your headphones are selected as the default. Furthermore, delve into the volume mixer. Ensure no individual application is muted. You may find that only one specific app is the issue. The Physical Connection: A Close Inspection
While software issues are prevalent, don't dismiss the physical realm. Because, sometimes, the simplest solutions are the most effective. Inspect the headphone jack on your laptop. Is it clean? Are there any obstructions? Dust and debris can disrupt the connection. After this, try wiggling the headphone plug. Does the sound cut in and out? This might indicate a loose connection. Consider also that the headphones themselves could be damaged, especially the cord. Thus, a quick wiggle test can help diagnose this. Beyond the Basics: Advanced Troubleshooting
For more persistent and perplexing problems, advanced methods are necessary. Start by exploring your system's troubleshooting tools. These built-in utilities are surprisingly effective in diagnosing and resolving audio issues. Then, consider a system restore. This allows you to revert your system back to a state when your headphones were working. You should only utilize this as a last resort. The process can be time-consuming, so proceed only when other methods fail. Additionally, think about checking your BIOS settings. The Shocking Revelation: The Unexpected Fix
Now comes the truly shocking part. After all the technical inspections, the root cause of your headphone woes may be surprisingly simple. In certain cases, a full shutdown may be necessary, as the OS may be experiencing conflicts after being put in Sleep Mode. This is worth trying before anything else. Protecting Your Headphones: Preventative Measures
In the meantime, consider preventative measures to avoid future problems. Properly storing your headphones is crucial. Avoid wrapping the cord tightly. Instead, coil it loosely. Then, ensure that you regularly clean your headphone jack. Gentle cleaning with compressed air or a cotton swab is often sufficient. Finally, invest in a protective case for your headphones. This is especially important for portable models. The Ultimate Audio Revival: A Symphony of Success
When your laptop headphones refuse to cooperate, don’t panic. By understanding the interplay of software, settings, and physical connections, you can unlock a world of solutions. Also, remember the unexpected – sometimes the simplest fix is the best fix. So, arm yourself with these tips, and prepare to experience an audio revival. Now, go forth and enjoy the sweet sound of success!
Laptop Drop: My Blu-ray Drive Died?! (😱)Laptop Headphones Not Working? This SHOCKING Fix Will BLOW Your Mind!
Hey tech enthusiasts! Ever felt that gut-wrenching panic when you plug in your headphones, ready to dive into your favorite tunes or a crucial Zoom call, only to be met with… silence? We’ve all been there. It’s like the universe is conspiring against your peaceful listening experience. But fear not, because we're about to unravel the mysteries of malfunctioning laptop headphones and, trust me, one of the fixes is so ridiculously simple, it'll make you facepalm in the best possible way. This isn't just a troubleshooting guide; it's a journey into the heart of audio dilemmas, sprinkled with a healthy dose of relatable anecdotes.
1. The Silent Symphony: Recognizing the Signs of Headphones in Distress
Before we jump into the "how," let's first acknowledge what we’re dealing with. The most obvious sign, of course, is the absence of sound. Like a lonely musician on a deserted island, your headphones refuse to play. But sometimes, the symptoms are a little more subtle. Perhaps you're hearing crackling noises, or the audio is muffled, as if someone's whispering secrets through a rusty pipe. Or, maybe, you're only getting sound from one ear – a frustrating experience, akin to watching a movie with only half the picture. We need to identify the problem.
2. Pre-Flight Check: Basic Troubleshooting Before Panic Sets In
Before you start tearing your hair out, let’s do a quick diagnostic. Think of this as the pre-flight checklist before taking off. Before accusing your laptop of sabotaging your audio happiness, ensure the basics are covered:
- Volume Control: This might sound silly, but we've all been there! Double-check those volume sliders. Are they cranked all the way down? Is the mute button engaged? Sometimes, the simplest solutions are the most elusive.
- Headphone Connection: Make sure your headphones are securely plugged into the correct port. It's a bit like trying to fit a square peg into a round hole -- it just doesn’t work. And yes, I've plugged my headphones into the microphone jack more times than I’d like to admit.
- Device Selection: Your laptop might be trying to play the audio through its built-in speakers, not your headphones. In your sound settings, verify that your headphones are selected as the default playback device.
3. The Software Sleuth: Exploring Your Operating System’s Audio Settings
Now, let's delve into the digital realm. Your operating system – be it Windows, macOS, or Linux – is the conductor of your audio orchestra. Let's make sure it’s leading the right instruments.
- Windows Wonderland: On Windows, right-click the speaker icon in the system tray (usually the bottom right corner). Select "Open Sound settings" and then "Manage sound devices." Ensure your headphones are enabled and set as the default output.
- macOS Magic: Head to "System Preferences," then "Sound." Under the "Output" tab, select your headphones from the list. Are they showing up at all? If not, there could be a deeper issue.
- Linux Landscapes: The process depends on your distribution, but generally, access your sound settings through the system settings menu. Look for the "Output" or "Playback" section and select your headphone device.
4. The Driver Drama: Updating and Reinstalling Audio Drivers
Drivers are the unsung heroes of the tech world. They're the software that allows your laptop and headphones to communicate. Sometimes, these drivers go rogue, leading to audio anarchy.
- Finding the Culprit: In Windows, you can access the Device Manager (search for it in the Start menu). Expand the "Sound, video and game controllers" section. Look for an entry related to your audio device (it might just say "Realtek Audio" or something similar).
- Updating the Driver: Right-click the audio device and select "Update driver." Windows will try to find and install the latest driver automatically.
- Reinstalling for Redemption: If updating doesn't work, try uninstalling the driver (right-click -> "Uninstall device"), then restarting your laptop. Windows should automatically reinstall the driver during the boot-up process. If not, a visit to the manufacturer's website is in order.
5. Hardware Hazards: Checking the Headphones and Ports
Okay, we’ve tackled the software. Now let's get physical. Sometimes the problem lies with the hardware itself.
- Headphone Inspection: Try your headphones on another device – your phone, a different laptop, whatever you have handy. This will immediately tell you if the headphones are faulty. If they aren’t making noise on any device, it's time for a replacement.
- Port Potential Problems: Inspect the headphone jack on your laptop. Is there any debris lodged inside? Dust bunnies love to congregate in these dark corners. Use a toothpick or compressed air (gently!) to clean it out.
- Testing the Test Device: Try different headphones in your laptop, and if they work like a charm, the original set needs a new home.
6. The "AHA!" Moment: The Volume Mixer's Hidden Secrets
This is where things get interesting. Windows has a feature called the Volume Mixer, which can be a sneaky culprit.
- Accessing the Mixer: Right-click the speaker icon in the system tray and select "Open Volume mixer."
- Application Apprehension: This mixer controls the volume levels for individual applications. Check the volume levels for the application you're using (Spotify, YouTube, etc.). Is the volume slider for that app turned all the way down, even if the master volume is up?
- The Subtle Sabotage: It's easy to accidentally mute an application within the Volume Mixer. Don’t let your favorite music take a stealthy pause.
7. Bluetooth Battles: Troubleshooting Wireless Headphone Issues
If you’re using Bluetooth headphones, the troubleshooting process gets a little more complex. It's like training a particularly stubborn puppy.
- Pairing Problems: Ensure your headphones are properly paired with your laptop. Go to your Bluetooth settings and remove the headphones, then re-pair them.
- Connection Conundrums: Make sure your headphones are connected, not just paired. Sometimes, they'll pair successfully but not connect to your laptop.
- Interference Interference: Bluetooth signals can be disrupted by other devices (Wi-Fi routers, microwaves, etc.). Try moving your laptop closer to your headphones to minimize interference.
- Driver Driver Dilemmas Yes, even for Bluetooth devices, drivers can be a problem. Update them by consulting the Device Manager as pointed in step 4.
8. The Shocking Fix: The Simple Re-Start (Yes, Really!)
Here it is. The moment of truth. The fix that often elicits a facepalm of epic proportions. Have you tried turning it off and on again? I know, I know, it sounds cliché. But, trust me, restart your laptop. It's surprising how often a simple reset can resolve seemingly insurmountable audio problems. It’s the tech equivalent of a good night’s sleep.
9. External Audio Devices: Testing with a Different Source
Sometimes, isolating the issue can be as simple as testing the headphones with a different source. To determine if the problem is with your laptop, plug your headphones into your phone, a tablet, or any other device with an audio output.
10. The Internal Speakers' Interference
Your internal laptop speakers may sometimes create an impedance problem. To make sure the internal speakers aren't causing some kind of an obstruction, simply disable them from the audio settings, and see if the headphones start to play.
11. The Software Conflicts: Closing Out All Unnecessary Apps
Other software can create audio conflicts, especially programs relating to audio processing, such as audio equalizers. Before you start any new audio tests, close any running software, or apps, that may inadvertently try to use the audio output, and create a conflict.
12. Specialized Software Issues: Troubleshooting Audio Through Specific Programs
Specific software programs, such as music players, video editors, or virtual meeting apps, may have their own audio settings that can affect headphone functionality. Check the individual settings within these programs to make sure they're set to use your headphones as the default audio output.
13. The Audio Enhancements Debacle: Disabling Audio Enhancements
Windows and other operating systems often come with audio enhancement features designed to optimize your audio experience. However, these enhancements can sometimes interfere with headphone playback. In your sound settings, look for a tab or section related to audio enhancements and try disabling them one by one to see if it resolves the issue.
14. The BIOS Blues: Checking for Audio Settings in the BIOS
More advanced users may want to check the audio settings within the BIOS of their laptop. Sometimes, the BIOS can override certain audio configurations. To do this, you'll need to access the BIOS during startup (usually by pressing a key like F2, Delete, or Esc). Consult your laptop's manual for instructions on accessing the BIOS.
15. When All Else Fails: Seeking Expert Help
If you've tried everything, and your headphones are still stubbornly silent, it might be time to consult the professionals
Acer Laptop Sound DEAD? FIX This NOW!FIXED windows 10 no sound from headphones 2025 windows 10 no sound headphones

By Etechniz FIXED windows 10 no sound from headphones 2025 windows 10 no sound headphones by Etechniz
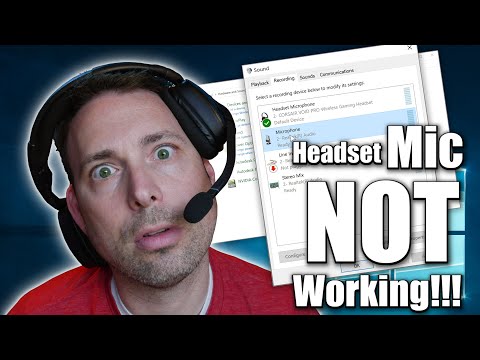
Headset Mic Not working on Windows 10 4 Ways to Fix

By Tech White Headset Mic Not working on Windows 10 4 Ways to Fix by Tech White
Fix Headphone Connected But No Output Sound in Windows 1110

By MJ Tube Fix Headphone Connected But No Output Sound in Windows 1110 by MJ Tube
Title: Why isn't My Headset Mic Working & How do I Fix it - Windows & Software Settings
Channel: Maraksot78
Why isn't My Headset Mic Working & How do I Fix it - Windows & Software Settings by Maraksot78
Laptop Working
Laptop Headphones Not Working? This SHOCKING Fix Will BLOW Your Mind!
We've all been there: poised on the precipice of productivity, headphones securely in place, ready to dive into a world of focused work or immersive entertainment. Then, silence. Your meticulously crafted digital symphony, your crucial conference call, or your carefully curated podcast – all lost to the ether. Laptop headphones refusing to cooperate can quickly transform a productive day into a frustrating exercise in troubleshooting. But before you resign yourself to the dreaded tinny laptop speakers or the inconvenience of an external setup, take heart. We're here to guide you through a series of troubleshooting steps, culminating in a solution so effective, so straightforward, it'll redefine your approach to headphone connectivity.
Understanding the Common Culprits: The Initial Diagnostic
The first step in conquering headphone woes lies in identifying the enemy. We must systematically eliminate potential culprits to pinpoint the source of the problem. Let's embark on a diagnostic journey, starting with the most obvious and progressing to the more nuanced.
1. The Physical Connection: A Critical Examination
Begin by scrutinizing the physical connection. Are your headphones securely plugged into the correct jack? Laptop jacks, often color-coded green for headphones and pink for microphones, are prone to wear and tear. Inspect the headphone plug itself. Look for any bends, breaks, or damage to the tip or the shaft - a common source of intermittent audio failures. Try wiggling the plug slightly within the jack. Does this induce any change in the audio output? If so, the connection itself is highly suspect. Clean the headphone jack with compressed air to remove any dust or debris that may be interfering with the contact.
2. Hardware vs. Software: A Crucial Distinction
Next, we must discern if the problem stems from a hardware malfunction or a software configuration issue. A quick test: try plugging your headphones into another device. Does the audio transmit correctly? If the headphones work flawlessly elsewhere, the problem almost certainly lies within your laptop. Conversely, if they still fail to produce sound, the fault likely rests with the headphones themselves.
3. Volume Levels: The Elementary Check
It may seem rudimentary, but it's a vital step. Ensure the volume isn't muted or set at an extremely low level. Check the following:
- The volume control on your laptop's keyboard (usually function keys combined with volume up/down buttons).
- The system tray volume icon (usually located near the clock).
- The volume control within the audio application you're using (e.g., media player, video conferencing software).
4. Driver Issues: The Digital Gatekeepers
Drivers, the software that bridges the gap between your hardware and operating system, can be the source of many audio-related problems. Outdated, corrupted, or improperly installed drivers can wreak havoc on headphone functionality.
Advanced Troubleshooting: Diving Deeper into Solutions
If the initial checks fail to yield results, it's time to delve into more advanced troubleshooting techniques, focusing on software and driver configurations.
1. Device Manager: Unveiling the Audio Devices
Open the Device Manager (search for it in your Windows search bar). Expand the "Sound, video, and game controllers" section. You should see your audio devices listed here.
- Check for Errors: Look for any yellow exclamation marks or red crosses next to your audio devices. These indicate driver issues or hardware conflicts.
- Driver Updates: Right-click on your audio device (e.g., Realtek High Definition Audio) and select "Update driver." Choose "Search automatically for drivers." Windows will attempt to find and install the latest drivers.
- Driver Rollback: If a recent driver update caused the problems, right-click your audio device, select "Properties," go to the "Driver" tab, and choose "Roll Back Driver." This reverts to a previous driver version.
- Driver Uninstall/Reinstall: If updating or rolling back the driver doesn't work, try uninstalling the device and then restarting your laptop. Windows will attempt to reinstall the driver upon reboot.
2. Sound Settings: Navigating the Audio Landscape
Open the Sound settings (search for "Sound settings" in your Windows search bar).
- Playback Device Selection: Ensure your headphones are selected as the playback device. If multiple devices are listed, make sure your headphones are chosen as the default. Right-click on your headphones and select "Set as default device."
- Output Level Adjustment: Verify that the output level for your headphones isn't muted or excessively low.
- Troubleshoot Problems: The Windows sound settings often include a troubleshooting tool that can automatically diagnose and fix common audio issues.
3. The Audio Services: Ensuring Vital Functions are Running
Certain Windows services are essential for audio functionality. Ensure they are running correctly.
- Open Services: Type "services.msc" in the Windows search bar and press Enter.
- Verify Audio Services: Locate the following services: "Windows Audio," "Windows Audio Endpoint Builder."
- Check Service Status: Ensure both services are running. If they are stopped, right-click on each and select "Start."
- Set Startup Type: Right-click on each service and select "Properties." In the "Startup type" dropdown, choose "Automatic." This ensures they start automatically when your laptop boots.
The SHOCKING Fix: Unveiling the Ultimate Solution
After meticulously exploring these troubleshooting steps, you might still be facing silence. Here's where the "SHOCKING" fix emerges – a solution often overlooked but remarkably effective. It often addresses underlying issues.
1. The Audio Enhancements Tab: The Untapped Power
Within the Sound settings (Playback tab, select your headphones, click Properties), explore the "Enhancements" tab. Here lies a hidden world of audio-processing features.
- Disable Enhancements: The first step is to disable all audio enhancements. Check the box labeled "Disable all enhancements." Some enhancement settings, however well-intentioned, can sometimes introduce compatibility problems.
- Explore Individual Enhancements (Cautiously): If disabling all enhancements resolves the issue, you can attempt to re-enable them one at a time to identify the culprit. However, proceed with caution, as the enhancement settings are known for audio problems.
2. The Exclusive Mode: Taking Control Of The Audio Stream
Within the Sound settings (Playback tab, select your headphones, click Properties), navigate to the "Advanced" tab.
- Uncheck "Allow applications to take exclusive control of this device": This is the solution you may need to bring back your audio again. This setting can sometimes interfere with driver compatibility and sound output. By disabling exclusive mode, the audio stream is open to other programs.
- Test the Results: After unchecking this box, reboot your laptop and test your audio output.
3. The BIOS Update (Advanced Users Only):
A BIOS (Basic Input/Output System) update can be a powerful, albeit potentially risky, fix for some hardware and driver-related problems.
- Understand the Risks: Incorrect BIOS flashing can render your laptop inoperable. Only proceed if you are comfortable with this process and understand the steps involved.
- Download the Correct Update: Visit your laptop manufacturer's website and download the latest BIOS update specifically for your laptop model.
- Follow Instructions Carefully: The flashing process varies depending on your laptop model. Follow the manufacturer's instructions precisely.
- Test the Result: After the update, reboot your laptop and test your headphone audio.
Maintaining Audio Clarity: Prevention is Key
Troubleshooting headphone issues is only half the battle. Preventative measures can keep your audio experience seamless.
- Regular Driver Updates: Regularly check for driver updates through Windows Update or your laptop manufacturer's website.
- Avoid Physical Stress: Handle your headphones with care. Protect the cable from bending, pulling, or kinking.
- Clean Connections: Regularly clean the headphone jack to prevent dust and debris buildup.
Conclusion: A Symphony of Sound, Restored
By systematically applying these troubleshooting steps and, ultimately, embracing the "SHOCKING" fix, we can confidently overcome the challenges of non-functional laptop headphones. We restored you to your digital symphony, ready to face the day with clear audio and unwavering productivity.
