my laptop audio is not working windows 10

Title: FIXED windows 10 no sound from headphones 2025 windows 10 no sound headphones
Channel: Etechniz
FIXED windows 10 no sound from headphones 2025 windows 10 no sound headphones by Etechniz
my laptop audio is not working windows 10, my laptop volume is not working windows 10, my hp laptop sound is not working windows 10, why does my laptop suddenly have no sound windows 10, why is my audio not working on my windows 10
Laptop Audio DEAD? Windows 10 FIX (Guaranteed!)
Laptop Audio Apocalypse? Don't Panic! Windows 10 Can Be Tamed… (Probably!)
Alright, let's be honest. There's nothing quite as frustrating as a silent laptop. You're ready to binge-watch your favorite show. You're prepared to jam out to your pump-up playlist. Then…crickets. Your laptop’s audio has seemingly vanished. But before you start shopping for a new machine, breathe. Often, the fix is surprisingly simple. We will navigate through the digital wilderness and conquer this soundless struggle.
The Silent Treatment: Unmasking the Culprits
First, let's play digital detective. What exactly went wrong? Before you dive into the deep end of Windows troubleshooting, take a moment. Double-check the obvious. Is your volume turned down? Maybe the mute button is accidentally engaged. It sounds silly, yet these are surprisingly common culprits. Also, are headphones plugged in? Sometimes Windows can get a little confused. Naturally, if headphones are connected your laptop's speakers won’t function. Assuming you've ruled out these basic issues, we can move onto the more advanced methods.
Digging Deeper: Windows 10's Audio Arsenal
Windows 10 is a powerful operating system. It also has its quirks. Consequently, audio problems often stem from software conflicts or driver issues. Therefore, we need to start dissecting the issue. Here's a methodical approach. We’ll systematically eliminate potential problems.
1. The Troubleshooter's Triumph
Windows includes a built-in audio troubleshooter. This tool is surprisingly effective. It can diagnose and repair common sound problems. To access it, search for "troubleshoot". Select "Troubleshoot settings". Then, find "Playing audio" under the "Get up and running" section. Run the troubleshooter. Follow the on-screen prompts, and hopefully, it finds a solution. If it does, you're in luck!
2. Driver Dilemma: The Device Manager Dance
Drivers are essential software components. They allow your hardware to work with Windows. Audio problems often arise from corrupted or outdated audio drivers. To check this, open Device Manager. You can search for it in the Start menu. Look for "Sound, video and game controllers". Expand this section. You should see your audio device listed. Right-click it, and select "Update driver". Choose "Search automatically for drivers". Let Windows do its work. If it finds an update, install it. Then, restart your computer.
3. Rollback to Rescue: Driver Versioning
Sometimes, a recent driver update causes problems. That's when the “rollback” feature comes in handy. In Device Manager, right-click your audio device. Select "Properties". Go to the "Driver" tab. If the "Roll Back Driver" button is active, click it. This reverts your audio driver to the previous version. Following this, restart your computer. Maybe the older driver will provide a solution.
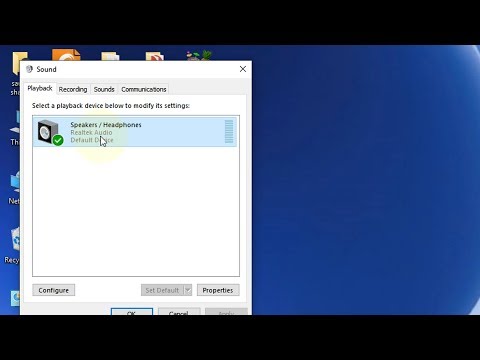
4. Playback Device Problems
Sometimes, the problem isn’t the driver itself. It is the selected playback device. Right-click the speaker icon in your system tray (bottom right). Select "Open Sound settings". Make sure your laptop speakers (or your chosen audio device) are selected. Next, click "Manage sound devices". Check that your speakers are enabled. If there are multiple devices, ensure the correct one is set as the default.
5. Services Shenanigans
Occasionally, audio services get disabled. This can cause major issues. Search for "Services" in the Start menu. Scroll down until you find "Windows Audio" and "Windows Audio Endpoint Builder". Ensure both are running. If they aren't, right-click each and select "Start." Moreover, set them to “Automatic” startup type. This is a good precaution.
6. The Audio Enhancement Angle
Windows often includes audio enhancements. These are usually enabled by default. These can ironically interfere with the sound sometimes. In Sound settings, click "Device properties" for your audio device. Then, click "Additional device properties". In the "Enhancements" tab, try disabling audio enhancements. Test and listen to the audio.
Restart, Re-evaluate, and Repeat!
After each troubleshooting step, restart your laptop. Test the audio. If the issue persists, proceed to the next solution. Keep trying these steps. The goal is to isolate the root cause and resolve it.
Still No Sound? Advanced Tactics & Further Steps
If you've tried everything above and still have no sound, don’t give up. There are a few more measures to undertake.
1. Reinstalling the Driver
Sometimes, a complete driver reinstall is necessary. In Device Manager, right-click your audio device. Select "Uninstall device". Check the box that says "Attempt to remove the driver for this device." Restart your computer. Windows should automatically attempt to reinstall the driver. If it doesn't, download the latest driver from your laptop manufacturer's website.
2. Check for Hardware Issues
While rare, the problem might be hardware-related. Try using external speakers or headphones. If they work, the issue could be with your laptop's internal speakers. Contact a repair shop if you suspect a hardware failure.
3. System Restore: A Time Machine Solution
If none of the above helps, you could try a system restore. It takes your computer back to a previous state. This rolls back all settings to a specific point in time. This is useful if you're unsure what changes caused the problem. Ensure you have a recent restore point. Search for "Create a restore point" in the Start menu. Follow the instructions to restore.
The Final Word: Perseverance Pays Off!
Troubleshooting audio problems can be a test of patience. But don't lose hope! Moreover, most audio issues are fixable. By following these steps, you will most likely have your laptop audio restored. Be persistent. Try different solutions. Eventually, you'll hear that sweet sound again. Now, go forth and enjoy your audio!
Work & Game Like a Boss: The ULTIMATE Laptop Showdown!Laptop Audio DEAD? Windows 10 FIX (Guaranteed!)
Hey everyone! Ever been there, staring at your laptop screen, ready to dive into a movie night or jam out to your favorite tunes, only to be met with… silence? Crickets. That sinking feeling that your laptop audio has decided to take an unexpected vacation? Yeah, we've all been there. It’s the digital equivalent of a flat tire on a cross-country road trip – utterly frustrating and seemingly impossible to fix without a professional. But fear not, because we’re diving headfirst into the murky waters of laptop audio troubleshooting, specifically for Windows 10, and trust me, we will get your sound back. Consider this your survival guide!
1. The Silence of the Lambs – Identifying the Problem
Before we start smashing keyboards in frustration (tempting, I know!), let's figure out why your audio is MIA. Is it a complete silence, or just a faint whisper? Are all sounds gone, or just certain applications?
- Complete Silence: This is the big one. No system sounds, no notifications, nada.
- App-Specific Issues: Your YouTube video's silent, but Spotify works perfectly, or vice-versa.
- Crackling/Distortion: Sounds like static or someone's whispering at a Metallica concert.
- No Sound Through Speakers, But Headphones Work: A common hardware issue.
Pinpointing the source helps immensely. It's like a detective finding the clue that unlocks the whole case.
2. The Obvious Suspects: Checking the Basics
Okay, let’s cover the “duh” stuff first. I know, I know, it sounds silly, but sometimes the simplest solutions are the ones we overlook.
- Volume Levels: Is your system volume turned down to zero? Click the speaker icon in your system tray (bottom right by the clock) and make sure the volume slider isn't at the bare minimum.
- Mute Button: Do you have a mute function enabled on your laptop (often a dedicated button or key combination)? Check that function.
- Hardware Speakers: Physically, ensure your speakers are connected and powered on, if applicable.
- Headphones or External Speakers: If you're using external audio devices, double-check their connections and power.
It’s like checking your car’s gas tank before assuming the engine's shot – easy checks, but essential.
3. Device Manager: The Digital Doctor’s Office
This is where things get a bit more techy, but don’t worry, we'll hold your hand through it. Think of the Device Manager as your laptop’s internal doctor, diagnosing the issues.
- Accessing Device Manager: Right-click the Windows Start button and select "Device Manager." Alternatively, type "Device Manager" in the search bar and open it.
- Expand "Sound, video and game controllers": This is where the audio devices live.
- Look for Errors: Are there any yellow exclamation marks or red crosses next to your audio devices? These are clear signs of a problem.
- Device Issues: If any problems exist, right-click on the faulty device, select "Properties," and read the error message. This will provide a clue to what's wrong.
- Driver Issues: Often, a driver problem will be listed.
4. Driver Drivers: Your Laptop’s Software Road Map
Drivers are the software that allows your Windows 10 to communicate with your hardware. These are like crucial maps for the devices.
- Updating Drivers: Right-click the problematic audio device in Device Manager and choose "Update driver." Select "Search automatically for drivers."
- Rolling Back Drivers: If the audio stopped working after a recent driver update, right-click the device, select "Properties," go to the "Driver" tab, and choose "Roll Back Driver." This returns you to the previous working driver version.
- Uninstalling and Reinstalling Drivers: Sometimes, a clean reinstall is the best solution. Right-click the device, select "Uninstall device," and restart your laptop. Windows 10 should automatically reinstall the driver (or you can go back and update as shown above).
Don't worry. It's simpler than it sounds. If you’re a visual learner, search for “updating drivers in windows 10” on YouTube - there are tons of video tutorials showing you the steps.
5. Windows Troubleshooter: The Digital Superhero
Windows has surprisingly helpful built-in troubleshooters designed to resolve common issues without your manual intervention.
- Open Sound Settings: Right-click the speaker icon in your system tray and select "Troubleshoot sound problems."
- Follow the Prompts: The troubleshooter will scan your system, identify potential issues, and guide you through the resolution process.
- Try the suggested fix: Windows will attempt to fix the issues. After completion, test your audio.
It's like having a tech support assistant already on your computer.
6. Audio Enhancements: Toggling the Settings
Windows 10 has audio enhancement options that, while sometimes helpful, also can cause conflicts.
- Access Sound Playback Devices: Right-click on the speaker icon in your system tray and choose "Sounds."
- Select the Device Tab: Click on "Playback." Right-click the device being utilized for sound output (such as "Speakers" or "Headphones") and select "Properties."
- Disable Enhancements: On the "Enhancements" tab, check the box to "Disable all enhancements" and then click "Apply."
- Test and Adjust: Play some audio to see if the sound has returned. You might have to experiment with different enhancement options.
7. Windows Audio Service: The Heartbeat of Sound
The Windows Audio service is vital for your audio functionality; it's the digital heartbeat of your sound.
- Open Services: Press
Win + R, typeservices.msc, and click "OK." - Locate the Service: Find "Windows Audio" and "Windows Audio Endpoint Builder."
- Check Status: Ensure both services are "Running" and set to "Automatic" startup. If they're not, right-click on each service, select "Properties," and adjust the "Startup type" to "Automatic." You can also restart both services by right-clicking and selecting "Restart."
8. Application Conflicts: The Sound Saboteurs
Sometimes, other software can interfere with your audio, like a clumsy neighbor at a party.
- Close Unnecessary Programs: Close any other audio-intensive applications, like recording software, streaming services, or even video games, to rule out interference.
- Check Audio Settings in Apps: Make sure the audio output device in your problematic software is configured for your speakers or headphones.
9. Codec Woes: Dealing with Audio File Formats
Codecs are essential for your computer to decode and play audio files.
- Install Codec Packs: Consider installing a codec pack like K-Lite Codec Pack to ensure your system can play a wide variety of audio and video formats.
- Test Different File Types: Try playing different file formats. If one kind of audio consistently fails, it might be related to a missing or corrupted codec.
10. The Sound Settings Menu: Deep Dive Examination
The Sound Settings menu is your control panel for all things audio.
- Access the Sound Settings: Right-click the speaker icon in the system tray and choose "Sounds."
- Playback Tab: This section shows all your audio output devices. Make sure the correct device is selected as the default one.
- Recording Tab: Check your microphone settings and make sure the correct microphone is selected.
11. Hardware Issues: The Last Resort
If you tried the above solutions and still get no sound, there's a probability of hardware issues.
- Internal Speakers: Laptop internal speaker, in some models, might be prone to failure after years of use.
- Headphone Jack: Check if the headphones are fully functional.
- External Speakers: External speakers or audio devices might need repairs or replacement.
- Contacting Support: If you suspect hardware problems, contact your laptop manufacturer’s tech support.
12. Dust and Debris: The Invisible Enemy
Sometimes, the simplest solutions are the most overlooked. Dust and debris can disrupt audio functions.
- Clean Vents: Use compressed air on your vent. This can occasionally cause audio issues.
- Clean Speaker Grills: Use a soft brush or cloth to remove build-up.
13. System Restore: Rewinding the Clock
If problems started after a change to the system, try System Restore. It is your digital time machine.
- Access System Restore: In search, type "create a restore point" and select the tool.
- Choose a Restore Point: Select "System Restore." The tool will suggest restore points, select one made before the audio issue started.
- Confirm and Restore: Follow the prompts to begin the restoration process. This will revert your system to an earlier state.
14. Fresh Windows Install: A Last Resort
If everything else fails,
HP Mouse Dead? FIX This Laptop Nightmare NOW!Troubleshoot Audio Problems in Windows 10 HP Computers HP Support

By HP Support Troubleshoot Audio Problems in Windows 10 HP Computers HP Support by HP Support
How to fix No Sound on Windows 10
By The Geek Page How to fix No Sound on Windows 10 by The Geek Page
No audio output device installed windows 10, No sound problem windows 10, Fix No Sound windows 10

By Smrity Computer No audio output device installed windows 10, No sound problem windows 10, Fix No Sound windows 10 by Smrity Computer

Title: 100 SOLVED - No Output Devices Found Windows 1110 Fix Windows 1110 Sound Not Working Problem
Channel: How To Fix Tech
100 SOLVED - No Output Devices Found Windows 1110 Fix Windows 1110 Sound Not Working Problem by How To Fix Tech
Wifi On Laptop Phone
Laptop Audio DEAD? Windows 10 FIX (Guaranteed!)
Experiencing a sudden silence from your laptop? That frustrating moment when the familiar chime of Windows fails to greet you, or the audio from your favorite video abruptly vanishes? You're not alone. Many users find themselves wrestling with sound issues on their Windows 10 laptops. But before you resign yourself to a silent existence, understand that a multitude of solutions exist, and frequently, they are surprisingly simple to implement. We've compiled a comprehensive guide, a detailed walkthrough designed to diagnose and, with a high degree of certainty, restore the aural experience you deserve. Let’s bring your laptop’s audio back to life.
Initial Diagnosis: The Obvious Checks
Before diving into complex solutions, let's methodically eliminate the most common culprits. These initial checks ensure that we don't waste time and effort on overly elaborate fixes while overlooking the obvious.
Volume Control Verification: This may seem elementary, but it's the cornerstone of sound troubleshooting. First, look at the system tray (usually in the bottom right corner of your screen). Locate the speaker icon. Click it. Is the volume slider muted or set to zero? If so, adjust the slider to an audible level. Also, ensure the speaker icon itself isn't displaying a mute symbol (a small "X" or a speaker crossed out). If it is, click the icon directly to unmute.
Application-Specific Volume: Some applications have their own volume controls, which might override the global system volume. Check the volume settings within the application you're using. For example, if the audio is missing just within a web browser like Chrome or Firefox, review the volume settings within the browser itself, which may be found by clicking the speaker icon next to the browser tab. In media players like VLC or Windows Media Player, confirm that the player's volume isn’t dialed down or muted.
Physical Hardware Checks: If you're using external speakers or headphones, ensure they’re properly connected. Check the physical connections: make sure the headphone plug is securely inserted into the audio jack, or that the speaker cable is tightly connected to your laptop’s audio-out or the speaker's input. Also, verify that the external speakers are powered on and that their volume controls are adjusted appropriately. It's often useful to try a different set of headphones or speakers to rule out a hardware failure.
Restarting the Laptop: This age-old solution frequently works wonders. Restarting your laptop clears temporary files and processes that might be causing audio conflicts. A simple reboot can often resolve underlying issues.
Deeper Dive: Troubleshooting System Sounds and Drivers
If the initial checks fail to resolve the issue, it's time to delve into the more technical aspects of audio management within Windows 10.
Sound Playback Device Selection: Windows allows for multiple audio output devices. Your laptop may have onboard speakers, an HDMI port, and the standard headphone jack. Sometimes, the wrong output device is selected. To check this:
- Right-click the speaker icon in the system tray.
- Select "Open Sound settings."
- Under "Output," ensure the correct device (e.g., "Speakers" or the name of your headphones) is selected from the dropdown menu. If multiple devices are listed, try selecting each one to see if any produce sound.
Driver Issues: The Culprit Behind Many Troubles: Audio problems are often caused by corrupted, outdated, or incompatible audio drivers. To investigate this:
- Right-click the "Start" button or press the Windows key + X.
- Select "Device Manager."
- In Device Manager, expand the "Sound, video and game controllers" category.
- You should see entries for your audio devices. If you see a yellow exclamation mark next to any of these audio devices, it indicates a driver problem.
Driver Updates: The key is updating or reinstalling the drivers. You have several options:
- Automatic Driver Update via Device Manager: Right-click on the audio device and click "Update driver." Select "Search automatically for drivers." Windows will search for and install the latest drivers if available.
- Manual Driver Download from the Manufacturer: Go to your laptop manufacturer's website (e.g., Dell, HP, Lenovo) and navigate to the "Support" or "Drivers" section. Enter your laptop's model number. Download the latest audio drivers for your specific Windows 10 version. Once downloaded, run the installer.
- Driver Rollback: If the audio problem started after a recent driver update, you can roll back to the previous stable driver version. In Device Manager, right-click the audio device, select "Properties," and go to the "Driver" tab. If the "Roll Back Driver" button is active (not grayed out), click it. This will revert to the previously installed driver.
Driver Reinstallation: If updating doesn't work, uninstalling and then reinstalling the driver can be effective. In Device Manager, right-click the audio device, select "Uninstall device." When prompted, check the box to delete the driver software if it is available. Restart your laptop. Windows should automatically attempt to reinstall the driver when it restarts. If not, manually install the driver you download from the manufacturer's website.
Advanced Troubleshooting: Services, Conflicts, and Codecs
If the basic and intermediate steps haven't resolved the issue, we'll explore more advanced solutions.
Audio Services: Windows relies on several audio-related services. Ensure these services are running and set to start automatically:
- Press Windows Key + R, type "services.msc," and hit Enter.
- Locate the following services: "Windows Audio," "Windows Audio Endpoint Builder," and "Remote Procedure Call (RPC)."
- Double-click on each service.
- Ensure "Startup type" is set to "Automatic." If the service isn't running, click the "Start" button.
Audio Enhancements: Some Windows 10 installations have certain audio enhancements enabled, and they may create issues. Disable audio enhancements as follows:
- Right-click on the speaker icon in the system tray and choose "Open Sound settings."
- Click on "Device properties" under output.
- Under "Enhancements," select "Disable all enhancements"
Codec Issues: Codecs are essential for decoding audio files. Corrupted or missing codecs can prevent audio playback.
- Ensure that you have the necessary codecs installed. Windows 10 typically includes many codecs. However, if you're having trouble playing specific audio file formats (e.g., certain types of video files), consider installing a codec pack, such as K-Lite Codec Pack.
Hardware Conflicts: Although rare, conflicts between audio devices and other hardware can occur. To check for hardware conflicts, go back to Device Manager. Look for any devices with a yellow exclamation mark. These conflicts might impact audio. However, troubleshooting the conflicts is very complicated and involves researching the specific devices in conflict.
Troubleshooter: Windows 10 offers a built-in troubleshooter for audio problems:
- Right-click the speaker icon in the system tray.
- Select "Troubleshoot sound problems."
- Follow the on-screen instructions. The troubleshooter will automatically attempt to diagnose and fix audio issues.
The Ultimate Test: System Restoration
If, after diligently following all of the previous steps, your audio still remains stubbornly silent, the final option is a System Restore. This reverts your system to a previous state when the audio was functioning correctly.
Create a Restore Point: Before performing a System Restore, create a manual restore point. This acts as a backup, in case something goes wrong during the restore process. In the Windows search bar, type "Create a restore point" and select it. In the System Properties window, click "Create." Give the restore point a descriptive name (e.g., "Before Audio Fix").
Performing the System Restore:
- In the Windows search bar, type "Create a restore point" and select it.
- Click the "System Restore" button.
- Select "Choose a different restore point" and then click "Next."
- Choose a restore point from a date when your audio was working or from before you started experiencing the issue.
- Click "Next" and then "Finish."
- The system will restart and begin the restore process. This process may take some time.
A Final Word and a Guarantee of Success
We have provided a thorough, comprehensive guide to troubleshooting laptop audio problems in Windows 10. By systematically working through these steps, from the simplest checks to the more advanced driver and system-level solutions, you can confidently restore your laptop's audio. While we cannot provide an absolute guarantee in every situation, this detailed guide offers the highest probability of a successful fix. Remember to always back up your important data before making any significant system changes. We hope that your laptop's audio is back up and playing your favorite songs, videos, or the important sounds from your favorite programs. If, after exhausting these steps, your audio remains elusive, consider consulting a professional technician.
