hdmi cable not working laptop

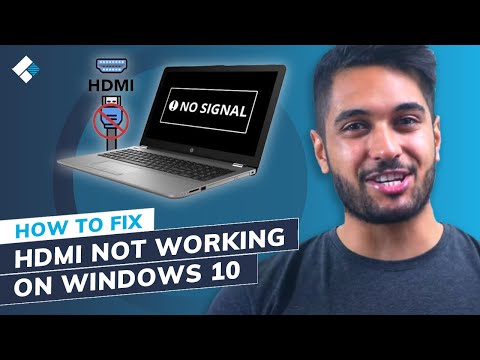
Title: 2023 NEW How to Fix HDMI Not Working on Laptop Windows
Channel: Wondershare Recoverit Data Recovery
2023 NEW How to Fix HDMI Not Working on Laptop Windows by Wondershare Recoverit Data Recovery
hdmi cable not working laptop to monitor, hdmi cable not working laptop to tv, hdmi cable not working laptop, hdmi cable not working on laptop windows 11, hdmi cable not working on hp laptop, hdmi cable not working on lenovo laptop, hdmi cable not working on dell laptop, hdmi cable is not working from laptop to projector, why is my hdmi cable not working from laptop to projector, hdmi cable laptop to tv not working windows 10
HDMI Cable Disaster? Fix Your Laptop's Dead Screen NOW!
Laptop Screen Troubles? Don't Panic, Here's Your SOS!
Let's face it; technology can be a fickle friend. One minute, you're streaming your favorite show, and the next… a blank screen stares back at you. If you’re dealing with a laptop that's suddenly gone dark, especially after connecting an HDMI cable, breathe easy. Before you start envisioning expensive repairs, let's troubleshoot this situation. The cause of the problem sometimes isn’t what you’d expect.
The HDMI Connection Conundrum: Unraveling the Mystery
HDMI, your gateway to big-screen brilliance, can occasionally be a troublemaker. Because of the various factors at play, a simple HDMI connection might be at the core of your screen’s demise. But don't jump to conclusions. Firstly, consider that the fault could lie within the connection process itself. Inspect the cable and the ports on both your laptop and the external display. Ensure everything is securely plugged in. Dust and debris within the ports is yet another possible culprit. A thorough cleaning can often work wonders.
Diagnosing the Darkness: Pinpointing the Source of the Issue
So, the screen is black. What do you do next? Secondly, we need to narrow down the possibilities. Is the problem the laptop, or is it the external display? Therefore, try these steps to diagnose the problem. Begin by disconnecting the HDMI cable. Next, restart your laptop. If the screen returns to life, the issue likely stems from the HDMI connection or the external device. On the other hand, if the screen remains blank, it implies an internal issue. Then, connect your laptop to a different external monitor or TV. If this works, the initial external display is the problem. However, if the second display also fails, you should investigate your laptop further.
Software Shenanigans: Checking Your Display Settings
Sometimes, the solution is within your software settings. To check your display settings, press the Windows key + P simultaneously. This action will bring up the “Project” menu. Here, you'll see various display options, such as "PC screen only," "Duplicate," "Extend," and "Second screen only." Select the option that best suits your needs. For example, try “Duplicate” to mirror your laptop screen, or "Extend” to use both screens. Moreover, your graphics drivers might be outdated. They’re critical for running your screen. Often, updating these through Device Manager can resolve display errors. In light of this, check for driver updates.
Hardware Hiccups: When the Problem Runs Deeper
If software tweaks don’t offer a solution, hardware issues may be the problem. Ensure you've secured your display cable. Make sure there is no damage to the screen. If there is damage, then you may need a screen replacement. Furthermore, examine the laptop's hardware. Consider the possibility of a damaged graphics card or internal display cable. In this context, consider taking your laptop to a qualified repair technician. Moreover, avoid any further DIY repairs. Doing any DIY repairs yourself could lead to more serious damages.
Troubleshooting Tips: Quick Fixes to Try First
Before calling in the tech cavalry, implement these quick fixes. Firstly, try a different HDMI cable. A faulty cable can cause screen issues. Therefore, switching cables is the fastest troubleshooting step. Secondly, unplug your laptop and remove the battery (if removable). Hold the power button down for 30 seconds. Then, reinsert the battery and boot up. This can sometimes reset the system. Thirdly, check the brightness settings on your laptop. This is often overlooked. In turn, increasing the brightness might reveal a faint image. Moreover, a simple visual check can help.
Preventative Measures: Keeping Your Screen Happy
Besides troubleshooting, preventative measures keep your screen functioning well. Avoid bending or stressing the HDMI cable. It's important to handle the cable with care. Next, regularly clean your laptop screen. Gentle cleaning maintains good visibility. In addition, protect your laptop from extreme temperatures. Heat can cause screen damage. Finally, invest in a quality HDMI cable. A reliable cable ensures a stable connection. In fact, it can prevent potential problems.
Professional Assistance: When to Seek Expert Help
If all else fails, don't hesitate to seek professional help. Especially if you're not comfortable with internal diagnostics. Laptop repair technicians possess specialist knowledge. They also have the right tools. If your screen issues persist, a professional assessment is important. Repairing your laptop yourself could cause more damage. So, let the experts handle the complex repairs. They can often diagnose and fix issues quickly.
The Takeaway: Staying Calm and Troubleshooting Effectively
Dealing with a dead laptop screen is frustrating. Remember to stay calm. Apply a systematic approach to troubleshooting. By doing so, you’ll often find a solution. Whether it's a simple software fix or a minor hardware adjustment, you can usually fix it. Using the above steps, you can navigate the fix. You'll be back to enjoying your screen in no time. With quick thinking and a bit of patience, your laptop will be ready to perform.
Laptop SIM Card Magic: Unlock the Secret!HDMI Cable Disaster? Fix Your Laptop's Dead Screen NOW!
Hey there, fellow tech enthusiasts! Ever felt that gut-wrenching moment when you plug in your HDMI cable, expecting glorious visuals on your big screen, only to be met with… nothing? A black void. A digital shrug. A display that stubbornly refuses to cooperate. We've all been there. Trust me, I’ve stared into the abyss of a dead laptop screen more times than I care to admit, usually right before a major presentation or a highly anticipated movie night. But don't despair! This isn't the end of the world. In fact, it's a solvable mystery, a puzzle we’re going to crack together. So, grab a cup of coffee (or tea, whatever floats your boat), and let's dive into the wonderful, and sometimes frustrating, world of HDMI cables and dead laptop screens.
1. The Silent Culprit: Unmasking the HDMI Cable’s Secrets
First things first: let's identify the potential villains in our drama. The HDMI cable itself is often the initial suspect. Think of it as the messenger, faithfully carrying the precious data from your laptop to your external display. But like any messenger, it can sometimes stumble. A simple cable can be faulty, damaged, or just not quite up to the task.
- Check for Physical Damage: Inspect the cable for any bends, kinks, or frayed wires. A damaged cable is like a broken pipeline – it won't deliver the goods.
- Try a Different Cable: Experiment with a known-good HDMI cable. This is a quick and easy way to rule out (or confirm!) the cable as the problem. Consider this the tech equivalent of borrowing a sugar from your neighbor – it’s simple troubleshooting.
2. The Laptop's Perspective: Verifying the Output
Okay, so the cable seems fine. Now, let's shift our focus to the laptop itself. Is it even trying to send a signal? We need to ensure your laptop’s HDMI port is actually active and properly configured.
- Check Your Display Settings: Most laptops allow you to mirror or extend your display. Right-click on your desktop (or go into settings), and look for "Display Settings" or "Screen Settings." You should see options to duplicate, extend, or use only the external display. Make sure you've selected the correct mode.
- Detect the External Display: There's usually a button or shortcut (like Fn + a function key) that forces the laptop to recognize the external display. Experiment with these until you see a signal.
3. Troubleshooting the External Display: Where's My Picture?
It's not just the laptop at fault! We must shift focus to the big screen. Your television, monitor, or projector might be the weak link in the chain.
- Power and Input: Double-check that your display is powered on and set to the correct HDMI input. This sounds basic, but it’s surprising how often this is the culprit! Imagine staring at a locked front door only to realize you don't have the key!
- Test with Another Device: Connect another device (like a gaming console or another laptop) to the display using the same HDMI cable. If that works, you’ve narrowed the problem down to your original laptop. This is like checking if your water pipes are working by testing other faucets.
4. Driver Dilemmas: The Software Side of Things
Sometimes, the issue isn’t hardware at all, but rather software glitches. Your graphics drivers, the software that lets your laptop communicate with its display hardware, might be out of date or corrupted.
- Updating Your Graphics Drivers: Visit the manufacturer's website (Nvidia, AMD, or Intel) and download the latest drivers for your graphics card. This often resolves the most common display issues.
- Reinstalling Graphics Drivers: If updating doesn't work, try completely uninstalling your drivers and then reinstalling the latest version. Think of this as giving your computer a fresh start – it often clears out the cobwebs.
5. Resolution Rescues: Matching Displays
It is very important to consider resolution compatibility. Your laptop may be trying to send a signal that your external display simply cannot handle.
- Adjusting Display Resolution: In your display settings, try lowering the resolution on your laptop. Start with something lower and gradually work your way up until you find a setting that works.
6. The HDMI Port Percussive: Checking the Laptop's Port
What if the laptop's HDMI port itself is damaged? It is a possibility.
- Inspect the Port: A quick visual inspection can reveal bent pins or debris clogging the port and interfering with the connection. However, be extraordinarily careful.
- Try Another Port (If Available): If your laptop has multiple HDMI ports, try using a different one. This eliminates the possibility of a single, faulty port.
7. The Power Play: Battery and Power Settings
Believe it or not, your laptop's power settings can sometimes interfere with HDMI output.
- Check Power Profiles: Some power-saving modes limit performance, which may affect display output. Ensure your laptop is set to a "High Performance" or a similar profile.
- Plug It In: Sometimes, a laptop struggling to provide power may impact the display output. Plug your laptop into a power outlet and see if that makes a difference.
8. Sound the Alarm: Audio Output Issues
Audio and video frequently go hand-in-hand. If you’re seeing an image, but have no sound, that may be a clue.
- Check Sound Settings: Make sure your external display is selected as an audio output device. This is typically found in your sound settings (search for “sound” in your Windows search bar).
- Update Audio Drivers: Similar to graphics drivers, outdated audio drivers can cause problems.
9. The Docking Station Decision: When to Use One
If you frequently connect to multiple displays or need extra ports, consider a docking station.
- Benefits of a Docking Station: Docking stations simplify connections, providing multiple ports (HDMI, USB, Ethernet, etc.) through a single cable.
- Docking Station Troubleshooting: If using a docking station, check the station’s power supply, drivers, and connections.
10. The Operating System Outburst: Addressing OS Issues
Sometimes, the operating system itself may be contributing to the challenge.
- Restart Your Laptop: A simple restart can resolve temporary software glitches that may be hindering the HDMI connection. It works surprisingly often!
- Check for Operating System Updates: Run the latest, available update.
11. BIOS Blues: Investigating the BIOS Settings
Advanced users might want to check their laptop's BIOS settings.
- Accessing the BIOS: This varies by laptop model; typically, it involves pressing a key (Del, F2, Esc, etc.) during startup.
- Check Display Settings in BIOS: Look for options related to display output and ensure they are correctly configured.
12. The Cables' Chronicles: Examining Cable Standards
Not all HDMI cables are created equal. There are various standards, and using the right one is critical.
- Understanding HDMI Standards: Know the difference between HDMI 1.4, 2.0, and 2.1.
- Choosing the Right Cable: Select a cable that supports the resolution and refresh rate of your display.
13. The Dust Devil's Deception: Cleaning the Laptop's Port
Sometimes, something as simple as dust can cause problems.
- Cleaning the HDMI Port: Use compressed air or a soft brush to gently clean the HDMI port on your laptop.
14. Hardware Harm: When to Get Professional Help
Sometimes, the problem cannot be troubleshot easily.
- Signs of Serious Problems: If none of the above solutions work, you're likely facing a hardware problem. Seek professional help.
- Contact a Tech Specialist: A repair technician can diagnose and fix hardware issues with your laptop.
15. Prevention is Key: Maintaining Your Laptop
Preventive measures are necessary to protect a laptop.
- Protect HDMI Port: Avoid excessive plugging and unplugging of the HDMI cable.
- Proper Storage: Store your laptop properly to avoid damage.
Wrapping Up This HDMI Saga
So, there you have it! We've journeyed through the potential pitfalls and solutions of the dreaded dead screen. Remember, the key is to systematically troubleshoot, ruling out possible causes one by one. Think of it like detective work – gathering clues, following leads, and eventually uncovering the truth behind the black screen.
You've equipped yourself with the knowledge to conquer this digital foe. If a simple fix solves your problem, great! Now, go forth and enjoy your movies, presentations, and games on the big screen. If it’s a more complex issue, don't hesitate to seek professional help. But most importantly, don't give up! With a little patience and persistence, we can get your laptop displaying those visuals again in no time. Now go forth and conquer that dead screen!
FAQs
Q1: My laptop screen is working, but the external display is still blank. What should I do?
A: Double-check your display settings to ensure you've selected the correct output mode (mirroring, extending). Also, make sure the external display is powered on
DELL Laptop Sound DEAD? FIX IT NOW! (Easy Steps Inside!)How to Fix HDMI Not Working on Laptop Windows 11

By Ground Zero How to Fix HDMI Not Working on Laptop Windows 11 by Ground Zero
second monitor is not detecting try these keys windows 11 is not detecting the second monitor

By Hardware System second monitor is not detecting try these keys windows 11 is not detecting the second monitor by Hardware System
How to Fix HDMI Not Working on Laptop Windows 10 5 Methods
By Wondershare Recoverit Data Recovery How to Fix HDMI Not Working on Laptop Windows 10 5 Methods by Wondershare Recoverit Data Recovery

Title: how to connect laptop and tv through hdmi cable screen mirroring laptop with tv
Channel: sky computers technology
how to connect laptop and tv through hdmi cable screen mirroring laptop with tv by sky computers technology
Working With Laptop
HDMI Cable Disaster? Fix Your Laptop's Dead Screen NOW!
We've all been there. The heart-stopping moment when you connect your laptop to an external display via HDMI, and… nothing. The dreaded black screen, the flickering, the sheer panic that your device is kaput. But before you resign yourself to costly repairs or replacement, take a deep breath. In most cases, the issue isn't a catastrophic failure, but a solvable HDMI-related glitch. We will walk you through a comprehensive troubleshooting guide, designed to diagnose and resolve the “dead screen” problem and get your laptop displaying on your external monitor, projector, or TV—fast.
Initial Checks: Ruling Out the Obvious
Before diving into complex solutions, let's eliminate the simple stuff. These preliminary steps often resolve the problem without requiring more advanced troubleshooting.
- Power Up, Properly: Ensure both your laptop and the external display are fully powered on and connected to a reliable power source. A dead external display is a common culprit.
- The Cable, the Whole Cable, and Nothing But the Cable: Inspect your HDMI cable meticulously. Look for any visible damage, kinks, or breaks along its length. Even a seemingly minor imperfection can disrupt the signal. Replace the cable with a known-good HDMI cable to rule out a faulty connection. Borrow one from a friend, or use a different HDMI cable if you have one available.
- Port Power Play: Check the HDMI ports on both your laptop and the external display. Look for debris, bent pins, or any physical obstruction. Try connecting the HDMI cable to a different port on the external display, and even a different HDMI port on your laptop if available. Some laptops have multiple HDMI ports.
- The Input Shuffle: Ensure your external display is set to the correct input source. Use your TV or monitor's remote control to cycle through the input options (HDMI 1, HDMI 2, etc.) until you select the port to which your laptop is connected.
- Restart, Reconnect: Power down both your laptop and the external display. Disconnect both ends of the HDMI cable. Wait at least 60 seconds. Then, reconnect the HDMI cable, ensuring it's firmly seated in both ports. Power on the external display first, followed by your laptop.
Software Solutions: Harnessing the Power of Your Operating System
If the physical connections check out, the issue may be with your operating system’s configuration or drivers.
- The Windows Key + P Dance (Windows): Windows offers a quick and easy way to cycle through display modes. Press the Windows key + P simultaneously. A sidebar will appear, allowing you to choose from the following options:
- PC screen only: Uses only your laptop's display.
- Duplicate: Displays the same content on both your laptop and the external display.
- Extend: Extends your desktop across both screens, providing a larger working space.
- Second screen only: Displays content solely on the external display. Experiment with these options to see if any combination activates your external display.
- Display Settings (Windows and macOS): Access your display settings. On Windows, you can usually right-click on your desktop and select "Display settings". On macOS, go to System Preferences > Displays. Within these settings, you should see options to detect and configure multiple displays:
- Detection: Look for a “Detect” or “Identify” button. Clicking this often prompts your operating system to recognize the external display.
- Resolution and Orientation: Once the external display is detected, adjust the resolution to a setting that is supported by both your laptop and the external display. Incorrect resolution settings can lead to a blank screen. Also, check the "Orientation" settings (Landscape, Portrait, etc.) to ensure they are correctly configured.
- Multiple Displays: Ensure that the "Multiple displays" option is set to either “Extend these displays” or “Duplicate these displays.” The options will depend on what type of setup you want.
- Driver Detectives: Updating Your Display Drivers (Windows and macOS): Outdated or corrupted display drivers are a common cause of HDMI connectivity problems.
- Windows:
- Search for "Device Manager" in the Windows search bar and open it.
- Expand the "Display adapters" section.
- Right-click on your graphics card (e.g., Intel HD Graphics, NVIDIA GeForce, AMD Radeon).
- Select "Update driver."
- Choose "Search automatically for drivers." Windows will attempt to find and install the latest drivers.
- If that doesn’t work, try "Browse my computer for drivers." Select the latest driver you downloaded from the manufacturer's website.
- Restart your computer after the driver update.
- macOS:
- macOS typically handles driver updates automatically. However, it's worth checking for software updates in System Preferences > Software Update.
- If you recently completed a macOS operating system upgrade, make sure that you have all the latest driver updates.
- Windows:
- HDMI Audio Troubles (Windows): Sometimes, HDMI-related issues stem from improper audio settings, particularly if your external display has speakers.
- Right-click the speaker icon in the system tray (bottom right corner of your screen).
- Select "Open Sound settings."
- In the "Output" section, ensure that your external display is selected as the output device. If you don’t see the external display, click “Manage sound devices”.
- If the external display is available, click on it and select “Enable”. Then, set the "output device" as your default.
- Test the sound by playing a media file with audio.
- Right-click the speaker icon in the system tray (bottom right corner of your screen).
Advanced Troubleshooting: Delving Deeper into the Abyss
If the above steps don't provide a solution, we will need to take a deeper dive.
- Monitor Compatibility: Check the manufacturer website to ensure that your laptop and the external display are compatible.
- Using the BIOS (Advanced): Occasionally, the BIOS settings can influence HDMI functionality. This is an advanced step requiring care. Incorrect BIOS configurations could negatively affect your device.
- Restart your laptop and repeatedly press the key associated with the BIOS setup (typically Del, F2, F10, or F12—refer to your laptop's manual).
- Navigate through the BIOS menus. Look for settings related to "Video," "Graphics," or "Display."
- Check if there are options to control the use of discrete graphics cards or integrated graphics, specifically for external displays. You may need to enable, disable, or switch between them.
- Save the BIOS settings and exit.
- Restart your laptop and repeatedly press the key associated with the BIOS setup (typically Del, F2, F10, or F12—refer to your laptop's manual).
- Consider an External HDMI Adapter (If Applicable): In some cases, especially with laptops that feature a USB-C port, an external adapter could provide the signal to the external monitor.
- Purchase a USB-C to HDMI adapter.
- Plug it into your laptop's USB-C port.
- Connect the adapter to HDMI.
- Roll Back Windows Updates (If Applicable): If the problems started after a recent Windows update, it may be worth attempting to roll back the update.
- Go to Settings > Update & Security > View update history > Uninstall updates.
- Select the most recent update and click "Uninstall."
- Restart your computer.
- Operating System Reinstallation (Last Resort): If all else fails, a clean install of your operating system might resolve a deep-seated software conflict. This is a drastic measure, so back up any essential data before proceeding.
Prevention is Key: Protecting Your HDMI Setup
Once you've resolved the issue, implementing preventative measures can reduce the likelihood of future HDMI headaches.
- Gentle Handling: When connecting and disconnecting HDMI cables, handle them carefully. Avoid bending or pulling on the cable excessively.
- Cable Management: Keep your cables organized to prevent them from being stepped on, kinked, or otherwise damaged.
- Regular Dusting: Dust can accumulate inside your laptop and on the external display. Therefore, dust both units regularly for optimal performance.
- Driver Updates: Keep your display drivers updated regularly to ensure compatibility and prevent potential problems.
By systematically working through these troubleshooting steps, you can often restore your laptop’s connection to your external display and enjoy a seamless viewing experience. Don't give up! In most cases, a solution is just a few clicks or connections away, saving you money and frustration. Get connected, and get back to work or play without delay.
