dell laptop cd rom not working

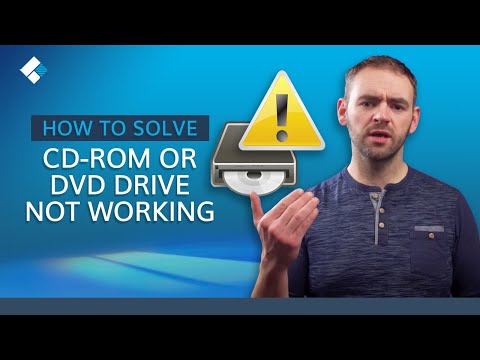
Title: CDDVD Drive Is Not Detected in Windows 10
Channel: TechFixIT
CDDVD Drive Is Not Detected in Windows 10 by TechFixIT
dell laptop cd drive not working, dell inspiron cd drive not working, dell laptop cd drive not opening, dell laptop cd drive not detected, dell inspiron cd drive not opening, dell inspiron desktop cd drive not opening, cd rom not working dell laptop
Dell Laptop CD ROM Dead? 😱 FIX IT NOW!
Dell Laptop CD ROM Troubles? Don't Panic! Here's How to Revive It.
So, your Dell laptop's CD-ROM drive has decided to take an early retirement? 😩 That's frustrating, isn't it? But before you start shopping for a new laptop or throwing your hands up in despair, let's explore some solutions. Because, let's be honest, a dead CD-ROM can be a real pain. You're probably thinking, "Why now?". Hang tight, because we'll address that thought later.
The Initial Diagnosis: What's Really Going On?
First things first. Don't jump to conclusions. It might not be a complete failure. Sometimes, it's a simple software glitch or a minor hardware hiccup. Nevertheless, take a deep breath. We'll methodically investigate. However, let's begin by examining the most common culprits. Specifically, let's rule out the obvious.
Is It a Disc Issue? The Simplest Explanation
Sometimes, the problem isn't the drive itself. It’s the disc. Therefore, try this first. Insert a different CD or DVD. Make sure it's clean and scratch-free. Because even a tiny scratch can render a disc unreadable. Did it work? Great! Because you've averted a potential drive replacement.
Drivers: The Unsung Heroes (and Villains!)
Drivers are the unsung heroes of your computer. They're also sometimes the villains. They're responsible for your hardware talking to your software. Consequently, let's ensure your CD-ROM drivers are in good working order.
Here's How to Check and Update Drivers:
- Access Device Manager: Right-click on the Windows Start button. Then, select "Device Manager." This is your control center.
- Locate the CD/DVD Drive: Expand the "DVD/CD-ROM drives" section. You should see your drive listed here.
- Check for Errors: Look for any yellow exclamation marks or red crosses. These indicate problems. If you spot one, you know you're on the right track.
- Update the Driver: Right-click on the drive and select "Update driver." Follow the prompts. Windows will search for the latest drivers.
- Uninstall and Reinstall (if necessary): If the update doesn't work, try uninstalling the driver. Then, restart your laptop. Windows will usually reinstall the driver automatically.
Hardware Troubles: Time to Investigate Further.
If software isn't the issue, we'll move on to hardware. It's not always this level of complexity. It sometimes is. For instance, is the drive physically present within Device Manager? If it’s absent, the drive might not be connected properly.
Checking the Physical Connection:
- Shutdown and Disconnect: Power off your laptop. Unplug the power adapter. Because safety first!
- Open It Up (Carefully!): Accessing the CD-ROM drive on a laptop requires some finesse. Consult your Dell laptop's manual. This will provide specific instructions.
- Check the Cables: Locate the drive's connections. Make sure they're secure. A loose cable can cause these issues.
- Reassemble and Test: Once you've checked and reconnected everything, put your laptop back together. Power it on. Test the drive again.
Cleaning the Lens: A Simple Fix That Often Works.
Dust and debris can accumulate on the CD-ROM drive's lens. Accordingly, it's a good idea to clean it. You can buy a CD-ROM lens cleaner disc from any computer store. Insert the disc and follow the instructions. Ultimately, this could solve the problem quickly.
BIOS Settings: The Final Frontier?
Sometimes, your BIOS settings could be causing trouble. The BIOS (Basic Input/Output System) controls basic hardware functions. Therefore, let's check to be sure.
Checking CD-ROM Settings in BIOS:
- Access the BIOS: Restart your laptop. Immediately press the key to enter your BIOS setup. Typically, this is F2, Delete, or Esc.
- Navigate the Settings: Find the settings related to boot order or devices. Ensure that your CD-ROM drive is listed and enabled.
- Save and Exit: Save your changes and exit the BIOS. Restart your computer.
External Drive Option: A Convenient Alternative.
If all else fails, consider an external CD-ROM drive. These are often much more reliable. They connect via USB. They're also easy to use. Moreover, they're a cost-effective solution.
Conclusion: Back to the Future (and Your Data!)
A dead CD-ROM drive can be a setback. However, with some troubleshooting, you can often revive it. Therefore, follow these steps. You'll hopefully get your drive working again. Hopefully, you’ll quickly be back to enjoying your music, installing software, and accessing your data. And that, my friend, is a win!
Laptop USB Port Dead? This SHOCKING Fix Worked INSTANTLY!Dell Laptop CD ROM Dead? 😱 FIX IT NOW!
Hey there, fellow tech enthusiasts! Ever stared at your Dell laptop, that sleek piece of technology, only to be met with the dreaded silence of a dead CD-ROM drive? The spinning disc sits there, taunting you with its apparent uselessness. We've all been there, haven't we? The frustration is real. You want to install that software, rip those old CDs, or simply access the data you know is sitting right there. Don't worry! We're diving headfirst into this problem, tackling the mysteries of the silent disc drive, and getting that CD-ROM roaring back to life. Consider this your digital rescue mission, a roadmap to CD-ROM resurrection!
1. The Initial Panic: "My Dell's CD-ROM Is Gone!"
Okay, first things first: take a deep breath. That initial panic is perfectly normal. You might even be tempted to throw the laptop out the window (don't do that!). The good news is that in most cases, the death of your Dell laptop’s CD-ROM isn't a terminal illness. Think of it more like a temporary technical hiccup, a minor inconvenience. Before you start envisioning expensive repairs, let's systematically troubleshoot the issue. Think of it like this: you're a digital detective, and your CD-ROM is the missing piece of the puzzle. We'll sift through the evidence, identify the culprit, and hopefully, restore order to your digital world.
2. Is It REALLY Dead? Checking the Obvious (and Saving Face!)
Before we get to the heavy-duty troubleshooting, let's eliminate the simple stuff. I'm talking about the equivalent of checking if your car is plugged in before declaring it dead. We've all been there, right?
- The Disc Itself: Is the CD or DVD actually scratched or dirty? Give it a gentle wipe with a soft cloth (a microfiber one is ideal). Sometimes, the simplest solutions are the most effective.
- The Disc Insertion: Did you insert the disc correctly? It might seem obvious, but we've all been guilty of a backwards insertion at some point.
- The Eject Button: Press it. Gently. Sometimes, a simple reboot can clear things up. Think of it as hitting the "reset" button for your CD-ROM.
Think of it like this: sometimes, the problem is simply an invisible obstacle causing the CD/DVD to not be recognized.
3. Software Shenanigans: Could Drivers Be the Culprit?
Ah, drivers. The digital gatekeepers that tell your computer how to talk to your hardware. If the drivers are outdated, corrupted, or simply missing, your CD-ROM might be rendered useless. It's like trying to communicate with someone who speaks a language you don't understand.
- Device Manager Deep Dive: Press the Windows key, type “Device Manager,” and hit Enter. In the Device Manager, look for your CD/DVD drive. Does it have a yellow exclamation mark or a red "X"? That's a big clue.
- Driver Updates: Right-click on the CD/DVD drive and select "Update driver." Let Windows search automatically for updated drivers.
- Manual Intervention: If automatic updates fail, you might need to visit Dell's website and download the latest drivers for your specific laptop model. This can involve navigating the website, inputting your service tag, and then downloading the required software to make the CD-ROM to respond.
Think of updating drivers as giving your laptop a new set of instructions for interacting with the CD-ROM.
4. Hardware Check: Is the CD-ROM Properly Connected? (Proceed with Caution!)
This is where things get a little more involved, and it requires a degree of technical comfort. Proceed with caution and only if you feel comfortable opening up your laptop. If you're not sure, seek professional help.
- The Inside Scoop: Carefully open your laptop (refer to your Dell laptop’s manual for instructions). Locate the CD-ROM drive.
- Connection Check: Ensure the cables connecting the drive to the motherboard are securely connected. Sometimes, a loose cable is all it takes.
- External Drive Scenario: If you're comfortable, consider testing the CD-ROM drive on another computer. This will confirm if the issue sits with your CD-ROM drive or your laptop.
This is like giving the CD-ROM a physical "check-up," ensuring all the internal connections are working correctly.
5. Boot Order Blues: Making Sure Your CD-ROM Is Recognized at Startup
This is often overlooked. Your computer "boots" up using a specific order of devices (like the drive options). Ensuring the CD-ROM is in that order can make all the difference.
- BIOS Configuration: Restart your laptop and press the key to enter the BIOS setup (usually Del, F2, F12, or Esc – check your manual).
- Boot Order Menu: Navigate to the "Boot" or "Boot Order" section of the BIOS.
- Prioritize the CD-ROM: Make sure your CD-ROM drive is higher in the boot order than your hard drive. This means your computer will try to start from the CD-ROM before anything else.
Think of this as rearranging the seating chart for your computer's startup process, giving the CD-ROM a chance to shine.
6. The "Last Resort" Reset: Reinstalling Your Operating System (Use With Caution!)
This is the equivalent of a digital exorcism, a drastic measure for serious issues. Back up your data beforehand!
- Boot from Recovery Media: Obtain or create an installation disc or USB drive with the operating system you want to have on the laptop.
- Follow the Instructions: Follow the on-screen instructions to reinstall your operating system.
- Cross Fingers: Once installed, install your drivers and hope the CD-ROM springs up to life!
This is the digital equivalent of "starting over."
7. Hardware Failure Confirmed? Consider a Replacement.
If none of these solutions work, the grim reality might be a faulty CD-ROM drive. Hardware failure, unfortunately, happens.
- External Drive Solution: The easiest fix: buy an external CD/DVD drive. They're inexpensive and plug into a USB port. Problem solved!
- Internal Drive Replacement: Replacing the internal drive is an option, but it requires technical skill and a compatible replacement drive.
- Professional Assistance: If you're not comfortable with either of these options, take your laptop to a qualified technician. They will have a professional outlook and tools to get the replacement done.
Acceptance is essential to tackle any form of failure.
8. Troubleshooting Tips for Specific Dell Laptop Models
Dell laptops, like all tech products, have their nuances. Certain models may have specific issues or quirks related to their CD-ROM drives. Searching online forums or contacting Dell support can be very helpful.
9. Data Recovery Dilemmas: What if the Data Is Still on the Disc?
Even if the CD-ROM drive is dead, the data on the disc might still be recoverable.
- Try Another Drive: See if you can borrow or purchase any drive to try and rip the data from the disc.
- Professional Recovery Services: In extreme cases, professional data recovery services can often salvage data from damaged discs.
10. Preventive Measures: Keeping Your CD-ROM Healthy
Once you get it fixed, you'll want to keep it working!
- Regular Cleaning: Gently clean the CD-ROM drive lens with a soft, dry cloth.
- Avoid Dust: Keep your laptop away from dusty environments.
- Gentle Handling: Insert and remove discs carefully.
11. The Era of the CD-ROM: A Nostalgic Glance
Let's not forget the history of CD-ROMs!
- Remembering the Past: Consider the initial CD-ROM experiences.
- Changing Times: Consider the transition to digital data storage.
12. Software Installation: Essential to Keep Data Access Smooth
- Software that reads the CD-ROM: Think of software to install and read a CD-ROM.
- Data ripping software: Consider using ripping software.
13. Modern Alternatives: Embracing USB Drives and Cloud Storage
Times are changing, and CD-ROMs aren't the go-to anymore.
- USB Drives: USB drives were created to offer more convenience and data storage.
- Cloud Storage: Explore how to store and retrieve data using cloud services.
14. The Takeaway: Persistence, Patience, and a Little Luck
Fixing a dead CD-ROM can be a journey. Don't give up easily, and even if the problem persists, at least you can eliminate several steps to find the issue.
15. Beyond the Fix: Embracing the Digital Future
It's important to know modern means to save data.
- Data Safety: Make sure to save your data into external resources.
- Digital Future: Take advantage of new tech.
Closing Thoughts:
So there you have it, your comprehensive guide to resurrecting that silent Dell laptop CD-ROM. We hope this article has equipped you with the knowledge and confidence to tackle the problem head-on. Remember, technology can be frustrating, but with a little patience and our handy
Dell Laptop Touchpad DEAD? FIX This NOW!DVD CD-ROM drives not showing in device manager fix DVD drive not listed in device manager

By troubleshooterrors DVD CD-ROM drives not showing in device manager fix DVD drive not listed in device manager by troubleshooterrors
How to Fix CDDVD Drive Not Working in Windows 10 Second video

By GroupsBD How to Fix CDDVD Drive Not Working in Windows 10 Second video by GroupsBD
How To Fix CD DVD Drive Problems Cd Drive Not Detected Problem Solved In Tamil Cd Drive Issue

By Techslide- How To Fix CD DVD Drive Problems Cd Drive Not Detected Problem Solved In Tamil Cd Drive Issue by Techslide-
Title: How to Solve CD-ROM or DVD Drive not working in Windows
Channel: Wondershare Recoverit Data Recovery
How to Solve CD-ROM or DVD Drive not working in Windows by Wondershare Recoverit Data Recovery
Wifi On Laptop
Dell Laptop CD-ROM Dead? 😱 Revive Your Drive: A Comprehensive Guide
Encountering a non-functional CD-ROM drive on your Dell laptop can be a frustrating experience. Whether you're attempting to install software, access music, or retrieve important data from a disc, a dead drive renders these tasks impossible. Fortunately, in many cases, the issue isn't a catastrophic failure. This guide offers a systematic approach to diagnosing and, more often than not, rectifying the problem, allowing you to breathe new life into your Dell’s optical drive.
Initial Diagnostic Steps: Identifying the Root Cause
Before diving into complex troubleshooting, it's crucial to establish the nature of the problem. Is the drive completely unresponsive, or are there intermittent issues? Does the drive attempt to read discs but fail, or is it unable to recognize any media at all? These initial observations provide vital clues.
Physical Inspection: Begin by examining the drive itself. Does the eject button function? If the button does not depress or seems jammed, the issue may stem from a physical obstruction within the drive mechanism. Use a flashlight to peer into the drive slot. Look for any visual obstructions like small debris or a bent tray. Avoid forceful attempts at ejection.
System Startup Test: Upon powering on your Dell laptop, listen carefully for any sounds emanating from the CD-ROM drive. Does it make any noise whatsoever, such as whirring, clicking, or attempting to spin up? Or is it completely silent? This can help differentiate between a power-related issue versus a problem with the drive’s internal mechanics.
BIOS Check: Access your Dell laptop's BIOS setup. This is usually accomplished by pressing a specific key (such as F2, F12, or Delete) during the initial boot sequence. Within the BIOS, navigate to the boot order or device configuration section. Verify that the CD-ROM drive is recognized and listed as a bootable device. If it is not listed, the computer may have a hardware problem.
Software-Related Troubleshooting: Addressing Driver Issues
Often, a malfunctioning CD-ROM is attributable to software glitches rather than hardware failure. Driver issues and operating system conflicts can prevent proper functionality.
Driver Reinstallation: The operating system's drivers could be corrupted or outdated. To rectify this, open Device Manager (search for it using the Windows search bar). Expand the "DVD/CD-ROM drives" section. Right-click on your CD-ROM drive and select "Uninstall device." Restart your Dell laptop. Windows will attempt to automatically reinstall the drivers upon reboot.
Driver Update: If the automatic reinstallation fails, manually update the CD-ROM drive's drivers. In Device Manager, right-click on the drive and select "Update driver." Choose the option to search for drivers automatically. Windows will search online for the latest drivers.
System Restore: Consider restoring your Dell laptop to a previous point in time when the CD-ROM drive was functioning correctly. This will revert the operating system to an earlier state, potentially resolving any software conflicts that may have arisen. Search for “Create a restore point.” This process, though potentially time-consuming, can often resolve recent software-related issues affecting the CD-ROM's functionality.
Check for Conflicts with Other Devices: Device Manager can also reveal potential conflicts. Yellow exclamation marks next to a device indicate a conflict. Investigate those devices and try updating or removing conflicting drivers.
Hardware Troubleshooting: Examining Internal Components
If the software is running without issues, the problem might be related to damaged hardware. Inspecting and, potentially, replacing components is the next step.
Loose Connections: Open up the laptop and locate the CD-ROM drive. Carefully disconnect it from the motherboard. Reconnect if necessary. Ensure all connectors are firmly seated.
Cleaning the Lens: Over time, dust and debris can accumulate on the laser lens of the CD-ROM drive, impeding its ability to read discs. Locate the lens (usually a small, circular component) and use a cotton swab lightly dampened with isopropyl alcohol to gently clean it. Be exceedingly careful not to apply excessive pressure or damage the lens. Allow the area to dry completely before reassembling the drive.
Identifying the Drive's Type: You need to understand your drive type. Is it a standard CD-ROM drive, a CD-RW (CD ReWritable) drive, a DVD-ROM drive, or a DVD-RW drive? Each has specific capabilities and some may cause different problems.
Try a Different Disc: Attempt to play different media, CDs, DVDs, and Blu-rays. The drive may work with some media and not others. If you can use some discs then it may be a hardware problem.
Replacing the Drive: If all other troubleshooting steps fail and the drive still malfunctions, the CD-ROM drive itself might need to be replaced. This is a more advanced procedure and requires caution.
Obtain the Correct Replacement: Identify the model number of your Dell laptop and the type of CD-ROM drive it uses (e.g., SATA, IDE). Purchase a compatible replacement drive.
Laptop Disassembly: Consult your Dell laptop’s service manual (available online). The process of replacing a CD-ROM drive can be complex and requires precise steps. The service manual will help prevent damage.
Disconnect Power and Remove the Battery: Before disassembling your Dell laptop, disconnect the power adapter and remove the battery. This is a crucial safety measure to prevent electrical shock and damage to the components.
Careful Removal of the Old Drive: Once you have access to the drive, disconnect any cables (data and power) connecting it to the motherboard. Carefully remove the old drive from its bay.
Installation of the New Drive: Install the replacement CD-ROM drive. Connect the cables. Secure the drive in its bay and reassemble the laptop.
Dealing with Disc-Related Issues: Troubleshooting Media Problems
Not all issues originate with the drive itself. Sometimes, the problem lies with the media being used.
Disc Condition: Examine the discs for scratches, smudges, or other damage. Scratched discs may be unreadable. Clean the discs with a soft, lint-free cloth, wiping from the center outwards.
Disc Compatibility: Ensure the disc format (CD, DVD, Blu-ray) is compatible with your CD-ROM drive. Keep in mind, not all drives can read every type of media.
Region Codes: DVD and Blu-ray discs may be region-locked. Verify that the disc’s region code matches the region code of your Dell laptop’s DVD drive.
Protected Discs: Some discs use copy protection measures that might interfere with the CD-ROM drive’s ability to read them.
External CD-ROM Drives: A Viable Alternative
If you are hesitant to perform the more complex troubleshooting steps or if the internal CD-ROM drive proves irreparable, consider an external CD-ROM drive. This is a straightforward solution that connects to your Dell laptop via USB. Installing an external CD-ROM is often an easy fix.
Plug and Play: Most external CD-ROM drives are “plug and play,” meaning they require minimal setup. Simply connect the drive to a USB port, and Windows will automatically install the necessary drivers.
Portability: External drives are portable, allowing you to use them with other computers as well.
Cost-Effective: External drives are often less expensive than a full laptop repair.
Disc Burning Capability: Some external CD-ROM drives also provide the capability to burn discs, in case that functionality is missing from your Dell laptop.
Prevention and Maintenance: Ensuring Longevity
Proactive measures can help extend the life of your Dell laptop's CD-ROM drive.
Avoid Dust and Debris: Keep your laptop in a clean environment. Regularly use compressed air to remove dust and debris from the CD-ROM drive slot.
Gentle Handling: Avoid forcing discs into the drive or yanking them out.
Regular Cleaning: Periodically clean the laser lens (as described above) to maintain optimal performance.
Eject Discs Properly: Always eject discs using the operating system's eject function. This will help to avoid damage to the drive mechanism.
Software Updates: Maintain an up-to-date operating system and drivers.
By employing these steps, you can diagnose and resolve problems with your Dell laptop's CD-ROM drive, restoring full functionality and ensuring you can continue to access your media. Remember to exercise caution throughout the troubleshooting process, and if you are ever unsure about any step, consult a qualified technician.
