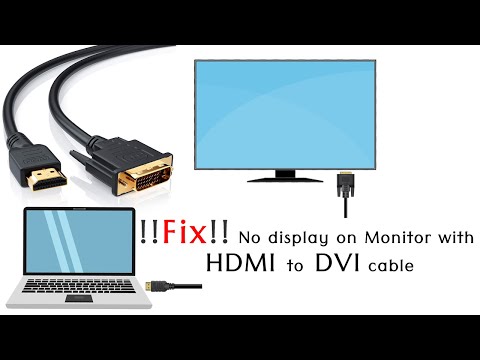
hdmi to dvi cable not working on other laptops

Title: Laptop HDMI to DVI monitor not working no signal
Channel: The Computer Oracle
Laptop HDMI to DVI monitor not working no signal by The Computer Oracle
HDMI to DVI FAIL?! This Weird Laptop Trick FIXED It!
HDMI to DVI: A Tech Tango & The Unexpected Savior!
Ah, technology. It's a marvelous thing, isn't it? But sometimes, it can be a downright puzzle. You know the feeling; you crave seamless connectivity, you desire a crisp display, and then, bam! The dreaded "no signal" message rears its ugly head. You've probably been there: connecting your laptop to a DVI monitor using an HDMI-to-DVI adapter. The anticipation builds, you expect visual glory, but instead, you're staring at a black screen. Frustrating, to say the least!
The HDMI-to-DVI Conundrum: A Tale of Two Ports
The problem often stems from the very nature of these two connection types. HDMI, designed primarily for digital audio and video in modern devices, frequently handles both quite effortlessly. However, DVI, especially the DVI-D variation commonly found on older monitors, focuses specifically on the video component. This difference, while seemingly minor, is often the root of your display dilemma. Typically, HDMI sends a slightly different signal than DVI expects, resulting in display issues.
Troubleshooting 101: Beyond the Basic Checks
So, you've plugged everything in. You've jiggled the cables. You've rebooted your laptop. You've checked the monitor's input source. Great. But still, your screen remains as dark as a moonless night. If those basic steps haven't done the trick, it's time to dig a little deeper. You've likely already explored the obvious, though! But let's consider a few less-obvious culprits before you panic.
For instance, ensure the adapter itself is of good quality. A cheap adapter can be a weak link in the chain. Check both the HDMI and DVI ports for any dust or debris. Clean connections are crucial. Next, make sure your drivers are up to date. Outdated graphics drivers can cause a multitude of display problems. Now, is your laptop configured to send video to an external display to begin with? If the laptop isn't set to output to the external screen, then you have a problem.
The Unexpected Hero: A Laptop Display Setting
Believe it or not, the solution can sometimes hide in plain sight. This is where the "weird laptop trick" comes into play. It’s not necessarily about the physical connections. It’s about how your device is handling the signal output.
Here's the thing: a common setting in your laptop's display options might be the key. This is where things get interesting. Many laptops offer a quick way to toggle between display modes. Look for the function keys (F1, F2, etc.) at the top of your keyboard. These often have a small icon that resembles a monitor. The icon's purpose usually relates to display settings.
For instance:
- Press the Function key AND the relevant F key. This combination allows you to cycle through display options. These options usually include: laptop display only, external display only, duplicate display, and extended display mode.
- Duplicate Display: Both your laptop screen and the external monitor show the same thing.
- Extended Display: The displays act as one large space. You can drag windows between them.
- Experiment with the Display Setting. Try each setting and see if the external monitor wakes up.
Advanced Tactics: Unleashing the Power
If the function keys don't do the trick immediately, don't lose heart. Additionally, we can delve deeper. Here's another strategy. Access your laptop's display settings. You can usually find this by right-clicking on your desktop and selecting "Display Settings." In the display settings, locate the section related to multiple displays. You'll find the option to detect your external monitor. Your laptop should now recognize your external display.
The Ultimate Resolution: A Few Final Points
Let’s just say the whole thing is frustrating, right? But often, the fix is simple. You just need to know where to look. Consider these points.
- Cable Quality Matters: Invest in a quality HDMI cable and DVI adapter. Avoid the cheapest options.
- Restart After Changes: Sometimes, restarting your laptop after making display setting changes can help the changes take effect.
- Consult Your Laptop's Manual: If problems persist, consult your laptop's manual for troubleshooting tips specific to your model.
- Seek External Help: If you're still stuck, don’t hesitate to seek help from online forums, or a tech-savvy friend.
Conclusion: Triumph Over Technical Turbulence!
So, there you have it! The "weird laptop trick" is often the key to unlocking a working HDMI-to-DVI connection. Remember, technology can be tricky, but with a little patience and these troubleshooting steps, you can conquer those connectivity conundrums. Now, go forth and enjoy that beautiful, crisp display! You deserve it.
USB Cable Dead? Fix Your Laptop Connection NOW!HDMI to DVI FAIL?! This Weird Laptop Trick FIXED It!
We've all been there. You're all set for that epic movie night, ready to fire up your laptop on your trusty monitor via HDMI to DVI, and… nothing. The screen remains stubbornly black, the connection a defiant void. "HDMI to DVI fail?!" You cry into the digital wilderness. Frustration mounts like a pressure cooker. But before you chuck that perfectly good cable and monitor out the window (we’ve almost been there, trust us), let's dive into why this common issue plagues us, and more importantly, how we finally slammed the door shut on it. This isn't just some tech jargon regurgitation; this is the tale of our battle, our victories, and the one weird trick that transformed our frustrating setup into a smooth, sweet streaming symphony.
1. The HDMI to DVI Dilemma: A Match Made in (Tech) Hell?
Let's be honest, HDMI and DVI are like mismatched socks. They should work together, right? One’s the digital powerhouse, the other a reliable, if slightly older, workhorse. But often, they just don’t play nice. This incompatibility can manifest in a variety of ways: a complete lack of signal, flickering, distorted images, or even audio problems (if you're lucky enough to get audio at all via the DVI connection). This "HDMI to DVI fail" scenario is a rite of passage for anyone bridging these two connection types. We've spent hours troubleshooting, Googling frantically, and feeling increasingly like we were navigating a minefield of technical jargon.
2. Understanding the Culprits: Why Your Connection is Crashing
Before we get to the fix, let's understand the enemy. The “HDMI to DVI fail” problem has a few usual suspects:
- Signal Compatibility: HDMI carries both video and audio, DVI only handles video. This difference can confuse things, especially if your setup is trying to push both signals through.
- Resolution and Refresh Rate Conflicts: Your laptop and monitor might be squabbling over the best settings. If they can’t agree, you’re in for a black screen. Think of it like two stubborn chefs arguing over the perfect seasoning.
- Cable Issues: This is the simplest culprit, but easily overlooked. A faulty cable is like a kinked hose, restricting the flow of data. Could be you'd need a new one.
- Graphics Driver Glitches: Outdated or corrupted graphics drivers are the digital bogeyman for any display setup. They're the software equivalent of a leaky faucet.
3. Our Initial Attempts at Salvation (and Failures!)
We've tried it all, haven't we? The usual suspects: checking the cable (multiple times!), restarting the laptop (a ritual we’ve perfected), fiddling with the monitor settings (more frantic button-pushing than problem-solving), and praying to the digital gods (desperate times…). We even considered sacrificing a perfectly good HDMI cable to appease the tech gods. Nothing seemed to work consistently. Each minor victory felt like a temporary reprieve, a small win before the inevitable "HDMI to DVI fail" re-emerged, ready to wreak havoc on our entertainment.
4. The "Weird" Laptop Trick: Unveiling the Hero
And now, the moment you've been waiting for! After countless hours lost to frustrating, we stumbled upon a solution. It's not revolutionary, but it’s effective, and frankly, a bit unexpected. This “weird” trick? Changing your display settings within your laptop's operating system -- specifically, adjusting the display mode settings to "Duplicate these displays" or sometimes "Extend these displays."
5. Step-by-Step Guide: Conquering the Connection
Here’s how we did it (and how you can too):
- Connect the Cables: First things first: Plug in your HDMI cable to your laptop and connect the other end to your DVI adapter (or directly to your DVI monitor, if your cable supports it).
- Access Display Settings:
- Windows: Right-click your desktop and select "Display settings." Alternatively, type "display settings" into the Windows search bar.
- MacOS: Click the Apple menu (top left corner) > System Preferences > Displays.
- Find Your Display Options: Look for a section that allows you to choose how your displays interact. This might be labeled "Multiple displays," "Arrange displays," or something similar.
- Choose the Magic Option: Here's where the magic happens. Experiment with the following:
- Duplicate these displays: This mirrors your laptop screen on the monitor connected via DVI. Perfect for presentations or sharing content.
- Extend these displays: This turns your monitor into extra screen real estate, giving you more space to work.
- Sometimes a third option exists, such as Show only on 1 and Show only on 2, to manually select which screen is active.
- Apply and Marvel: Click "Apply" and see if your monitor springs to life! You might need to adjust resolution or refresh rate settings (also found in the Display Settings) for optimal results.
6. Why This Trick Works: Decoding the Digital Jargon
The “Duplicate” or “Extend” setting forces your laptop and monitor to communicate on a more basic level. It simplifies data transmission, essentially bypassing any complex negotiation that might be causing the "HDMI to DVI fail" problem. It’s like agreeing on a shared language, rather than getting bogged down in dialects. It's a method of forcing the graphics card to render the display on both screens in a way it can actually handle, even when the HDMI connection isn't behaving as expected.
7. Troubleshooting Tips: When the Magic Doesn't Work Immediately
If the “weird” trick doesn't work immediately, don’t despair! Here are a few troubleshooting steps:
- Restart Your Laptop: This simple step clears out temporary glitches.
- Update Your Graphics Drivers: Go to your laptop manufacturer's website or the website of your graphics card (NVIDIA, AMD, Intel) and download the latest drivers.
- Try Different Resolutions and Refresh Rates: Experiment with the display settings until you find a combination that works.
- Check Your Monitor's Input Source: Make sure your monitor is set to the correct input (DVI).
- Test with a Different Monitor or Cable: This helps isolate the problem to either your laptop, the monitor, or the cable.
8. Beyond the Basics: Optimizing Your Setup
Once you've conquered the initial hurdle, there are a few things you can do to optimize your setup for a smoother experience:
- Get a Good HDMI to DVI Adapter: Invest in a quality adapter to minimize signal loss and ensure compatibility.
- Consider a Powered Adapter: If you're still encountering issues, a powered adapter that draws power from an external source can boost the signal strength.
- Manage Your Cables: Keep your cables tidy to avoid accidental disconnections and tripping hazards, especially if you are using it at home.
9. The Audio Conundrum: Tackling the Sound Issue
As mentioned, DVI doesn't carry audio. If you're planning to stream movies or play games, you'll need to figure out how to get the sound working. Here are a few options:
- Laptop Speakers: The easiest solution! Just use your laptop's built-in speakers.
- External Speakers: Connect external speakers to your laptop's headphone jack (3.5mm).
- USB Audio Device: Some monitors have USB audio capabilities.
- Bluetooth Audio: Use Bluetooth speakers or headphones.
10. HDMI to DVI Fail: A New Beginning
Even if you're stuck in the "HDMI to DVI fail" situation, don't fret. A black screen can be overcome. We learned a ton. And you can too. The “weird” laptop trick – the "Duplicate/Extend" trick – will probably solve your problem.
11. The Importance of Knowledge: You Are In Control
Armed with the right knowledge, you're no longer at the mercy of tech glitches. You're in control. You can diagnose the problem, try different solutions, and ultimately, get your setup working the way you want it to. We hope this guide empowers you to conquer the "HDMI to DVI fail" issue!
12. The Power of Community: Sharing is Caring
Remember, you're not alone in this. Thousands of others have faced the same challenges and found solutions. Chat with other tech enthusiasts for questions and ideas! Share your triumphs and your failures. Build upon the collective knowledge!
13. What's Next? Experimentation and Discovery
Now that you've fixed the initial problem, don't stop there! Experiment with different settings, explore the capabilities of your setup, and discover new ways to use your laptop and monitor. The world of digital entertainment is vast!
14. The Future of Connections: Adapt and Evolve
Technology changes rapidly. New standards, protocols, and adapters emerge constantly. Keep an open mind, stay curious, and embrace the evolution. What works today might not work tomorrow, but the spirit of experimentation will always be your best ally.
15. Concluding Thoughts
Laptop Work On Your Phone? This Insane Trick Will Blow Your Mind!Fix for no display on Monitor HDMI to DVI No Connection Check Signal Cable error
By AG Creations Fix for no display on Monitor HDMI to DVI No Connection Check Signal Cable error by AG Creations
HDMI To DVI Adapter for External Monitor - Does it Work

By Tech & Lifestyle HDMI To DVI Adapter for External Monitor - Does it Work by Tech & Lifestyle
How to connect a Monitor to your laptop using HDMI and DVI adapter

By Donovan Schneider How to connect a Monitor to your laptop using HDMI and DVI adapter by Donovan Schneider

Title: Laptop HDMI to DVI monitor not working no signal DVI-D to HDMI Adapter Not Working FIXED
Channel: KW Tech Official
Laptop HDMI to DVI monitor not working no signal DVI-D to HDMI Adapter Not Working FIXED by KW Tech Official
Change Wifi Settings
HDMI to DVI FAIL?! This Weird Laptop Trick FIXED It!
Have you ever been in the throes of a presentation, deep into a gaming session, or desperately trying to get your dual-monitor setup working, only to be confronted with the dreaded black screen? The scenario: you're connecting your laptop to an external display via an HDMI to DVI cable, the connection seems secure, yet… nothing. Silence. The digital equivalent of a blank stare. This frustrating situation, often accompanied by a growing sense of technical inadequacy, is a common woe. But, before you resign yourself to technological defeat, know this: there's a remarkably simple solution, often overlooked, that can breathe life back into your external display. This isn't magic; it's a clever workaround, a digital sleight of hand that can often alleviate the HDMI to DVI display conundrum.
Decoding the Digital Divide: Why HDMI to DVI Can Go Wrong
Before delving into the fix, let's briefly dissect why this seemingly straightforward connection can fail. The primary culprit lies in the different signals handled by HDMI and DVI. HDMI (High-Definition Multimedia Interface) is a digital interface designed to transmit both video and audio signals. DVI (Digital Visual Interface), while also digital, primarily focuses on video. This critical distinction leads to a potential incompatibility: HDMI can carry an audio signal that a DVI monitor, lacking the necessary hardware, simply can’t process. Think of it as trying to send a fully equipped orchestra to a single violin. The violin can handle the notes, but the rest is lost in the void. The lack of audio handling is not the only cause, there can also be an issue of the difference of resolutions and refresh rates. When laptops output high resolutions, it's an issue. This is because the DVI standard has inherent limitations which might result in incompatibility with the laptop HDMI output. The DVI standard has several formats. The most common used is the DVI-D which is compatible with HDMI. There is also DVI-I which is compatible with analog interfaces, and the DVI-A which is only analog. This distinction is crucial when troubleshooting, and the fix often addresses this exact conflict.
The Secret Weapon: Mastering the Display Settings
The key to unlocking your external display lies within your laptop’s display settings. This may seem obvious, yet the precise steps required are often missed. The issue is often not a failure of the cable or the monitor hardware, but rather a misconfiguration within your laptop's operating system. We're talking about the digital equivalent of turning on a light switch. But, often, this "light switch" isn't immediately apparent. First, you need to properly identify the issue which is not always simple.
Step 1: The Hardware Check
Before diving into software settings, conduct a basic hardware check. Ensure both the HDMI cable and the DVI cable are securely connected. Wiggle them, and if possible, try another HDMI cable to rule out a faulty cable. Inspect the HDMI port on your laptop for any bent pins or physical damage. Similarly, examine the DVI port on your monitor. This step is often skipped, but it's essential to rule out the most basic, and often the simplest, solutions. Also, try connecting the setup without the DVI cable, while only using the HDMI cable.
Step 2: Accessing Your Display Settings
Locate your operating system's display settings. This varies slightly depending on whether you're using Windows, macOS, or Linux.
- Windows: Right-click on your desktop and select "Display Settings". Alternatively, type "display settings" into the Windows search bar and select the appropriate option.
- macOS: Click the Apple icon in the top-left corner of your screen, select "System Preferences", and then click "Displays".
- Linux: The method varies, but typically you'll access a display configuration utility through your desktop environment settings.
Step 3: The Crucial Configuration: Duplicate or Extend?
Here's the critical step that often resolves the HDMI to DVI connection issue. Inside your display settings, you’ll typically see options related to multiple displays:
- Duplicate These Displays: This setting mirrors your laptop's screen onto your external display. While straightforward, it can sometimes be problematic when dealing with different resolutions or refresh rates.
- Extend These Displays: This setting treats your external display as a separate screen, allowing you to extend your desktop workspace. This is often the preferred option for dual-monitor setups as it provides more functionality.
The Power of "Extend": The magic often lies in choosing the "Extend These Displays" option. The reason is simple: It often forces the laptop to recognize the external display more fully, allowing it to properly handshake and negotiate the correct video signal. By extending the display, you are explicitly telling the laptop to treat the external monitor as an individual display, rather than just a simplified mirror. This can solve the issue of the laptop screen interfering with the display's refresh rates.
Step 4: Resolution and Refresh Rate Adjustments
Once you’ve selected the "Extend These Displays" option, scrutinize the resolution and refresh rate settings for both your laptop screen and the external display. The goal is to ensure they are compatible. Select the recommended resolution for your external display, and if you experience flickering or other visual glitches, experiment with different refresh rate settings (typically 60Hz is the standard). A resolution compatibility error may be one of the factors that cause HDMI to DVI failure.
Step 5: Identifying and Selecting the Correct Display
Within your display settings, there should be a visual representation of each connected display. Identify the external display (it might be labeled "Display 2" or something similar). If the external display isn't recognized, click on the "Detect" button (if available) within your display settings. Once the display is recognized, you can select it and configure its settings independently, such as adjusting its resolution, orientation, and refresh rate.
Step 6: Experimenting with "Output to":
Some operating systems, particularly within more advanced graphical interfaces or Linux environments, provide more granular control over display output. Look for options like "Output to" or "Video Output" settings. Here, you might find specific settings to force output to the external display. This is again telling the laptop to recognize the display.
Step 7: Driver Updates and Troubleshooting
If the above steps fail, consider updating your graphics drivers. Outdated drivers can cause all sorts of display-related issues. Visit the manufacturer's website (e.g., NVIDIA, AMD, Intel) and download the latest drivers for your graphics card.
Step 8: Reboots and the Ritual of Reset
After each adjustment to your display settings, it's wise to test the connection and, if necessary, restart your laptop. A simple reboot can sometimes resolve lingering software conflicts and ensure the changes take effect. Additionally, you may need to turn off and on your external monitor.
Advanced Troubleshooting: Diving Deeper if the Simple Steps Fail
If the steps above haven't resolved the issue, it's time to dig deeper. This involves exploring more advanced troubleshooting techniques.
The EDID Dance: Ensuring Proper Communication
- Understanding EDID: EDID (Extended Display Identification Data) is a crucial communication protocol between your monitor and your laptop. It essentially tells your laptop what the monitor is capable of displaying (resolution, refresh rate, etc.). Sometimes, EDID data can be corrupted or incorrectly interpreted.
- EDID Override: In some cases, you can manually override the EDID data. This is a more advanced technique, and it requires a degree of technical proficiency. EDID override is helpful when the monitor's EDID is not compatible with the laptop's HDMI output.
Checking the HDMI/DVI Converter
- Active vs. Passive Adapters: Ensure you are using the correct cable or adapter. There are passive adapters that are more general and can only handle basic operations, and then there are active adapters that actively convert the signal. If a passive adapter is used, then it can be incompatible.
- Adapter Selection: When using adapters, selecting a good-quality adapter might be necessary. The adapter itself might be the source of the issue.
The Power of Elimination
Test Different Devices: If possible, test your HDMI to DVI setup with another laptop or another monitor. This helps isolate whether the problem lies with your laptop, the monitor, the cable, or the adapter.
Troubleshooting with Other Cables: If possible, try testing the HDMI port with another HDMI device, which helps identify the issue of your setup.
The Linux Solution
Xrandr for the Technically Inclined: For Linux users, the Xrandr command-line utility provides powerful control over display settings. This can be particularly useful for fine-tuning resolution, refresh rates, and other advanced display parameters.
Configuration Files: Linux environments often allow for the manual configuration of display settings through configuration files. This provides a high degree of control but requires a deeper understanding of the operating system.
The Bottom Line: Persistence Pays Off
The HDMI to DVI connection issue is often a temporary setback, not a technological dead end. With patience, careful troubleshooting, and a willingness to explore your laptop’s display settings, you can almost always find a solution. Always remember, before you get frustrated, the answer often lies in a simple configuration tweak. A combination of hardware checks, software configurations, and a bit of persistence will most likely get your external display up and running.
