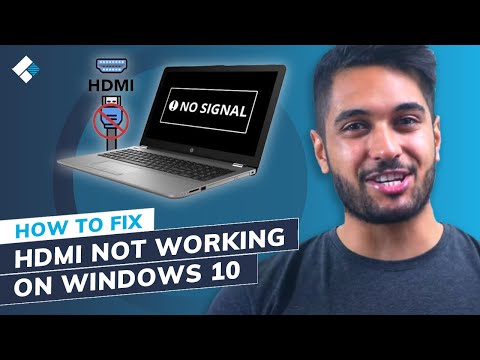
hdmi cable not working on laptop

Title: 2023 NEW How to Fix HDMI Not Working on Laptop Windows
Channel: Wondershare Recoverit Data Recovery
2023 NEW How to Fix HDMI Not Working on Laptop Windows by Wondershare Recoverit Data Recovery
hdmi cable not working on laptop, hdmi cable not working on laptop to tv, hdmi cable not working on laptop to monitor, hdmi cable not working on laptop windows 11, hdmi cable not working on hp laptop, hdmi cable not working on lenovo laptop, hdmi cable not working on dell laptop, hdmi cable is not working from laptop to projector, hdmi cable not detected on laptop
HDMI Cable Dead? Laptop Fix: SHOCKINGLY Simple Solution!
HDMI Cable Blues Got You Down? A Surprisingly Easy Laptop Rescue!
Ever stared at a blank screen, the promise of glorious visuals flickering mockingly at you? Your HDMI cable, that digital artery pumping entertainment from your laptop to your TV, abruptly ceased functioning. The frustration is immediate, right? Before you consider replacing expensive equipment, there’s a potential solution. It might seem too good to be true. However, often the simplest fixes are the most effective.
The Silent Culprit: A Common HDMI Misunderstanding
Let's be honest. We often assume the worst when technology fails. Because, the HDMI cable itself is the first suspect. However, the problem may reside elsewhere. It might be within the laptop or the external display. This can be a frustrating situation. After all, these electronic devices are generally reliable until something unexpected happens. Thus, immediately assuming a faulty HDMI cable is frequently a mistake. A quick diagnostic step is essential.
Troubleshooting Begins: Unveiling the Hidden Issues
So, where do we begin? First, eliminate the obvious. Ensure both your laptop and TV are switched on. Check that the correct input source is selected on your television. It sounds simple, yet sometimes it is overlooked. After that, test the HDMI cable with a different device. Does it work with a game console or a Blu-ray player? Consequently, this helps isolate the issue.
If the cable tests fine, then we must look closer. Start by restarting both your laptop and your TV. Sometimes, a simple reboot clears temporary glitches. Then, inspect the HDMI ports on both devices. Look for any visible damage, like bent pins or debris. Often, this is the underlying issue.
The Laptop's Perspective: Addressing Internal Conflicts
Now, let's switch focus to your laptop. Drivers are the unsung heroes of hardware functionality. They are software programs that enable your operating system. Consequently, it allows your computer to communicate with devices. Are they up to date? Outdated or corrupted display drivers can cause HDMI output issues. Also, Windows and macOS update these periodically.
Here’s how to update them on Windows: Search for "Device Manager" in the Start menu. Expand the "Display adapters" section. Right-click on your graphics card (e.g., NVIDIA, AMD, or Intel). Select "Update driver." Windows will automatically search for new driver versions. In macOS, you usually receive driver updates with system updates.
Mirroring and Extending: Understanding Display Modes
Within the display settings of your laptop, you will find mirroring and extending options. Mirroring duplicates your laptop's screen on the TV. Extending uses both displays simultaneously. If your laptop is set to "Extend," and the TV isn't detected, then try switching to "Mirror." Then, check if the TV displays the image.
After that, you can switch it back. This sometimes forces the laptop to recognize the display. Right-click on your desktop (Windows) or go to System Preferences > Displays (macOS). Then, identify the display mode settings.
A Shockingly Simple Solution: The Power Cycle Trick!
Here's the surprising part. This method frequently resolves HDMI connection problems. It involves a power cycle. Disconnect both your laptop and TV from their power sources. Wait for at least two minutes. This allows any residual electrical charge to dissipate.
After the wait, reconnect the power to both devices. Turn them on and try connecting them via HDMI again. This simple reset often solves the issue because it resets the hardware. Finally, it clears any temporary software conflicts.
Beyond the Basics: Delving Deeper into Potential Culprits
Consider other possibilities. Another potential factor is the HDMI cable itself. Although you tested it earlier, it could still be a factor. Cables can degrade over time. Try a different HDMI cable. This is an easy test to determine the quality.
Do not forget to rule out your TV's settings. Check its input settings and resolution options. Moreover, some TVs have settings that can impact HDMI connectivity. For example, ensure that the HDMI port is enabled or configured correctly. In addition, you may need to adjust the resolution settings.
Prevention is Key: Protecting Your HDMI Connection
To avoid HDMI issues, take precautionary measures. Handle your HDMI cables with care. Avoid bending or crimping them excessively. Make sure you unplug them by holding the connector, not pulling on the cable. Moreover, power surges can damage HDMI ports. Using a surge protector will help. Keep your laptop and TV's drivers up to date. Regularly cleaning the ports for dust and debris is also essential.
The Final Verdict: Triumph Over a Blank Screen!
In conclusion, HDMI connection problems can be frustrating. But frequently, the solution is simpler than you think. By following these troubleshooting steps, you can often revive your connection. Starting with the basics and implementing the power cycle trick are the first steps. With a little patience and persistence, you can get your laptop and TV working together again. Remember the preventive measures to minimize future issues. Now, relax, and enjoy your content.
Dell Touchscreen DEAD? This FIX Will SHOCK You!HDMI Cable Dead? Laptop Fix: SHOCKINGLY Simple Solution!
Alright, friends, let's be real. We've all been there. You're pumped for movie night, ready to dive into that epic series on your laptop, and BAM! The dreaded HDMI gremlin strikes. Black screen. No signal. Your heart sinks faster than a lead weight in the ocean. Is the HDMI cable dead? Is your laptop doomed? Don't panic! We're going to unravel this mystery and, spoiler alert, the solution might be far simpler than you think. Trust me, I've been through this enough times to know the drill, and more often than not, the fix is…well, shockingly simple.
1. The HDMI Horror Story: When Your Screen Goes Dark
Let's paint the picture. You meticulously connect your laptop to your TV or monitor. You've double-checked, triple-checked, and maybe even muttered a few choice words under your breath. Yet, the second screen remains stubbornly black. The HDMI cable, your trusty digital messenger, seems to be on strike. This can be a frustrating experience, especially when you have to entertain your family or have a presentation. It's like having a race car that refuses to start the engines.
2. Before You Freak Out: Quick Checks and Sanity Saves
Before you start tearing your hair out, let's do some quick, non-destructive troubleshooting. We want to make sure we are not jumping to a big assumption without a proper check.
- The Obvious: Power and Connections: Is everything plugged in tightly on both ends? Sounds basic, I know, but it's the number one culprit! Make sure your laptop and the external display are powered on. A loose connection is the digital equivalent of forgetting your keys – a common, yet easily fixable, problem.
- The Input Game: Is your TV or monitor set to the correct HDMI input? TVs are notorious for defaulting to cable or satellite. Make sure you've selected the HDMI port you plugged your laptop into.
- Restart Rodeo: Try restarting both your laptop and the external display. (Yes, I know, the old "turn it off, then turn it back on" trick. But it works!). Sometimes, a simple reboot is all it takes to kickstart the connection. It's like giving your computer a digital espresso shot.
- Different Cable Quest: If you have another HDMI cable handy, test it. This helps you rule out a faulty cable as the issue as sometimes the cable itself has stopped functioning.
3. The Laptop's Perspective: Diving into Display Settings
Okay, so the basics didn't work? Don't worry, we've got more tricks up our sleeves. Our next step takes us into the inner workings of your laptop's operating system. Both Windows and macOS have display settings that control how your screen functions with external devices.
- Windows Wonders: Right-click on your desktop, select "Display settings." From there, look for the "Multiple displays" section. You might see options like "Duplicate these displays," "Extend these displays," or "Show only on 2." Experiment with these settings. Sometimes, your laptop might not be recognizing the external display until you tell it to. Using the "Detect" button is also an excellent idea, to ensure the system scans for the external display.
- macOS Mavericks: Apple's got you covered too. Go to "System Preferences," then "Displays." You might need to click on the "Detect Displays" button. If you don't see the external display listed, try holding down the "Option" key while clicking "Detect Displays." This can sometimes force the system to recognize the connection.
4. Driver Drama – The Silent Culprit
Ah, the dreaded drivers. These little software programs tell your computer how to "talk" to its hardware, a bit like translators in a busy international conference. Sometimes, drivers can become outdated, corrupted, or just plain buggy. This can prevent your HDMI connection from working properly.
- Windows Driver Detective: Go to Device Manager (search for it in the Windows search bar). Expand "Display adapters." Right-click on your graphics card (e.g., Intel HD Graphics, NVIDIA GeForce). Select "Update driver." Choose "Search automatically for drivers." Windows will try to find the latest drivers for you.
- macOS Driver Maneuvers: macOS usually handles driver updates automatically. However, if you think there's a driver issue, you might want to check for software updates in the App Store. Although, the driver issue is rarer in macOS.
5. The "Secret Weapon": Restart Your Graphics Driver
Here's a little trick that can work wonders, especially if you're feeling impatient. It's like giving your graphics card a jump start. On Windows, try pressing the Windows key + Ctrl + Shift + B. This keyboard shortcut restarts the graphics driver without restarting your entire computer. On a Mac, there isn't a direct equivalent; however, often restarting the computer can help ensure the driver starts with a clean slate.
6. Addressing the Physical HDMI Port: The Gentle Approach
Sometimes, the issue isn't the cable itself but the ports. The ports on your laptop and the external device can accumulate dust or debris, preventing a proper connection.
- Cleaning Ritual: Gently clean the HDMI ports on both your laptop and the external display. Use a can of compressed air to blast away any dust or debris. Be careful not to damage the pins inside the port.
- Port Inspection: Inspect the pins inside the ports. Are any bent or damaged? If so, that could be your problem. If you aren’t comfortable, you could seek professional help.
7. Resolution Revelation: Matching Display Settings
Incorrect resolution settings can sometimes be the cause of your display issues. Ensure that the resolution settings on your laptop are compatible with the external display. We can't expect them to show the same visual with completely different settings.
- Resolution Resolution: Adjust the resolution in your laptop's display settings. Try different resolutions until you find one that works well with your external display.
- Refresh Rate Reconciliation: If your external display supports it, adjust your laptop's refresh rate to match.
8. The Audio Angle: Sounding Out the Issue
While HDMI primarily handles video, it also transmits audio. Sometimes, you might get video but no sound. This can be a sign of a more complex issue.
- Audio Output Audit: Check your laptop's sound settings. Ensure that the HDMI output is selected as your default audio device.
- Driver Deep Dive: Sometimes the audio drivers for your graphics card can cause issues. Head back into Device Manager (Windows) or update the audio and software settings (macOS).
9. Battery Blues: Power Management Perplexities
Power management settings can sometimes interfere with HDMI connections, especially on laptops.
- Power Planning: Check your power settings. Ensure that your laptop isn't set to automatically turn off the display or go into sleep mode when it's connected to an external display.
- Battery Buffering: Plug your laptop into a power source when using an external display. This can help ensure that your laptop has enough power to drive the connection.
10. The "Almost Always" Solution: Reboot and Reconnect
At this point, if you've tried everything, it's time to revisit the basics. Sometimes, the simplest solution is the most effective.
- Restart Symphony: Restart your laptop and your external display. Then, reconnect the HDMI cable.
- Fresh Start: Sometimes, a fresh start is all that's needed to clear up any temporary glitches or software hiccups.
11. The "Outside the Box" Scenarios: Not Always the Computer, Sometimes the Display
It's not always your laptop at fault. The external display could be the culprit.
- External Device Evaluation: Test the HDMI cable with another device (like a game console or Blu-ray player) to ensure it's working.
- Display Detective Work: Check the external display's settings to see if the HDMI input is enabled and properly configured.
12. When Nothing Works: Seeking Professional Assistance
If none of the above solutions work, it might be time to seek professional help.
- Repair Refresher: Take your laptop to a qualified computer technician. They can diagnose the problem and recommend the best course of action.
- Warranty Wisdom: If your laptop is still under warranty, contact the manufacturer or the retailer.
13. The HDMI Mythbusting: Common Misconceptions
Let's dispel some common myths about HDMI issues.
- Myth: HDMI cables die instantly. Fact: HDMI cables can malfunction and die, but it's not usually a sudden occurrence. They often give signs through intermittent issues.
- Myth: HDMI is always the problem. Fact: Problems can arise from any part of the chain.
- Myth: Expensive cables always work better. Fact: While quality matters, very expensive cables don't always guarantee better results.
14. HDMI Cable Care: Preventative Measures
Preventing future HDMI headaches is simple.
- Cable Care: Handle HDMI cables with care. Avoid bending or crimping them.
- Dust Defense: Keep both the cable and ports free from dust.
- Good Storage: When not in use, store cables properly.
15. The
Laptop Touchpad Mystery SOLVED! (You Won't Believe How It Works!)How to Fix HDMI Not Working on Laptop Windows 11

By Ground Zero How to Fix HDMI Not Working on Laptop Windows 11 by Ground Zero
How to Fix HDMI Not Working on Laptop Windows 10 5 Methods
By Wondershare Recoverit Data Recovery How to Fix HDMI Not Working on Laptop Windows 10 5 Methods by Wondershare Recoverit Data Recovery
Laptop Not Detecting HDMI TV in Windows 111087 - How To Fix PC not Connected 4K tv Via hdmi

By Victor Explains Laptop Not Detecting HDMI TV in Windows 111087 - How To Fix PC not Connected 4K tv Via hdmi by Victor Explains

Title: How to Fix HDMI Not Working in Windows 11 NEW 2025
Channel: TechFixIT
How to Fix HDMI Not Working in Windows 11 NEW 2025 by TechFixIT
Laptop Wifi Connect
HDMI Cable Dead? Laptop Fix: SHOCKINGLY Simple Solution!
The crisp, vibrant visuals. The immersive audio experience. The seamless connection between your laptop and your television, projector, or monitor. We've all benefited from the magic of HDMI. But what happens when that magic fades? What happens when the screen flickers, the audio cuts out, or, worst of all, the display remains stubbornly blank? The frustration is palpable. The panic sets in. Is it the expensive new cable? The device itself? Fear not. Before you rush out to buy a replacement or call in the tech cavalry, we’re here to guide you through some surprisingly simple, often overlooked, solutions that can breathe new life into your HDMI connection. Prepare to be shocked – not by electricity, but by how readily available these fixes truly are.
Diagnosing the Problem: Pinpointing the Source of the HDMI Grievance
Before we dive into the fixes, let's establish a crucial first step: pinpointing the source of the problem. Is it definitively the HDMI cable? Or could it be something else entirely? A systematic approach will save you time, money, and untold headaches.
The Obvious Suspect: The HDMI Cable Itself. A damaged cable is, regrettably, a frequent culprit. Inspect the connectors at both ends. Are there any bent pins? Any visible damage to the cable insulation? Even a seemingly minor kink can disrupt the delicate transmission of data. Try a different HDMI cable. This is the quickest and easiest troubleshooting step, and it often yields immediate results. If the new cable works, congratulations! You've found your problem (and a simple solution).
Device Interrogation: Is the Laptop or Display at Fault? Ruling out the devices themselves is essential. Connect your laptop to a different display, ideally one you know functions correctly (a friend's TV, a monitor at work, etc.). Does the connection work there? If so, the problem likely lies with your original display. Conversely, connect a different device (a gaming console, a Blu-ray player) to your display. Does that device work? If it does, the problem is likely with your laptop. This cross-testing narrows down the possibilities considerably.
Port Pursuit: Are the HDMI Ports Functional? Both your laptop and your display have HDMI ports. These ports can become compromised. Try plugging the HDMI cable into a different HDMI port on your display (if it has multiple ports). Also, try plugging the cable into a different HDMI port on your laptop, if your laptop has more than one HDMI port. If another port works, then you’ve identified the faulty port.
The Power Cycle Protocol: A Digital Reset for Your HDMI Heartbeat
Often, the simplest solutions are the most effective. And in the realm of technology, that often translates to a good old-fashioned power cycle.
The Two-Device Tango: Laptop and Display Shutdown. Completely power off both your laptop and your display. Unplug both devices from their power sources. This is not just a matter of pushing the power button; you need to cut off the flow of electricity entirely. The goal is to clear any residual charge that might be interfering with the connection.
The Waiting Game: Allow Time for Digital Rebirth. Let the devices sit unplugged for a minimum of 60 seconds. Some experts recommend waiting longer, even up to five minutes. This extended "off time" allows all internal components to reset. Think of it as a digital deep breath.
Reconnection Ritual: Powering Up with Precision. After the waiting period, plug your display back into the power outlet. Power it on. Then, plug your laptop back into the power outlet. Power it on, too. Now, re-establish the HDMI connection. Often, this simple reset will resolve the issue.
Driver Dilemmas: Keeping Your Graphics Engine in Top Shape
Your laptop's graphics drivers are the unsung heroes of your visual experience. They are the software intermediaries that translate the digital language of your laptop into the images you see on your screen. Outdated or corrupted drivers can wreak havoc on your HDMI connection.
Identifying Your Graphics Card: Before you can update your drivers, you need to know which graphics card your laptop uses. This is typically either an integrated Intel graphics card, a dedicated NVIDIA GeForce or AMD Radeon card, or a combination of both (Intel with a dedicated card). You can usually find this information in your laptop's system information settings (search for "System Information" in the Windows search bar).
Driver Download Destination: The Right Source for Driver Updates. Never download drivers from unreliable websites. Always obtain the latest drivers directly from the manufacturer. For Intel graphics, go to the Intel website. For NVIDIA, visit the NVIDIA website. For AMD, go to the AMD website.
The Driver Update Procedure: A Step-by-Step Guide. Download the appropriate driver for your graphics card and your operating system (Windows 10, Windows 11, etc.). Run the downloaded installation file. Follow the on-screen instructions. The installation process may require you to restart your laptop. Be prepared for this and save any unsaved work.
Troubleshooting Driver Issues: If updating the drivers doesn't solve the problem, you might consider rolling back to a previous driver version. Sometimes, the newest driver can introduce compatibility issues. You can usually find the option to roll back drivers in your device manager (search for "Device Manager" in the Windows search bar).
Display Settings Deep Dive: Fine-Tuning Your HDMI Harmony
Sometimes, the problem isn't a faulty cable or outdated drivers, but rather a misconfiguration of your display settings.
Identifying the Primary Display: Ensure that your external display is recognized by your laptop. Right-click on your desktop (the background screen), and select "Display settings." In the display settings window, you should see icons representing your laptop's screen and your connected display.
The "Detect" Button: If your external display isn't showing up, click the "Detect" button within the display settings window. Windows will then attempt to identify and recognize the attached display.
The "Multiple Displays" Menu: Once your display is recognized, check the "Multiple displays" dropdown menu. Ensure that the correct setting is selected. The options usually include "Duplicate these displays" (mirrors the laptop display), "Extend these displays" (treats the external display as an extension of your laptop's desktop), and "Show only on 1" or "Show only on 2" (disables the laptop screen and uses only the external display). Experiment with these settings to find the one that suits your needs.
Resolution Revelation: Make sure the resolution of your external display is set correctly to match your display’s native resolution (the maximum resolution the monitor is capable of). Incorrect resolution settings can lead to a blurry, distorted image or can prevent the display from working altogether. Again, check the Display Settings menu and select the optimal resolution.
The Audio Angle: Ensuring Sound Synchronization
Don't overlook the audio connection. While HDMI carries both video and audio, sometimes the audio settings can cause unexpected problems.
The Default Audio Device: Right-click on the speaker icon in your system tray (bottom right corner of the screen). Select "Open Sound settings." Make sure your external display (or its associated audio output) is selected as the default output device.
Volume Verification: Double-check the volume levels. Ensure that the volume isn’t muted or set too low on both your laptop and your external display.
Driver Specific Audio Issues: Check for Driver Compatibility: If your external display has its own speakers you might need to update your sound card drivers too. Open the Device Manager (search for "Device Manager" in the Windows search bar). Expand the "Sound, video and game controllers" section. Right-click on your sound card or the relevant audio device and select "Update driver." Choose the option to search automatically for drivers.
Beyond the Basics: Specialized HDMI Troubleshooting
EDID (Extended Display Identification Data) Problems: EDID is a data structure that the display uses to communicate its capabilities (resolution, refresh rates, etc.) to the source device (your laptop). Occasionally, EDID data can become corrupted, leading to display problems. Resetting the EDID can sometimes help. This usually involves powering off both devices, disconnecting them, and then connecting them and powering them back on. This allows the source device to rediscover the display.
HDMI Handshake Failures: The HDMI connection requires a "handshake" between the source and the display, a process to establish a secure connection. Issues with this handshake can generate display problems. Ensure the devices are compatible and that the HDMI cable is rated for the resolution and refresh rate you are using.
External interference: In very specific rare cases, radio interference from other devices could in principle interfere with the signal.
Final Thoughts: A Resilient Approach to HDMI Hurdles
Navigating the world of HDMI troubleshooting can feel daunting, but with a systematic approach, patience, and the simple solutions we’ve outlined, you can often overcome the most frustrating of connection problems. Remember to start with the basics: the cable, the devices, and the power cycle. Then, delve into driver updates and display settings. These "shockingly simple" solutions are often all that's needed to restore your HDMI connection to its former glory. Don't get discouraged. Try one, try them all. With persistence, you'll soon be enjoying that seamless visual experience once more.
