how to check if all my laptop ports are working

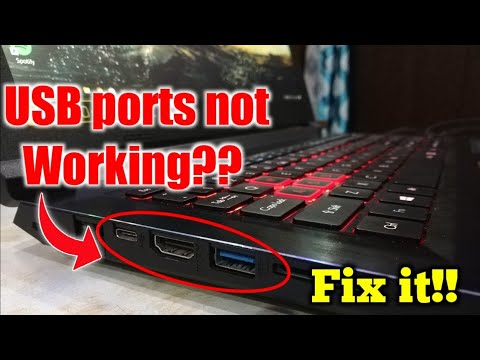
Title: How to Fix USB Ports Not Working in Windows 1011
Channel: The Geek Page
How to Fix USB Ports Not Working in Windows 1011 by The Geek Page
how to check if my laptop usb ports are working, how to check if laptop ports are working, how to check what ports your laptop has, how to check all port status in windows
Is Your Laptop's Secret Port DEAD? (Find Out NOW!)
Is Your Laptop's Hidden Port a Goner? Unmasking the Truth!
Ever wonder about those mysterious ports on your laptop? They are often there, tucked away. You might not even know what they do. However, their functionality is crucial. You could be missing out big time. Let's delve into this digital detective story. We're seeking the truth about your laptop's hidden connections.
The Silent Sentinel: Recognizing the Secret Port
First things first: Identify your laptop's secret port. It's most commonly a Thunderbolt or USB-C port. These ports usually come bearing a small lightning bolt icon. Sometimes there's a D-shaped symbol indicating display connectivity. It looks somewhat similar to the USB-A port. However, the shape is different. Thus, it's essential to distinguish between them. These versatile ports are frequently on the sides or back of your laptop. But where they are located varies.
Why Your Silent Port Might Be Silent
Now, ask yourself: Is your secret port actually working? Because maybe it isn't. A non-functional port can stem from multiple causes. Consequently, this situation might seem daunting. But don't fret. We'll explore the critical reasons.
- Hardware Hiccups: Firstly, the port itself could be damaged. Perhaps something was accidentally inserted with too much force. Secondly, the port's internal components can malfunction. This is a classic scenario. Physical damage is often the culprit.
- Driver Dilemmas: Secondly, outdated or corrupted drivers can cause problems. Drivers act as the middleman. They facilitate communication between your laptop and the connected device. Make sure they are current. Check for driver updates.
- Power Problems: Furthermore, power issues could be to blame. Insufficient power delivery will hinder functionality. This is, in effect, blocking it. This is especially true for peripherals.
- Software Snags: Then, it can be a software issue. Malware might have corrupted your system. A software conflict could also be causing trouble. Consider running a virus scan. Keep your operating system updated.
- Cable Conundrums: Also, the cable you use matters. Faulty cables can quickly become a problem. Test with another cable. Ensure it’s compatible with the port.
Troubleshooting: Reviving the Dormant Port
Ready to troubleshoot? Let's proceed methodically. These steps can restore your port to its former glory.
- Inspect the Port: Carefully examine the port. Look for any visible debris. Gentle cleaning with compressed air can solve the problem. But caution is key. Avoid damaging the internal pins.
- Restart Reality: Rebooting your laptop is often a simple fix. It can refresh the system, tackling temporary glitches. This is certainly a good first step.
- Driver Diagnostics: Head into your device manager. Verify the port's driver status. Update if necessary. Sometimes, you may need to uninstall and reinstall the driver.
- Power Play: Ensure the port is receiving adequate power. Some laptops have settings related to power delivery. Check your laptop's power management settings.
- Cable Check: Swap out the cable. Try a different one, one you know works. If it works, then the previous cable was at fault.
- Peripheral Pursuit: Test a different compatible device. This will help isolate the issue. If the new device works, the problem is elsewhere.
- System Scans: Run a system scan for viruses and malware. These are a significant threat. You can also troubleshoot existing software. Uninstalling and reinstalling the software could fix the problem.
When to Seek Professional Help
Sometimes, your secret port resists your efforts. If all else fails, it's time to call in the experts. Don't hesitate to reach out.
- Hardware Damage: Any physical damage needs professional repair. This includes bent pins or internal issues.
- Systemic Software Glitches: If your laptop is experiencing persistent system errors. A qualified technician can diagnose and fix it.
- Beyond Basic Troubleshooting: If you have tried all the basic steps. It's often more efficient to request help.
The Secret Port's Significance: Why Bother?
Why care about a port you barely use? Because that port unlocks incredible potential. It's about more than just charging. That port allows for:
- External Displays: Connect to larger monitors for improved productivity. Extend your workspace.
- Fast Data Transfer: Quickly transfer files to external drives. High data transfer speeds are essential.
- Docking Stations: Transform your laptop into a desktop powerhouse. Use docking stations to boost your productivity.
- External GPUs: Boost your graphics capabilities. Enhance your gaming or video editing experience.
Conclusion: Don't Let Your Port Perish!
Your laptop's secret port deserves your attention. Don't let it become a digital ghost. Keep it active, and fully utilized. By following this guide, you can diagnose and resolve most port problems. You're now equipped to explore the full potential of your laptop. So, get out there. Uncover the hidden possibilities! And, always remember: Keep learning, keep exploring, and keep your tech alive and kicking!
Dell Inspiron 1525 Keyboard DEAD? FIX This NOW!Is Your Laptop's Secret Port DEAD? (Find Out NOW!)
Hey tech adventurers! Ever feel like you're stuck in a digital maze, desperately seeking a shortcut? We've all been there. My name's Alex, and I practically live and breathe tech. And trust me when I say, a dead port on your laptop can feel like a death sentence for your workflow. Seriously, it's like your trusty steed suddenly lost a leg right before a race. But don't panic! We're diving deep today into the murky waters of laptop ports, uncovering those hidden gems, and most importantly, figuring out if yours is six feet under. Let's get started and find out, Is Your Laptop's Secret Port DEAD? (Find Out NOW!)
1. The Digital Graveyard: Why Ports Go Rogue
Okay, let's be honest. Ports are the unsung heroes of the digital world. They're the gateways to everything – charging, transferring data, connecting to the internet, the whole shebang. But like all heroes, they can fall. Think of it like this: your laptop is a complex ecosystem, and ports are its vital organs. They get battered around, subjected to dust bunnies, spilled coffee (ugh!), and the relentless plugging and unplugging of cables. Over time, wear and tear, electrical surges, and even just plain old bad luck can cause these crucial connections to go south. This can range from something as simple as a bent pin to a complete internal meltdown.
2. Decoding the Port Alphabet Soup: Know Your Connectors
Before we diagnose the patient (your laptop), we need to brush up on our anatomy. Knowing your ports is step one! We're not talking about the obvious USB ports here; we're getting into the secret agent territory. Let's quickly run through the usual suspects:
- USB-A (The OG): The rectangular port probably used for your mouse or keyboard. It's like that reliable friend who's always there, but the technology is pretty old.
- USB-C (The Versatile Champ): The sleek, oval-shaped port that's quickly becoming the standard. It's fast, versatile, and can handle everything from data transfer to charging and video output. Think of it as the Swiss Army knife of ports.
- HDMI (The Video Star): For connecting to monitors, TVs, and projectors. It's the red carpet entrance for your visual content.
- DisplayPort (The Professional): Another video port, frequently found on laptops, offering superior performance, often preferred for professional use.
- Thunderbolt (The Speed Demon): Similar in shape to USB-C, but much faster. It's like the Formula 1 of data transfer.
- Ethernet (The Wired Warrior): For a direct internet connection. It's that reliable, wired connection that's always dependable… sometimes.
3. The Symptoms: Clues Your Secret Port Might Be Sick
Alright, detective, let's gather some clues. Your laptop might be trying to tell you something. Here are the tell-tale signs that a port could be on its last legs:
- The "No Connection" Blues: You plug something in, and nothing happens. No response, no recognition. It's like the port is giving you the silent treatment.
- Erratic Behavior: Sometimes it works, sometimes it doesn't. This is a frustrating sign, often indicating an intermittent connection, like a bad wire within the port itself.
- Charging Issues: Your laptop refuses to charge, or it charges extremely slowly. This can stem from a faulty charging port or a problem with the adapter.
- Physical Damage: Bent pins, loose connections, or visible debris within the port. It's like looking at a broken bone - it's obviously not working right.
- The Smell Test: A burning smell emanating from your laptop is a serious red flag. This could signal overheating within the port or internal damage.
4. The Simple Fixes: DIY Port Revival Techniques
Before you resign yourself to the digital graveyard, try these simple troubleshooting steps:
- Restart Your Laptop: As cliché as it sounds, sometimes a simple reboot can work wonders. It's like hitting the reset button on your entire system.
- Inspect the Cable: Are you using the right cable? Is it damaged? Try a different cable of the same type to rule out the possibility of a cable issue.
- Clean the Port: Gently clean the port with compressed air or a small, non-metallic brush. Dust and debris can often cause connection problems.
- Update Drivers: Outdated drivers can sometimes cause port connectivity issues. Make sure your drivers are up to date.
- Try a Different Device: Test the port with a different device to see if the problem persists. This helps determine whether the problem is with the port or the device itself.
5. Advanced Troubleshooting: Unveiling the Hidden Issues
If the simple fixes didn't work, then it's time for a deeper dive:
- Check Device Manager (Windows): Search for "Device Manager" in your Windows search bar. Look for any devices with yellow exclamation marks, which signal driver conflicts or hardware problems.
- Run Hardware Diagnostics: Many laptops have built-in diagnostic tools. Consult your laptop's manual or manufacturer's website for instructions.
- Test the Port with Other Devices: This helps you determine if the issue is with a port or the attached device.
- Check BIOS/UEFI Settings: Sometimes, a port can be disabled in BIOS/UEFI settings. Access your system's BIOS/UEFI and look for any relevant port settings.
6. The Hardware Hustle: When to Call in the Professionals
Let's face it, sometimes things are beyond our DIY capabilities. Here's when it's time to call for backup:
- Physical Damage is Extensive: Bent pins, broken connectors, or any significant physical damage requires professional intervention.
- You're Not Comfortable with Disassembly: Opening up your laptop can be risky; you can cause even more damage. If you're unsure, leave it to the experts.
- The Problem Persists After Troubleshooting: If you've exhausted all your efforts, and the port still isn't functioning, it's time to seek professional help.
- Smells or Sounds of Electrical Burning Are Present: This is a potential fire hazard. Shut down your laptop immediately and take it to a repair shop.
7. The Repair Roadmap: Options and Costs
So, your port is truly dead? What are your options?
- Laptop Repair Shops: Local shops often offer port repair services at reasonable prices. You'll want to get a quote beforehand.
- Manufacturer's Service: If your laptop is still under warranty, contact the manufacturer for repair.
- DIY Repair (If You're Feeling Brave): Replacement ports and repair guides are often available online, but this requires technical skill and a steady hand.
- External Hubs/Adapters: This can be your workaround for using alternative connections if your laptop's built-in ports are damaged.
8. Prevention is Key: Protecting Your Ports from Doom
You can't always avoid the inevitable, but you can absolutely take steps to prolong the life of your ports:
- Gentle Handling: Avoid yanking cables; always unplug them carefully.
- Clean Regularly: Dust and debris are the enemies of ports. Keep them clean!
- Use Quality Cables: Cheap cables can fail, causing damage to your ports. Invest in quality cables.
- Avoid Extreme Temperatures: Extreme heat or cold can damage your laptop, including the ports.
- Unplug When Possible: If you don’t need a cable plugged in, take it out when you are not using it.
9. The USB-C Conundrum: Specific Troubles and Solutions
USB-C is fantastic, but it's also prone to issues. Here's what you need to know:
- Charging Power: USB-C ports can handle a lot of power, but make sure your charger and laptop are compatible.
- Data Transfer: Not all USB-C ports offer the same data transfer speeds. Thunderbolt 3/4 offers the fastest performance.
- Video Output: USB-C can stream video. Ensure your adapter and external display support the video protocol.
- Water Damage: USB-C ports are particularly vulnerable to water damage due to their position on the edge of a laptop.
10. HDMI Horror Stories: Troubleshooting Video Problems
HDMI is essential. But issues come up. Here's how to smooth them over:
- Cable Issues: Ensure you have a functioning HDMI cable. Test with another cable. If it does not work, the cable is likely the problem.
- Display Settings: Make sure your laptop and external display are set to the correct resolution and refresh rate.
- Driver Updates: Ensure your graphics drivers are up-to-date.
- External Devices: If you are using a projector, make sure it receives power.
11. Thunderbolt Troubles: The High-Speed Hurdles
Thunderbolt is fast, but it's not always perfect. Here's how to tame it:
- Compatibility: Ensure your devices and cables are Thunderbolt-certified
How to fix USB ports if not working USB ports not working Laptop ports not working USB problem
By Techs and Facts How to fix USB ports if not working USB ports not working Laptop ports not working USB problem by Techs and Facts
How to identify USB 2.0 and 3.0 ports on Windows 10 PC

By The Geek Page How to identify USB 2.0 and 3.0 ports on Windows 10 PC by The Geek Page
How to Fix USB Ports Not Working in Windows 1011 Troubleshooting Guide

By WOODYBOX LITE How to Fix USB Ports Not Working in Windows 1011 Troubleshooting Guide by WOODYBOX LITE

Title: How to Fix USB Ports Not Working in Windows 11 FAST
Channel: SkillsBuild Training
How to Fix USB Ports Not Working in Windows 11 FAST by SkillsBuild Training
Laptop Wifi Connect
The Ultimate Guide to Mastering Authentic Italian Carbonara
We often encounter a dish that, despite its apparent simplicity, holds an almost mythical allure: Carbonara. This isn't just pasta with sauce; it's a culinary experience, a testament to the beauty of minimal ingredients and the transformative power of skilled execution. Far too often, we find imitations masquerading as the real thing, burdened with cream, vegetables, or inappropriate cheeses. This guide, crafted with passion and precision, will equip you to create carbonara as it's meant to be: a creamy, decadent masterpiece, born from tradition and executed with unwavering fidelity. We will delve deep, exploring the crucial components, the delicate techniques, and the nuances that elevate this Roman classic from good to extraordinary.
The Holy Trinity: Guanciale, Eggs, and Pecorino Romano
Before we even consider the pasta, we must understand the building blocks of authentic carbonara. These three ingredients form the foundation, dictating the flavor profile and textural harmony of the final dish. Their quality and proper handling are paramount to the success of the carbonara.
Guanciale: The Soul of Carbonara: Guanciale, cured pork jowl, is the undisputed king of carbonara. Unlike pancetta, which comes from the pork belly, guanciale boasts a higher fat content and a more robust, distinct flavor. The fat renders beautifully, infusing the dish with a rich, savory essence that's impossible to replicate. Seek out high-quality guanciale, ideally with a good ratio of fat to meat. The fat is crucial; it's what emulsifies with the egg yolks, creating the signature creamy sauce. We’re looking for guanciale that is not too dry or salty, but has a distinct aroma of cured pork. Careful with your selection, as this ingredient is hard to come across and can impact the final outcome.
Eggs: The Binding Force: The eggs provide the binding agent and the creamy texture. Traditionally, carbonara utilizes only the yolks for that iconic richness and vibrant color. While some variations include the whites for added structure, the purest expression focuses solely on the yolks. Fresh, high-quality eggs are essential, as they directly impact the flavor and creaminess. The richer the yolk, the more vibrant and flavorful the sauce will be. Free-range eggs, known for their deeper orange yolks, often provide the best results. The eggs also help to keep the sauce from becoming too thick.
Pecorino Romano: The Aromatic Cornerstone: Pecorino Romano, a hard, salty sheep's milk cheese, is the traditional cheese of choice. Its sharp, salty, and slightly tangy flavor provides a perfect counterpoint to the richness of the guanciale and eggs. Finely grate the Pecorino Romano, ensuring it is fresh; pre-grated cheese can be drier and less flavorful. You'll need a generous amount; the cheese is responsible for both the flavor and the initial thickening of the sauce, giving it binding properties.
Crafting the Creamy Emulsion: The Technique
The magic of carbonara lies in the emulsion, the artful blending of fat, eggs, and cheese to create a luscious sauce that clings perfectly to the pasta. This is where technique truly matters.
Preparing the Guanciale: Cut the guanciale into small pieces, about 1/4 inch thick. In a cold pan, place the guanciale and slowly render the fat over medium-low heat. The goal is to render the fat without browning the meat too quickly. The fat should be rendered, and the meat should be slightly crispy. Remove the crispy guanciale pieces with a slotted spoon, reserving them for the final topping. The rendered guanciale fat is what we will use to build our sauce.
Beating the Egg Mixture: In a bowl large enough to hold the pasta, whisk together the egg yolks (about 1 per ounce of pasta), a generous amount of finely grated Pecorino Romano (about 1/2 ounce per ounce of pasta), and a small amount of freshly ground black pepper. The pepper is a crucial flavouring element. The texture should be creamy, and the color should be a sunny yellow from the eggs.
Pasta and Sauce: The Delicate Dance: Cook the pasta al dente in salted boiling water. While the pasta is cooking, the pan should retain about 2 tablespoons of rendered guanciale fat. Once the pasta is ready and drained (reserve some pasta water), immediately add it to the pan with the rendered guanciale fat and toss to coat.
Emulsification: Bringing it All Together: Remove the pan from the heat (crucially important!), and immediately pour the egg and cheese mixture over the hot pasta. Work swiftly, using tongs to toss the pasta vigorously, ensuring every strand is coated. The heat of the pasta and the residual heat from the pan will gently cook the eggs, transforming them into a creamy sauce. If the sauce seems too thick, add a splash of the reserved pasta water, one tablespoon at a time, until the desired consistency is achieved. The sauce should cling to the pasta, coating it in a rich, glossy layer.
The Final Flourish: Immediately plate the carbonara, and garnish with the crispy guanciale pieces and a generous grating of extra Pecorino Romano and a final grind of black pepper. Serve immediately; carbonara is best enjoyed hot, immediately after being prepared.
Choosing the Right Pasta: The Canvas for Carbonara
While the sauce is the star, the pasta plays a vital role. The right pasta shape will perfectly capture and hold that creamy sauce, enhancing the overall sensory experience.
Traditional Choices: Spaghetti and rigatoni are the most traditional pasta shapes for carbonara. Both offer excellent surface area for the sauce to cling to. Spaghetti, with its round shape, provides a classic, elegant presentation. Rigatoni, with its ridged surface, grabs the sauce and the guanciale pieces, offering a more textural experience.
Alternative Considerations: While less traditional, other shapes can work beautifully. Bucatini, a thick spaghetti with a hole running through the center, can also be an excellent choice. The hole allows the sauce to penetrate, enhancing the flavor distribution. Avoid delicate pasta shapes like angel hair, which tend to overcook quickly and will not hold the sauce well.
Troubleshooting Common Carbonara Challenges
Even with careful attention to detail, things can sometimes go wrong. Here are some common issues and how to remedy them.
The Scrambled Egg Problem: Overcooked eggs are the most frequent downfall. The key is to remove the pan from the heat and work quickly. If the sauce starts to curdle, immediately add cold water, a tablespoon at a time, while whisking vigorously. The cold water helps to halt the cooking process and emulsify the sauce.
The Thin Sauce Conundrum: If the sauce is too thin, you could not add enough Pecorino Romano, or your pasta wasn't hot enough to begin the emulsification process. Adding more cheese, a tablespoon at a time, while tossing the pasta, can help to thicken the sauce. Additionally, make sure your pasta is al dente and that you are not adding too much pasta water.
The Salty Situation: Pecorino Romano is naturally salty. Use only a little salt in the pasta water, and taste the dish before adding more salt. If the dish is too salty, add more pasta, or a small amount of cream, to dilute it.
Variations and Enhancements: Exploring Beyond the Basics
While purists may insist on the traditional recipe, several variations can elevate the carbonara experience.
White Pepper Power: While black pepper is traditional, white pepper offers a subtler spice that can complement the other flavors. Experiment with a combination of black and white pepper for a more complex flavor profile.
A Touch of Nutmeg: A very small pinch of freshly grated nutmeg can add a warm, aromatic dimension to the dish. Use it sparingly, as it can easily overpower the other flavors.
The Parmesan Alternative: While Pecorino Romano is the traditional choice, a blend of Pecorino Romano and Parmigiano Reggiano can add a subtle, nutty note.
Carbonara and Wine: The Perfect Pairing
Carbonara demands a wine that can cut through the richness of the sauce while complementing the savory flavors of the guanciale and cheese.
Dry Whites: A crisp, dry white wine with good acidity is an ideal choice. Look for wines like Pinot Grigio, Soave, or a dry Riesling.
Light-Bodied Reds: A light-bodied red wine can also work, especially if served slightly chilled. Consider a Pinot Noir or a Beaujolais.
Conclusion: The Enduring Appeal of Carbonara
Carbonara is more than just a dish; it's a celebration of simplicity, technique, and the transformative power of quality ingredients. By mastering the essential elements and techniques outlined in this guide, you'll be well on your way to creating a carbonara that transcends the ordinary. Embrace the tradition, savor the process, and enjoy the unparalleled pleasure of a perfectly executed carbonara. The reward is a plate of pasta that is simply sublime, a testament to the enduring appeal of Italian culinary artistry. The quality of the dish is dependent on the quality of the ingredients. By understanding the components and following the guidance, you are on your way to mastering this wonderful dish.
