function f8 not working on dell laptop inspirion 17

Title: If Function keys do not work on the Laptop F1 - F12
Channel: Simple Tech
If Function keys do not work on the Laptop F1 - F12 by Simple Tech
DELL Inspiron 17 F8 Disaster? FIX Your Boot Problem NOW!
Dell Inspiron 17 F8 Flashing: Conquer Your Boot-Up Blues!
Have you recently encountered the dreaded F8 flashing screen on your Dell Inspiron 17? Don't panic! It can feel like a complete digital meltdown. However, this issue is often solvable, and more importantly, you're in the right place. We will explore a few ways to get your Dell Inspiron 17 back on track today.
Understanding the F8 Quandary: Decoding the Flash
The flashing F8 during startup signals a glitch. It signifies the system is trying to access boot options. Essentially, it's stuck. It's like your computer is frantically searching for the correct path to launch Windows. But, this doesn’t always reflect a critical hardware collapse. In fact, it can stem from a range of factors. For instance, corruption in the boot configuration, problems with connected peripherals, or issues stemming from recent software changes could cause this.
Beyond the Basics: Troubleshooting the Boot-Up Breakdown
First, let's try a simple reset. Sometimes, a tough reboot can solve minor hiccups. Completely shut down your laptop. Remove the power cord, and the battery if possible. After waiting for a minute, reconnect everything and power it up. Hopefully, this resets the system.
Secondly, hardware conflicts also cause this problem. Remove any external devices like USB drives, printers, or external hard drives. These devices sometimes influence the boot process. Try restarting again. If this clears the issue, there’s a conflict. Determine the problem, and you can continue.
Delving Into the Advanced: Exploring Boot Options
If these preliminary steps fail, it’s time to enter the boot options menu. You can usually access this by pressing F12 during startup. You should see a menu offering several choices. From here, you can see different bootable devices on your system. Select your hard drive or SSD, and save the settings. Next, try to reboot again.
The System Repair Disc: A Potential Lifeline
Alternatively, a system repair disc could provide assistance. You can create this using another functioning Windows computer. The media contains valuable tools for fixing boot-related problems. Then, insert the disc. Boot from this disc. It might automatically detect and resolve issues. Follow the on-screen prompts.
Investigating the Boot Configuration Data (BCD)
The BCD stores the settings for your computer's boot process. Corruption within this data will also cause the problem. It’s a bit more technical. Access the command prompt from your bootable media. Then, execute commands to repair the BCD. Because the information is sensitive, be thorough.
The Driver Dilemma: Identifying Potential Conflicts
Drivers are crucial. Faulty or outdated drivers can prevent your system from starting. In safe mode, Windows loads with a limited set of drivers. This lets you assess if certain drivers are interfering with the process. To enter safe mode, repeatedly press F8 during startup. If it starts in safe mode, there's a driver problem.
The Last Resort: Reinstalling Windows (with Caution)
If the previous steps fail, reinstalling Windows may be necessary. This process wipes all data on your hard drive. Consequently, back up your data before proceeding. You'll need a Windows installation media. Boot from this media, follow the prompts, and choose the option to install Windows.
Preventing Future F8 Frustrations: Proactive Measures
Because prevention is key, install a solid antivirus program. Regularly update drivers and Windows. Consider creating system restore points. This lets you revert to a previous state. Finally, back up your data to an external drive regularly.
Conclusion: From F8 Flashing to Functional Laptop
The F8 flashing screen does not have to be a computer catastrophe. Hopefully, this deep dive has equipped you with the knowledge to resolve the issue. Take these steps, and get your Dell Inspiron 17 back in action. If the problem persists, consider contacting Dell support for expert assistance. Now, get back to what matters!
HP Laptop Wi-Fi DEAD? FIX It NOW! (Easy Steps)DELL Inspiron 17 F8 Disaster? FIX Your Boot Problem NOW!
Hey there, fellow tech travelers! Ever felt that sinking feeling when your beloved Dell Inspiron 17, the trusty workhorse (or entertainment hub) you rely on, suddenly decides to play dead? Specifically, if it’s giving you the cold shoulder with boot issues, flashing the dreaded F8 key for seemingly eternity, then you're in the right spot. We’ve all been there. It's like your best friend has vanished into the digital ether. But don’t fret! We're going to navigate this together, transforming that boot-up drama into a smooth, triumphant comeback. Think of this as your personal tech intervention, designed to get your Dell back on its feet, faster than you can say "Windows is loading."
1. The Dreaded F8: What’s Going On?
First things first, let's understand the enemy. That F8 key you're desperately hitting during startup? It's your gateway to the Advanced Boot Options menu. Normally, it allows you to access handy recovery tools and troubleshoot those pesky problems. But when your Dell is refusing to cooperate, the F8 key might just be taunting you. Imagine it as the key to a locked door, and your computer has lost the lock combination. This is where we begin our detective work.
2. Initial Troubleshooting: Simple Checks That Might Just Save the Day
Before you start tearing your hair out (or worse, calling in the expensive cavalry), let's try some simple fixes. Think of them as the tech equivalent of checking if the fridge is plugged in.
- Power Cycle: This is the classic "turn it off and on again" solution. Shut down your Dell completely. Unplug the power cord (and the battery, if it's accessible). Wait a solid minute or two. Then, plug everything back in and try booting up again. Sometimes, a simple reset is all it takes.
- External Devices: Disconnect all unnecessary devices connected to your laptop, such as USB drives, printers, or external hard drives. Sometimes, a rogue device can interfere with the boot process.
- Visual Inspection: Give your Dell a once-over. Look for any obvious signs of hardware failure: loose cables, damaged ports, or anything that looks out of the ordinary.
3. Accessing the Advanced Boot Options: Your First Line of Defense
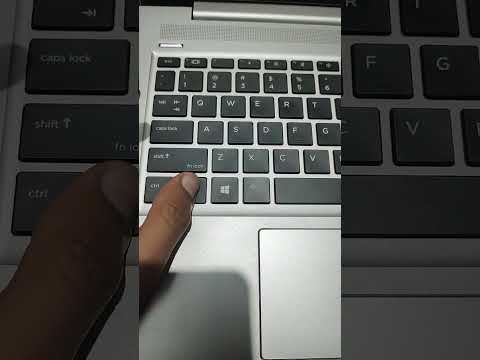
Okay, so the basics didn't work. Time to get serious. Repeatedly tap the F8 key immediately after you power on your Dell. You should be presented with the Advanced Boot Options menu. If you're still stuck on the regular startup screen and the F8 key isn't working, consider these points:
- Timing is Crucial: It's like trying to catch a fleeting moment. Press F8 rapidly and rhythmically right after you turn on the laptop.
- BIOS Settings: Sometimes, interference can be caused by the Basic Input/Output System (BIOS).
- Keyboard Malfunction: Ensure that your keyboard is functioning correctly. Try using an external keyboard if you have one.
4. Safe Mode: A Digital Doctor's Visit
Assuming you've accessed the Advanced Boot Options, Safe Mode is your first port of call. It starts Windows with a minimal set of drivers and services, allowing you to diagnose problems. Think of it like stripping your computer down to its bare essentials. Select "Safe Mode" and see if your Dell boots successfully.
- If Safe Mode Works: This suggests a driver or software conflict is the culprit. You can then try uninstalling recently installed programs or drivers.
- If Safe Mode Fails: This indicates a more significant issue, potentially involving hardware or core system files.
5. System Restore: Rewind Your Computer's Timeline
System Restore is your digital time machine. If you've encountered boot issues after installing a specific software or driver, System Restore allows you to revert your operating system to a previous state when everything was working smoothly. In the Advanced Boot Options, look for the "Repair your computer" option. This will guide you to the System Restore utility. Just choose a restore point prior to when the problems began.
6. Startup Repair: Automated First Aid
Windows has a built-in Startup Repair tool that can automatically diagnose and fix certain boot-related problems. This tool scans for and attempts to fix common issues, such as corrupt system files or missing boot configuration data. It's like having a digital first responder. Access it through the "Repair your computer" option in the Advanced Boot Options menu.
7. Rebuilding the Boot Configuration Data (BCD): A Technical Tune-Up
If the Startup Repair fails, you might need to get your hands a little dirtier. The BCD stores crucial information about how your operating system boots. Corruption here can spell disaster. You'll need a Windows installation disc or a bootable USB drive.
- Boot from the Media: Boot your Dell from the installation media.
- Access the Command Prompt: Navigate to the "Repair your computer" option, and then select "Command Prompt."
- Run These Commands:
bootrec /fixmbr(Fixes the Master Boot Record)bootrec /fixboot(Writes a new boot sector)bootrec /scanos(Scans for installed operating systems)bootrec /rebuildbcd(Rebuilds the BCD)
8. Checking Your Hard Drive: The Heart of Your Beast
A failing hard drive is a common cause of boot failures. Windows has built-in tools to check for and repair hard drive errors, but you will also need a Windows installation disc again. In the Command Prompt, type chkdsk /f /r C: (replace "C:" with the drive letter where Windows is installed) and press Enter. This will scan for and attempt to fix errors on your hard drive. It might also take a long time, even hours, so be patient.
9. BIOS Settings and Boot Order: Making Sure It Knows Where to Look
The BIOS (or UEFI) settings control your computer's fundamental operations, including the boot order. Sometimes, the boot order gets messed up, causing your computer to look in the wrong place for the operating system. Access the BIOS by pressing a specific key during startup (usually Del, F2, F12 or Esc – the exact key varies by Dell model).
- Check the Boot Order: Make sure your hard drive is the first device in the boot order.
- Check for Updates: Ensure your BIOS is up-to-date; outdated BIOS versions can cause compatibility issues.
10. Driver Issues: Identifying and Resolving Conflicts
Drivers are the unsung heroes (or villains!) of your computer's operation. They allow your hardware to communicate with your operating system. If a driver is corrupt or incompatible, it can cause boot problems.
- Safe Mode is Your Friend: As mentioned earlier, Safe Mode is vital for pinpointing driver conflicts.
- Driver Rollback: If you recently updated a driver and your problems started, try rolling it back to an earlier version.
- Reinstall Drivers: If problems persist, try reinstalling the drivers manually.
11. Hardware Failure: When the Problem Runs Deep
If you've tried everything else and your Dell still won't boot, the problem might be with a hardware component:
- Hard Drive Failure: A failing hard drive is a common culprit.
- RAM Issues: Faulty RAM can cause boot failures.
- Motherboard Problems: In extreme cases, the motherboard may be the issue.
If you suspect hardware failure, you'll likely need to take your Dell to a qualified technician.
12. Data Recovery: Preserving Your Precious Files
If the worst happens and you can't get your Dell to boot, don't panic about losing your data. Data recovery services or software can often retrieve files from a failing hard drive. Act fast, as the longer you wait, the higher the risk of data loss.
13. Preventing Future Problems: A Tech-Savvy Lifestyle
Once you’ve conquered your boot problems, let's make sure it doesn't happen again!
- Regular Backups: Back up your important files regularly. Cloud storage or an external hard drive can be lifesavers.
- Keep Your System Updated: Install Windows updates promptly.
- Be Careful with Software: Only install software from trusted sources.
- Use Antivirus Software: Protect your system from malware.
14. When To Seek Professional Help: Knowing Your Limits
We've covered a lot here, but sometimes, calling in the professionals is the best option. Consider professional help if:
- You are not comfortable with technical troubleshooting.
- You suspect serious hardware failure.
- You need data recovery assistance.
- You've tried all the steps above, and your Dell is still unresponsive.
15. The Triumphant Return: Celebrating Your Victory
With any luck, you've triumphantly resurrected your Dell Inspiron 17! Pat yourself on the back; you've worked through a tricky tech challenge. Enjoy your fully functional laptop, and remember these tips for future incidents. You've been equipped with tech knowledge that can help you avoid some tech headaches in the future.
Closing Remarks
So, there you have it.
Is Your Personal Laptop KILLING Your Productivity? (You NEED This!)Fix In 3 Seconds - Volume Control Keys, Mute Button Not Working Microsoft Surface Pro Windows
By Mechanical Mike Fix In 3 Seconds - Volume Control Keys, Mute Button Not Working Microsoft Surface Pro Windows by Mechanical Mike
Function Button Not Working Problem in Windows 11,10,7Function Keys Not Workingmacnitesh2024short

By Mac Nitesh Function Button Not Working Problem in Windows 11,10,7Function Keys Not Workingmacnitesh2024short by Mac Nitesh
ONOFF FN KEY 2023 TRICK
By Hacks & Tricks ONOFF FN KEY 2023 TRICK by Hacks & Tricks

Title: Dell Laptop function key problem fix Fn Key Not work solution
Channel: K C Meena RPF
Dell Laptop function key problem fix Fn Key Not work solution by K C Meena RPF
Wifi On Laptop Phone
DELL Inspiron 17 F8 Disaster? FIX Your Boot Problem NOW!
The sleek lines and expansive screen of your DELL Inspiron 17 – a device promising productivity and entertainment in equal measure. Then, the dread: the boot sequence stalls, the screen remains stubbornly dark, and the promise of seamless computing shatters. You're met with the digital equivalent of being stranded – a frustrating impasse that threatens to derail your work, your studies, and your connection to the digital world. But fear not, for we've compiled a comprehensive guide to diagnose and conquer the DELL Inspiron 17 boot problem. Let's dive in and restore your laptop to its rightful place as a reliable companion.
Identifying the Culprit: Pinpointing the Source of Your Boot Failure
Before we unleash the digital cavalry to fix your DELL Inspiron 17, we must first ascertain the enemy. The "boot problem," as it's colloquially known, can stem from a variety of sources, each demanding a specific tactical response:
Hardware Woes: The Physical Foundation
Hardware failures are often the most insidious, manifesting as seemingly random glitches.
- The Hard Drive's Demise: A failing hard drive is a common culprit. The telltale signs include unusual noises (clicking, grinding), extended boot times, and, of course, the frustrating inability to fully load the operating system. To determine if this is the issue, your primary action should be to access the BIOS setup, look for the hard drive and check its SMART status. If your drive is not present or reports a critical error, the drive may be failing. Replace the hard drive to remedy this issue.
- RAM Ramifications: Faulty RAM modules can wreak havoc on the boot process. The DELL Inspiron 17 often has a panel for easier access to the memory sticks, however, the procedure can differ depending on the exact model of your laptop. Run a memory diagnostic test from the BIOS menu or use a dedicated software tool to scan for errors. Replacing a faulty RAM module can often resolve boot problems.
- Power Problems: A dead or dying battery will often display a failure message. More subtle problems sometimes emerge from a failing AC adapter or even a damaged power jack. Ensure your adapter is delivering sufficient power and that the jack is firmly connected. Test with a known-good adapter to eliminate the power supply as a source of trouble.
- Loose Connections: It's a slim possibility, but sometimes internal components become dislodged. Carefully inspect the components, such as the hard drive and RAM modules, during disassembly before reassembly.
Software Sabotage: The Digital Demons
Software glitches are typically easier to resolve than hardware failures.
- Corrupted Operating System Files: Vital system files can be corrupted by malware, abrupt shutdowns, or other software issues. A system restore or a clean operating system installation may be required.
- Driver Deficiencies: Outdated, corrupted, or incompatible drivers can prevent the operating system from loading correctly. Pay attention to the drivers that are installed or that were changed recently.
- Boot Sector Blunders: The boot sector contains crucial information for the operating system's start-up. Damage to the boot sector can prevent the operating system from loading. Employing boot repair tools from the installation media can be helpful in this scenario.
- Malware Menace: Viruses and malware can be insidious. Malware can damage system files, corrupt the boot process and even prevent the operating system from loading. Run a boot-time scan with your preferred antivirus software.
Troubleshooting Tactics: A Step-by-Step Guide to Boot Problem Resolution
With the potential causes in mind, let us embark on the repair:
1. The BIOS Check: A Preliminary Assessment
Your DELL Inspiron 17's BIOS (Basic Input/Output System) is the first software that runs when you power on your laptop. It allows you to configure hardware settings and diagnose potential issues.
- Accessing the BIOS Setup: Power off your laptop. Press the power button, and immediately begin tapping the BIOS setup key (usually Del, F2, F12, or Esc) until the BIOS setup screen appears. The specific key varies depending on the model. Please consult your DELL Inspiron 17's manual if you're unsure.
- Hardware Inspection: Within the BIOS, examine the detected hardware. Check for hard drive recognition, RAM detection, and proper power supply readings.
- Boot Order: Ensure the boot order is set correctly, usually with the hard drive or the Windows installation media as the primary boot device.
2. The Safe Mode Gambit: Isolating the Problem
Safe Mode loads a limited version of Windows, enabling you to troubleshoot software-related issues without loading potentially problematic drivers or applications.
- Accessing Safe Mode: Power on your Inspiron 17. As Windows attempts to load, repeatedly press the F8 key (or Shift + F8) during startup. This will open the Advanced Boot Options menu. Select "Safe Mode" or "Safe Mode with Networking."
- Driver Rollback: If the boot problem began recently, consider rolling back recently installed drivers. In Safe Mode, navigate to Device Manager (search for it from the Start menu) and roll back any suspect driver updates.
- System Restore: From Safe Mode, you can launch System Restore (search for it from the Start menu) and revert your system to a previous working state. This can undo recent software installations or configurations that may be causing the boot failure.
3. Bootable Media: The Repair Toolkit
A bootable USB drive or DVD containing the Windows installation files is an indispensable tool for fixing boot problems.
- Creating Bootable Media: If you don't already have it, download the Windows installation media from the Microsoft website. Use the Media Creation Tool to create a bootable USB drive or a DVD.
- Booting from the Media: Insert the USB drive or DVD into your DELL Inspiron 17. Restart the laptop and enter the BIOS setup. Change the boot order to prioritize the USB drive or DVD. Save the changes and restart.
- Repairing Windows: When prompted, choose the "Repair your computer" option. This provides advanced options such as Startup Repair, System Restore, and Command Prompt.
- Startup Repair: This automated tool can fix common boot problems.
- System Restore: Restore your system to an earlier state using the System Restore tool.
- Command Prompt: Use the Command Prompt for advanced troubleshooting. Execute commands like
bootrec /fixmbr,bootrec /fixboot, andbootrec /scanosto repair the Master Boot Record (MBR) and boot sector. These commands rebuild the boot configuration data.
4. The Clean Install Option: A Fresh Start
If all else fails, a clean install of Windows might be the only way to resolve the issue. This will erase all data on your hard drive, so back up your important files before proceeding, if possible.
- Boot from Installation Media: Boot from the bootable USB drive or DVD, as described above.
- Custom Installation: Choose "Custom: Install Windows only (advanced)."
- Drive Partitioning: Select the drive where Windows is installed, and format it if necessary.
- Operating System Installation: Proceed with the Windows installation, following the on-screen prompts.
Preventative Measures: Maintaining a Healthy Boot Sequence
Once your DELL Inspiron 17 is back in action, implement these practices to minimize the chances of future boot problems:
- Regular Backups: Back up your important files and data regularly. This ensures you can recover your data in case of a hardware failure or other disaster.
- Antivirus Vigilance: Install and maintain robust antivirus software.
- Driver Prudence: Update your drivers judiciously. Only install drivers from trusted sources.
- Clean Shutdowns: Always shut down your laptop properly.
- Optimize Your Hard Drive: Regularly perform disk cleanup, disk defragmentation (for mechanical hard drives), and other maintenance tasks to optimize your hard drive's performance and organization.
- Monitor Temperatures: Ensure proper cooling to prevent overheating.
- Avoid Physical Trauma: Protect your laptop from physical shocks or spills.
By meticulously following this guide, you'll not just overcome the DELL Inspiron 17 boot problem but also gain valuable skills to diagnose and remedy future computing challenges. Your laptop will soon be back to its essential role as your reliable digital companion.
