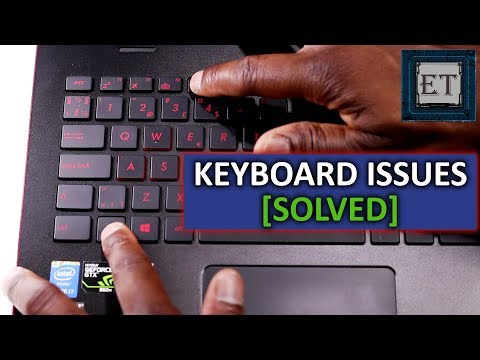
what to do when the laptop keyboard is not working

Title: How to Solve Keyboard Keys Not Working shorts keyboard pc
Channel: TonaziTube
How to Solve Keyboard Keys Not Working shorts keyboard pc by TonaziTube
what to do when the laptop keyboard is not working, what to do when laptop keyboard is not working properly, what to do when laptop keyboard is not working dell, what to do when laptop key is not working, what to do when hp laptop keyboard is not working, what to do when lenovo laptop keyboard is not working, what to do when laptop keypad is not working, what to do when one key on the laptop keyboard is not working, what to do when your lenovo laptop keyboard is not working, what to do if laptop keyboard is not working properly
Laptop Keyboard Dead? 😱 FIX It NOW! (Easy Steps)
Laptop Keyboard Catastrophe? Don't Panic! Here's How to Get Typing Again
So, your laptop keyboard decided to take an unscheduled vacation? That sinking feeling is totally relatable. You're staring at a frozen screen, the cursor mockingly blinking, and the digital world, with all its emails and entertainment, feels tantalizingly out of reach. But breathe. Before you start pricing out a new machine, there's a good chance we can resurrect those stubborn keys. Let’s dive into some troubleshooting!
Step 1: The Obvious (But Often Overlooked) Checklist
Firstly, let's tackle the easiest fixes. They're often the culprits, and they’re simple to check.
Is It Plugged In? Seriously. Especially if you’re using an external keyboard. Ensure the receiver is firmly connected to a USB port.
Power Up! Many laptops have on/off switches for the keyboard. Usually involving a function key and a lock icon. Double-check you haven't accidentally deactivated it.
Restart, Restart, Restart! This is the digital equivalent of a good night's sleep. Rebooting your laptop clears out temporary glitches. Because sometimes, a fresh start is all you need.
Check for Sticky Keys: Food crumbs, dust, and who-knows-what-else can lodge themselves under the keys. Use compressed air (gently!) or a soft brush to dislodge any debris. This is crucial.
Step 2: Software Shenanigans – Diagnosing the Underlying Problems
If the initial steps don’t revive your keyboard, you should explore the software side. Moreover, there’s several things to examine.
Driver Dilemmas: Outdated, corrupted, or missing keyboard drivers can cripple functionality. Fortunately, updating drivers is usually straightforward. Navigate to Device Manager (search for it in the Windows search bar). Locate your keyboard. Right-click and update the driver. Follow the prompts. You can expect success.
Filter Keys Follies: Filter Keys are a Windows accessibility feature. It's designed to ignore brief or repeated keystrokes. Occasionally, it can interfere with keyboard operation. To disable, search for "Ease of Access Keyboard settings." Then, turn off Filter Keys.
Language Settings Labyrinth: Incorrect language settings can lead to misinterpreting keystrokes. Verify your keyboard language settings. Go to Settings > Time & Language > Language. Confirm your preferred language is at the top. If it's not, add it and set it as default. This step is important.
Step 3: Hardware Hurdles - When Things Get Physical
Now, if software fixes fail, we confront potential hardware problems. This is where things get a little more involved.
External Keyboard Test: Connect an external USB keyboard. If that works, the issue almost certainly lies with your laptop's built-in keyboard. This will help you narrow things down.
Keyboard Connector Capers: The keyboard connects to the motherboard via a small cable. Over time, this cable can become loose or disconnected.
DIY Detective Work (With Caution): This is where you need to exercise extreme care. If you're comfortable with small electronics, researching your laptop model’s disassembly. Then, turn off and unplug your laptop. Remove the battery. Carefully open the laptop's case (consulting online guides is a must!). Locate the keyboard cable. Re-seat the connector. Ensure it's firmly in place. At this point, cautiously reassemble your laptop.
Step 4: The Tech Support Tango – When You Need Backup
If you've exhausted these steps, it’s time to seek professional help.
Local Repair Shops: Independent computer repair shops are often a good bet. They may offer faster turnaround times and more personalized service than the big box stores. Find a reliable shop.
Manufacturer Support: Contact your laptop’s manufacturer. They can offer specific troubleshooting steps for your model. They may also have repair options, perhaps under warranty.
Online Forums and Communities: There's a wealth of knowledge on online forums. Search for your laptop model. Ask questions. Other users may have encountered the same issue. You might find the answer you need.
The Final Word: Don’t Give Up!
A dead keyboard can be frustrating. But don't despair. In most cases, it's a solvable problem. Working through these steps systematically can often bring you back to typing bliss. So, grab your virtual toolkit. Get ready to troubleshoot. Moreover, remember to take breaks. Finally, breathe. You've got this!
Laptop Party Crash? Fix Your House Party NOW!Laptop Keyboard Dead? 😱 FIX It NOW! (Easy Steps)
Ever stared at your seemingly perfect laptop screen, ready to churn out that epic email or dive into a late-night gaming session, only to be met with…silence? 😩 Your keyboard, that trusty companion, has suddenly decided to take a vacation. Don't panic! We've all been there. It's like your digital right hand has decided to stage a sit-in. But before you start envisioning the dreaded tech repair shop, let's explore some easy fixes. We're going to troubleshoot this keyboard catastrophe together, and trust me, it’s often simpler than you think. Think of this as a digital first-aid kit for your laptop.
1. The Initial Diagnosis: Is It Really Dead? 🤔
Before we start tearing things apart, let’s make sure the keyboard is actually the culprit. It's like assuming the garden hose is broken just because the sprinkler isn't working – there might be a blockage elsewhere.
Restart: The classic, the go-to, the "have you tried turning it off and on again?" First, give your laptop a full restart. Sometimes, the keyboard gets temporarily glitched, and a simple reboot can work wonders. Think of it as hitting the "reset" button on your brain after a long day.
External Keyboard Test: Got an external keyboard lying around? Plug it in. If that one works, we’ve confirmed the keyboard problem is indeed internal. If the external keyboard also fails, it's likely a system-wide issue, pointing towards software rather than hardware.
Check Caps Lock & Num Lock: Do the Caps Lock or Num Lock indicator lights respond when you press those keys? If they don't, the problem is likely deeper. If they do light up, but no other keys work, it could be a driver issue (more on that in the next section!).
2. Software Shenanigans: Drivers and Updates 💻
Okay, so the keyboard is the problem, but the external one works, and the indicator lights are behaving. Let’s dive into the software side of things.
Driver Check: Your laptop’s keyboard, like any piece of hardware, needs a driver – a translator between the keyboard and the operating system. The driver might be corrupted or outdated. Here’s how to check:
- Windows: Right-click the Start menu, select "Device Manager." Expand "Keyboards." If you see a yellow exclamation mark next to your keyboard, you've got a driver problem. Right-click the keyboard, select "Update driver." Let Windows find the best driver.
- Mac: While Macs generally handle drivers automatically, sometimes, after an OS update, things get wonky. Go to "System Preferences," then "Keyboard." Make sure "Keyboard Shortcuts" are not, somehow, interfering with your typing.
System Updates: Ensure your operating system (Windows or macOS) is up-to-date. These updates often include crucial driver updates and bug fixes that can magically revive a dead keyboard. It's like giving your computer a shot of digital adrenaline!
3. The Sticky Situation: Crumbs, Craziness, and Cleansing 🧼
Sometimes, the fix is as simple as a good spring cleaning! Let’s address the obvious – are there crumbs, dust bunnies, or sticky substances jamming up your keyboard's circuits? Imagine trying to run a marathon with a rock in your shoe – it's not fun!
Gentle Blow: Turn your laptop upside down and give it a good, gentle blow. Use a can of compressed air (carefully!) to blast away any visible debris. Don't get too aggressive! Think of it as a gentle digital massage.
Isopropyl Alcohol (IPA) Intervention: Using a q-tip lightly dampened with isopropyl alcohol (70% or higher – avoid water!) and gently wipe around the keycaps. This can help dissolve sticky residue. Important: Disconnect the power and turn off your laptop first.
Keycap Removal (Proceed with Caution): If you're comfortable, you can carefully remove the keycaps to give a deeper cleaning. This is a more advanced step and may void your warranty. Look for tutorials specific to your laptop model online. Just remember – patience is key!
4. Hardware Hurdles: The Keyboard Connection 🔌
Okay, we've cleaned, we've updated drivers – but still, nothing? Let’s move into the hardware realm. This is a bit trickier, but it's often fixable.
Internal Connection Check (For Tech-Savvy Users): This is for those who are comfortable with disassembling and reassembling electronics. If you are not comfortable with this, do not attempt it, and seek an expert. Your keyboard connects to the motherboard via a ribbon cable. Carefully open your laptop (consult your laptop's service manual or online guides – iFixit is your friend!), locate the keyboard connection, and ensure the cable is firmly seated. Sometimes, it can become loose.
The Dreaded Liquid Spill: Did you recently spill something on your keyboard? Even a tiny amount of liquid can wreak havoc. Disconnect the power IMMEDIATELY. Try the IPA cleaning, but if the spill was significant, corrosion might be the problem. You may need professional help (or a new keyboard).
5. External Factors: The Peripheral Perplexities 🖱️
Sometimes, the issue isn’t your keyboard itself but how your system interacts with it. External factors can also play a role.
Conflict with Third-Party Software: Some software, especially those related to accessibility, might interfere with keyboard functions. Try booting your laptop in Safe Mode (see instructions online for your specific operating system) to see if the keyboard works then. If it does, a program is the culprit.
Malware Mayhem: In rare cases, malware can disable keyboard input. Run a full scan with your antivirus software.
6. The Ultimate Last Resort: Keyboard Replacement ⌨️
If you've tried everything, and your keyboard is still unresponsive, the unfortunate reality is that it may be time for a replacement.
- DIY Replacement: Replacing a laptop keyboard is often less daunting than you might think. Find a replacement keyboard compatible with your laptop model (search online using your laptop's model number). Follow online instructions (again, iFixit is a great resource) carefully.
- Professional Repair: If you're not comfortable with replacing the keyboard yourself, or if you're unsure about the extent of the damage, take your laptop to a qualified repair shop.
7. Preventative Measures: Keeping Your Keyboard Happy 😊
Prevention is always better than cure! Here are a few tips to keep your keyboard in tip-top shape:
- Regular Cleaning: Wipe down your keyboard regularly with a microfiber cloth to remove dust and debris.
- Avoid Eating/Drinking Over It: This is the golden rule! Keep food and drinks away from your laptop.
- Consider a Keyboard Cover: A silicone keyboard cover can protect against spills and dust.
8. Beyond the Basics: Specialized Keyboard Issues 🕹️
Some keyboard problems are very specific. For example, laptop specific keys such as volume up or down, brightness, and others, might not work.
- Function Key Quirks: Function keys (Fn keys) share functions with the F1–F12 keys (volume, brightness, etc.). Check if the Fn key is stuck or malfunctioning. Sometimes, there are settings in BIOS/UEFI (accessed during startup) to toggle the Fn key behavior.
- Gaming Keyboard Woes: If you're a gamer, your keyboard might be suffering from ghosting or key rollover issues. These can be software issues, or caused by the internal hardware. Solutions include: updating the keyboard drivers, checking for keyboard shortcut conflicts, and ensuring the keyboard controller doesn't have a configuration issue.
9. Troubleshooting with Troubleshooting Tools 🛠️
For advanced users, there are tools to help you diagnose the issue.
- Keyboard Test Websites: There are online sites where you can test individual keys to check if they are working, so you can identify which keys are not working.
10. Windows-Specific Solutions 💻
Windows is the most popular operating system. But the issues can be specific to Windows.
- Windows Troubleshooter: Windows has a built in keyboard trouble-shooter. Go to Settings > System > Troubleshoot > Other trouble-shooters > Keyboard and run the keyboard troubleshooter. It can automatically detect and fix some issues.
11. Mac-Specific Solutions 🍎
Macs have their own quirks.
- Check for External Interference: Ensure there's nothing attached that might be causing a problem, like USB hubs or other peripherals.
- Resetting SMC and NVRAM/PRAM: These are more advanced troubleshooting steps, but can fix potential issues. You can find instructions online for your specific Mac model.
12. The Role of BIOS/UEFI ⚙️
Sometimes, the problem may be at the BIOS level.
- Check BIOS Settings: BIOS/UEFI settings (accessed during startup) can be altered. Make sure there are no settings that interfere with your keyboard.
13. Avoiding Keyboard Damage 🛡️
- Invest in a laptop case or sleeve: This protects your laptop.
- **Don
How to Fix Laptop Keyboard Not Working Windows 11, 10, 8, 7
By EasyTechs How to Fix Laptop Keyboard Not Working Windows 11, 10, 8, 7 by EasyTechs
How to Fix Some Keys Not Working on Laptop Keyboard Keyboard Not Working

By Tech White How to Fix Some Keys Not Working on Laptop Keyboard Keyboard Not Working by Tech White
How To Fix Troubleshoot Laptop Computer Key, Keys, or Keyboard Not Working

By PC Monkey How To Fix Troubleshoot Laptop Computer Key, Keys, or Keyboard Not Working by PC Monkey

Title: '' at key Shift2 Not Working. Typing Wrong Character on Windows 10
Channel: Laiju RK
'' at key Shift2 Not Working. Typing Wrong Character on Windows 10 by Laiju RK
Laptop Wifi Connect
Laptop Keyboard Dead? 😱 Revive Your Input - A Comprehensive Troubleshooting Guide
Have you ever stared at your laptop screen, fingers poised above the keys, only to be met with frustrating silence? A non-responsive keyboard can transform your productivity from a swift river into a stagnant pond. Panic might set in, but before you consider drastic measures, breathe a deep sigh of relief. We're going to navigate the labyrinth of keyboard malfunctions, offering expert guidance and actionable solutions to breathe life back into your laptop’s input. This isn't a quick fix checklist; it's an in-depth exploration designed to equip you with the knowledge to diagnose and conquer the problem at hand.
Pinpointing the Problem: Is It the Keyboard Itself?
Before you embark on a repair journey, it’s critical to accurately pinpoint the source of the issue. Is it purely the keyboard? The failure could stem from external factors like software glitches or hardware conflicts. Let's methodically assess.
External Keyboard Test: The Quickest Diagnostic
The first and most immediate test involves connecting an external keyboard. This simple maneuver will instantly provide you with crucial data.
- Success Indicator: If an external keyboard works flawlessly, the problem very likely resides within your laptop's integrated keyboard. This narrows down your focus considerably.
- Troubleshooting: If the external keyboard doesn't respond, the issue might be more systemic, suggesting a wider hardware or software problem. Check your USB ports or Bluetooth if the external keyboard is wireless.
Boot-Up Blues: Does the Keyboard Function at Startup?
The BIOS (Basic Input/Output System) is your laptop's core software, functioning independently of your operating system. This is important. Most laptops allow keyboard input during the BIOS stage (accessed by pressing keys like Del, F2, F12 during startup).
- BIOS Test: Restart your laptop and repeatedly press the key that allows you to enter the BIOS (check your laptop's manual). Attempt to navigate the BIOS menus using the arrow keys and Enter.
- Interpretation: If the keyboard works within the BIOS, the problem is likely a software or driver issue. If the keyboard fails here, it strongly indicates a hardware problem.
Software Conflicts: The Driver's Dilemma
Drivers are the software bridges connecting your operating system to your hardware. Corrupted or outdated keyboard drivers can render your input device useless.
- Device Manager Inspection: Access the Device Manager (search for it in the Windows search bar or locate it in the Control Panel). Expand the "Keyboards" section.
- Driver Status Check: Look for any yellow exclamation marks or error symbols next to your keyboard. These flags signify driver problems. Right-click on the keyboard device and select "Update driver." Choose "Search automatically for drivers."
- Reinstalling the Driver: If updating doesn’t work, try uninstalling the keyboard driver and rebooting your laptop. The operating system will attempt to reinstall the driver automatically.
Hardware Hurdles: Delving Into the Keyboard Itself
If the diagnosis points to a hardware issue, it’s time to get hands-on. Be cautious, take your time, and follow these steps.
External Debris and Sticky Situations
Sometimes, the simplest solutions are the most effective. Dust, crumbs, and spilled liquids are the keyboard’s worst enemies.
- Gentle Cleaning: Turn your laptop off and unplug it. Use compressed air to dislodge debris trapped between the keys. Turn the laptop upside down and gently shake it to remove loose particles.
- Keycap Removal: If you suspect a specific key is causing problems, you can carefully remove its keycap (use a small, flat tool like a spudger or a thin credit card). Clean the underlying mechanisms with isopropyl alcohol on a cotton swab. Allow it to dry completely before reassembling.
The Internal Connection: Examining the Keyboard Cable
The keyboard connects to the motherboard via a delicate ribbon cable. A loose or damaged cable can disrupt the signal.
- Caution: The procedure described below may void your laptop's warranty. Consult your laptop's manual or a professional before proceeding if you are unfamiliar with internal components.
- Accessing the Keyboard Cable: Power down your laptop and unplug it. Remove the battery (if removable). Consult your laptop's service manual for instructions on accessing the keyboard. This usually involves removing screws from the bottom of the laptop.
- Ribbon Cable Inspection: Once you've accessed the keyboard, locate the ribbon cable connecting it to the motherboard. Carefully detach the cable and reattach it. Ensure it's firmly seated in its connector. Inspect the cable for any signs of damage (tears, kinks).
- Professional Assistance: If you're uncomfortable with this step, or if you see damage to the cable, it's best to seek professional repair.
Liquid Damage: The Aftermath and Recovery Attempts
Spilled liquids are a mortal threat to electronics. Time is of the essence. The following actions may prevent further damage.
- Immediate Action: Immediately shut down and unplug your laptop. Remove the battery if possible. Turn the laptop upside down to drain any liquid.
- Drying Process: Allow your laptop to dry completely. Place it in a well-ventilated area for at least 48 hours or more. Do not use a hairdryer or oven, as these can cause irreversible damage.
- Professional Intervention: Liquid damage often corrodes components. Contact a qualified repair technician to assess the extent of the damage and clean any affected parts.
Software Solutions: Tweaking and Troubleshooting
Sometimes, the problem isn't physical; it's digital. Certain software settings could be causing your keyboard to behave oddly.
Filter Keys and Sticky Keys: The Accessibility Settings
Windows includes accessibility features that can interfere with keyboard functionality if misconfigured.
- Disable Interference: Go to the Control Panel and search for "Ease of Access". Select "Make the keyboard easier to use." Ensure that "Filter Keys," "Sticky Keys," and "Toggle Keys" are disabled.
- Testing: After disabling these settings, restart your laptop and test the keyboard.
Keyboard Layout and Language: Check the Fundamentals
A mismatch between your physical keyboard and your operating system's language settings can lead to seemingly random key outputs.
- Language and Region Settings: In Windows, go to "Settings" > "Time & Language" > "Language." Verify that the correct language is selected for your keyboard layout.
- Layout Verification: Click on the language and ensure it's set to the correct keyboard layout (e.g., US QWERTY).
- Troubleshooting: If the keyboard is still unresponsive, check if it's the physical keyboard's fault. Connect an external keyboard to your system and check if it's a problem with the physical keyboard.
System Restore: Rolling Back in Time
If the keyboard problem appeared after installing new software or making system changes, a system restore might be a viable solution.
- Access System Restore: Search for "Create a restore point" in the Windows search bar. Click on "System Restore."
- Choose a Restore Point: Select a restore point from a date before the keyboard issue began. Follow the on-screen prompts.
- Data Preservation: System Restore won't affect your personal files, but it will uninstall programs and drivers installed after the selected restore point.
When to Seek Professional Help
While this guide provides extensive troubleshooting steps, some problems demand professional attention.
- Deep Hardware Issues: If your keyboard is physically damaged, the ribbon cable is irreparably broken, or liquid damage is severe, a professional repair is likely necessary.
- Motherboard Problems: If the keyboard consistently fails in the BIOS and an external keyboard also fails, the issue may lie on the motherboard.
- Lack of Confidence: If you are not comfortable opening your laptop or performing hardware repairs, do not hesitate to seek expert help. Incorrect repairs can cause more damage.
