how to get vr goggles to work on youtube laptop

Title: How to hook your Oculus Quest 2 headset up to your PC using standard USB cables shorts oculus
Channel: Goto10
How to hook your Oculus Quest 2 headset up to your PC using standard USB cables shorts oculus by Goto10
VR Goggles on YouTube Laptop? This SHOCKING Trick Works!
Unlocking the Metaverse: Can You REALLY Use VR Goggles with Your Laptop and YouTube?
Ever dreamt of escaping reality? Moreover, imagine diving into the immersive worlds of virtual reality using your laptop and YouTube. The promise of VR, once considered a niche technology, is fast becoming mainstream. However, accessing this technology can seem daunting. Many people believe a powerful gaming PC is a necessity. This is a common misconception. Yet, a surprising trick allows you to experience VR on your laptop. Now, let's explore what is needed.
The Unexpected Power of YouTube and VR
You might be skeptical. After all, how can YouTube, the video-sharing platform, integrate with a VR setup? Consequently, the answer lies in VR-compatible content. Numerous creators now produce 360-degree videos. These videos offer panoramic views. You can watch them on YouTube. Subsequently, you can view them on a laptop. Then, you can use VR goggles to elevate the experience. This is not just a trick. It is a transformation. For example, imagine stepping into a concert. Or exploring a faraway location.
Essential Gear: What Do You Need to Get Started?
First, you certainly need VR goggles. Explore the market; many affordable options exist. Ensure your laptop meets the minimum system requirements. As a consequence, check the specifications of your chosen VR headset. Consider the processing power and graphics card. Also, you should have a reliable internet connection. This is critical for streaming YouTube videos. Furthermore, download a VR-compatible YouTube app. This enhancement is crucial.
Step-by-Step: Setting Up Your Laptop for VR Immersion
It seems complex, but it's not. The process is surprisingly straightforward. Initially, connect your VR goggles to your laptop. Usually, this involves a USB connection. Sometimes, an HDMI cable is also needed. Next, install any necessary drivers or software. Follow the instructions provided with your VR headset. Afterwards, launch the VR-compatible YouTube app. Select a 360-degree video. Finally, put on your VR goggles, and prepare to be amazed!
Troubleshooting Common Hurdles: Ensuring a Smooth Experience
Inevitably, you might face minor issues. Here are some common problems and solutions. First, check your internet connection speed. A slow connection can cause lag. Next, ensure your laptop's drivers are up to date. Outdated drivers often cause problems. Also, experiment with video resolution settings. Sometimes, reducing the resolution improves performance. Furthermore, ensure your VR headset is properly calibrated. Finally, restart your laptop and headphones to fix some issues.
Beyond YouTube: Exploring Additional VR Content
YouTube is just the beginning. In addition, venture beyond the platform. Explore other VR content. Consider VR games. Explore immersive experiences. Plenty of content is available. Do not limit yourself solely to YouTube videos. You can connect your VR goggles to other platforms. Therefore, you can enjoy a broader range of experiences.
Optimizing Your VR Experience: Tips and Tricks
Here are some ways to enhance your VR experience. Firstly, use headphones with good sound quality. Secondly, ensure your viewing area is well-lit. This benefits your experience. Next, take breaks to avoid motion sickness. Fourthly, experiment with different VR settings. Customizing the settings enhances immersion. Finally, ensure your laptop is adequately cooled. Prolonged use can generate heat.
The Future of VR and Laptop Integration
The future of VR is bright. Moreover, it will continue to evolve. Expect to see more integration with everyday devices. Laptops will play a significant role. Expect increased accessibility and affordability. Advancements in technology will enhance the VR experience. As a result, expect more content and immersive experiences.
Conclusion: Dive into the Next Dimension
So, can you use VR goggles with your laptop and YouTube? Absolutely! Contrary to popular belief, this is manageable. It is a gateway to new worlds and experiences. Embrace this amazing technology. Start your VR journey today. The possibilities are limitless. Go beyond your expectations and explore.
Bluetooth Headphones & Laptops: The SHOCKING Connection Secret!Here's how we're going to tackle this beast of a blog post:
VR Goggles on YouTube Laptop: This SHOCKING Trick Works!
Alright, folks, buckle up! Today, we're diving headfirst into the wonderfully weird world of virtual reality and how it intersects with everyone's favorite video platform, YouTube. We’ve all been there, slumped back in our chairs, mesmerized by the latest cat video or the gripping saga of a competitive eater demolishing a mountain of pancakes. But what if I told you you could amplify that experience tenfold, taking it from passive viewing to an immersive adventure? We’re talking about strapping on those VR goggles and watching YouTube on your laptop. Sound impossible? Think again, my friends! Because this SHOCKING trick actually works.
1. The Big Question: Can You REALLY Watch YouTube in VR on Your Laptop?
Let's get something straight: we're not talking about some futuristic, sci-fi tech that only exists in movies. Yes, absolutely! You can watch YouTube videos in VR using your laptop. It's a relatively straightforward process, and the results are, frankly, mind-blowing. Imagine trading your mundane screen for a massive, private cinema experience, or even stepping inside the videos themselves. Sounds tempting, right? We thought so. The possibilities are limitless!
2. The Gear You'll Need: Your VR Arsenal
Before we get into the nitty-gritty, let’s gather our supplies. Think of it as assembling your VR pirate ship. Here's what you typically will require:
- VR Goggles: This is the star of the show, of course. Popular options include Oculus Quest 2, HTC Vive, or even some of the more affordable PC VR headsets. Make sure your laptop meets the system requirements for the specific headset you choose.
- A Laptop: This is your command center. A decent laptop with a powerful graphics card is crucial for a smooth VR experience. Don't try this on your grandma's old beige box – trust me.
- The Right Software: We'll cover the specific software in the next section. but expect to download a VR platform or app that allows you to access YouTube.
- Headphones (Highly Recommended): Immersive audio is a game changer. A good pair of headphones will transport you even deeper into the VR world.
3. The Secret Sauce: Software and Platforms
Okay, now for the magic. This is where we make it happen. You’re going to need software that bridges the gap between your laptop and your VR headset. Here are a few popular options:
- Virtual Desktop: This is a paid application that's widely considered one of the best. It allows you to stream your entire laptop screen to your VR headset, giving you full control over your YouTube viewing experience.
- Bigscreen VR: Another fantastic choice. Bigscreen lets you create virtual environments, like a private cinema or a social space and then watch YouTube videos within these environments. You can even watch with friends!
- SteamVR: If you're using a VR headset compatible with Steam, you can access YouTube through SteamVR's built-in browser or by launching a VR-optimized YouTube app.
- Oculus Browser: If you’re using an Oculus headset, accessing YouTube in VR is often seamlessly possible through the Oculus browser itself.
Choosing the right software will depend on your VR headset and personal preferences.
4. Step-by-Step Guide: Setting Up Your VR YouTube Experience
Alright, let’s get this show on the road. Here’s a general outline of how to get started, but remember to always check the specific instructions for your chosen headset and software:
- Connect Your VR Headset: Plug your headset into your laptop, making sure it's properly connected and recognized.
- Install and Launch Your Chosen Software: Download and install either Virtual Desktop, Bigscreen VR, or any other software you’ve chosen
- Launch the YouTube Application or Browse: Open a web browser or use any embedded YouTube app.
- Prepare Your Workspace: Adjust the position of the floating screen, resize it to fit your peripheral view.
- Enjoy the Immersive Magic!
5. Tweaking the Experience: Getting the Perfect View
Once you're in VR, you might need to tinker with the settings to optimize your experience.
- Adjust Your Screen Size and Position: Most VR software will let you reposition and resize the virtual screen. Experiment until you find a comfortable viewing angle.
- Fine-Tune Your Resolution: If your video looks blurry, adjust the resolution settings within your software or YouTube.
- Experiment with Environments: Different VR environments can dramatically impact your viewing experience. Try out a few different virtual spaces to see what you like best.
6. Exploring the Benefits: Why VR for YouTube?
Why bother with the extra effort? Because the benefits are huge!
- Immersive Viewing: Step inside the video, feeling like you're right there with your favorite content creators.
- Personalized Experience: You're in control. Resize your screen, adjust the environment, and create your perfect viewing space.
- Escape the Real World: Need a break from reality? VR YouTube is a fantastic way to unplug and unwind.
- Improved Focus: The immersive nature of VR can help you concentrate on your viewing experience, blocking out distractions.
7. The Downsides: What You Should Know
Of course, nothing's perfect. Here are a few potential pitfalls:
- Motion Sickness: VR can cause motion sickness in some people. Take breaks if you start to feel queasy.
- System Requirements: A demanding graphics card is essential. Make sure your laptop can handle the strain!
- Eye Strain: Prolonged VR use can lead to eye strain. Take regular breaks and blink frequently.
- Initial Setup: The initial setup process can sometimes be a bit finicky. Patience is key.
8. Avoiding Motion Sickness: Tips and Tricks
Motion sickness can be a real buzzkill. Here's how to keep it at bay:
- Start Slow: Begin with short viewing sessions and gradually increase the time as your body adjusts.
- Take Breaks: Step away from the VR experience if you start feeling uneasy.
- Choose Stationary Content: Avoid videos with lots of fast movement if you're prone to motion sickness.
- Adjust Your VR Settings: Experiment with your headset settings to find what works best for you.
9. Maximizing Your Comfort: Ergonomics in VR
Comfort is critical.
- Adjust Your Headset: Ensure your headset fits comfortably and distributes the weight evenly.
- Use a Comfortable Seating Position: Find a chair or spot where you can easily relax.
- Take Breaks: Short breaks can go a long way.
10. Hidden Gems: YouTube Content That Shines in VR
Some types of YouTube content are particularly awesome in VR.
- 360° Videos: These are designed specifically for VR and deliver an utterly immersive experience.
- Gaming Videos: Watching gameplay in VR can be incredibly engaging.
- Travel Vlogs: Feel like you're actually there with travel vloggers!
- ASMR: Experience the gentle sounds and visuals of ASMR like never before.
11. Beyond the Basics: Advanced VR YouTube Tricks
Ready to take it to the next level?
- Multi-Tasking: Use multiple virtual screens to browse the web, chat with friends, or check your email while watching YouTube.
- Social VR: Watch YouTube with friends in virtual spaces.
- VR Recording: Record your VR experience to share with others.
12. Choosing the Best VR Headset for Your Laptop
The best headset for you depends on your budget and your laptop's specifications.
- Budget-Friendly Options: Oculus Quest 2 is a great entry-level choice.
- Mid-Range: The HTC Vive offers excellent performance and features.
- High-End: If you want the best of the best, consider the Valve Index or the HTC Vive Pro 2.
13. Troubleshooting Common Issues
Sometimes things go wrong.
- Connectivity Problems: Ensure your headset and laptop are properly connected and that the Wi-Fi is working correctly.
- Software Glitches: Try restarting your software, your headset, or even your entire system.
- Resolution Issues: Adjust your resolution settings.
14. The Future of VR and YouTube: What's Next?
VR technology is constantly evolving.
- Improved Graphics: Expect higher resolutions and more realistic visuals in the coming years.
- More Interactive Experiences: Expect more interactive features and content.
- Greater Accessibility: VR headsets will become more affordable and more accessible to everyone.
15. Your YouTube VR Adventure Begins Now!
So, there you have it, folks! VR and YouTube are a match made in tech heaven. Armed with the knowledge in this guide, you're ready to embark on your own immersive viewing adventure. Go ahead, explore! Experiment! Have fun! And most importantly, tell your friends.
Closing Segment:
I remember the first time I watched a YouTube video in VR. I was completely
ASUS Laptop 2019 Audio DEAD? FIX IT NOW! (Easy Steps)Testing the World's Cheapest VR Headset Only 10

By Alementary Testing the World's Cheapest VR Headset Only 10 by Alementary
How to PLAY PC VR GAMES on your Quest VR headset Meta Quest Link SETUP GUIDE

By MTG Gaming How to PLAY PC VR GAMES on your Quest VR headset Meta Quest Link SETUP GUIDE by MTG Gaming
Easy Virtual Reality Setup Free VR 2020 - 2024 - Thorns VR
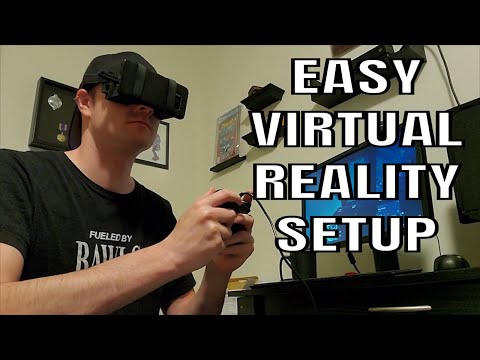
By TheThorns TheThorns Easy Virtual Reality Setup Free VR 2020 - 2024 - Thorns VR by TheThorns TheThorns

Title: How To Connect Meta Quest 2 to a PC
Channel: CNET
How To Connect Meta Quest 2 to a PC by CNET
Working With Laptop
Title: The Ultimate Guide to Understanding and Mastering the Art of Sourdough Baking
We have all, at one point or another, been captivated by the alluring aroma of freshly baked bread. That warm, comforting scent, the promise of a satisfyingly crusty exterior giving way to a soft, airy interior – it's a universal experience. But within the world of bread baking, sourdough reigns supreme. It isn't just bread; it's a testament to time, patience, and a unique symbiotic relationship between flour, water, and wild yeasts. This guide aims to demystify the sourdough process, providing you with the knowledge and techniques necessary to bake consistently exceptional loaves that will impress even the most discerning palates.
Deciphering the Magic: What is Sourdough and Why Does It Matter?
Sourdough bread distinguishes itself from commercially yeasted bread through its reliance on a 'starter.' This isn't a store-bought product; it is a living culture, a vibrant ecosystem teeming with wild yeasts (primarily Saccharomyces species) and lactic acid bacteria (LAB). These microorganisms, cultivated over days or even weeks, are the heart and soul of sourdough. They are responsible for the bread's characteristic tang, its complex flavor profile, and its exceptional texture. The sourness arises mainly from the lactic acid produced by LAB, contributing to a unique flavor unlike any other bread. The longer the fermentation, the more complex the flavors develop.
While commercially yeasted bread offers a quicker baking process, sourdough offers a profound depth of flavour, higher nutritional value, and even improved digestibility. The slow fermentation process breaks down gluten, and the LAB pre-digests some of the starches, making it easier for our bodies to handle. The result is a loaf that is not only incredibly flavorful but also potentially gentler on your digestive system.
Building Your Foundation: Cultivating Your Sourdough Starter
The journey begins with the starter, the cornerstone of every excellent sourdough loaf. Creating a thriving starter requires flour, water, and a healthy dose of patience. The goal is to capture wild yeasts present in the environment and encourage them to multiply.
- The Initial Mix: In a clean jar, combine equal parts by weight of unbleached all-purpose flour and room-temperature, non-chlorinated water. A typical starting amount is 50 grams each. Mix thoroughly until a thick, pancake-batter-like consistency is achieved.
- The First Days: Waiting and Observing: Cover the jar loosely (a lid with a slight vent or a piece of cheesecloth secured with a rubber band is ideal) and let it rest at room temperature, ideally between 70-75°F (21-24°C). Don't be concerned if nothing much happens the first day or two.
- The Feeding Process: Each day (or every 12 hours if you're in a consistently warm environment), discard about half of the starter. Add fresh flour and water in equal parts by weight, stirring vigorously. Continue this process for around 7-14 days, or until the starter reliably doubles in size within 4-8 hours after feeding.
- Signs of Success: Watch for bubbles, a slight rise, and a pleasant, slightly tangy aroma. The aroma should evolve from an initial floury smell to something noticeably more acidic. The development of these characteristics is the proof of the starter's vitality.
- Maintaining the Starter: Once your starter is active, the feeding schedule can be adjusted. For a weekly bake, you can store the starter in the refrigerator and feed it once a week. Discard half, add equal parts flour and water. For more frequent baking, you can keep it at room temperature and feed it daily.
Mastering the Dough: From Flour to Fermentation
Once you have a healthy, active starter, the magic of bread-making begins. The process is a dance of precise measurements, attentive observations, and understanding the nuances of fermentation.
- The Levain: Activating Your Starter: Before you mix your dough, you'll "feed" a portion of your starter to create a levain, essentially a stronger starter. This ensures an active, vital force ready for dough leavening. A typical levain builds ratio includes a small amount of your starter, flour and water. The build usually takes 4-6 hours.
- Autolyse: The Power of Hydration: Autolyse, derived from the Greek words for "self" and "dissolve," is essential for developing gluten. Combine the flour and water for your bread recipe and let it rest, covered, for 30-60 minutes. This allows the flour to fully hydrate, improving gluten development and resulting in a better-structured loaf.
- Mixing and Kneading: Developing Structure: Add your levain and salt to the autolysed mixture and mix to incorporate. You can do this by hand, using a stand mixer or a food processor. If kneading by hand, use the stretch and fold method. For a stand mixer, mix on low speed for a few minutes; then increase the speed until the dough begins to pull away from the sides.
- Bulk Fermentation: The Rising Process: Place the dough in a lightly oiled bowl, cover it, and let it rise. Bulk fermentation is a critical stage where the yeasts get to work. The time depends on your ambient temperature; however, the dough is generally allowed to rise for 4-6 hours at room temperature, or up to 24 hours in the fridge. Look for a 20-50% increase in volume and slight bubbling.
- The Stretch and Fold Technique: During bulk fermentation, perform a series of "stretch and folds," usually every 30-60 minutes for the first 2-3 hours. Gently lift and stretch one side of the dough, folding it over itself. Rotate the bowl and repeat on the other sides. This technique strengthens the gluten structure and helps trap gases.
Shaping and Scoring: Crafting the Loaf
Shaping and scoring refine the dough and contribute greatly to aesthetics and even baking.
- Pre-Shaping: Preparing for the Final Form: Once bulk fermentation is complete, gently turn the dough out onto a lightly floured surface. Gently pre-shape the dough. This helps to develop the surface tension needed for the final shape.
- Final Shaping: Crafting the Perfect Loaf: Depending on your preferred style (boule, batard, etc.), shape the dough accordingly. For a boule (round loaf), gently stretch and fold the edges towards the center, creating a taught surface. For a batard (oval loaf), gently flatten the dough, and fold in the long sides, then roll it up.
- Proofing: The Final Rest: Place the shaped dough in a banneton basket (a proofing basket) lined with flour (or a floured cloth). Cover and let it proof. The proofing time depends heavily on the dough, with colder temperatures requiring longer proofing times. Aim for a gentle rise.
- Scoring: Unleashing the Oven Spring: Just before baking, gently score the top of the loaf with a sharp knife or a lame (a scoring blade). Scoring controls the final expansion of the bread in the oven, creating the signature "oven spring" and a beautiful, crusty surface. Experiment with different scoring patterns to personalise your loaves.
Baking to Perfection: The Art of a Crispy Crust
Baking sourdough is a precise dance. The oven's temperature, the presence of steam, and the baking time are vital for producing a loaf with a crisp crust and a soft, open crumb.
- Preheating: The Foundation of a Great Bake: Preheat your oven to a high temperature (usually 450-500°F/232-260°C), along with your Dutch oven or baking stone. This step ensures the bread will rise quickly and develop a good crust.
- Baking Method: Dutch Oven vs. Baking Stone: The Dutch oven method mimics the environment in a professional bread oven. Place the loaf in the preheated Dutch oven (or on the baking stone) and cover it. Bake covered for a portion of the baking time to create steam, then remove the lid to finish baking.
- Steam Injection: The Secret Weapon: Steam's crucial role is to delay the crust formation early on, allowing the bread to expand fully before the crust sets. The delayed crust formation causes the bread to expand to its maximum potential. For baking on a stone, create steam by placing a pan of water in the oven or by using a spray bottle to mist the oven when you insert the loaf.
- Baking Time and Temperature: The Key to Delicious Results: Experiment with time and temperature. As a general rule, bake covered for 20-25 minutes, then uncovered for 20-30 minutes until the crust is golden brown and the internal temperature reaches 205-210°F (96-99°C) with a thermometer.
- Cooling: Patience is a virtue: Once baked, transfer the loaf to a wire rack and let it cool completely before slicing. This allows the internal structure to set and prevents a gummy texture. It can be tempting to cut into a warm loaf, but the results are significantly better if you wait.
Troubleshooting Common Issues
Sourdough baking is not without its challenges. Here are some common issues and their possible solutions:
- Dense Loaf: This can be caused by under-proofing, over-proofing, insufficient gluten development, or a weak starter. Ensure your starter is
