what to do when hp laptop keyboard is not working

Title: How To Fix HP Laptop Keyboard Not Working in Windows 10
Channel: Cap Trong Nam - How To
How To Fix HP Laptop Keyboard Not Working in Windows 10 by Cap Trong Nam - How To
what to do when hp laptop keyboard is not working, what to do when your hp laptop keyboard stops working, how do you fix an unresponsive laptop keyboard, what to do when hp keyboard is not working, how to fix keyboard not working hp laptop
HP Laptop Keyboard Dead? FIX It NOW! (Easy Steps)
HP Laptop Keyboard: When Your Keys Go Silent (And How to Bring Them Back!)
It’s a moment that strikes dread in the heart of every HP laptop owner: the keyboard suddenly goes dark. The screen displays a frozen cursor, and the comforting click-clack of the keys vanishes. Fear not! Because, this frustrating situation doesn't always mean an immediate trip to the repair shop is necessary. In fact, you've got a fighting chance to bring your keyboard back from the brink. Let’s explore the steps you can take.
A Quick Diagnostic: Is It Really the Keyboard?
Before we dive into fixes, let's make sure the problem is the keyboard. Consequently, ruling out other potential culprits saves time. First, try connecting an external USB keyboard. Does it work? If so, that strongly suggests a hardware issue with your laptop's built-in keyboard. If not, the problem might lie elsewhere. Therefore, it could be a software glitch or even a driver issue.
Unlocking the Power Button Reset: A Simple First Step
Like with many tech problems, a simple restart is the first thing to try. However, sometimes a standard reboot isn't enough. Because, it doesn’t completely clear out the system's memory. A power button reset can be a little more effective. Here’s how: Turn off your laptop completely. Remove the battery, if removable. If the battery is not removable, hold down the power button for a full 60 seconds. Afterwards, reinsert the battery (if applicable) or plug in the charger. Now, turn your laptop back on. This process can sometimes clear minor software glitches. And, it can restore the keyboard's functionality.
Driver Dilemmas: Updating or Reinstalling Keyboard Drivers
Drivers are essentially the translators between your hardware and your operating system. Moreover, an outdated or corrupted driver is a common cause of keyboard malfunctions. You can update or reinstall your keyboard drivers. Right-click the Start menu and select "Device Manager." Look for "Keyboards" in the list, expand it. Finally, locate your keyboard device (likely just "Standard PS/2 Keyboard" or something similar). Then, right-click on it. You'll have options to "Update driver" or "Uninstall device." Choose "Update driver" first. Follow the on-screen instructions. If the update doesn’t work, try uninstalling it. Next, restart your computer. Windows should automatically reinstall the driver.
Sticky Keys and Physical Obstructions: Clean Up Your Keyboard
Sometimes, the solution is surprisingly simple. Moreover, dirt, dust, and crumbs can wreak havoc on a keyboard. These can cause keys to stick or not register keystrokes. So, start by turning off your laptop and unplugging any power cords. Now, gently flip your laptop upside down and shake it to dislodge loose debris. Then, use a can of compressed air to blow out any remaining particles. Furthermore, you can use a soft brush or a slightly damp (not wet!) cloth to wipe down the keys. Avoid harsh chemicals or excessive moisture, as they can damage the keyboard.
BIOS Blues: Checking Your Keyboard Settings in BIOS
The BIOS (Basic Input/Output System) is the earliest software your computer runs. Furthermore, it controls basic hardware functions. Sometimes, keyboard settings are inadvertently changed within the BIOS. Accessing the BIOS varies depending on your HP laptop model. Typically, you'll press a specific key (such as Esc, F2, F10, or Del) repeatedly during startup. Check your HP laptop’s manual. Once in the BIOS, look for keyboard settings. Ensure that your keyboard is enabled. Finally, save the changes and exit the BIOS. Restart your laptop.
Troubleshooting Windows Troubleshooter:
Windows has a built-in keyboard troubleshooter. Therefore, it can automatically detect and try to fix common keyboard problems. You can access it through the Windows Settings app. Indeed, go to "Update & Security" > "Troubleshoot." Then, look for "Keyboard" and run the troubleshooter.
Software Conflicts: Investigating Recent Installations
Recently installed software can sometimes conflict with your keyboard drivers. Therefore, consider whether the keyboard issues started after installing a new program. If so, you may want to uninstall the software. Check if the keyboard starts functioning again. Also, look for any software that might be remapping keyboard keys.
Hardware Hurdles: When to Call for Professional Help
If you’ve tried all the previous steps, and the keyboard is still unresponsive, it might be a more serious hardware issue. Furthermore, this is when you should consider seeking professional help. The keyboard itself might need replacing, or there could be a problem with the motherboard. In such cases, contact HP Support or take your laptop to a reputable repair shop.
Preventative Measures: Keeping Your Keyboard Happy
Finally, preventative measures can help. Always handle your laptop with care. Therefore, avoid placing it in areas where it could be subjected to excessive moisture. Also, clean your keyboard regularly. Moreover, install a keyboard cover. This will provide an extra layer of protection against dust and spills. By following these suggestions, you can significantly increase the longevity of your laptop's keyboard. More importantly, you can reduce the likelihood of future issues.
Laptop Scroll Pad Dead? FIX IT NOW!HP Laptop Keyboard Dead? FIX It NOW! (Easy Steps)
Hey there, tech adventurers! Ever been in the throes of a deadline, a crucial video call, or just trying to order pizza online, and BAM! Your HP laptop keyboard decides to stage a silent protest? Yeah, we’ve all been there. It’s like having a Ferrari with a broken engine – gorgeous to look at, utterly useless for getting anywhere. Fear not, because we're diving deep into the world of troubleshooting and fixing that stubborn HP laptop keyboard. Consider this your ultimate survival guide. Let's get your fingers tapping again in no time!
1. The Silent Treatment: Why Your HP Laptop Keyboard Suddenly Went Dark
Think of your keyboard as your laptop's communication portal. When it goes silent, it’s like your computer is suddenly speaking in sign language, and you forgot the cues. The reasons for this digital muteness are varied, ranging from simple glitches to hardware hiccups. Often, it’s a software issue, a driver that’s gone rogue like a rebellious teenager. Sometimes, it's a physical problem, like a spilled drink or a rogue crumb that’s caused havoc to the inner workings. Regardless of the cause, we’re going to unravel the mystery together.
2. First Response: Simple Checks Before You Panic
Before you start envisioning expensive repairs or a complete computer overhaul, take a deep breath. Often, the simplest solutions are the most effective.
- Restart Your Laptop: We know, it sounds cliché, but it’s the digital equivalent of hitting "reset" in life. Restarting clears out temporary memory and can often fix minor software glitches.
- Check the External Keyboard: If you have an external keyboard, connect it to your laptop. If it works, then you've narrowed the problem to your internal keyboard.
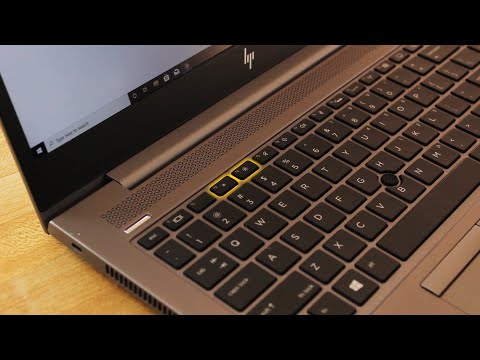
- Examine the Keyboard Lock: Some laptops have a function key combination (like Fn + F7, F8, or F9) that can disable the keyboard. Accidentally pressing this could lead to the same silence. Review your keyboard's function key to discover whether your keyboard lock has been accidentally enabled.
These initial troubleshooting steps are like checking your car’s gas tank before calling a mechanic. Let's see how far we get before we need to call in the professional.
3. Diving Deeper: Exploring Software Solutions
If the simple fixes don't work, we'll need to get our hands dirty (metaphorically, of course!). The following steps involve navigating your operating system and digging into the software side of things.
Driver Troubleshoot: Your keyboard's driver is the translator between the keyboard and your operating system. A corrupted or outdated driver can lead to malfunctions.
- Go to Device Manager (search for it in the Windows search bar).
- Expand “Keyboards”.
- Right-click your keyboard and select "Update driver."
- Choose "Search automatically for drivers."
- If no updates are found, try uninstalling the keyboard driver and restarting your laptop. Windows will often automatically reinstall it.
Run the Hardware Troubleshooter: Windows has built-in troubleshooters that can automatically detect and fix common hardware problems. Search for the "Hardware and Devices troubleshooter" and run it.
4. The Physical Examination: Checking for Hardware Issues
Now, let’s talk about the physical hardware, because sometimes the problem goes beyond software.
- Inspect for Spills and Debris: Accidents happen. If you've recently spilled liquid on your laptop or if your keyboard has been subject to a snack attack, there might be residue interfering with the keys.
- Turn off your laptop and unplug it.
- Carefully flip the laptop upside down to dislodge any loose debris.
- Use a can of compressed air to gently blow out dust and crumbs from between the keys. Be careful to hold the can upright to prevent any of the propellant from going in.
- Check for Loose Connections (Advanced): This is where you can consider getting a professional helping hand, especially if you are not tech-savvy. If you're comfortable opening your laptop (and voiding your warranty if applicable), there might be a loose connection to the keyboard. This usually involves removing the bottom cover of your laptop and carefully inspecting the ribbon cable that connects the keyboard to the motherboard. If you’re not comfortable with that, don't hesitate to call in the pros!.
5. The "Fn" Key Mystery: Understanding Function Keys
The Fn (Function) key is the unsung hero of laptop functionality. It often controls a plethora of features, including keyboard backlights, volume control, screen brightness, and, yes, sometimes, the keyboard itself.
- Experiment with Fn combinations: Experiment for a moment to see whether it has been accidentally disabled. The key may be Fn + a Function key, but this varies between models.
6. Power Struggles: Battery & Power Issues
Believe it or not, a low battery can sometimes lead to keyboard problems. It's rare, but possible.
- Plug in your laptop: Ensure your laptop is connected to a power source, and that the power cord is working correctly.
- Check Battery Settings: In the power settings, make sure that your power plan isn't overly aggressive about disabling components to save power.
7. Viruses and Malware: Cyber Threats
Malware can sometimes wreak havoc on your keyboard's functionality. It's like a digital gremlin that tampers with your system.
- Run a full system scan: Use your antivirus software to perform a comprehensive scan of your system.
- Consider a Malware Removal Tool: If your antivirus doesn’t find anything, consider using a dedicated malware removal tool.
8. System Restore: Rolling Back to a Simpler Time
If the problem started recently, a System Restore might be a lifesaver. Think of it as a digital time machine.
- Access System Restore: Search for "System Restore" in the Windows search bar.
- Choose a Restore Point: Select a restore point from before the keyboard issue appeared. This reverts your system to a previous state, resolving recent software conflicts.
9. BIOS Updates: Keeping Your Brain Updated
BIOS (Basic Input/Output System) is the very foundation of your laptop’s operating system. An outdated BIOS can sometimes cause hardware issues.
- Check for BIOS Updates: Visit the HP website and go to support. Enter your laptop model and look for any BIOS updates.
- Follow Instructions Carefully: BIOS updates can be tricky, so follow the instructions provided by HP precisely.
10. External Keyboard as a Temporary Solution: Getting Work Done
While you're in the midst of troubleshooting your internal keyboard, an external keyboard is a lifesaver.
- Connect an external keyboard: This allows you to keep working while you try to fix your internal keyboard.
- Use Bluetooth or USB Keyboard: Both wired USB and Bluetooth keyboards will work.
11. Keyboard Replacement: When All Else Fails
Sometimes, no amount of troubleshooting can fix a dead keyboard. In these situations, replacement is the only option.
- Research Keyboard Replacement: Find a replacement keyboard specifically for your HP laptop model.
- Consider DIY or Professional Repair: You can either attempt the replacement yourself (if you're comfortable with it) or take your laptop to a repair shop.
12. Prevention is Key: Avoiding Future Keyboard Issues
Like any piece of tech, your keyboard needs to be treated kindly.
- Keep it Clean: Regularly clean your keyboard to prevent dust and debris buildup.
- Avoid Spills: Be extra cautious around liquids.
- Install Protection: Some people use a keyboard cover.
13. Warranty and Support: When to Call for Help
If your laptop is still under warranty, don't hesitate to contact HP support.
- Check Your Warranty Status: Visit the HP website and enter your laptop's serial number to check your warranty status.
- Contact HP Support: Report the issue to HP. They can offer remote assistance or direct you to a repair center.
14. Data Preservation: Backing Up Your Files
Before any major repairs, it's essential to back up your data.
- Back Up Your Files: Use an external hard drive, cloud storage, or another method to back up.
- This safeguards your precious data.
15. Troubleshooting Tips Summary: Your Quick Checklist
Let’s recap our troubleshooting steps in a concise checklist.
- Restart Laptop
- Check External Keyboard
- Check Keyboard Lock
- Driver troubleshooter
- Hardware Troubleshooter
- Inspect for Spills and Debris
- Fn Keys
- Power Issues
- Virus Scan
- System Restore
- BIOS Updates
Closing Thoughts: Getting Back on Track!
So, there you have it. A comprehensive guide to diagnosing and fixing a dead HP laptop keyboard. We've covered everything from simple resets to hardware checks. Remember, don’t be afraid to experiment, but if you're uncomfortable with a particular step, seek professional help. The goal is to get you back up and typing again, and hopefully, this guide has given you the tools to do just that. Good luck, and happy typing!
FAQs
**1
Laptop Won't Turn On? This SHOCKING Fix Worked for ME!How To Fix HP Laptop Keyboard Not Working in Windows 10 Solved

By Tricknology How To Fix HP Laptop Keyboard Not Working in Windows 10 Solved by Tricknology
HP Laptop Brightness Keys Not Working FIX
By Graphically Challenged HP Laptop Brightness Keys Not Working FIX by Graphically Challenged
Fix Some keys on Laptop Keyboard Not Working in Windows 10 Solve keyboard keys Won't typing

By Victor Explains Fix Some keys on Laptop Keyboard Not Working in Windows 10 Solve keyboard keys Won't typing by Victor Explains

Title: HP Keyboard Not Working - 6 Fix
Channel: Tech Bachhal
HP Keyboard Not Working - 6 Fix by Tech Bachhal
Wifi Not Found
HP Laptop Keyboard Dead? FIX It NOW! (Easy Steps)
Is the keyboard on your HP laptop refusing to cooperate? Seeing a screen full of unresponsive keys can be incredibly frustrating. But before you resign yourself to an external keyboard or, heaven forbid, a costly repair, let's explore a systematic approach to diagnose and, more often than not, resolve the issue. We'll delve into the likely causes, from simple software glitches to more hardware-related problems, providing clear, actionable steps every step of the way. This guide is designed to empower you to take control and breathe new life into your HP laptop's essential input device.
Step 1: Preliminary Troubleshooting - The Quick Checks
Before you dive into the more technical aspects, start with these fundamental checks. They are quick, easy, and often reveal the solution immediately.
- Restart Your Laptop: This might seem overly simple, but a fresh reboot clears temporary glitches in both the operating system and drivers. Fully shut down your HP laptop (not just sleep or hibernate) and then power it back on. Observe the keyboard's behavior at the BIOS/boot screen. If it works there, the problem is highly likely software-related.
- Check the Caps Lock and Num Lock Keys: Do these keys illuminate when pressed? This seemingly minor test provides valuable clues. If these indicator lights don't respond, the issue is likely more hardware-oriented, such as a physical cable connection. If they do respond, it points towards driver or software conflicts.
- External Keyboard Test: If you have an extra USB keyboard, plug it into your HP laptop. Does it function correctly? If so, this strongly suggests that the problem lies within your laptop's integrated keyboard. If the external keyboard also fails to function, it's more likely there's a more widespread hardware issue affecting USB ports or operating system conflicts.
- Examine the Fn Key: The Fn (Function) key, often found in the lower-left corner of your keyboard, allows access to secondary functions on many keys (like volume control or screen brightness). Ensure it is not accidentally engaged, as it can inadvertently alter the behavior of other keys.
Step 2: Software-Based Solutions - Addressing Driver and System Issues
If the preliminary checks suggest a software issue, these steps will guide you through the most common culprits and corresponding fixes.
- Update or Reinstall Keyboard Drivers: Outdated or corrupted drivers are frequent causes of keyboard malfunctions.
- Access Device Manager: Right-click the Start button (Windows logo) on your HP laptop and select "Device Manager."
- Locate the Keyboard Section: In the Device Manager window, click on the "Keyboards" section to expand it. You should see your laptop's keyboard listed .
- Update the Driver: Right-click on your keyboard device, and select "Update driver." Choose "Search automatically for drivers." If an updated driver is found, install it and restart your laptop.
- Reinstall the Driver: If updating doesn't work, right-click the keyboard device again and select "Uninstall device." Restart your laptop. Windows should automatically reinstall a default driver.
- Run the Windows Troubleshooter: Windows has built-in troubleshooters that can often automatically identify and fix keyboard problems.
- Access Troubleshooter Settings: Go to Settings > System > Troubleshoot > Other troubleshooters.
- Run the Keyboard Troubleshooter: Locate the "Keyboard" troubleshooter and click "Run." Follow the on-screen instructions.
- Perform a System Restore: If the keyboard started malfunctioning recently, consider using System Restore to revert your operating system to a previous point. This will undo recent software changes that might be causing the problem.
- Access System Restore: Type ‘Create a restore point’ in the Windows search bar and click on the result. Then select ‘System Restore’.
- Choose a Restore Point: Select a restore point from before the keyboard issue began. Follow the on-screen prompts. Note that this can take some time, and data on your computer is not lost when running system restore.
- Check for Malware: Malware can sometimes interfere with keyboard functionality. Run a full scan using your antivirus software.
Step 3: Hardware-Related Solutions - Exploring Physical Connections and Components
If the software solutions haven't resolved the issue, or if your Caps Lock/Num Lock keys don't respond, it's time to explore the hardware.
- Inspect the Keyboard Cable (If Possible): Some HP laptop models allow you to access the keyboard cable internally.
- Consult Your Laptop's Manual: Refer to your HP laptop's service manual (available online by searching for your specific model number and "service manual"). This manual will provide detailed instructions for disassembling the laptop.
- Carefully Disassemble (If Comfortable): If you're comfortable, carefully remove the battery, and then the bottom panel of your laptop. Locate the keyboard cable – a small, flat ribbon cable that connects the keyboard to the motherboard.
- Reseat the Cable: Gently detach the cable from its connector on the motherboard, then re-seat it firmly. Ensure the connector is properly locked in place.
- Check for Liquid Damage or Debris: Spills are the bane of laptops.
- Turn Off and Disconnect: Immediately shut down and disconnect your laptop from its power supply.
- Carefully Examine the Keyboard: Use a flashlight to thoroughly inspect the keyboard keys and surrounding areas for any signs of liquid damage (sticky residue, discoloration) or debris.
- Clean the Keyboard (If Necessary): If you find any debris, use compressed air to gently blow out the particles. For liquid spills, contact a professional repair service.
- Evaluate the Keyboard Itself: This requires more advanced steps.
- Consider Professional Repair: If the above steps don't work, or if you're not comfortable disassembling and repairing your laptop, it may be time to seek professional help from a qualified repair technician.
- Keyboard Replacement: In many cases, the only definitive fix is to replace the keyboard itself. This can be done by a professional or, if you're technically inclined, it can be fixed with a replacement keyboard which can be sourced online. Research and compare the cost of a replacement keyboard with the cost of professional repairs to decide the most cost-effective option.
Step 4: BIOS Troubleshooting - A Deep Dive
The BIOS (Basic Input/Output System) is the fundamental software that initializes your computer's hardware before the operating system loads. In rare cases, BIOS settings can interfere with keyboard functionality.
- Access the BIOS: The method for accessing the BIOS varies depending on your HP laptop model. Typically, you'll need to press a specific key (like F2, F10, F12, or Del) repeatedly immediately after you turn on the laptop, before Windows starts to load. The key you must press should appear on screen.
- Check Keyboard Settings Within the BIOS: Once in the BIOS, navigate through the settings (usually using the arrow keys and the Enter key) to find keyboard-related options. Look out for things like USB legacy support or keyboard initialization settings.
- Reset BIOS to Default Settings: If you're unsure of the BIOS settings or if you've made changes recently, it might be helpful to reset the BIOS to its default configuration. There is always an option in the BIOS menus allowing a restore to default settings. Be sure to restart your computer after applying all changes in the settings.
Step 5: Preventing Future Keyboard Issues
Once you've addressed the current problem, it's wise to take steps to prevent future keyboard failures.
- Regular Cleaning: Dust and debris can accumulate under the keys. Consider using compressed air or a soft brush, and be sure to follow all guidelines provided by HP.
- Liquid Spill Prevention: Avoid eating or drinking near your laptop.
- Consider a Keyboard Protector: For added protection, especially if you're prone to spills, invest in a keyboard protector.
- Keep Your Drivers Updated: Regularly update your laptop's drivers, including your keyboard drivers, through Windows Update or HP Support Assistant.
By systematically following these steps, you significantly increase your chances of resolving keyboard issues on your HP laptop. Remember to be patient, methodical, and always prioritize your safety. If you encounter problems that you are not comfortable solving yourself, don't hesitate to seek professional assistance and take your computer to a qualified technician.
