why is the volume on my hp laptop not working
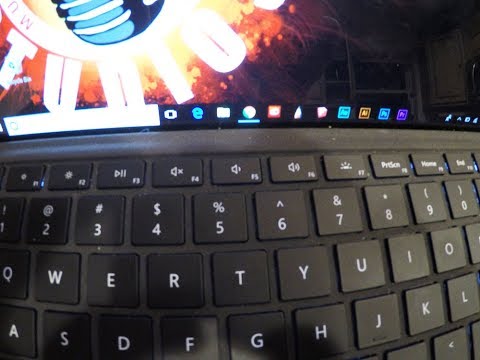
Title: Fix In 3 Seconds - Volume Control Keys, Mute Button Not Working Microsoft Surface Pro Windows
Channel: Mechanical Mike
Fix In 3 Seconds - Volume Control Keys, Mute Button Not Working Microsoft Surface Pro Windows by Mechanical Mike
why is the volume on my hp laptop not working, why is the audio on my hp laptop not working, why does the sound on my hp laptop not work, why isn t the sound on my hp laptop working, why is the sound not working on my hp envy laptop, why is my volume button not working on my hp laptop
HP Laptop Sound Dead? FIX This NOW!
HP Laptop Sound Woes? Don't Panic, We've Got This!
Okay, so your HP laptop has gone silent. The music has stopped. The videos are mute. Suddenly, the world feels a little less vibrant. Don't worry, because we've all been there. But before you rush to the nearest tech repair shop, take a deep breath. Because, thankfully, fixing a dead sound on an HP laptop is often easier than you think. And trust me, you can do this!
Is It Really a Sound Problem, or Just a Silly Mistake?
First things first, let’s rule out the simplest solutions. Actually, sometimes the most obvious things are the culprits. More often than not, it's something incredibly straightforward causing the problem. Therefore, before you dive deep into the tech weeds, check these quick fixes.
- Volume Check: Yes, I know this sounds basic, but always double-check the volume levels. Maybe it's just muted or turned down extremely low. Look for the speaker icon in your system tray (usually at the bottom right). Ensure it’s not muted and that the volume slider is set to a reasonable level. It seems elementary, but it works.
- Headphones or External Speakers: Are headphones or external speakers plugged in? If they are, your laptop might be trying to send the audio there. Unplug everything and see if sound returns through the built-in speakers.
- Restart Your Laptop: Turning it off and on again really does solve a lot of problems. Restarting your laptop is a quick way to clear any temporary glitches that might be messing with the sound. This sometimes refreshes software issues.
Troubleshooting Deeper: Software & Driver Drama
Still no sound? If the quick checks didn't work, let's move on to some slightly more involved troubleshooting. The next steps often point to software or driver issues.
- Check Your Sound Settings: Open your sound settings. You can usually find this by searching "sound settings" in the Windows search bar (the little magnifying glass). Select the right output device. Ensure your internal speakers are selected as the default playback device. Also, confirm that the output level is not on zero.
- Driver Updates: The Silent Killer (and Saviour!)
Outdated or corrupted audio drivers are a common cause of sound problems. Consequently, updating your drivers can often fix the issue. Here's how:
- Open Device Manager. You can find this by searching for it in the Windows search bar.
- Expand "Sound, video and game controllers."
- Right-click on your audio device (e.g., "Realtek Audio").
- Select "Update driver." Choose "Search automatically for drivers."
- Follow the prompts.
- Restart your laptop after the driver is updated.
- Roll Back Driver: If you recently updated your audio driver and the sound went dead afterward, try rolling back to the previous version. In Device Manager, right-click your audio device, select "Properties," then go to the "Driver" tab and click "Roll Back Driver."
- Run the Windows Troubleshooter: Windows has a built-in troubleshooter that can often identify and fix sound problems automatically. In Sound Settings, click on "Troubleshoot" next to the output device. Then, follow the on-screen instructions.
Hardware Hurts? Potential Physical Problems
If software solutions don't bring back the sound, it's possible there's a hardware issue. This is less common, but certainly not impossible.
- Internal Speaker Failure: The speakers within your laptop might have physically failed. Over time, this can happen. This is especially true if you've been running your laptop at high volumes for extended periods.
- Loose Connections: Sometimes, internal connections can become loose. If you're comfortable, you could open your laptop up and check the audio connections. However, this can void your warranty. Therefore, proceed with caution, or better yet, consult a professional.
- Motherboard Malfunction: In a worst-case scenario, there could be a problem with the laptop's motherboard. However, this is usually the last resort.
Final Troubleshooting Touches and Some Prevention
You've tried everything, and the sound still isn't working? Sometimes, a clean install of Windows, while a big step, is what's needed. Back up your important files first. You may also want to consider reaching out to HP support or a qualified technician.
- Regular Maintenance: Keep your drivers updated to prevent future issues.
- Protect Your Laptop: Avoid dropping your laptop or exposing it to extreme temperatures or moisture. This can damage components.
- External Speakers: Invest in external speakers or headphones. They can be a great backup if your internal speakers fail.
- Consult the Manual: If everything else fails, refer to your HP laptop's user manual. It may contain specific troubleshooting steps for your model.
The Good News
The final thought? Most HP laptop sound issues are fixable. Sometimes, the solution is ridiculously simple. So, take a deep breath. Follow these steps. You can often get your sound back and enjoy your music, videos, and games again! Good luck, and happy listening!
HP Laptop Keys Dead? This SHOCKING Fix Works!HP Laptop Sound Dead? FIX This NOW!
Let's be honest, there's nothing quite as frustrating as your trusty HP laptop suddenly deciding to go mute. You're ready to dive into that epic movie marathon, catch up on the latest podcast, or even just listen to some background music while you work, and bam! Silence. It's like the audio gremlins have invaded your machine and declared a sound embargo. But fear not, fellow tech warriors! We've all been there, and we're here to get your HP laptop's voice back. Think of us as your personal audio troubleshooters.
1. The Silent Treatment: Recognizing the Problem
First things first: are you actually experiencing a dead sound situation? It might seem obvious, but let's double-check. Did you accidentally mute the volume with a quick keyboard shortcut? Have you recently plugged in headphones or external speakers? These are the sound equivalents of forgetting where you parked your car – easy to overlook in the moment. If you're sure the volume is up, and everything should be making noise, yet you're getting nothing but crickets, then you've got yourself a sound issue. Now, let's get to the good stuff – fixing it.
2. Elementary, My Dear Watson: Basic Sound Checks
Before we dive into the deep end of technical wizardry, let's start with the sound equivalent of checking if your car has gas before calling a mechanic. Seriously, these simple steps can often resolve the issue:
- Volume Level: Is the volume slider at the bottom of your screen cranked all the way up? Don't laugh – we've all done it! Also, check the volume mixer (right-click the speaker icon in your system tray). Perhaps individual applications are muted.
- Speakers: Ensure your speakers are selected as the default playback device. In Windows, right-click the speaker icon and choose "Open Sound settings." Select the right output device. It might have defaulted to a Bluetooth device you aren't using.
- Restarting: The classic "turn it off and on again" trick. This works wonders for many tech problems, including audio woes. A simple reboot can often clear temporary glitches. Think of it like hitting the "reset" button on your brain after a long day.
3. Driver's Ed: Audio Driver Troubleshooting
Drivers are the unsung heroes of the tech world. They're the software that allows your hardware (like your sound card) to communicate with your operating system. Sometimes, these drivers get corrupted, outdated, or even go missing altogether. If those basic checks didn't work, fixing the audio drivers is your next step.
- Device Manager: Open Device Manager (search for it in the Windows search bar). Expand "Sound, video and game controllers."
- Update Drivers: Right click on your audio device (it'll probably have a name like "Realtek Audio" or "Intel Display Audio") and select "Update driver." Choose "Search automatically for drivers."
- Reinstall Drivers: If updating doesn't work, try uninstalling the driver (right-click, "Uninstall device"), restarting your laptop, and letting Windows automatically reinstall a driver. It's like giving your drivers a fresh start.
4. Hardware Hurdles: Physical Connections and Internal Issues
Sometimes, the problem isn't software at all. It could be a physical issue.
- Headphone Jack: Try wiggling a pair of headphones in your headphone jack. Sometimes, a loose connection can interfere with the sound.
- External Speakers: If you're using external speakers, make sure they're properly connected, and powered on. Double-check the speaker's volume control.
- Internal Speaker Failure: Okay, this is less common, but it's a possibility. The internal speakers of your HP laptop might have failed. This is where you'd need to seek professional help, but let's hope we don't have to go there!
5. The Audio Service Anomaly: Checking Windows Audio Services
Windows relies on audio services to manage sound output. Think of them as the internal traffic controllers for your laptop's audio. If these services stop working, your sound can disappear.
- Open Services: Type "services" in the Windows search bar, and select "Services."
- Check Audio Services: Look for "Windows Audio" and "Windows Audio Endpoint Builder." Make sure their Status is "Running." If they're stopped, right-click and select "Start." Also, ensure their "Startup type" is set to "Automatic" (right-click, "Properties").
- Restart Services: If they are running, try restarting them (right-click, "Restart"). It's like giving the audio traffic controllers a new shift.
6. Decoding Codecs: Examining Audio Codecs
Codecs are like translators for audio files. They're responsible for encoding and decoding the sound data. Sometimes, a missing or corrupted codec can prevent your laptop from playing audio.
- Codec Packs: You can try installing a codec pack, like K-Lite Codec Pack, which includes a wide variety of codecs. It's like having a library of translators for all sorts of audio file types.
- Windows Media Player: Ensure Windows Media Player is up-to-date. Sometimes, outdated media players can cause codec issues.
7. BIOS Blues? Checking the BIOS Settings
Your BIOS (Basic Input/Output System) is the firmware that your laptop uses to initialize hardware during startup. Although it's rare, sometimes sound settings within the BIOS can interfere with audio output.
- Accessing BIOS: When your laptop starts up, you'll see a prompt telling you which key to press to enter BIOS settings (often Del, F2, or F12).
- Audio Settings: Once in BIOS, look for audio-related settings. Ensure the onboard audio device is enabled.
8. External Devices: Testing with Headphones or Speakers
To isolate the problem, try using headphones or external speakers. If sound works through headphones or external speakers, the issue is likely with your laptop's internal speakers. If sound isn't working with any device, the fault lies elsewhere in the audio system.
9. System Restore Salvation: Rolling Back to a Prior State
If you suspect a recent software change or update is the culprit, system restore can be your knight in shining armor. System Restore allows you to revert your laptop to a previous state when audio was working.
- Open System Restore: Search for "Create a restore point" in your Windows search bar, and select "System Restore."
- Choose a Restore Point: Select a restore point from before you started experiencing audio problems. Heuristic: you need to have a restore point for this, which is a critical parameter that must be activated to get this to work for you.
- Follow Prompts: Follow the on-screen instructions to restore your system.
10. Malware Mayhem: Scanning for Malicious Software
Malware can sometimes interfere with system functions, including audio. Ensure your antivirus software is up to date, and run a full system scan. Think of this as fumigating your laptop for potential security breaches.
11. Power Plan Problems: Power Saving Interference
Power-saving settings can sometimes disrupt audio performance. Disabling any aggressive power saving settings for your audio card can fix the issue.
- Power Options: Go to "Control Panel" -> "Hardware and Sound" -> "Power Options".
- Change Plan Settings: Adjust your current power plan settings to maximize performance.
- Advanced Settings: Within advanced settings, ensure that the settings for audio devices are set to optimize for performance, and not power saving.
12. Sound Card Struggles: When the Card Is the Culprit
In some cases, the sound card itself may be at fault. If all else fails, the sound card could be failing.
- Checking for Errors: Windows Device Manager will often flag any hardware issues. Look for error symbols (like an exclamation mark) next to your sound card in Device Manager.
- Hardware Replacement: If you've tried everything, and your sound card is faulty, it might need to be replaced. This may require sending your laptop to a repair shop, or if you're tech-savvy, replacing it yourself.
13. The Great Uninstaller: Removing Recent Software
Sometimes a recent software installation can collide with the audio drivers.
- Control Panel: Open "Programs and Features" in the Control Panel (or in Settings -> Apps -> Apps & Features).
- Recent Installations: Look at the list of recently installed programs.
- Uninstalling: Try uninstalling software that has been recently installed.
14. Seeking Professional Help: Knowing When to Call in the Experts
Realistically, we can only do so much ourselves. If you've exhausted all these troubleshooting steps, it might be time to call in the professionals. A laptop repair shop can diagnose the problem with specialized equipment and expertise. They've seen it all before.
15. Future-Proofing Your Audio: Prevention Is Key
Just like preventative maintenance for your car protects your investment, some steps can help avoid sound problems with your HP laptop:
- Software Updates: Keep your operating system, drivers, and audio software up to date.
How To Fix No Sound Audio on HP Laptop & PC
By Your Fix Guide How To Fix No Sound Audio on HP Laptop & PC by Your Fix Guide
100 SOLVED - No Output Devices Found Windows 1110 Fix Windows 1110 Sound Not Working Problem

By How To Fix Tech 100 SOLVED - No Output Devices Found Windows 1110 Fix Windows 1110 Sound Not Working Problem by How To Fix Tech
Troubleshoot Audio Problems in Windows 10 HP Computers HP Support

By HP Support Troubleshoot Audio Problems in Windows 10 HP Computers HP Support by HP Support
Title: Fix HP Computer Has No Sound in Windows 11 FIX Sound Problems On HP Tutorial
Channel: TechFixIT
Fix HP Computer Has No Sound in Windows 11 FIX Sound Problems On HP Tutorial by TechFixIT
Laptop Wifi Hotspot
Title: Mastering the Art of Gourmet Coffee at Home: A Comprehensive Guide
Introduction: Elevating Your Coffee Experience
For coffee aficionados, the allure of a perfectly brewed cup transcends mere caffeine consumption. It represents a ritual, a moment of solace, a sensory symphony meticulously crafted from the finest beans. The pursuit of this ideal cup, often associated with expensive cafes, is actually readily achievable within the sanctuary of your own kitchen. This comprehensive guide unlocks the secrets to brewing gourmet coffee at home, empowering you with the knowledge and techniques to transform your daily routine into an exquisite experience. We will delve into every aspect, from selecting the perfect beans to mastering brewing methods, ensuring a consistently delightful coffee experience, cup after cup.
Choosing the Right Coffee Beans: A Journey of Flavor Discovery
The foundation of exceptional coffee lies in the quality of the green coffee beans. The journey begins at the origin, where the terroir – the unique combination of soil, climate, and altitude – imparts distinct characteristics to the beans. Broadly speaking, coffee beans are classified into two primary species: Arabica and Robusta. Arabica, renowned for its complex flavor profiles and lower caffeine content, dominates the specialty coffee market. Robusta, more robust and caffeinated, is often used in espresso blends for its crema-producing qualities and bold flavor.
Within the Arabica species, a vast world of varietals awaits exploration. Consider the nuanced sweetness and floral notes of a Yirgacheffe from Ethiopia, the balanced acidity and chocolate undertones of a Colombian Supremo, or the vibrant citrus of a Gesha varietal. The flavor profile is significantly influenced by the processing method the farmers employ. The washed process, involving meticulous grading and fermentation, often results in clean, bright flavors. The natural process, where the coffee cherry dries with the bean inside, contributes to fruity and complex tasting notes. The honey process, which varies depending on the amount of mucilage left on the bean during drying, creates coffees with a rich, syrupy body and sweeter tasting notes.
Freshness is paramount. Always seek out whole-bean coffee, as pre-ground coffee loses its aromatic oils quickly. Look for a roast date, not a “best by” date. Ideally, purchase beans roasted within the last two weeks for optimal flavor. Store whole beans in an airtight container, away from sunlight, heat, and moisture. Consider a vacuum-sealed container for extended freshness. Once ground, use the coffee immediately. Decanting a small amount of beans to use in the following days will maximize the amount of flavor you’ll get from your beans.
Mastering the Grind: The Key to Flavor Extraction
Grinding coffee is a crucial step, directly impacting the extraction process and the resulting flavor. The ideal grind size varies depending on the brewing method. A burr grinder is essential, as it provides consistent particle size, leading to even extraction. Blade grinders, while often less expensive, produce irregular grind sizes, resulting in inconsistent flavor and potential bitterness.
For French press, a coarse grind is recommended, preventing excessive sediment. For pour-over methods like the Hario V60, a medium-fine grind works best, allowing for optimal extraction over a few minutes. Espresso machines require a very fine grind, designed for high-pressure brewing. Experimentation is key. Adjust the grind size based on taste. If the coffee tastes sour and under-extracted, you need a finer grind. If it tastes bitter and over-extracted, the grind may be too fine. To evaluate the grind consistency, gently shake the ground coffee and observe the uniformity of the particle size.
Water: The Unsung Hero of Brewing Excellence
Water quality is often overlooked, yet it's a primary ingredient in coffee. Use filtered water, as chlorine and minerals can negatively impact the flavor. The ideal water temperature for brewing is between 195-205°F (90-96°C). A gooseneck kettle with temperature control is a valuable investment, allowing for precise water temperature control and steady pouring.
The water-to-coffee ratio is crucial. A general guideline is a ratio of 1:15 to 1:17 – one gram of coffee for every 15-17 grams of water. Adjust this ratio to taste, depending on the brewing method and your personal preferences. This ratio depends on the coffee beans you prefer and the level by which you want their flavor notes to appear.
Brewing Methods: Exploring the Landscape of Coffee Preparation
A myriad of brewing methods offers a diverse range of flavor profiles and experiences. Each method offers a unique expression from the coffee beans.
French Press: A classic method known for its full-bodied flavor and rich mouthfeel. Steep coarsely ground coffee in hot water for 4 minutes, then slowly plunge the filter. Be cautious not to over-extract, which can lead to bitterness.
Pour Over (Hario V60, Chemex): Provides exceptional clarity and precision. This method involves pouring hot water over freshly ground coffee in a cone-shaped filter. The slow, controlled pour allows for nuanced flavor extraction. Experiment with pour rate, water temperature, and grind size to dial in the perfect cup.
Aeropress: A versatile method that excels at producing a clean, flavorful cup in a short time. The Aeropress uses pressure to push hot water and finely ground coffee through a filter, resulting in a smooth, concentrated brew.
Cold Brew: Offers a smooth, low-acid coffee with a bold flavor. Steep coarsely ground coffee in cold water for 12-24 hours, then filter. The result is a refreshing and versatile concentrate.
Espresso: The cornerstone of specialty coffee drinks, Espresso is brewed by forcing hot water, under high pressure, through finely-ground, compacted coffee. This method extracts concentrated flavor. Mastery of espresso requires precision and practice, but the rewards are undeniable.
Techniques for Perfect Extraction: Unlocking the Flavor Potential
Regardless of the chosen brewing method, several techniques contribute to optimal extraction.
Pre-infusion (Blooming): Introduce a small amount of hot water to the ground coffee and allow it to "bloom" for 30-45 seconds. This allows the coffee to degas, releasing trapped carbon dioxide and enhancing the aroma.
Consistent Pouring: Maintain a steady, controlled pour rate to ensure even saturation of the coffee grounds.
Water Temperature Control: Precisely control the water temperature, ensuring it is within the optimal range.
Ratio Adjustments: Adjust the coffee-to-water ratio to reach your preferred flavor.
Filter Hygiene: Rinse filters thoroughly before brewing to remove any paper taste.
Milk and Sweeteners: Enhancing the Coffee Experience
While purists may prefer black coffee, the addition of milk and sweeteners can enhance the flavor profile and create unique experiences.
Milk Selection: Whole milk typically provides the richest flavor and body. Oat milk, almond milk, and soy milk are excellent dairy-free alternatives.
Milk Texturing (For Espresso Drinks): Learning to properly steam milk is essential for creating lattes, cappuccinos, and other espresso-based drinks. The process involves stretching the milk to incorporate air, then creating a smooth, micro-foam.
Sweetener Choices: Experiment with various sweeteners, ranging from simple syrup to honey or agave. The choice is entirely based on individual preference.
Troubleshooting Common Coffee Problems
Even with diligent attention, occasional brewing issues may arise.
Sour Coffee: Indicates under-extraction. Try a finer grind, higher water temperature, or a longer brew time.
Bitter Coffee: Points to over-extraction. Use a coarser grind, lower water temperature, or a shorter brew time.
Weak Coffee: May result from insufficient coffee, a coarse grind, or a low extraction time. Increase the coffee amount, use a finer grind, or extend the brew time.
Muddy Coffee: A result of an incorrect grind size or filter issues. Use a filter that's the correct one for your brewing method.
Elevating Your Coffee Ritual: Creating an Ideal Brewing Space
Transforming your kitchen into a coffee sanctuary enhances the entire experience.
Organization: Keep your coffee equipment organized and within easy reach. Consider dedicated storage for coffee beans, filters, and accessories.
Ambiance: Create a calming and inviting atmosphere. Consider incorporating soft lighting, plants, and your favorite coffee mugs.
Practice: The best way to learn is by practicing. The more you experiment with these methods, the more confident you will be with your coffee creation.
Conclusion: The Continuing Journey of Coffee Discovery
Mastering the art of gourmet coffee at home is an ongoing journey of exploration and refinement. As you experiment with different beans, brewing methods, and techniques, your palate will develop, allowing you to appreciate the nuanced flavors and aromas of exceptional coffee. Embrace the process, enjoy the ritual, and savor the moment of perfect coffee, brewed just for you.
