dell laptop hdd not working

Title: How to Fix Hard Drive Errors DELL Official Dell Support
Channel: Dell Support
How to Fix Hard Drive Errors DELL Official Dell Support by Dell Support
dell laptop hard drive not working, dell laptop hdd not detected, hard drive problem in dell laptop, how to fix hard drive error on dell laptop
Dell Laptop HDD Dead? 😱 FIX It NOW! (Easy Steps)
Dell Laptop HDD Dead? Don't Panic! Revive Your Data (Easy Guide)
So, your Dell laptop is acting up. The dreaded symptoms are there, aren't they? Slow performance, error messages galore, or maybe…nothing at all. A dead hard drive can feel like a digital catastrophe. It's like losing a piece of yourself. But before you resign yourself to this fate, let’s explore some options. Because, hey, sometimes a seemingly lost cause can be resurrected!
Spotting the Signs: Is Your HDD Really Gone?
First things first: Is your hard drive actually dead? It's important to confirm this. Several signs might point to this grim reality. Consider these clues carefully. Does your laptop take an eternity to boot up? Are programs crashing frequently? You might notice a grinding or clicking sound. This is a classic warning siren. Files might become corrupted. You might also see the infamous "Blue Screen of Death". Furthermore, your system might not even recognize the drive. Even if not all symptoms are present, the hard drive could still be struggling. Therefore, the sooner you assess the situation, the better.
Step 1: Initial Troubleshooting – Gentle Diagnostics
Before you rip your laptop apart, try some gentle troubleshooting steps. It's always best to start simple. Power cycle your laptop first. Shut it down completely then unplug it. Wait a few minutes. Then, plug it back in and restart. Sometimes, this is all it takes. After that, check your BIOS settings. Access your computer's BIOS by pressing a specific key during startup (usually Del, F2, F12, or Esc). Within the BIOS, look for your hard drive. Is it listed? If it is, that is promising. If not, the drive might be truly dead.
Step 2: The External Enclosure Solution
If your drive is indeed the problem, let's try something. Remove the hard drive from your Dell laptop. It can be intimidating, but it's usually doable with a screwdriver. Because Dell laptops have specific designs, always look for a guide. After that, purchase an external hard drive enclosure. It’s a relatively inexpensive purchase. Now, carefully place the drive into the enclosure. Connect it to another computer using a USB cable. Do you see your files? Hopefully, they appear. If you can access your data, congratulations! You might have just saved the day.
Step 3: Data Recovery Software – Your Digital Lifesaver
Perhaps the drive is recognized, but your files are still inaccessible. Then, data recovery software could be your savior. There are several reputable brands available. They can scan your drive for recoverable files. Many offer free trial versions. Install the software on another computer. Then, connect your potentially failing drive. Run a scan. Be patient. The process can take a while. If the software finds your files, try to recover them to a DIFFERENT drive. Don't save them back to the potentially failing drive. That would be counterproductive.
Step 4: Assessing the Damage and Repair Options
If the drive isn't recognized or data recovery is unsuccessful, you face a harsh reality. Your hard drive might be beyond repair. However, don't lose heart. You have options at this point. Consider professional data recovery services. They have specialized tools and expertise. They can often retrieve data, even from severely damaged drives. This step is typically costly, though. On the other hand, if data recovery isn’t feasible, it’s time for a replacement. But before you do, consider the drive's age and usage.
Step 5: Replacing the Dead Hard Drive – A New Beginning
Replacing a hard drive is a pretty straightforward process. You’ll need a new drive. Either a standard HDD. Or perhaps, an upgrade to a faster SSD (Solid State Drive). SSDs offer a huge performance boost. They boot up incredibly fast. They also load programs swiftly. Ensure the new drive is compatible with your Dell laptop. Dell laptops use specific form factors. Consult your laptop's manual for details. Once you have the new drive, install it, and reinstall your operating system.
Step 6: Preventing Future Disasters – Data Backup is Key
Losing data once is often enough. Implement a robust backup strategy to safeguard yourself in the future. Back up your data regularly. Use an external hard drive. Or, utilize cloud-based backup services. There are many reputable providers. They will keep your data safe, automatically. Moreover, ensure your existing backups are working well. Consider running a test recovery. This process will verify your backup's integrity. This will guarantee retrieval, if need be. Finally, keep your backups current.
Final Thoughts: Don't Give Up Without Fighting
A dead hard drive does feel like a digital gut punch. But with some patience and these steps, you can hopefully recover your precious data. Even if recovery isn't possible, at least you'll know you tried. Don't forget preventative measures. Always back up your data. Remember, data loss is never fun. However, now you are better equipped. You are ready to face this challenge. Good luck, and may your data be restored!
Portland's BEST Laptop Workspots: Secret Cafes & Hidden Gems!Dell Laptop HDD Dead? 😱 FIX It NOW! (Easy Steps)
Hey there, fellow tech travelers! Ever felt that stomach-churning dread when your Dell laptop screen freezes, and the spinning wheel of doom just… keeps… on… spinning? Yeah, we’ve all been there. That feeling is amplified a hundredfold when you suspect your hard drive (HDD) is gone belly up. Believe me, I've stared into the abyss of a dead HDD more times than I care to admit (mostly because of a very unfortunate coffee incident). But fear not! Because if your Dell laptop’s HDD has kicked the bucket, this isn't the end of the world! It's a bump in the road, a temporary detour. We’re going to walk through some easy steps to diagnose the problem, explore potential fixes, and get you back up and running faster than you can say "data recovery."
1. The Dreaded Diagnosis: Is It Really the HDD?
Before we start tearing things apart (or panicking!), we need to be absolutely sure the HDD is the culprit. Just like a doctor runs tests before prescribing medicine, we need to run some diagnostics. Sometimes, it's something simpler!
- Listen Carefully: Does your laptop sound…off? Grinding, clicking, or unusual noises are often red flags that your HDD is about to retire (or already has). Think of it like a grumpy old car struggling to start.
- The Blue Screen of Death (BSOD): That dreaded blue screen with error messages is a common symptom of HDD failure. Take note of any error codes, as they can give us clues.
- Slow Boot Times and Freezes: Does it take ages to boot up? Does everything freeze at random intervals? These are often telltale signs the HDD is struggling. Imagine trying to run a marathon with a broken leg.
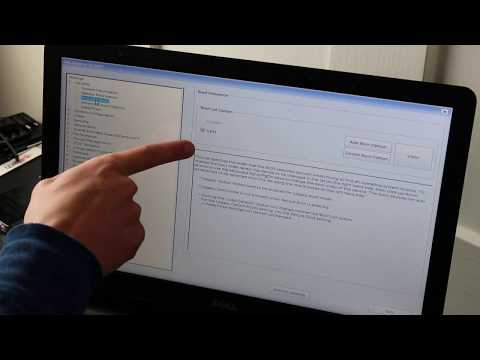
- BIOS Diagnostics: This is your first line of defense! Most Dells have built-in diagnostic tools accessible by pressing a specific key during startup (usually F12, F2, or Del – check your Dell's manual for specifics). Run the HDD test. This can often tell you definitively if the drive is toast.
2. Safety First: Back Up Your Data (If Possible!)
If you suspect your HDD is on its last legs, and you can still access your data, back it up IMMEDIATELY! This is like escaping a sinking ship with your most precious belongings. You can:
- Connect an external hard drive: Copy everything you need to a safe place.
- Use cloud storage: Services like Google Drive, Dropbox, or OneDrive are lifesavers.
- Create a bootable USB drive: If Windows won't load, creating a bootable USB drive with a Windows installation or a recovery tool can sometimes allow you to access your files.
Important Note: If your HDD is clicking or making unusual noises, stop using it immediately! Continuing to use a failing drive can lead to complete data loss.
3. The Troubleshooting Toolkit: What We Can Try Before Surgery
Alright, let's roll up our sleeves and try some DIY fixes. Think of this as a quick check-up before calling in a specialist.
- Restart Your Laptop: Seriously! Sometimes, a simple restart clears up temporary glitches. It's like giving your laptop a good night's sleep.
- Check the Connections: Open your laptop's service panel (carefully!) and check the hard drive connection cables. Make sure they're securely plugged in. It's like making sure your Christmas lights are plugged in properly.
- Run CHKDSK: This is a built-in Windows tool that checks and repairs file system errors. Open Command Prompt as administrator and type:
chkdsk /f /r C:(replace "C:" with the drive letter of your HDD). Be patient; this can take a while. Chkdsk is akin to fixing a pothole on the data highway. - Update Drivers: Outdated drivers can sometimes cause HDD issues. Go to Device Manager and update your storage controllers' drivers.
- Check for Malware: Malware can sometimes interfere with your HDD's performance. Run a full system scan with your antivirus software.
4. When the Fixes Fail: Exploring Replacement Options
If the above steps didn't work, it's likely your HDD is truly dead. Don't despair! Replacing it is a common procedure, like swapping out an old car part.
- Data Recovery (Professional Help): If your data is critical, consider professional data recovery services. They have specialized tools and expertise to potentially retrieve data from a failing drive. Be prepared for a significant cost. This is like calling a tow truck to recover a precious car from a ditch.
- Buying a New HDD or SSD: This is the most common solution. You can replace your old HDD with another HDD or upgrade to a Solid State Drive (SSD). SSDs are much faster and more reliable, like trading your horse-drawn cart for a Tesla.
- Choosing the Right Drive: Make sure you buy a drive that's compatible with your Dell laptop. Check your laptop's manual to see what type of drive it supports (SATA, etc.) and the size requirements. Also, consider the capacity you need.
- The Installation Process: The process varies slightly depending on your Dell model, but is usually straightforward. Refer to your Dell's manual or a reliable YouTube tutorial for specific instructions. It's easier than assembling IKEA furniture, promise!
5. Swapping That Drive: A Step-by-Step Quick Guide
Okay, let's get into the nitty-gritty. Here's a simplified overview of the replacement process.
- Gather Your Tools: You'll need a screwdriver (usually a Phillips head), an anti-static wrist strap (optional, but recommended to prevent static electricity damage), and your new HDD/SSD.
- Power Down and Disconnect: Turn off your laptop and unplug the power adapter. Remove the battery (check your Dell's manual for this).
- Open the Service Panel: Locate the service panel on the bottom of your laptop. It might be secured by screws. Unscrew them and carefully remove the panel.
- Locate the HDD: The HDD is usually in a bay or cage. It might be secured by screws, rails, or brackets.
- Remove the Old HDD: Unscrew the old drive, disconnect it from the SATA cable, and carefully slide it out.
- Install the New HDD/SSD: Place the new drive in the bay or cage, connect the SATA cable, and screw it in.
- Replace the Service Panel: Put the service panel back on, screw it in, and reinsert the battery (if applicable).
- Install the Operating System: You'll need to reinstall your operating system (Windows, etc.) from a bootable USB drive or disc. This will wipe your old drive (which is already bad, so it's okay).
- Restore Your Data: Once the operating system is installed, you can restore your data from your backup.
6. Setting Up Your New Drive: Beyond the Basics
So, you've installed your new drive. Great! But we're not quite done yet.
- BIOS Setup: After installing the new drive, you might need to go into the BIOS settings (press a key like F2 or Del during startup) to ensure that the new drive is recognized.
- Formatting the Drive: If the drive isn't formatted automatically during the OS installation, you'll need to format it. This is typically done during the OS installation process. Think of this as preparing the blank canvas for your digital art.
- Installing Drivers: Make sure you install the latest drivers for your new drive. These will ensure optimal performance.
- Data Migration: You will either need to install Windows again on the new disk, or you can use a migration utility to copy Windows and all of your content at one time from the old disk to the new one.
- Regular Backups: Always back up your data regularly! This is the best defense against future HDD failures (or any other data loss situation).
7. SSD vs. HDD: The Great Debate, Part Deux
Okay, so you're replacing your drive. Should you go for another HDD or embrace the future with an SSD?
- SSDs (Solid State Drives): These are like the Usain Bolt of storage. They're much faster than HDDs, resulting in quicker boot times, faster application loading, and a more responsive overall experience. They have no moving parts, making them more durable.
- HDDs (Hard Disk Drives): These are generally cheaper than SSDs for the same storage capacity. They're still perfectly functional, but they're slower and more susceptible to physical damage.
- Which to Choose? If your budget allows, go for an SSD. The performance difference is significant. If you need a lot of storage and are on a tight budget, an HDD is still a viable option (especially if you're not using your laptop for resource-intensive tasks).
8. Preventing Future HDD Disasters: A Little Prevention Goes a Long Way
We’ve fixed the problem, but what about preventing it from happening again? Here are some tips:
- **Handle Your Laptop with Care
How to fix Dell inspiron ssd not detected
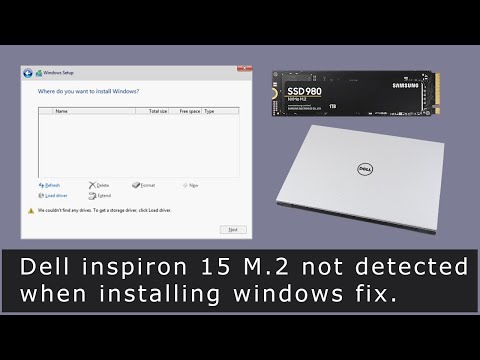
By JESSOK I.T STORE & SERVICES How to fix Dell inspiron ssd not detected by JESSOK I.T STORE & SERVICES
Fix No Boot Device Not Found Hard Disk 3F0 Error in DELL LaptopPC - Complete Solution

By John Explains Fix No Boot Device Not Found Hard Disk 3F0 Error in DELL LaptopPC - Complete Solution by John Explains
How To Fix Dell HDD, Hard Drive Not Detected, HDD Not Found, HDD Not Installed
By PC Monkey How To Fix Dell HDD, Hard Drive Not Detected, HDD Not Found, HDD Not Installed by PC Monkey

Title: Solved Hard drive not installed error on laptop - Hard Drive Not Found
Channel: Tech White
Solved Hard drive not installed error on laptop - Hard Drive Not Found by Tech White
Wifi On Laptop Phone
Here's the title for your article: The Ultimate Guide to Crafting Compelling Email Newsletters That Convert
The Ultimate Guide to Crafting Compelling Email Newsletters That Convert
Email newsletters remain a cornerstone of effective digital marketing, providing a direct line of communication with your audience. But in an inbox saturated with messages, simply sending an email isn't enough. We must craft newsletters that captivate, engage, and ultimately, convert readers into loyal customers. This guide will provide a comprehensive framework for creating email newsletters that transcend the ordinary, driving tangible results.
Defining Your Goals: Mapping Out Success Before You Even Write
Before penning a single word, we must clearly define our objectives. What do we hope to accomplish with our email newsletters? Increased website traffic? Higher conversion rates? Brand awareness? Lead generation? Specify your goals. The answers will shape every aspect of your newsletter from the subject line to the call to action. For instance, if lead generation is paramount, we might focus on offering valuable free resources in exchange for email sign-ups, nurturing those leads over time. Conversely, if the goal is sales, we'll emphasize product features, benefits, and limited-time offers. Thoroughly define and document your goals before we even start writing. Consider using the SMART framework: Specific, Measurable, Achievable, Relevant, and Time-bound.
Knowing Your Audience: The Cornerstone of Compelling Content
Understanding your target audience is crucial. Who are they? What are their interests, needs, and pain points? What kind of language and tone resonates with them? Conduct thorough audience research. Analyze your existing customer data, including demographics, purchase history, website behavior, and any feedback collected. Survey your subscribers directly, asking them what they want to see in your newsletters. Create detailed audience personas representing distinct segments of your subscriber base. By understanding your audience, you tailor your content to their preferences, increasing engagement and conversion rates.
Subject Lines: The Gatekeepers of Your Open Rates
The subject line is the first impression your newsletter makes. It's the key to unlocking the inbox and encouraging recipients to click open. Write subject lines that are compelling, intriguing, and relevant to your audience. Employ a variety of approaches:
- Intrigue: Use curiosity-inducing language to pique interest. "You Won't Believe What Happened Next…"
- Benefit-Oriented: Clearly state the value proposition. "Get 20% Off Your Next Purchase Today!"
- Personalized: Include the subscriber's name or tailor the subject line to their specific interests, based on their past purchases or behavior.
- Urgency-Driven: Create a sense of urgency to encourage immediate action. "Last Chance: Sale Ends Tonight!"
- Questioning: Pose a question that directly addresses a problem or need. "Is Your Website Mobile-Friendly?"
Test different subject lines to see which ones perform best. Use A/B testing to compare variations and analyze open rates. Keep subject lines concise, generally aiming for under 60 characters so they display correctly on mobile devices. Avoid overly promotional language or spam triggers.
Crafting Engaging Content: Delivering Value Beyond the Promotion
The content of your newsletter is the heart of your communication. It's where we build trust, demonstrate expertise, and provide value. Offer a balanced mix of content that delivers on your subscribers’ needs.
- Valuable Information: Share industry insights, tips, tutorials, and how-to guides. Position yourself as a thought leader and resource for your audience.
- Exclusive Content: Provide exclusive discounts, early access to products or services, or members-only content such as webinars or downloadable guides.
- Behind-the-Scenes Glimpses: Offer a look into your company culture, highlight employee profiles, or share stories about your team and values.
- Customer Success Stories: Showcase how your products or services have helped others achieve their goals. Case studies and testimonials are powerful social proof.
- Curated Content: Share relevant articles, videos, and resources from other sources, positioning yourself as a curator of valuable information.
Newsletter Design: Enhancing Readability and Visual Appeal
The visual design of your newsletter is just as important as the content. We must create a design that is clean, easy to read, and visually appealing.
- Mobile Optimization: Ensure your newsletter is fully responsive and displays correctly on all devices, particularly mobile phones.
- Clean Layout: Use a clear and organized layout with ample white space. Avoid clutter and visual distractions.
- Branding: Incorporate your brand colors, logo, and fonts throughout the design to maintain brand consistency.
- Imagery: Use high-quality images and graphics to break up text and add visual interest.
- Font Choices: Select professional, easy-to-read fonts. Use a larger font size for readability, especially on mobile.
- Whitespace: Utilize whitespace to prevent the design from looking cluttered.
Create a template that aligns with your brand. Keep the design consistent across all your newsletters to build brand recognition.
Calls to Action: Guiding Your Subscribers to Action
Every newsletter must include clear, concise, and compelling calls to action (CTAs). Your CTA should tell your subscribers what you want them to do.
- Placement: Position your CTA prominently, above the fold if possible. Repeat the CTA throughout the newsletter.
- Language: Use action-oriented language, such as "Shop Now," "Learn More," "Download Free Guide," or "Get Started Today."
- Design: Make your CTAs visually distinct. Use contrasting colors, buttons, and clear wording.
- Value Proposition: Clearly communicate the benefit of clicking the CTA.
- Variety: Experiment with different CTAs to see which ones resonate with your audience.
Segmentation and Personalization: Tailoring Your Messages
Segmenting your email list and personalizing your newsletters can significantly boost engagement and conversion rates. By dividing your subscribers into smaller groups based on demographics, interests, behavior, or purchase history, you can deliver more relevant and targeted content.
- Segmentation Examples: Age, Gender, Location, Purchase History, Website Activity, Lead Source
- Personalization Elements: Subscriber Name, Product Recommendations, Personalized Offers, Birthday Greetings, Behavior-Triggered Emails
- Dynamic Content: Use dynamic content to display different content for different segments. For example, if you provide different services to different demographics, tailor your emails to show only the content that best matches each subscriber's profile.
Use your email marketing platform's segmentation and personalization features to drive relevant messages. By tailoring your content to each subscriber's needs and preferences, you'll create a more engaging and rewarding experience, fostering stronger customer relationships.
Testing and Optimization: Continuous Improvement for Maximum Impact
Email marketing is an iterative process. Continuously test and optimize your newsletters to improve their performance.
- A/B Testing: Test different subject lines, content variations, CTAs, and design elements to see which ones perform best.
- Metrics Analysis: Track key metrics such as open rates, click-through rates, conversion rates, and unsubscribe rates.
- Deliverability Monitoring: Monitor your email deliverability to ensure your messages reach the inbox.
- Feedback Loops: Regularly collect feedback from your subscribers through surveys or direct contact.
- Data-Driven Decisions: Use the data from your testing and analytics to make informed decisions about your future newsletters.
By adopting a data-driven approach, you can refine your email strategy, improve your results, and build a successful and sustainable email marketing program.
Compliance and Best Practices: Avoiding SPAM Filters and Maintaining Trust
Adhering to email marketing best practices and complying with relevant regulations is essential for maintaining a positive reputation with your subscribers and avoiding being marked as spam.
- GDPR and CAN-SPAM: Comply with all relevant data privacy laws, including GDPR and the CAN-SPAM Act.
- Double Opt-In: Use a double opt-in process to confirm subscriptions from your subscribers. This helps to verify email addresses and ensures that your subscribers are genuinely interested in receiving your messages.
- Unsubscribe Option: Include a clear and easy way for your subscribers to unsubscribe from your emails.
- List Hygiene: Regularly clean your email list by removing inactive subscribers and invalid email addresses.
- Sender Reputation: Maintain a good sender reputation by avoiding spam triggers and sending relevant content.
- Privacy Policy: Link to your privacy policy in every email.
By following these guidelines, you ensure the legality and effectiveness of your email marketing campaign, protecting your brand reputation while building trust.
Analyzing Results and Refining Your Strategy
The process doesn't end with sending the newsletter. We must analyze the results to see what worked and what didn't.
- Open Rate Analysis: Determine which subject lines generated the most open rates.
- Click-Through Rate Analysis: Identify the content, CTAs, and design elements that drove the most clicks.
- Conversion Rate Analysis: Measure the performance of your newsletters in driving desired actions, whether it's sales, registrations, or other goals.
- Unsubscribe Rate Analysis: Investigate the reasons behind unsubscribes to understand what content or practices may have caused dissatisfaction.
- A/B Testing Feedback: Implement changes based on the results of your A/B tests, and continue to refine your strategy.
Regularly review metrics, making adjustments to the email content, design, and strategy. Consistent analysis and optimization are the
