enter button not working on lenovo laptop
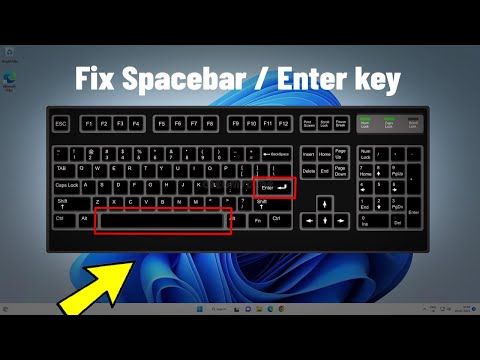
Title: Fix Spacebar Or Enter key Not Working in Windows 11 10 How To Solve space bar enter Button
Channel: Victor Explains
Fix Spacebar Or Enter key Not Working in Windows 11 10 How To Solve space bar enter Button by Victor Explains
enter button not working on lenovo laptop, enter key not working on lenovo laptop, how to fix enter key on lenovo laptop
Lenovo Laptop Enter Key DEAD? 😱 FIX This NOW!
Lenovo Laptop Enter Key Gone AWOL? Don't Panic! (Here's Your SOS Guide)
Has your trusty Lenovo laptop’s Enter key decided to stage a silent revolt? 😩 Suddenly, hitting that vital button yields… nothing? Don't toss your laptop across the room just yet. Because let's be honest, we've all been there. Instead, breathe easy! This guide is your digital life raft. We’ll navigate the choppy waters of tech troubleshooting together. Furthermore, we'll get that Enter key back in fighting shape.
The Great Key Debacle: Why Did My Enter Key Betray Me?
First things first: let's acknowledge the problem. A non-functioning Enter key is a major inconvenience. Besides, it's a productivity killer. There are several reasons behind this digital defiance. For instance, it may be a simple software glitch. Or, perhaps, a hardware issue is lurking beneath the surface. Either way, you’re not alone. We've seen it all. More importantly, we'll address all the possible causes.
Software Shenanigans: Troubleshooting the Digital Realm
Sometimes, the problem isn’t physical. Additionally, it might be a software hiccup. Consider these initial steps. They are essential for diagnosing the issue.
Restart Your Lenovo: This sounds cliché, but it works. It's a digital reset button. Try restarting your laptop. Often, a simple restart resolves a temporary software glitch. So, go ahead, give it a shot.
Driver Dilemma: The Keyboard's Digital Conductor: Your keyboard has a driver. It’s the software equivalent of an orchestra conductor. Subsequently, an outdated or corrupted driver can cause problems. Therefore, update your keyboard drivers. Head to Device Manager. Find the keyboard section. Right-click and select "Update driver."
Sticky Keys & Filter Keys: Are They Enabled? These features can sometimes interfere with normal keyboard function. Hence, check your Ease of Access settings. Ensure these keys aren’t accidentally enabled.
Hardware Heartbreak: Exploring the Physical Realm
If the software solutions fail, it's time to delve into the hardware. Consequently, let’s examine the physical components.
External Keyboard Test: Do you have an external keyboard? Connect it to your Lenovo. Does the Enter key on the external keyboard work? This is a crucial diagnostic step. If the external keyboard works, the problem is likely with your laptop’s built-in keyboard.
Visual Inspection: A Keen Eye for the Obvious: Before diving deeper, give the Enter key a quick eye check. Look for any visible debris. Similarly, check for any stuck keys. Use compressed air to remove any crumbs or dust.
The Keycap Capers: A Gently Applied Solution: Sometimes, a dislodged keycap is the culprit. Gently pry off the Enter keycap using a thin tool or your fingernail. Then, inspect the mechanism beneath. Replace the keycap carefully.
The Internal Keyboard Connection: A More Advanced Exploration: If you're comfortable, and only if you're comfortable, consider opening the laptop. This is a more advanced step. Locate the keyboard's ribbon cable. Ensure it's securely connected to the motherboard. However, consider professional repair if you're unsure.
Operating System Optimization: Fine-Tuning the Digital Engine
Your operating system also plays a role. Indeed, its performance affects your laptop's function.
Run System File Checker (SFC): Corrupted system files can sometimes cause keyboard issues. Run the System File Checker tool. Open Command Prompt as an administrator. Type "sfc /scannow" and press Enter. Let the scan complete.
Malware Mayhem: Is Your Laptop Infected? Sometimes, malware can interfere with keyboard functionality. In that case, run a thorough virus scan using your preferred antivirus software.
The Ultimate Backup: When All Else Fails
If all else fails, don't despair. There are still options.
System Restore: Turning Back Time: Consider using System Restore. This will revert your system to a previous point. Specifically, it will go back to when your Enter key was operational.
Factory Reset: The Nuclear Option: As a last resort, consider a factory reset. This will erase everything on your laptop. Thus, back up your files first! Then, reset the laptop to its original factory settings.
Professional Intervention: Calling in the Cavalry
Sometimes, the best course of action is to seek professional help.
Lenovo Support: The Official Assistance: Contact Lenovo support. They can offer specific troubleshooting steps for your model. They can also arrange for repairs.
Local Repair Shops: Expert Hands at the Ready: Local computer repair shops can diagnose the problem. They can also perform the necessary repairs.
Conclusion: Pressing Forward to Success!
So, that non-functional Enter key doesn’t have to be a permanent problem. You’ve got the knowledge. You have the tools. Now, go forth and conquer! Hopefully, these steps will bring that vital key back to life. Then, get back to typing. Don't forget to celebrate your victorious return to the world of efficient laptop use.
Does Your Laptop HATE Your SD Card? (Find Out NOW!)Lenovo Laptop Enter Key DEAD? 😱 FIX This NOW!
Hey there, fellow tech travelers! Ever felt that cold dread wash over you? You're in the middle of crafting a masterpiece (or maybe just an important email), your fingers are flying across the keyboard, and then… thud. The Enter key. That glorious, paragraph-breaking, command-executing key, just decides to take a vacation without telling anyone. On your Lenovo laptop, of all machines! Believe me, we've all been there. We’ve stared into the abyss of a single, never-ending line of text, just wishing, pleading for that Enter key to resurrect itself. Don’t panic! We're here to help. This isn't the end of the world. In fact, it’s probably just a minor hiccup. So, grab a coffee (or your preferred beverage), take a deep breath, and let's dive into some solutions to get that Lenovo laptop's Enter key back in action, pronto!
1. The Dreaded Silence: Symptoms of a Dead Enter Key
First things first. Let's establish whether the Enter key is truly deceased or merely experiencing a temporary malfunction. Sometimes it's a simple software glitch; other times, it’s a hardware issue that needs a bit of TLC. Here's what you might be experiencing:
- No Response At All: You tap it, you pound it, you beg it… nothing happens. Your cursor remains stubbornly on the same line. It's like the key has taken a vow of silence.
- Intermittent Functionality: Sometimes it works, sometimes it doesn't. You’re living on the edge, unsure if your precious paragraph breaks will actually, you know, break. It's like a mischievous gremlin is playing games with you.
- Incorrect Behavior: Instead of creating a new line, it might be activating a different command, opening a window, or, well, doing just about anything but entering. This is a real head-scratcher.
- Physical Issues: The key feels sticky, unresponsive, or perhaps even sunken. It's like the key has physically given up the ghost.
If you're nodding your head in agreement to any of these symptoms, then you're in the right place.
2. Restart, Reboot, and Recalibrate: The Fundamentals of Lenovo Laptop Troubleshooting
Before we go any further, let’s try the tech equivalent of slapping the side of a malfunctioning television. Sometimes, the simplest solutions are the most effective. Let’s try these:
- A Simple Restart: This is the digital equivalent of a good night's sleep for your laptop. Close everything, save your work, and gently restart. Often, this will clear out any temporary software glitches that might be messing with your Enter key. Think of it as hitting the "reset" button on your keyboard’s brain.
- Hard Reboot, If Necessary: If a regular restart doesn't do the trick, try a hard reset. This involves shutting down your Lenovo laptop completely (and I mean completely – not just putting it to sleep), removing the battery (if possible and safe), and holding down the power button for around 30 seconds. This can sometimes clear out residual power that might be causing problems.
- Check Your Keyboard Settings: Believe it or not, sometimes the layout settings get jumbled. Head to your Windows settings (search for "Keyboard settings") and ensure that the correct keyboard layout is selected (usually the one that matches your physical keyboard). A mismatched layout is like trying to speak Mandarin with a French accent - you're probably not going to get the intended results.
3. The Software Sleuth: Driver Dilemmas and Software Conflicts
Now, let’s delve a little deeper. The Enter key, like any other component of your laptop, relies on software to function correctly. Specifically, drivers. Think of drivers as the translators between your hardware (the keyboard) and your operating system (Windows, in this case). If the translator is on vacation (or just plain broken), things get a little… lost in translation.
- Driver Updates: Go to Device Manager (search for it in the Windows search bar). Expand the "Keyboards" section. Right-click on your keyboard (it might be listed as a "Standard PS/2 Keyboard" or something similar) and select "Update driver." Let Windows search for updates automatically. This is like giving the translator a refresher course.
- Driver Rollback: If the problem started after a recent driver update, you might need to roll back to a previous version. In Device Manager, right-click on your keyboard, select "Properties," and then go to the "Driver" tab. There should be an option to "Roll Back Driver" if such a version exists. This is like reverting to the previous translation.
- Software Conflicts: Sometimes, other software can interfere with your keyboard's functionality. This is less common, but it’s worth considering. Have you recently installed any new programs? Try uninstalling them (one at a time) and seeing if the Enter key starts working again. It's like removing the distracting noise to hear the key's true voice.
4. The Physical Examination: Cleaning and Checking the Keys
Let's roll up our sleeves and get physical! The Enter key (and indeed your entire keyboard) can develop issues due to dust, debris, and general wear and tear.
- Deep Clean Your Keyboard: This is a must-do on any Lenovo laptop. Turn your laptop off and unplug it. Use a can of compressed air to blow out any crumbs, dust, and other gunk that might be lurking beneath the keys. Be particularly attentive around the Enter key and surrounding keys.
- Examine the Key Itself: Gently try to pull the Enter key off its hinges. Many Lenovo laptops have keys that can be removed relatively easily. Important: Do this carefully. Use a small, flat tool (like a thin plastic card) to pry it up from the corners. Once removed, you can clean the keycap and the area underneath.
- Check for Physical Damage: Once the key is removed, inspect the little plastic or metal clips on the keycap and the keyboard itself. Are any broken or damaged? If so, they might need to be replaced. Replacing keycaps is easy and inexpensive, but you need to find the right keycap for your Lenovo model.
5. External Keyboard Savior: A Temporary Workaround
If all else fails, and you just need that Enter key to function right now, there's a simple (and often overlooked) solution.
- Plug in an External Keyboard: Connect a USB keyboard to your Lenovo laptop. This will immediately allow you to use the Enter key (and the rest of the keyboard) perfectly fine. This is like having a backup emergency escape plan. It’s not ideal as a long-term solution, but it'll get you through until you can find a permanent fix.
6. Lenovo's Support and Warranty: When to Call in the Professionals
Sometimes, the problem is beyond our DIY abilities. Don't be afraid to reach out for help. Particularly if your laptop is still under warranty.
- Contact Lenovo Support: Visit Lenovo's support website or call their customer service line. Describe the problem, and follow their instructions. They might walk you through troubleshooting steps or suggest sending your laptop in for repair.
- Check Your Warranty: Make sure your laptop is still under warranty. If it is, you might be eligible for a free repair.
- Consider Professional Repair: If your warranty has expired, you can still take your laptop to a reputable computer repair shop. They have the tools and expertise to diagnose and fix more complex hardware issues.
7. Avoiding Future Enter Key Headaches: Prevention is Key!
Now that you know how to fix a dead Enter key, let's talk about how to prevent this from happening again!
- Regular Cleaning: Make cleaning your keyboard a habit. A quick dusting with compressed air every week can make a huge difference.
- Gentle Typing: Avoid slamming on the keys. Treat your keyboard with respect.
- Environmental Awareness: Protect your laptop from spills and extreme temperatures.
- Keep Software Up-to-Date: Regularly update your operating system and drivers.
8. Keyboard Layout Options: A Hidden Solution?
Sometimes, the problem isn’t the Enter key itself, but the keyboard layout.
- Check Your Language Settings: Go to your Windows settings and ensure that your keyboard language matches the physical layout of your keyboard. A mismatch could lead to all sorts of odd behaviors.
- Try a Different Keyboard Layout: Experiment with alternative layouts. This may seem strange, but if your regular layout has issues, another might work.
9. Accessibility Settings: A Potential Interference
Windows offers accessibility settings designed to customize the way you interact with your computer. Sometimes, these can inadvertently interfere with keyboard functionality.
- Check Sticky Keys and Filter Keys: These settings can alter how your keyboard responds to key presses. Make sure they're turned off unless you specifically need them.
10. Virus Scans and Malware Checks: Security Matters
Malware can sometimes cause unexpected problems with your hardware.
- Run a Full System Scan: Use your antivirus software to scan your entire system for malware.
Spacebar or Enter Key is Not Working Windows 1110 FIX Guide

By MDTechVideos Spacebar or Enter Key is Not Working Windows 1110 FIX Guide by MDTechVideos
Backspace key is not working on your Laptop

By Facts Backspace key is not working on your Laptop by Facts
Spacebar or Enter Key is Not Working FIX
By TechFixIT Spacebar or Enter Key is Not Working FIX by TechFixIT

Title: Fix Backspace Key Not Working in Windows 11 10 How To Solve back space key not working
Channel: Victor Explains
Fix Backspace Key Not Working in Windows 11 10 How To Solve back space key not working by Victor Explains
Wifi On Laptop
Here is the title: The Definitive Guide to Mastering the Art of Sourdough Baking at Home
The Definitive Guide to Mastering the Art of Sourdough Baking at Home
Sourdough. The very word conjures images of crusty loaves, tangy aromas, and a connection to a culinary tradition that spans millennia. It's a craft, a science, and a source of immense satisfaction for those who undertake the journey. This definitive guide aims to equip you, the aspiring sourdough baker, with the knowledge and confidence to create exceptional sourdough bread in your own kitchen. We will delve far beyond basic recipes, exploring the intricacies that separate a good loaf from a truly remarkable one. Prepare to embark on a fulfilling adventure, one that culminates in the ultimate reward: a perfectly baked sourdough to savor.
Understanding the Foundation: The Sourdough Starter
The heart and soul of any sourdough bread lies in its starter, a living culture of wild yeasts and bacteria. Think of it as a pet, requiring consistent care and attention. Its health is paramount, dictating the success of your baking endeavors.
Cultivating Your Starter: Step-by-Step
Creating a sourdough starter from scratch is a rewarding experience. It's a testament to the power of nature.
- The Initial Mix: In a clean glass jar, combine equal parts unbleached all-purpose flour and non-chlorinated water (filtered is best). One tablespoon of each is a good starting point. Stir well to ensure all flour is hydrated.
- The Waiting Game: Cover the jar loosely (a lid with a small gap or some cheesecloth secured with a rubber band works well) and let it sit at room temperature (ideally between 70-75°F/21-24°C) for 24 hours.
- The First Feeding: After the first day, you might observe very little activity. Don't be disheartened. Discard about half of the mixture (this is crucial to prevent overgrowth) and add fresh flour and water in equal parts, matching the original amount.
- Monitoring and Adjusting: Continue feeding the starter once a day, discarding half and adding fresh flour and water. This process, for the first few days, may result in no visible signs. Look for bubbles, the smell will change and become slightly sour.
- The Transformation: Around day 5-10, you should begin to see signs of activity: bubbles forming, the mixture rising, and some sour aroma. At this stage, the starter still may not be mature enough to bake with. Continue feeding, and the frequency of feedings will be determined by the maturity of the starter.
- The Maturity Test: The starter is ready to bake with when it reliably doubles in size within 4-8 hours after feeding. The time for this to happen will vary based on room temperature, so adjust frequency accordingly.
- Maintenance (Ongoing): Once mature, you can either keep it at room temperature, feeding it daily, or refrigerate it. If refrigerated, feed it weekly. Always bring the starter to room temperature and feed it before baking.
Troubleshooting Your Starter
- No Activity: Ensure your flour is unbleached and contains no additives. Varying temperatures will affect your starter, so make sure to keep your starter at a consistent temperature.
- Mold: If you see any mold, discard and start anew.
- Hopped Starter: Initially, if the smell is off-putting, this is normal. The scent should become pleasant with a light tang.
Selecting Your Ingredients: Elevating the Quality
The ingredients directly translate into the final product. Avoid generic products.
Flour: The Cornerstone of Character
The type of flour significantly impacts the flavor, texture and rise of your sourdough.
- Unbleached Bread Flour: This is the workhorse of sourdough baking. It provides the gluten structure needed for a good rise and a chewy crumb.
- Whole Wheat Flour: Adding whole wheat flour introduces a nutty flavor and earthiness. Use it sparingly initially, as it absorbs more water and can affect the gluten development.
- Rye Flour: Rye flour contributes a distinctive tang and complexity. It does not contain gluten, so it is generally used in smaller percentages (10-20%) to add flavor.
- For the novice – Start with a mix of bread flour and whole wheat flour.
Water: Hydration's Role
Water is the bridge between your flour and your starter.
- Non-Chlorinated Water: Chlorine can hinder yeast activity. Filtered water is therefore best.
Salt: The Flavor Catalyst and Dough Conditioner
Salt plays a crucial role in both flavor and dough structure.
- Sea Salt or Kosher Salt: These are ideal options. Use about 2% salt of the flour weight. Salt also helps control fermentation and strengthens gluten.
Mastering the Sourdough Baking Process: A Comprehensive Guide
Sourdough baking requires patience, practice, and a keen understanding of the process. Each step contributes to the final outcome.
Mixing and Autolyse: The Foundation of Gluten Development
- Mixing: Combine your starter, flour, and water in a large bowl. Mix until just combined, ensuring there are no dry pockets of flour. Then, cover and let the mixture rest for 30-60 minutes.
- Autolyse: Before adding the salt, let the flour absorb the water. This is called the autolyse period. Over time, this allows gluten to begin to develop and improves the extensibility of the dough.
Adding Salt and Initial Kneading
- Adding Salt: After autolyse, add the salt to the dough.
- Kneading: Gently knead the dough in the bowl for a few minutes, or use a mixer if preferred. The dough will be wet and sticky, and that is perfectly okay.
Bulk Fermentation: Developing Flavor and Structure
- Bulk Fermentation: Place the dough in a lightly oiled bowl. Cover and let it ferment at room temperature.
- Stretch and Folds: Throughout the bulk fermentation period, perform a series of "stretch and folds." This strengthens the gluten. Every 30-60 minutes, stretch one side of the dough and fold it over on itself. Repeat these folds around the entire dough for 3-4 sets.
- Monitoring Fermentation: The bulk fermentation time depends on several factors, including the strength of your starter and the temperature of your environment. Watch how it evolves and how the dough changes. You want it to nearly double in size.
Shaping: From Dough to Loaf
- Pre-Shaping: Gently turn the dough out onto a lightly floured surface. Begin shaping the dough into a rough round or oval.
- Bench Rest: Allow the pre-shaped dough to rest covered for 15-30 minutes. This allows the gluten to relax, making the final shaping easier.
- Final Shaping: Form the final shape. Use the surface tension to your advantage. Be gentle as you handle the dough.
Proofing: The Final Rise
- Proofing Basket (Banneton): Place the shaped dough in a floured proofing basket (banneton) seam-side up. This will help the dough hold its shape and create a beautiful crust.
- Refrigeration vs. Room Temperature Proofing: Proofing in the refrigerator (cold proofing) for 12-24 hours allows for enhanced flavor development. You can also proof at room temperature for a shorter time.
Baking: Achieving the Perfect Crust
- Preheating: Preheat your oven with a Dutch oven inside to 450-500°F (232-260°C) for at least 30 minutes.
- Scoring: Gently invert the proofed loaf onto a piece of parchment paper. Score the top of the loaf with a sharp knife or a lame (a specific scoring tool).
- Baking in Dutch Oven: Carefully transfer the loaf inside the hot Dutch oven. Cover the Dutch oven with the lid. Bake for 20-25 minutes.
- Uncovering and Baking: Remove the lid and continue baking for another 25-30 minutes, or until the crust is deeply golden brown.
- Cooling: Transfer the baked loaf to a wire rack to cool completely before slicing (at least 2 hours). This allows the internal structure to set.
Fine-Tuning Your Techniques: Advanced Considerations
Beyond the fundamental steps, there are nuances that can elevate your sourdough baking even further.
Hydration Levels: Finding the Sweet Spot
- Hydration Percentage: Hydration refers to the percentage of water in the flour. Higher hydration (more water) yields a more open crumb but requires more developed gluten.
- Experimentation: Start with 70% hydration, then gradually adjust depending on the flour and the humidity.
Scoring Patterns: Aesthetics and Function
- Scoring Styles: Experiment with scoring patterns to control the oven spring and enhance the appearance of your loaf.
- Lame Usage: Use a very sharp lame to create clean scores.
Troubleshooting Common Sourdough Problems
- Flat Loaf: Under-proofing, weak starter, or insufficient gluten development can cause a flat loaf.
- **Dense
