usb drive not working on laptop
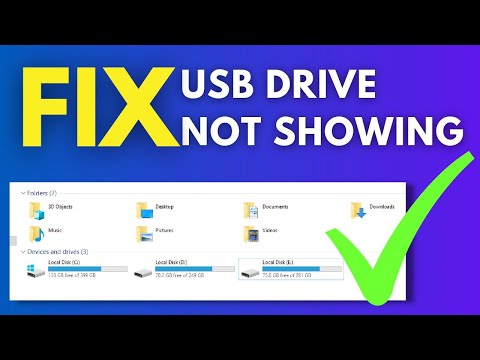
Title: Working Solution for USB Drive Not Showing Up USB Device not Recognized in Windows 10
Channel: FIXsage
Working Solution for USB Drive Not Showing Up USB Device not Recognized in Windows 10 by FIXsage
usb drive not working on laptop, external hard drive not working on laptop, usb ports not working on laptop windows 11, usb ports not working on laptop dell, usb drive not showing on laptop, flash drive not working on laptop, pen drive not working on laptop, usb ports not working on laptop hp, external hard drive not detected on laptop, flash drive not showing on laptop
USB Drive Dead? This ONE Trick Will FIX It!
Is Your USB Drive a Digital Ghost? Breathe Life Back Into Your Data!
Ever stare at a flickering, unresponsive USB drive and feel a knot of dread tighten in your stomach? We've all been there. That nagging feeling, the fear of lost photos, essential documents, or that all-important project. It's a digital heartbreak, isn't it? But before you completely despair and consign your flash drive to the technological graveyard, there's hope.
The Silent Killer: Recognizing USB Drive Failure
First, acknowledge the problem. It's crucial. Is your USB drive truly dead, or merely playing possum? A few telltale signs indicate a problem. Does your computer fail to recognize the drive? Perhaps it shows up, displays the drive's name, then disappears. Maybe it hangs indefinitely, refusing to open or display any files. You might also notice an unusual clicking or whirring sound. Above all, these are the red flags. Consider them warnings.
Moreover, a corrupted file system is another common culprit. The drive may be recognized, but its contents are inaccessible. You click, you wait, yet nothing. Furthermore, the drive might have stopped writing data. This is a major problem. In other words, if you cannot copy data, the drive is likely failing. These symptoms, unfortunately, point towards deeper issues.
The Resurrection Ritual: Potential Fixes for Your USB Drive
Now, for the good news. We can attempt a digital resuscitation. Believe it or not, there are several methods you can try. These won't always work, but it's definitely worth trying.
Firstly, try a different USB port. Seriously, because one port might be faulty. Sometimes, the simplest solution is the best. It allows your computer to see if the problem may be the port. Consequently, this eliminates this cause.
Secondly, try a different computer. Your computer itself could be the issue. This tests the drive's functionality. This ensures it isn't a problem with your specific device.
Thirdly, check the Device Manager. Access this through your computer's control panel. Look for your USB drive under "Disk drives." Right-click on it. Now, select "Uninstall device." Then, unplug your drive. Finally, plug it back in. Windows will reinstall the drivers. Therefore, this simple step can often work wonders.
The Command Line Champion: Unleashing CHKDSK
If those initial steps fail, proceed to the command line. This might seem intimidating, but it's actually pretty straightforward.
Consequently, type "CMD" into the Windows search bar. Right-click on "Command Prompt" and select "Run as administrator." This gives you the necessary permissions.
Next, you’ll want to find the drive letter assigned to your USB drive. Open "File Explorer." Locate your drive. Note the letter assigned to it.
After that, type the command chkdsk X: /f /r (replace “X” with your drive letter). For instance, if your drive is "G:", enter chkdsk G: /f /r. The /f parameter instructs CHKDSK to fix any errors. The /r parameter locates and recovers bad sectors. The process can take some time, so be patient.
Moreover, if CHKDSK finds and repairs errors, you might get your data back. In the meantime, make sure to carefully follow the on-screen prompts.
Low-Level Formatting: The Nuclear Option (Use with Caution!)
Finally, if all else fails, consider low-level formatting. This essentially wipes the drive clean. Therefore, it's a last resort. This can sometimes revive a drive. However, it will erase all data.
Notably, you'll need a special utility for this. Search online for "low-level format tool" for USB drives. Download a reputable program. Ensure you choose the correct drive. This is very important. Format the drive at your own risk. Back up anything important beforehand.
Data Recovery: When All Else Fails, Seek Expert Help
Sometimes, a USB drive is beyond DIY repair. In that case, consult data recovery specialists. They have specialized tools and expertise. They can help you retrieve your crucial information. Don’t hesitate to use their services. It can be an investment, but it could save your most valuable data.
Prevention is Key: Protecting Your Future USB Drives
Finally, think about proactively protecting your future USB drives.
Furthermore, always safely eject your drives before unplugging them. Avoid using USB drives in high-risk environments. For example, excessive heat or cold. Moreover, back up your data regularly. This simple step saves headaches. Consider using cloud storage. It's a smart investment. By following these tips, you'll minimize data loss. You will greatly improve your chances of avoiding future digital headaches.
In conclusion, your USB drive's demise doesn’t have to be permanent. Try these troubleshooting steps. You might just resurrect your valuable files. Because, remember, hope remains.
Laptop WiFi Dead? This SHOCKING Fix Worked INSTANTLY!Let's get to it!
USB Drive Dead? This ONE Trick Will FIX It!
Hey there, fellow tech travelers! Ever felt that gut-wrenching moment when you plug in your trusty USB drive, only to be met with… nothing? The little LED refuses to flicker, Windows doesn't acknowledge its existence, and all your precious photos, that epic presentation, or that crucial document seems to be stuck in digital no man's land. Believe me, we’ve all been there. I remember the time my wedding photos – yes, my wedding photos – vanished from a seemingly dead USB drive. Panic set in! But, after hours of research and a few hair-pulling moments, I stumbled upon a solution. And guess what? It's simpler than you think. That's what we're diving into today.
1. The Dreaded Black Screen: Why Your USB Drive Might Be MIA
First things first, let's understand the enemy. Before we jump into the fix, we need to figure out why your USB drive might be playing dead. Think of it like diagnosing a car problem – you wouldn't just start replacing parts without knowing what's wrong, right?
- Physical Damage: This is the most obvious, but sometimes overlooked. Has your drive taken a tumble? Been squashed in a bag? Maybe it got wet? Physical trauma can wreak havoc on the tiny components inside.
- Software Corruption: Just like your computer's operating system, the file system on your USB drive can get corrupted. This can happen during a power surge, an improper ejection, or even just from general wear and tear.
- Driver Issues: Sometimes, your computer's drivers (the software that allows your computer to "talk" to the hardware) might be the problem. They might be outdated, corrupt, or just plain incompatible.
- Dead Chips: This is sadly more common than we'd like to admit. The flash memory chips inside the drive can simply fail over time, especially with heavy usage.
- Power Problems: The USB port itself might be the issue. Perhaps the port isn’t providing enough power, or maybe the port is simply fried.
2. The "One Trick" We're All Here For: The Power Cycle Miracle
Alright, drumroll please! Here’s the secret weapon, the one trick that has rescued countless USB drives from the digital graveyard: The Power Cycle. Sounds ridiculously simple, right? But trust me, it works more often than you’d think. Think of it as a digital reboot for your USB drive.
Here's how it works:
Unplug and Wait: Unplug the USB drive from every device. This is crucial! We want to make sure there's absolutely no residual power flowing through it. Give it a good 30 seconds – think of it as a digital timeout.
Try a Different Port: Now, plug it into a different USB port on your computer. Preferably, try a USB 2.0 port, if available. These ports can sometimes be more forgiving, offering a slightly different power delivery.
Try a Different Computer: If it still doesn't work, try plugging it into a completely different computer. This helps eliminate the possibility of a computer-specific problem.
The Waiting Game: Let the drive sit plugged in to different computer and different USB ports for an approximate of 15 minutes.
Reboot and Reconnect: Now, reboot your computer. After the reboot, plug the USB drive back in.
Why Does This Work?
The power cycle helps reset the controller chip inside your USB drive. It's like hitting the reset button on your computer. Sometimes this resets the communication between the computer and the drive, clearing any temporary glitches or errors that might be preventing it from being recognized.
3. Troubleshooting Steps Before We Cry: Basic Checks to Run
Still no luck? Let’s move onto some basic troubleshooting steps before we resort to more drastic measures.
- Check the Drive in Disk Management (Windows): On Windows, type "disk management" into the search bar and open the Disk Management utility. Look for your USB drive in the list of drives. Even if it doesn't have a drive letter assigned, it should show up if the computer recognizes it at all.
- Check the Drive in Disk Utility (Mac): On a Mac, open Disk Utility (search for it in Spotlight). Look for your USB drive in the list of devices.
- Try a Different USB Cable/Extension (if applicable): If you're using a USB extension cable or hub, remove it and plug the drive directly into the computer. These things can sometimes cause power issues.
- Test a Different Device: Plug another USB device into the same port to ensure the port itself isn't the issue.
4. Format to the Rescue? (Use With Caution!)
If your computer sees the drive in Disk Management or Disk Utility, but you still can't access it, formatting might be your next step. Be warned: Formatting will erase everything on the drive! So only do this if you've exhausted all other options and you're okay with losing the data.
- How to Format on Windows: In Disk Management, right-click on the USB drive and select "Format." Choose a file system (FAT32 for broader compatibility, or exFAT for larger files) and click "Start."
- How to Format on Mac: In Disk Utility, select the USB drive and click "Erase." Choose a format (like exFAT for cross-platform compatibility) and click "Erase."
5. Driver Updates: The Unsung Hero of Tech
Sometimes, the problem lies with outdated or corrupted drivers. Let's make sure your computer has the latest drivers for USB devices:
- Windows: Open Device Manager (search for it in the Start menu). Expand "Disk drives." Right-click on your USB drive (or a generic "USB Mass Storage Device," which is often what it's labeled as) and select "Update driver." Choose "Search automatically for drivers."
- Mac: Macs generally handle driver updates automatically through macOS updates. Make sure your operating system is up-to-date.
6. Advanced Recovery Options: When Things Get Serious
If the power cycle and basic troubleshooting haven’t worked, it's time to consider more advanced recovery options. These steps can be more complex and might require specialized software.
- Data Recovery Software: Programs like Recuva (Windows) or Disk Drill (Mac) can scan your USB drive for lost files and attempt to recover them. The success rate depends on the extent of the damage and how quickly you act.
- Low-Level Formatting: This goes deeper than a regular format and can sometimes revive a drive that's on the brink. Be very careful with this, as it’s even more aggressive than a standard format.
- Professional Data Recovery Services: If the data is truly irreplaceable (those wedding photos, remember?), you might want to consider sending your drive to a professional data recovery service. They have specialized tools and expertise, but it’s also the most expensive option.
7. Preventing Future USB Drive Disasters
Let's be proactive! Here are a few tips to help you avoid the heartbreak of a dead USB drive in the future:
- Always Eject Properly: Never just yank the drive out of your computer. Right-click on the drive icon in your system tray (Windows) or drag the drive to the trash (Mac) to safely eject it.
- Avoid Extreme Temperatures: Keep your USB drives away from extreme heat or cold. Think of them like delicate flowers; they don't like being baked or frozen.
- Protect from Physical Damage: Store your USB drives in a safe place, away from potential bumps, drops, and spills.
- Back Up Your Data! This is the most important tip of all! Regularly back up the important files on your USB drive to another device (like a hard drive or the cloud) to avoid the disaster of data loss.
- Choose Quality Drives: Invest in USB drives from reputable brands. They're usually built with better components and are more reliable in the long run.
8. USB Drive Health Checks: Monitoring for Warning Signs
Keep an eye on your USB drives. Just as you'd do a health check on your car, you can look for warning signs that your USB drive is starting to fail.
- Slow Transfer Speeds: If your drive suddenly starts transferring files at a snail's pace, it could be a sign of problems.
- Frequent Errors: Are you seeing "Disk not formatted" or other error messages popping up? That's a red flag.
- Unusual Behavior: Does the drive make strange noises? Does it disconnect and reconnect randomly? These behaviors can indicate issues with the drive's internal components.
9. The USB Drive Lifespan: How Long Do They Last?
USB drives aren't immortal. While they're incredibly convenient, they do have a limited lifespan. What happens is that the flash memory inside the drive has a limited number of read/write cycles before, like a worn-out tire, they start to fail.
- Typical Lifespan: Most USB drives are designed to last for several years, but the exact lifespan depends on factors like the quality of the
Fix USB Device Not Recognized in Windows 11 10 How To Solve usb device not recognized 5 Ways
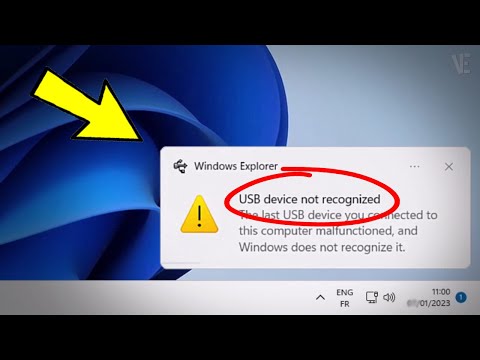
By Victor Explains Fix USB Device Not Recognized in Windows 11 10 How To Solve usb device not recognized 5 Ways by Victor Explains
Fix USB Flash No Media error Repair pendrive not show in computer Recover USB flash IT Adobe

By IT Adobe Fix USB Flash No Media error Repair pendrive not show in computer Recover USB flash IT Adobe by IT Adobe
Pen drive Not showing USB Flash No Media Fix No Media 0 byte Removable Disk Not Showing
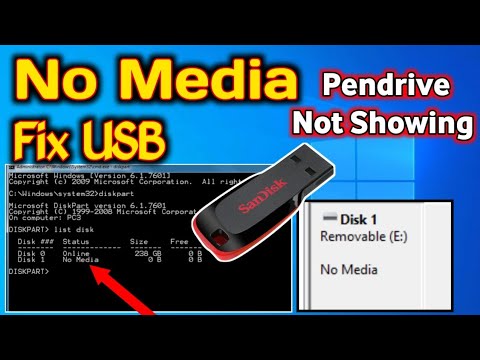
By Techie Zen Pen drive Not showing USB Flash No Media Fix No Media 0 byte Removable Disk Not Showing by Techie Zen
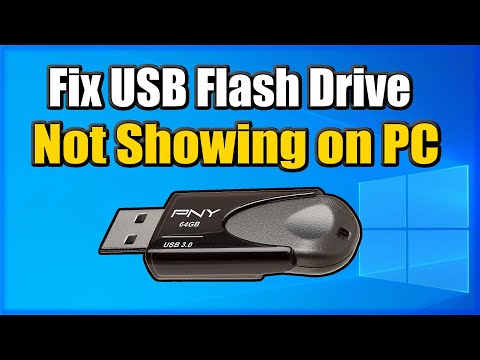
Title: How to FIX USB DRIVE not showing up Windows 10 Easy Method
Channel: YourSixStudios
How to FIX USB DRIVE not showing up Windows 10 Easy Method by YourSixStudios
Change Wifi Settings
USB Drive Dead? This ONE Trick Will Fix It!
The heart sinks. That sickening moment when your USB drive, the tiny digital vessel holding countless memories, vital documents, or perhaps even your entire life’s work, abruptly stops functioning. The light flickers, the computer doesn’t recognize it, and the dreaded feeling of data loss washes over you. But before you resign yourself to a fate of costly data recovery services or, worse, complete digital oblivion, take a deep breath. Because often, what appears to be a completely "dead" USB drive is merely suffering from a curable ailment. And in many, many instances, the prescription is surprisingly simple. Forget complicated software and complex procedures; there's a single, often-overlooked trick that can resurrect your seemingly deceased drive and recover your invaluable data.
Understanding the Enemy: Potential Causes of USB Drive Failure
Before we dive into the life-saving fix, it’s helpful to briefly touch upon the common reasons why a USB drive might seem to have succumbed. Recognizing the potential culprits allows for a more targeted approach and a better understanding of why our single trick is so effective.
Physical Damage: The most obvious, but sadly, the most permanent. Dropping the drive, crushing the plastic casing, or exposing it to extreme temperatures can inflict irreparable damage. However, even seemingly minor physical issues can disrupt the internal connection.
Logical Errors: These are software-related issues. Errors in the file system can make the drive unrecognizable to your computer. This is often what leads to the dreaded "drive needs to be formatted" prompt.
Corruption: Data corruption can arise during file transfers if the drive is abruptly disconnected or if the computer crashes. This corruption can render the drive unusable, and the data can be lost.
Power Surges/Voltage Fluctuations: USB drives are sensitive electronic devices. Unexpected power spikes can fry the internal components.
Outdated Drivers: While less common, outdated or corrupted USB drivers on your computer can prevent the drive from being detected.
Manufacturing Defects: Sometimes, a drive is simply manufactured with a flaw that eventually leads to its demise.
The Revelation: The Power of Low-Level Formatting
Now, for the moment you’ve been waiting for: the one trick. The solution. The key to potentially unlocking your data’s freedom: Low-Level Formatting.
What is Low-Level Formatting? Unlike the standard “format” option you find in Windows Explorer, low-level formatting delves deeper. It rewrites the entire surface of the USB drive. It essentially rewrites the drive at a physical level, clearing all the data and addressing any underlying logical problems.
Important Caveat: Low-level formatting erases all data on the drive. Before attempting this procedure, consider any steps you have taken to try and recover any data, always prioritizing your data over the functionality of the drive. If the data is recoverable, it can be performed with data recovery software.
How to Perform Low-Level Formatting (The Easy Way)
While true low-level formatting used to require specialized tools, the good news is that many modern drives can be successfully restored using readily available tools. There is no need to spend money on data recovery, the solution is free, safe, and does the trick.
Step-by-Step Guide:
Download the Right Tool: There are several free and effective low-level formatting tools available online. One of the most popular and reliable options is the "HDD Low Level Format Tool." You can easily find it by searching on your search engine. Download and install it.
Connect Your USB Drive: Plug the "dead" USB drive into your computer. Make sure it’s connected directly to a USB port on your computer. Avoid using a USB hub initially, as this can sometimes interfere with the process.
Launch the Tool: Open the HDD Low Level Format Tool. Take your time, and make sure you download the correct software.
Select the USB Drive: In the program's interface, you should see a list of connected storage devices. Carefully select your USB drive. It’s crucial to choose the correct drive to avoid accidentally formatting your hard drive or other storage devices. Double-check the drive model and capacity to ensure you've chosen correctly.
Initiate the Formatting Process: The program will present options. Choose the one that allows formatting of the USB drive. It will usually ask you to confirm your choice. A window will pop up to let you know that you are about to format the drive. Proceed.
Wait Patiently: Low-level formatting can take some time, often an hour or more, especially for higher-capacity drives. Be patient and allow the process to complete uninterrupted. Do not disconnect the drive or turn off your computer during the formatting.
Format and Test: Once the low-level formatting is complete, the drive will need to be formatted again using the standard Windows format. Right-click on the drive in Windows Explorer and select "Format." Choose a file system like NTFS or FAT32 (FAT32 is generally more compatible with older devices). Give the drive a label. Then, click "Start." After a final format, test the drive by transferring files.
Why This Works: The Magic Behind the Trick
Low-level formatting essentially resets the USB drive to its factory state. It sweeps away any corrupted data, bad sectors, and logical errors that might be preventing the drive from functioning correctly. It's like a digital deep clean, wiping the slate clean and allowing your computer to re-establish a proper connection with the drive.
Beyond the Fix: Proactive Measures to Protect Your USB Drives
Resurrecting a dead USB drive is a victory, but preventing future failures is equally important. Here are a few essential tips to safeguard your valuable data and your USB drives:
Eject Safely: Always safely remove your USB drive from your computer. Use the "Eject" option in your operating system to ensure a smooth and complete disconnection. Don’t simply yank the drive out.
Avoid Extreme Conditions: Protect your drives from extreme temperatures, humidity, and direct sunlight.
Use a Protective Case: Consider using a protective case or sleeve to shield your USB drive from physical damage.
Regular Backups: The most crucial data protection strategy of all: Regularly back up your important data. This is especially important if you are using a USB drive as your primary storage for important files. Cloud storage and external hard drives are excellent options.
Limit Exposure to Untrusted Computers: Be cautious about plugging your USB drive into computers you don't trust, as they could contain malware that could corrupt your data.
Use a USB Port That Provides Sufficient Power: Some USB ports provide less power than others. Ensure you're using a port that provides enough power to the drive, especially for external hard drives.
Troubleshooting and Advanced Considerations
While low-level formatting is often the magic bullet, there are times when it may not succeed. Here are a few troubleshooting steps and advanced considerations:
Verify the Drive's Physical Condition: If the drive has sustained physical damage, the low-level format might not fix it.
Check for Firmware Updates: Some USB drive manufacturers provide firmware updates that can improve drive performance and address potential issues. Check the manufacturer's website for any available updates.
Try a Different Computer: Sometimes, the problem lies with your computer. Try connecting the USB drive to a different computer to rule out compatibility issues or driver conflicts.
Consider Data Recovery Services: If the low-level formatting fails and your data is critical, consider professional data recovery services. These services use sophisticated techniques to attempt to recover data from damaged drives. Costs can vary greatly, so research and compare prices before committing.
Congratulations! You’ve (Potentially) Saved the Day.
The sinking feeling of a dead USB drive is a common digital nightmare. But armed with the knowledge of low-level formatting, you have a powerful tool in your arsenal. By understanding the causes of drive failure and following the simple steps outlined, you can often breathe new life into your "dead" drive and potentially retrieve your valuable data. Remember to be patient, proceed cautiously, and always prioritize data backup to safeguard yourself against future digital emergencies. Now, go forth and conquer the digital darkness!
