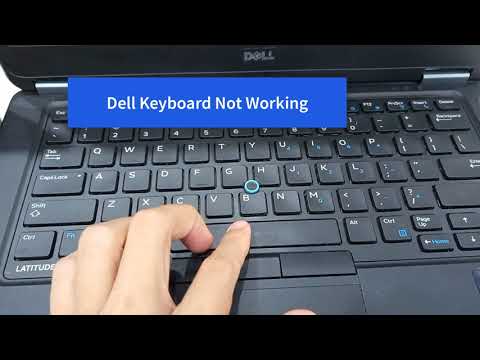
dell latitude laptop keyboard stops working

Title: Dell laptop keyboard not working Why is my Dell keyboard not typing
Channel: Suraj Computers
Dell laptop keyboard not working Why is my Dell keyboard not typing by Suraj Computers
dell latitude laptop keyboard not working, dell latitude laptop keyboard light not working, dell latitude e7450 laptop keyboard not working, dell laptop keyboard suddenly stopped working, why has my dell laptop keyboard stopped working, dell latitude laptop keyboard locked
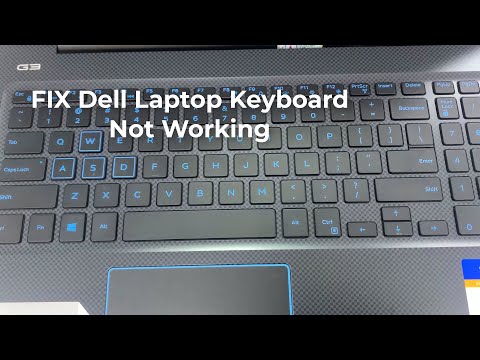
Dell Latitude Keyboard Dead? FIX IT NOW! (Easy Steps)
Is Your Dell Latitude Keyboard a Digital Dud? Quick Fixes Ahead!
Oh no! Your Dell Latitude keyboard decided to go on strike? Don't panic! It’s a frustrating situation, I agree. However, before envisioning a complete system overhaul, let's explore some straightforward solutions. We’ll get that key-pressing functionality back in a flash.
Initial Troubleshooting: The Obvious, Yet Often Overlooked
Firstly, breathe. We will get this sorted. Before diving into complex diagnostics, consider the simplest explanations. Start with the basics, always. Is it plugged in correctly? Even if it seems silly to ask. Seriously verify all connections. Make sure the keyboard cable (if external) is snugly connected. Also, is there a power outage happening? Check the power source. Perhaps it’s a simple matter of a loose plug or depleted battery. Furthermore, is the system turned on? Ensure your Latitude is fully powered and booted.
Software Glitches? Let’s Eliminate Them Quickly
Next, let’s consider internal problems. Software conflicts often cause keyboard malfunctions. Sometimes, a simple reboot can work wonders. Restart your Dell Latitude. Then, sometimes, an update is needed. Check for any pending software updates. This includes the operating system. It also involves any keyboard-related drivers. You can find these in Device Manager. Access Device Manager by searching in the Windows search bar. Look for any exclamation marks (!) next to your keyboard. This indicates a potential driver issue. If you find any, right-click and select "Update driver." If this fails, uninstall and then reinstall the drivers.
Unearthing Deeper Issues: Delving Into Hardware
If the software side checks out fine, we must move into the hardware. The true test. Now, if your keyboard is external, try another keyboard. This will immediately tell you if the problem is, in fact, the original keyboard. If the replacement works, the problem is the keyboard, plain and simple. If it's still not working, the problem might be inside your laptop. For internal keyboards, this gets a bit more complicated. You'll need to inspect the keyboard itself.
Laptop Disassembly (Proceed with Caution!)
This step demands carefulness. If you're comfortable with minor tech repairs, proceed. Otherwise, seek professional assistance. First, power down the Latitude. Then, unplug it from the power source. Then, consult your Dell Latitude’s service manual. Search online for "Dell Latitude [model number] service manual.” It will provide instructions for disassembly. The manual is your guide. It will outline the screws and connectors. Carefully remove the screws. Be careful, and keep them organized. You don't want to lose any! Next, gently detach the keyboard connector. Inspect it for any damage. Sometimes, a loose connection is the culprit. Reconnect the keyboard, ensuring it’s securely attached.
Keyboard Inspection: The Art of Observation
Once the keyboard is accessible, give it a thorough look. Look for visible damage. Are any keys physically broken? Is there liquid damage? Has anything fallen into the keys or mechanisms? Also, inspect the ribbon cable. This is the flexible cable connecting the keyboard to the motherboard. Ensure it's properly seated and not torn. Dust and debris are your enemies. Use compressed air to clear any dust or debris from under the keys. Moreover, check the keyboard's connection points. These are the points where the keyboard connects to the motherboard. A buildup of dust can interfere with contact.
Advanced Diagnostics: Exploring the Motherboard
If hardware issues persist, it might be a motherboard problem. This is a more complex issue. It often requires professional repair. The keyboard connector on the motherboard might be faulty. A motherboard repair or replacement is your ultimate choice.
Preventative Measures: Keeping Your Keyboard Happy
Prevention is always better than cure. So, how can you prevent keyboard issues? Regularly clean your keyboard. Use a soft cloth and compressed air. Also, avoid eating or drinking near your laptop. These activities can cause accidental spills. Furthermore, avoid harsh chemicals for cleaning. Instead, use a mild solution. Also, make sure your hands are clean before typing. This will minimize dust and debris.
When to Call in the Experts: Knowing Your Limits
If you’ve tried all this and your keyboard remains unresponsive, it's time. Time to seek professional help. Don’t hesitate to take your Latitude to a qualified repair technician. They have the expertise to diagnose and fix complex hardware issues. They also possess the tools.
Closing Thoughts: Typing Towards Success
Hopefully, one of these steps has helped you. You should now have a functioning keyboard again. If not, don't despair. Remember, patience and systematic troubleshooting are key. In some cases, the solution is simple. In others, it might be complex. No matter what, you’ve learned more about your laptop and its inner workings. Now, go forth and type! Your Dell Latitude awaits.
VR Goggles on YouTube Laptop? This SHOCKING Trick Works!Dell Latitude Keyboard Dead? FIX IT NOW! (Easy Steps)
Hey there, fellow laptop lovers! Ever stared at your Dell Latitude, that trusty sidekick, and found the keyboard… silent? It's enough to make you want to throw your hands up in the air (which, ironically, you might not be able to do effectively without a functioning keyboard). Don't worry, we've all been there. My own Dell Latitude once decided to stage a keyboard strike right before a crucial presentation. Panic mode activated! But fear not, because we're going to walk through the troubleshooting steps together, and hopefully, we'll resurrect your keyboard from the digital graveyard. Let's get started!
1. Is Your Keyboard Really Dead? The Initial Checkup
Before we dive in, let's make sure we're diagnosing the right problem. Sometimes, the keyboard seems dead, but it's just a temporary glitch. Think of it like a grumpy teenager – a little restart might be all it needs.
- Restart the Laptop: This is the digital equivalent of hitting the reset button. A simple restart can clear up minor software hiccups. Try it first! It's like the "have you tried turning it off and on again?" of the tech world.
- External Keyboard Test: Plug in an external USB keyboard. Does it work? If yes, then we know the problem is with the laptop's built-in keyboard. If the external keyboard also doesn't work, then the problem might be a broader issue with your operating system or a driver conflict.
- Check the Caps Lock/Num Lock Lights: Do these lights illuminate when you press the respective keys? If the lights do respond, then the keyboard is likely at least partially functional, and the issue could be software-related (like a driver issue).
2. The Power of the Power Cycle: A Deep Dive Reset
Sometimes a simple restart isn't enough. We need to give the system a deeper reset, purging any lingering gremlins from the system. This is where the power cycle comes in.
- Shut Down Completely: Don't just put your laptop to sleep; shut it down entirely. Make sure all programs are closed.
- Unplug Everything: Unplug the power adapter and remove any external devices (USB drives, mouse, etc.). Think of this as a digital detox.
- Hold the Power Button: Press and hold the power button for at least 30 seconds. This discharges any residual power and forces a complete reset. Imagine blowing all the dust out of a dusty old machine.
- Plug It Back In and Restart: Plug the power adapter back in (and any other external devices you need) and turn your laptop back on. Fingers crossed!
3. Driver Dilemmas: The Software Saboteurs
If the power cycle didn't work, the culprit might be a rogue driver. Drivers are like the translators that allow your keyboard to communicate with the operating system. Sometimes, these translators fall silent.
- Access Device Manager: Right-click on the Windows Start menu and select "Device Manager." (On newer Windows versions, you might need to right-click the Windows icon and select "Device Manager" from the menu.)
- Expand "Keyboards": Click the arrow next to "Keyboards" to expand that section. You should see your keyboard listed there (it might be a "HID Keyboard Device" or something similar).
- Update the Driver: Right-click on your keyboard and select "Update driver." Choose "Search automatically for drivers." Windows will try to find and install the latest driver.
- Uninstall and Reinstall: If updating doesn't work, try uninstalling the keyboard driver. Right-click on it in Device Manager and select "Uninstall device." Restart your laptop, and Windows should automatically reinstall the driver.
4. Keyboard Shortcuts to the Rescue
Believe it or not, some keyboard functions might still work, even if most keys appear dead. Let's explore some keyboard shortcuts that can help you troubleshoot:
- Windows Key + Ctrl + Shift + B: This shortcut is designed to restart your graphics driver. In rare cases, a corrupted graphics driver can interfere with keyboard functionality.
- Windows Key + X: This opens the "Quick Access Menu," which can be navigated with the arrow keys. This will help you see if there is a problem with the main computer.
- Use "On-Screen Keyboard": Type "On-Screen Keyboard" in the Windows search bar and open it. You can use your mouse to interact with the on-screen keyboard and see if that works. If the on-screen keyboard does, then we've narrowed the issue down to the physical keyboard!
5. The Hardware Hurdle: Physical Inspection
Now, for the moment of truth. If software fixes haven't worked, we might be dealing with a hardware issue.
- Check for Debris: Carefully examine the keyboard. Are there any crumbs, dirt, or other debris lodged between the keys? Use a can of compressed air to gently blow out any obstructions. Think of this as spring cleaning for your keyboard.
- Loose Cable Check (Advanced): Disclaimer: Proceed with caution, and if you're not comfortable working with electronics, it's best to consult a professional. Sometimes, the ribbon cable that connects the keyboard to the motherboard can become loose. You might need to remove the bottom panel of your laptop (consult your Dell Latitude's service manual for specific instructions) and gently check the connection. Make certain you've shut it down completely by this stage.
- Look for Damage: Inspect the keyboard closely. Are there any signs of physical damage, such as broken keys or spilled liquids? Water damage, in particular, can be the kiss of death for keyboards.
6. BIOS Blues: Could the BIOS Be the Bad Guy?
The BIOS (Basic Input/Output System) is the firmware that runs when your laptop boots up. It's the foundation of your system. Could there be an issue lurking there?
- Access the BIOS Setup: Turn off your computer, then turn it back on. Immediately start pressing the key that accesses your BIOS setup. (This is typically the Del, F2, F10, or F12 key – check your Dell Latitude's documentation for the specific key).
- Keyboard Test in BIOS: Once in the BIOS, navigate the menus using the arrow keys, Enter, and Esc keys. Does the keyboard function within the BIOS? If your keyboard is working in the BIOS, it's not a hardware issue, but if the keyboard still doesn't work, it points to a serious issue.
- BIOS Update (Advanced): Caution: Updating your BIOS can be risky and should only be done if you're comfortable with the process. If you're feeling brave, consider updating your BIOS to the latest version from the Dell support website. This can sometimes resolve compatibility issues.
7. The Factory Reset Option: Nuking it From Orbit
If you've tried everything, and your keyboard is still stubbornly silent, a factory reset might be necessary. It's like a digital exorcism, removing all traces of the problem.
- Backup Your Data: Important: A factory reset will erase all your data on the hard drive. Before you proceed, back up all your important files (documents, photos, videos, etc.) to an external drive or cloud storage.
- Access the Recovery Environment: During startup, repeatedly press the key that accesses the Dell recovery environment (again, consult your Dell's documentation). This will take you to a special menu.
- Choose "Reset this PC": Select the option to reset your PC. Follow the on-screen instructions, choosing to either keep your files or completely wipe the drive.
8. Is It the Keyboard Itself, or the Little Connection?
Sometimes, the problem isn't the keyboard itself but the connection between the keyboard and the rest of the computer.
- Check the Ribbon Cable: As mentioned earlier in the physical inspection, there's a small ribbon cable that runs from the keyboard to the motherboard. A loose or damaged cable can make the keyboard completely useless.
- Reseat the Cable: This can be complex and you may want to consult a professional. If you're comfortable, carefully disconnect the ribbon cable from the motherboard, check for any damage, and re-seat it firmly.
- Inspect the Connector: Examine the connector on the motherboard. Is it clean, or is there any corrosion or damage?
9. Diagnostics Through Dell Support Assist
Dell often includes powerful diagnostic tools in its software. Take advantage of these tools!
- Launch Dell SupportAssist: Find this program in your Start menu or through the Dell Support site.
- Run a Hardware Scan: Run a full hardware scan, specifically targeting the keyboard. This scan can often identify issues that you might not find otherwise.
- Follow the Recommendations: Dell SupportAssist will give you recommendations based on the scan results.
10. The Liquid Spill: A Keyboard's Worst Nightmare, and How to Recover
A spilled drink can be a keyboard's death knell. But all hope isn't lost.
- Act Fast: If you spill liquid, immediately shut down the laptop and disconnect the power.
- Invert and Drain: Turn the laptop upside down to allow the liquid to drain out.
FIX Dell Keyboard Not Working Windows 10 Dell Latitude 3410

By Cap Trong Nam - How To FIX Dell Keyboard Not Working Windows 10 Dell Latitude 3410 by Cap Trong Nam - How To
FIX Dell Keyboard Not Working Windows 10 Dell Latitude E7450 Laptop
By Cap Trong Nam - How To FIX Dell Keyboard Not Working Windows 10 Dell Latitude E7450 Laptop by Cap Trong Nam - How To
Dell Latitude e5450 Keyboard Replacement

By Reedtech Dell Latitude e5450 Keyboard Replacement by Reedtech
Title: FIX DELL keyboard not working in Windows 1087 3 METHODS
Channel: Cap Trong Nam - How To
FIX DELL keyboard not working in Windows 1087 3 METHODS by Cap Trong Nam - How To
Wifi On Laptop Phone
Dell Latitude Keyboard Dead? FIX IT NOW! (Easy Steps)
Experiencing a lifeless keyboard on your Dell Latitude? That moment when you hit a key expecting a response, only to be met with silence, can be incredibly frustrating. Don't despair! We've compiled a straightforward, comprehensive guide to diagnose and resolve this common issue, restoring your keyboard functionality quickly and efficiently. Follow these steps; your Latitude's keyboard should be back online soon.
Step 1: The Initial Assessment – Basic Troubleshooting
Before delving into complex solutions, let's rule out the simplest causes. Sometimes, the solution is surprisingly simple. Start with these fundamental checks:
- Reboot Your Latitude: This action is often the most effective first step. A simple restart can clear temporary glitches that may be interfering with the keyboard's operation. Press and hold the power button until the device shuts down. Then, restart it.
- Check the Power Supply: Ensure your Dell Latitude is plugged into a working power outlet and that the power adapter is functioning correctly. A depleted battery, or an unreliable power source, can sometimes manifest in unusual behavior, including keyboard malfunctions.
- External Keyboard Test (If Applicable): If your Latitude allows it, connect an external USB keyboard. Does the external keyboard work? If it does, the issue likely lies within your Latitude's built-in keyboard or its connection. If the external keyboard encounters the same problems, it's likely a system-level issue.
- Inspect the Keyboard Connector (If Possible): If you are comfortable with basic hardware adjustments, and if your Dell Latitude model allows easy access (consult your service manual), carefully check the internal keyboard connector. Sometimes, it can become loose. Ensure the connector is securely seated. Important: Always power down and disconnect your AC adapter before opening your laptop!
Step 2: Software Solutions - Addressing Driver Conflicts and System Issues
Software issues often lie at the heart of keyboard problems. Troubleshooting these requires a more technical approach.
- Driver Reinstallation: Keyboard driver issues can arise from corrupted or outdated drivers. Here's how to rectify that:
- Access Device Manager: Right-click on the Windows start menu (the Windows icon) and select "Device Manager".
- Locate the Keyboard: In the Device Manager window, expand the "Keyboards" section.
- Uninstall and Reinstall: Right-click on your keyboard device (it might be labeled "HID Keyboard Device" or similar) and choose "Uninstall device". In the prompt window, select the "delete the driver software for this device" box, then select Uninstall. Then, restart your Dell Latitude. The operating system will automatically reinstall the correct drivers on reboot.
- Update Drivers: If the automatic reinstallation doesn't work, go back into Device Manager, right-click on the keyboard and click "Update driver". Select "Search automatically for drivers." This will search for the latest version online.
- Run the Hardware Troubleshooter: Windows incorporates built-in troubleshooters that can identify and correct common hardware problems. Here’s how to run the hardware troubleshooter:
- Access Settings: Click the Windows Start button. Go to Settings (the gear icon).
- System and Troubleshoot: Click "System," then select “Troubleshoot.”
- Run the Hardware Troubleshooter: Click "Additional troubleshooters." Click on “Keyboard” and run the troubleshooter. Follow the on-screen prompts.
- System File Check (SFC) and DISM Scan: Corrupted system files can lead to various problems, including keyboard malfunctions. Use these utilities:
- Open Command Prompt as Administrator: Type "cmd" in the Windows search bar, right-click "Command Prompt", and select "Run as administrator."
- Run SFC Scan: Type
sfc /scannowand press Enter. This command will scan and attempt to repair corrupted system files. - Run DISM Scan: After the SFC scan completes (or if it doesn't fix the issue), run the DISM scan. Type
DISM /Online /Cleanup-Image /RestoreHealthand press Enter. This command uses Windows Update to repair system image issues. - Restart your Dell Latitude after the DISM scan.
- Check for Malware: Malicious software can sometimes interfere with keyboard functionality. Run a full system scan using your preferred antivirus program. Consider running a secondary scan with a reputable anti-malware tool, such as Malwarebytes.
Step 3: Hardware Diagnostics and Repair (If Necessary)
If software solutions fail, it's time to investigate hardware possibilities.
- Check for Physical Damage: Carefully inspect your Dell Latitude's keyboard for physical damage. Look for:
- Spilled Liquids: Evidence of spills (sticky residue, discoloration) is a common culprit. If a spill occurred, power down your Latitude immediately, disconnect from power, and consider professional cleaning.
- Key Detachment: Ensure all the keys are securely attached. Sometimes, a key can come loose or become dislodged.
- Debris: Small crumbs or other debris can get lodged beneath keys, preventing proper function. Try carefully cleaning around each key with compressed air or a soft brush while the computer is powered down.
- Keyboard Membrane Issues (Less Common, Requires Disassembly): On older Dell Latitude models, the keyboard’s internal membrane pads can sometimes get worn. These membrane pads can be found underneath the keys. You'll need to detach the keyboard from your laptop if you decide to investigate this. (This step is not recommended for novice users – it presents the risk of causing further damage.)
- Keyboard Replacement: In many cases, the most practical solution is to replace the keyboard. This option is often the most cost-effective and ensures full functionality. Consider a professional laptop repair service or purchasing a replacement keyboard and conducting the replacement yourself. Replacing a keyboard can sometimes be difficult depending on the laptop model. Always make sure the new keyboard is compatible with your model.
- Motherboard Problems (Rare But Possible): In extremely rare situations, the problem may stem from the motherboard. If all other solutions have been exhausted, it's advisable to consult a professional repair technician.
Step 4: Maintaining Your Dell Latitude's Keyboard
Prevention is always better than cure. Implement these practices to prolong the life of your keyboard:
- Regular Cleaning: Use compressed air to remove dust and debris regularly. A soft brush can also help.
- Avoid Spills: Exercise extreme caution near liquids. If a spill occurs, act immediately. Shut down and unplug your Latitude.
- Handle with Care: Avoid excessive force when typing or using your laptop.
- Consider a Keyboard Protector: A silicone or plastic keyboard cover can provide an extra layer of protection against spills and debris.
- Proper Storage: When storing your Dell Latitude for extended periods, ensure it is in a clean, dry environment, and the keyboard is covered or protected.
Step 5: Seeking Professional Assistance
If you’ve exhausted these steps and your Dell Latitude keyboard remains unresponsive, it’s time to seek professional help.
- Dell Support: Contact Dell's technical support directly. They can offer specific guidance or repair options.
- Local Repair Shops: Search for reputable laptop repair services in your area. They can diagnose the problem and offer repair options.
- Warranty Coverage: If your Dell Latitude is still under warranty, the repair might be covered. Check your warranty terms before seeking external repairs.
Addressing a dead keyboard on your Dell Latitude can seem daunting, but by methodically following these steps, you can likely identify the cause and implement a solution. From a simple reboot to hardware replacements, there's a high probability that you can restore your keyboard's functionality and get back to being productive!
