hp laptop hdmi input not working
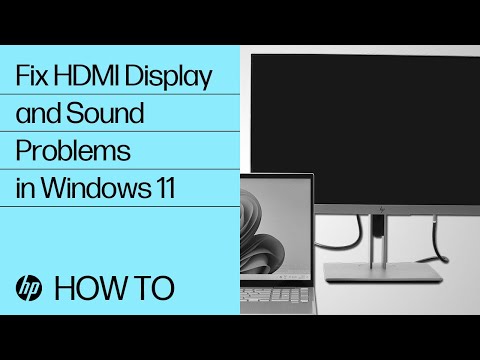
Title: How to fix your HDMI display and sound problems in Windows 11 HP Computers HP Support
Channel: HP Support
How to fix your HDMI display and sound problems in Windows 11 HP Computers HP Support by HP Support
hp laptop hdmi port not working, hp laptop hdmi port not working windows 11, hp laptop hdmi port not working windows 10, hp envy laptop hdmi port not working, hp omen laptop hdmi port not working, hp pavilion x360 hdmi port not working, hp pavilion dv6 hdmi port not working, hp laptop hdmi not working, laptop hdmi input not working, hp laptop hdmi output not working
HP Laptop HDMI Nightmare? FIX It NOW!
HDMI Hell on Your HP Laptop? Conquer the Connection Chaos!
Ever wrestled with your HP laptop, only to find your external monitor stubbornly refusing to cooperate? You're not alone. Many HP laptop users face HDMI connection frustrations. This article will guide you through the potential culprits and, more importantly, how to resolve them. So, let's dive in and get your external display working perfectly.
The Elusive HDMI Handshake: Understanding the Basics
First, it’s important to understand what's occurring behind the scenes. HDMI (High-Definition Multimedia Interface) provides a digital link for high-quality video and audio transmission. Essentially, your laptop and external display need to "shake hands" successfully. However, this handshake can sometimes falter. Several factors can disrupt this crucial communication.
Troubleshooting Titans: Unmasking the HDMI Villains
Let’s identify potential issues. We'll target common problems head-on.
- The Cable Conundrum: Is your HDMI cable the problem? Sadly, it often is. Try a different cable. Test with a known working one. Furthermore, consider the cable's age and condition. Inspect it carefully. Look for bends, kinks, or any visible damage. A faulty cable can easily sabotage your connection.
- Port Paralysis: Could the HDMI port on your laptop be at fault? Check the port meticulously. Look for any debris or damage. Sometimes, a simple cleaning with compressed air can resolve the issue. If you see any physically damaged pins, that's a different story. Your laptop might need repair.
- Driver Dilemma: Are your graphics drivers up to date? Outdated drivers are a frequent cause of display issues. Go to your HP laptop’s support page. Locate the drivers for your specific model. Then, download and install the latest graphics drivers. Restart your laptop after installation.
- Display Settings Detour: Your display settings are a significant factor. Once you've connected your external monitor, you should access your display settings. Usually, you can find these settings by right-clicking on your desktop. Select "Display Settings." Ensure your external monitor is detected. You may have to extend or duplicate the display. Thus, experiment with the various options.
- Power Problems: Is your external monitor powered on? This seems obvious, yet it’s frequently overlooked. Verify that the monitor is receiving power. Check the power cord and ensure it’s securely plugged in.
Step-by-Step HDMI Rescue: A Practical Guide
Now, let’s move to practical solutions. Follow these steps to restore your HDMI connection:
- Restart Ritual: Start with a simple reboot. Restarting your laptop is often a quick fix. It clears temporary glitches that might be causing problems. It also forces a fresh start for the operating system.
- Cable Capers: Replace your HDMI cable. As mentioned earlier, test with a different known good cable. This eliminates a common culprit. It's a swift way to verify cable functionality.
- Port Pilgrimage: Inspect the port. Thoroughly examine your laptop's HDMI port. Remove any dust or debris. Use a soft brush and compressed air.
- Driver Detox: Update your graphics drivers. Download current ones from the HP website. Then, install them. Reboot your system.
- Display Discovery: Access display settings. Detect your external monitor. Then, adjust the settings. Experiment with ‘Extend’ or ‘Duplicate’ modes. Choose what best suits your needs.
- Hardware Harmony: If possible, test your monitor with another device. This will help to verify whether the problem lies with the monitor. If the monitor works flawlessly with another device, the issue is likely your laptop.
Advanced Tactics: Deep Dive into Display Diagnostics
Sometimes, you need to dig deeper. Consider these advanced troubleshooting steps:
- BIOS Breakthrough: Less frequently, but potentially relevant, check your BIOS settings. Accessing the BIOS varies depending on your HP laptop model. Consult your laptop’s documentation. Look for display settings. Ensure the appropriate display adapter is enabled.
- Windows Troubleshooter Expedition: Windows has built-in troubleshooters. Navigate to Settings, then System, and then Troubleshoot. Run the "Hardware and Devices" troubleshooter. This tool can automatically identify and fix common hardware problems.
- External Display Exorcism: Try connecting your external monitor to another HDMI port. If your monitor has multiple HDMI ports, test them all. This often isolates the problem quickly.
- Power Cycle Paradigm: Disconnect both your laptop and monitor from the power supply. Leave them disconnected for several minutes. Afterwards, reconnect both. This fresh start can refresh those sometimes-stuck connections.
When to Seek Expert Assistance: Knowing Your Limits
If you’ve tried all these steps and still face HDMI difficulties, it might be time to seek professional help. Here's when to call in the reinforcements:
- Hardware Halts: If you suspect physical damage to your laptop’s HDMI port.
- Persistent Perplexities: If the problems persist despite all troubleshooting efforts.
- Technical Troubles: If you feel uncomfortable performing advanced troubleshooting steps.
Take your HP laptop to a certified repair technician. They have specialized tools and knowledge for resolving complex hardware issues.
Conclusion: Claim Your HDMI Victory!
HDMI connection issues on HP laptops can be frustrating. However, with careful troubleshooting, you can conquer these problems. Thus, step-by-step guides and advanced strategies help you. So, follow the steps outlined in this article. You'll be back to enjoying seamless external display functionality. Now, go forth and conquer your HDMI nightmare!
HP Envy FN Key Dead? This SHOCKING Fix Works!HP Laptop HDMI Nightmare? FIX It NOW!
We've all been there. You're ready to binge-watch your favorite show on the big screen, give that crucial presentation, or maybe even connect your laptop to a second monitor for some serious productivity gains, but then… nothing. The dreaded HDMI connection fails. If you're rocking an HP laptop and experiencing the HDMI blues, you're in the right place. This article is your lifeline, your troubleshooting bible, your guide to finally getting that HDMI connection working like a charm. Let's dive in!
1. The HDMI Heartbreak: Understanding the Problem
First things first, let’s acknowledge the frustration. The HDMI connection is supposed to be simple – plug and play, right? Wrong. Sometimes, it's more like plug and pray. We're talking about the black screen of doom, the intermittent connection that flickers like a dying firefly, or the frustrating "no signal" message. The culprit? Could be anything from a dodgy cable to outdated drivers or even a hardware malfunction. But before you panic, let's troubleshoot like pros.
2. The Usual Suspects: Common HDMI Problems
Before we get into the nitty-gritty of solutions, let’s run through some of the most common problems you might be facing. This is like understanding the suspect's profile before the police investigation:
- The Cable Culprit: A frayed, damaged, or simply low-quality HDMI cable is a prime suspect. They're like the weak link in a chain.
- The Port Peril: Your HP laptop’s HDMI port might be dusty, damaged, or even internally broken. We’ll check this carefully.
- Driver Drama: Outdated or corrupted graphics drivers are a leading cause of HDMI connection failures. They're like the software saboteurs.
- Display Settings Disasters: Incorrect display settings on your laptop can easily prevent the HDMI connection from working properly. Think of it as the wrong instructions being followed by the system.
- Hardware Hiccups: Sometimes, it's a deeper issue – a faulty graphics card or other hardware component. Let's hope it doesn't come to this!
3. Quick Fixes: Your First Line of Defense
Before you start tearing your hair out, let’s go through some quick checks and easy fixes. Think of these as the first line of defense, the low-hanging fruit:
- The Obvious Check: Make sure both the HDMI cable and your external display (TV, monitor, projector) are plugged in securely. Sometimes, it’s that simple.
- Cable Swap: Try a different HDMI cable. This single step solves a surprising number of issues. It’s like pulling the plug on a potential electricity overload.
- Power Cycle: Turn off both your HP laptop and the external display. Unplug both from power, wait a minute, plug them back in, and turn them back on. It’s like giving your system a digital reset.
- Source Selection: On your external display, make sure you've selected the correct HDMI input source. Easy to overlook!
4. Driver Detective: Updating Your Graphics Drivers
This is where things get a bit more technical, but don't worry, we'll guide you through it. Outdated graphics drivers are the bane of HDMI connections. Here's how to update them:
- Device Manager Access: Press the Windows key + X simultaneously and select "Device Manager." This is your control centre.
- Display Adapters Unveiled: Expand the "Display adapters" section. You'll likely see your graphics card listed here (e.g., Intel, NVIDIA, AMD).
- Driver Update Command: Right-click on your graphics card and select "Update driver."
- Automatic Search: Choose "Search automatically for drivers." Windows will try to find and install the latest drivers.
- Manufacturer's Website: If Windows can't find updated drivers, try visiting the website of your graphics card manufacturer (Intel, NVIDIA, AMD) and downloading the latest drivers for your HP laptop model.
5. Display Settings SOS: Configuring Your Display
Sometimes, the problem isn't the connection itself but how your laptop is interpreting it. Here's how to configure your display settings:
- Windows Key + P: This handy shortcut opens up the "Project" settings.
- Choose Your Mode: Select the desired mode:
- "PC screen only" (only uses your laptop screen).
- "Duplicate" (shows the same image on both displays).
- "Extend" (treats the external display as a second screen, great for multitasking).
- "Second screen only" (uses only the external display).
- Advanced Display Settings: Right-click on your desktop, select "Display settings," and then click on "Identify" to confirm that your external display is recognized.
6. HDMI Port Inspection: A Closer Look
Let's get our magnifying glasses out if necessary! Carefully inspect the HDMI port on your HP laptop. Look for:
- Bent Pins: Any bent or damaged pins in the port can prevent a proper connection.
- Debris Buildup: Dust, lint, or other debris inside the port can interfere with the connection.
- Cleaning Gently: If you see debris, you can carefully use compressed air or a soft, dry brush to clean it. Avoid anything that can cause damage.
7. The External Display's Role: Checking the Other End
Don't neglect the other end of the connection! Your external display could also be the problem.
- Test on Another Device: Try connecting your external display (TV, monitor) to another device (like another laptop, a game console, or a Blu-ray player) using the same HDMI cable. If it works, you've narrowed down the problem to your HP laptop.
- Firmware Check: Ensure your external display has the latest firmware updates. Check the manufacturer's website for instructions.
8. Software Conflicts: The Silent Saboteurs
Sometimes, software conflicts can interfere with your HDMI connection. To ensure no one is meddling with the process, consider a clean boot:
- Run msconfig: Type "msconfig" in the Windows search bar and press Enter.
- Services Tab Access: Go to the "Services" tab.
- Hide Microsoft Services: Check the box that says "Hide all Microsoft services."
- Disable All: Click "Disable all."
- Startup Tab: Go to the "Startup" tab and click "Open Task Manager."
- Disable Startup Items: Disable all startup items.
- Restart Time: Restart your computer and see if your HDMI connection works. If it does, then one of your programs was causing the issue. Re-enable programs one by one to identify the culprit.
9. Power Adapter Power-Up: Ensure Sufficient Power
Yes, you might even need to check your adapter:
- A Wattage Check: Make sure your HP laptop is connected to its power adapter. Some laptops require a certain level of power to output video via HDMI.
10. BIOS Blues? Checking for Updates
In some rare cases, an outdated BIOS (Basic Input/Output System) can cause HDMI problems.
- HP Support Assistant: HP laptops often come with the HP Support Assistant software. Open it.
- Check for Updates: Look for updates to BIOS or other firmware. Follow the on-screen instructions to install any available updates.
11. Hardware Headaches: When the Problem is Internal
If you've tried all the above steps and still no HDMI connection, it might be a hardware issue.
- Graphics Card Glitch: There might be a problem with the graphics card itself.
- HDMI Port Damage: The HDMI port on your laptop could be damaged internally, requiring professional repair.
- Professional Help: It's time to contact HP support or take your laptop to a qualified technician.
12. Testing in Safe Mode: Isolating the Problem
Safe Mode starts Windows with a minimal set of drivers and programs. This can help you determine if the HDMI issue is caused by a third-party software conflict.
- Entering Safe Mode: Restart your laptop and repeatedly press F8 (or Shift + F8) during startup until you see the Advanced Boot Options menu. Select "Safe Mode."
- Test the HDMI: In Safe Mode, try connecting your laptop to your external display via HDMI. If it works in Safe Mode, the issue is likely caused by a driver or software conflict outside of the standard settings.
13. The Windows Troubleshooter: A Last Resort
Windows has a built-in troubleshooter that can sometimes fix HDMI problems.
- Access the Troubleshooter: Go to Settings > System > Troubleshoot > Other troubleshooters.
- Run the Video Playback Troubleshooter: Run the "Video Playback" troubleshooter and follow its instructions.
14. Preventative Measures: Keeping Your HDMI Connection Healthy
Once you’ve got your HDMI connection working, let's take some steps to prevent future nightmares:
- Gentle Handling: Treat your HDMI cable and port with care. Avoid bending or yanking the cable forcefully.
- Dust Prevention: Regularly clean
2023 NEW How to Fix HDMI Not Working on Laptop Windows

By Wondershare Recoverit Data Recovery 2023 NEW How to Fix HDMI Not Working on Laptop Windows by Wondershare Recoverit Data Recovery
HOW TO REPLACE HDMI PORT PRO PROFESSIONALLY

By Mmanzils Tech HOW TO REPLACE HDMI PORT PRO PROFESSIONALLY by Mmanzils Tech
hp g4 laptop all usb port not working solution

By Deepak sharma hp g4 laptop all usb port not working solution by Deepak sharma

Title: How to Fix HDMI Not Working on Laptop Windows 11
Channel: Ground Zero
How to Fix HDMI Not Working on Laptop Windows 11 by Ground Zero
Working With Laptop
HP Laptop HDMI Nightmare? FIX It NOW! Your Comprehensive Guide
We understand the frustration – a crisp, vibrant image on your laptop screen, only to be met with a frustrating blankness when connecting to an external display via HDMI. It’s a common plight, and one we’re here to help you conquer. Forget the guesswork and the endless forum threads. We'll walk you through a precise, step-by-step guide to diagnose and resolve your HP laptop's HDMI connectivity woes.
Initial Troubleshooting: Ruling Out the Obvious
Before diving into complex solutions, let's eliminate the simplest possibilities. These preemptive checks can often save significant time.
- The Cable's Integrity: The HDMI cable is the first suspect. Ensure it’s a functional cable, certified and in good condition. Test the cable with another device, like a game console or Blu-ray player, to confirm it's transmitting a signal. A faulty cable is a surprisingly common culprit.
- The External Display's Sanity: Double-check that your external monitor or TV is powered on and set to the correct HDMI input. Many displays have multiple HDMI ports; make sure you've selected the one the cable is connected to.
- Port Inspection: Examine the HDMI port on both your HP laptop and the external display for any physical damage. Bent pins or debris inside the port can prevent a secure connection. A flashlight might be helpful here.
- Restart Ritual: A simple restart of both your HP laptop and the external display can often resolve temporary software glitches that might be hindering HDMI functionality. This should be your first step anytime a connection isn't recognized.
Driver Diagnostics: The Heart of the Matter
Graphics drivers are the unsung heroes (and sometimes villains) of the HDMI experience. They manage the communication between your laptop’s graphics processing unit (GPU) and the external display.
- Driver Updates: Essential Maintenance: Outdated or corrupted graphics drivers are a leading cause of HDMI problems. Updating your drivers is crucial. Here’s how:
- Device Manager: Navigate to the Device Manager by searching for it in the Windows search bar. Expand the "Display adapters" section.
- Driver Update: Right-click on your graphics card (likely an Intel, NVIDIA, or AMD chip) and select "Update driver." Choose "Search automatically for drivers." Windows will attempt to find and install the latest drivers.
- Manufacturer's Website: If Windows doesn't provide updated drivers, visit the HP website or the website of your graphics card manufacturer (Intel, NVIDIA, or AMD). Download the latest drivers specifically for your HP laptop model and operating system. Ensure that you select the correct version for your laptop.
- Fresh Driver Installation: Sometimes, a clean installation is necessary to resolve driver conflicts.
- Uninstall: In Device Manager, right-click your graphics card and select "Uninstall device." Check the box that says "Delete the driver software for this device" if available.
- Restart: Restart your laptop. Windows should revert to a basic driver.
- Reinstall: Download and install the latest drivers from the HP website or the manufacturer.
- Rollback Option: If a recent driver update caused the problem, you can roll back to a previous version. In Device Manager, right-click your graphics card, select "Properties," go to the "Driver" tab, and click "Roll Back Driver" if the option is available.
Display Settings: Fine-Tuning Your Connection
Once the drivers are sorted, the display settings themselves might need a little tweaking to enable HDMI output.
Detecting the External Display: Windows may not automatically detect your external display. Here's how to force a detection:
- Windows Key + P: Press the Windows key and the P key simultaneously. This opens the "Project" menu.
- Display Options: Select an option like "Duplicate," "Extend," or "Second screen only" to configure how your display outputs. Sometimes, you might need to cycle through these options to establish a connection.
Advanced Display Settings: Access these settings to customize your display configuration.
- Right-click: Right-click on your desktop and select "Display settings."
- Multiple Displays: In the "Multiple displays" section, ensure your external display is detected. If not, click "Detect."
- Resolution and Refresh Rate: Select the correct resolution and refresh rate for your external display. The resolution should match your display's native resolution for optimal image quality. A mismatched refresh rate can also create issues, so make sure that both devices are in sync.
Intel Graphics Control Panel or NVIDIA Control Panel/AMD Radeon Software: Your graphics driver software provides further control over display settings.
- Access software: Right click the Desktop screen, you will find the option to enter the intel graphics control panel, Nvidia control panel or AMD Radeon software.
- Configuration: Inside, you can manage display configurations, scaling, and even color settings for each attached display. Explore these options to fine-tune the HDMI output.
Power Management: Preventing Hiccups
Power management settings can sometimes interfere with HDMI connectivity.
- Power Plan Settings: Access your power plan settings.
- Search: In the Windows search bar, type "power plan."
- Edit Plan Settings: Select "Choose a power plan" and then "Change plan settings" for your active power plan.
- Advanced Settings: Click "Change advanced power settings."
- USB Selective Suspend: Expand "USB settings" and disable "USB selective suspend setting."
- PCI Express: Expand "PCI Express" and set "Link State Power Management" to "Off."
- Screen Saver: Ensure your screensaver is not active when you want to use HDMI.
BIOS Updates: The Deep Dive (Use with Caution)
Updating your BIOS (Basic Input/Output System) can sometimes resolve underlying hardware compatibility issues, including those affecting HDMI. However, this is a more advanced step. It’s important to proceed with caution.
- HP Website: Visit the HP support website and find the drivers and software download page for your specific laptop model.
- BIOS Update: Locate the BIOS update for your model. Carefully follow the instructions provided by HP.
- Power and Connectivity: This is crucial. Ensure your laptop is connected to a stable power source during the BIOS update and that the internet is stable. A failed BIOS update can render your laptop unusable.
- Back up your data: Before proceeding with a BIOS update, it's wise to backup your critical data.
Troubleshooting Specific Problems
Let's address some common HDMI issues and offer targeted solutions.
- No Picture, Only Sound: This suggests a video signal issue. Double-check your display settings and drivers. Try different resolutions. If your display has multiple HDMI ports, try them all.
- Flickering or Intermittent Connection: This could be a cable problem, a driver issue, or a problem with the external display. Test with a different HDMI cable. Update your drivers. Test the external display with another device.
- Distorted Image: This may be caused by an incorrect resolution setting. Set the resolution to the native resolution of your external display.
Advanced Solutions: Rarely Needed But Worth a Look
If the above steps haven’t resolved your problem, consider these less common solutions.
- Clean Boot: Performing a clean boot can help identify software conflicts that might be interfering with HDMI output. Search "System Configuration" in Windows. In the "Services" tab, check "Hide all Microsoft services," and then click "Disable all." In the "Startup" tab, click "Open Task Manager" and disable all startup items. Restart your laptop. If HDMI works in a clean boot, re-enable services and startup items one by one to identify the culprit.
- External Docking Station: An external docking station can sometimes bypass HDMI issues by providing a dedicated video output. This is an option if you frequently use an external monitor.
- Factory Reset: As a last resort, a factory reset can eliminate software problems. Back up your data before attempting this. This resets your laptop to its original state.
Preventative Measures: Keep the HDMI Blues Away
Once you've resolved your HDMI problem, consider these preventative measures:
- Regular Driver Updates: Stay up-to-date with your graphics drivers.
- Physical Inspection: Regularly inspect your HDMI port and cable.
- Safe Shutdown: Always shut down your laptop properly before disconnecting the HDMI cable.
- Temperature Control: Ensure your laptop is adequately cooled. Overheating can sometimes contribute to hardware problems.
By carefully following these steps, we are confident you can conquer your HP laptop's HDMI challenges and enjoy a seamless external display experience. If you've tried everything and the problem persists, it may be a hardware issue. In this case, contact HP support or a qualified repair technician. Good luck, and enjoy your extended display!
