fix laptop charger not working

Title: How to FIX Any Laptop Not Charging while plugged in
Channel: GMODISM
How to FIX Any Laptop Not Charging while plugged in by GMODISM
fix laptop charger not working, how to fix my laptop charger not working, how to fix hp laptop charger not working, how to fix dell laptop charger not working, how to fix lenovo laptop charger not working, how to fix your laptop charger if it's not working, how to fix laptop not working without charger, why is my laptop charger not working, what causes a laptop charger to stop working, what to do when my laptop charger is not working
Is Your Laptop Charger DEAD? (This 1 Trick Fixes It!)
Is Your Laptop Charger Kaput? Breathe Easy: A Secret Weapon
Honestly, there's few things more frustrating than a dead laptop charger. You're in the middle of something important. Your laptop unexpectedly shuts down. That familiar sinking feeling creeps in. But before you resign yourself to defeat, hold on! Before you rush out to buy a new one, there might be a simple fix. This could save you time, money, and a whole lot of stress. In fact, it's likely something you already have.
The Culprit: The Dreaded Power Cycle
Often, what we perceive as a dead charger isn't dead at all. Instead, it's experiencing a momentary glitch. It's like your laptop's brain has short-circuited. The charger, in its own way, is trying to protect itself. Therefore, it might have simply 'locked up'. It's not uncommon for chargers to get confused. They might sense a different voltage than expected. Or, perhaps, it's a minor internal hiccup.
Embrace the Power Cycle: Your First Line of Defense
Here's your secret weapon: The power cycle. It’s easier to execute than you think. First, unplug your charger from the wall outlet. Next, unplug the charger from your laptop. Now, here comes the critical part. You need to hold down the power button on your laptop for a full 30 seconds. That’s right, a solid 30 seconds of button-mashing. This drains any residual power and resets the system.
Reassembling the Puzzle: The Right Way
Okay, now for reassembly. Carefully plug the charger back into the wall outlet. Then, plug it into your laptop. Cross your fingers and hit the power button. Don't be surprised if your laptop springs back to life. Often, this simple reset works wonders. This quick fix can save you a lot of headache. If your laptop turns on, you’re in luck!
Beyond the Basics: Troubleshooting Deeper Issues
What happens if a power cycle doesn't work? Don't worry yet. There are still a few things to try. First, inspect your charger's cable. Look closely for any visible damage. Check for fraying, kinks, or exposed wires. Also, see if the plug is secure. A loose connection can prevent charging.
Identifying the Source: Pinpointing the Real Problem
Next, try a different wall outlet. Perhaps the outlet you were using is not working. Sometimes, a blown fuse can affect outlets. A simple test can help determine if it’s the outlet. Plug something else into that outlet. A lamp will work in this situation. If the lamp doesn’t turn on, there’s a problem with the outlet and not the charger.
Considering a Second Charger: An Important Test
If possible, try using a different charger. Borrow one from a friend or family member. If their charger works with your laptop, you know your charger is the problem. This quick test can confirm the issue. This means you'll likely need a new charger.
Delving into the Laptop: More than Just the Charger
Sometimes, the problem isn’t the charger. It could be your laptop’s charging port. Inspect the port for debris. Dust or lint can block the connection. Gently clean the port with compressed air. Ensure that the pin is seated correctly.
The Battery Conundrum: When to Consider a Replacement
Your laptop's battery itself might be the issue. Over time, batteries degrade. They may struggle to hold a charge. If your laptop works fine when plugged in but dies quickly unplugged, the battery is likely the problem. Consider replacing your battery.
When to Seek Professional Help: The Critical Point
If none of these steps work, it might be time to call a professional. A technician can diagnose more complex issues. They can also repair internal problems. Do not attempt internal repairs yourself. This could void your warranty or cause further harm.
Preventative Measures: Keeping Chargers Happy & Healthy
Besides this, there are some things you can do to extend your charger's life. Avoid bending the cable sharply. Always store the charger in a cool, dry place. Furthermore, avoid wrapping the cable too tightly. Unplug your charger when it's not in use. Finally, only use the charger that came with your laptop.
The Ultimate Takeaway: Don't Give Up Too Soon
In conclusion, before you start shopping for a new charger, try the power cycle trick. It's simple, effective, and free. You might save yourself a lot of trouble. Remember, technology often has a way of surprising us. Sometimes, the easiest solutions are the most effective. Therefore, implement these simple steps before panicking. You can often fix a dead charger, extending your laptop’s lifespan. Go forth and conquer your dead charger!
Dell Laptop Headphone Mic Dead? FIX This NOW!Is Your Laptop Charger DEAD? (This 1 Trick Fixes It!)
Ah, the dreaded moment. You reach for your laptop, ready to dive into that project, binge-watch your favorite show, or simply connect with the world, and… nothing. The screen remains defiantly black. The familiar blue light on your charger is nowhere to be found. Your heart sinks. Is your laptop charger dead? Before you start panicking and contemplating the purchase of a new one (and let’s be honest, they can be pricey!), let's breathe. We’ve all been there, staring at that lifeless brick, convinced we're doomed to digital silence. But hold on! Often, the problem isn't as dire as it seems.
The Initial Panic: Recognizing the Signs of a Charger Crisis
Let’s face it; the digital world is our lifeline. Without a functioning laptop, we feel disconnected from everything. Before we jump to conclusions, let's walk through the initial telltale signs that your charger might be on the fritz. Is the laptop completely unresponsive, showing no signs of life even when plugged in? Does the charging indicator light on the laptop refuse to illuminate? Or perhaps it flickers sporadically, giving you a tantalizing glimpse of hope, only to extinguish it again? These are the classic symptoms of a potential charger malfunction. It feels like a mini-tragedy when your digital companion refuses to cooperate, doesn't it? I remember frantically troubleshooting my own laptop charger during an important deadline. Pure chaos! But before we succumb to despair, let’s investigate…
Beyond the Obvious: Common Culprits Behind Charger Failure
Sometimes, the reason for a dead charger isn't as straightforward as a complete internal failure. Think of it like this: your charger is the lifeline, the conduit for energy that keeps your digital world alive. The failure could be at any point along that line. Let's examine some of the common culprits that can interrupt this vital connection.
- The Wall Outlet: Sounds simple, right? But often, the simplest solution is the correct one. A faulty wall outlet can easily be the problem. Try plugging your charger into a different outlet, preferably one you know is working reliably. This is the equivalent of switching a dead lightbulb for a new one.
- The Power Cord: The power cord itself, the cable connecting the charger brick to the wall, can develop faults. Fraying, bending, or even pet-induced chewing (we’ve all been there!) can damage the internal wires, interrupting the flow of power.
- The Charger Brick Itself: This is the most common point of failure. Overheating, power surges, and general wear and tear can all take their toll on the internal components of the charger brick.
- The Laptop's Charging Port: This port, the entry point for power on your laptop, can become damaged, clogged with debris, or experience internal issues. Think of it as a gatekeeper, and if the gate is blocked, the power can't get through.
The One Trick: A Reset That Might Just Save Your Charger!
Now, for the moment you've been waiting for: the one trick that could resurrect your seemingly dead charger. This is a simple reset that can sometimes, miraculously, bring your charger back to life. I've personally used this technique countless times, and the success rate is surprisingly high. It's like giving your charger a gentle nudge back to consciousness.
Here's what we're going to do, step-by-step:
- Unplug Everything: Disconnect the charger from both the laptop and the wall outlet. This includes any other devices plugged into the same power strip. Think of it as a digital defibrillation, removing all connections.
- Wait a Moment: Let everything sit unplugged for at least a minute, maybe even a few. This allows any residual power to dissipate and gives the charger a chance to reset. Imagine it as giving the internal circuits a breather.
- Re-Plug: Plug the charger back into the wall outlet first. Then, plug it into your laptop.
- Test the Waters: Try turning on your laptop. Be patient. Give it a moment to respond.
And that’s it! It's a simple process, but the results can sometimes be nothing short of amazing.
Delving Deeper: Understanding Why This Trick Works
Okay, so why does this simple reset actually work? Well, it’s all related to how chargers are designed. Most modern chargers contain internal protection circuits. These circuits are designed to protect the charger (and your laptop) from power surges, short circuits, and other electrical anomalies. Sometimes, these protection circuits can trip, even if there isn’t a significant problem. The reset effectively clears the tripped circuit, allowing the charger to function normally again. It's like hitting the "reset" button on a computer – clearing the memory and restarting the system. The wait period is crucial. It gives the components a chance to cool down and reset themselves.
Troubleshooting Other Charger Issues: Beyond the Reset
If the simple reset doesn't work, don't lose hope. We can still explore other avenues of troubleshooting:
- Inspect the Cables and Ports: Carefully examine the power cord and the laptop's charging port for any visible damage. Are there any bends, fraying, or debris? Use a flashlight to get a good look at the port. Canned air can be helpful in dislodging any dust or particles.
- Try a Different Charger (If Possible): If you have access to another charger of the same type (borrowing from a friend, for example), try using it to see if your laptop starts charging. This is a surefire way to determine whether the problem lies with your laptop or the original charger. It helps you differentiate between the charger being the problem and the charging port or the laptop being dead.
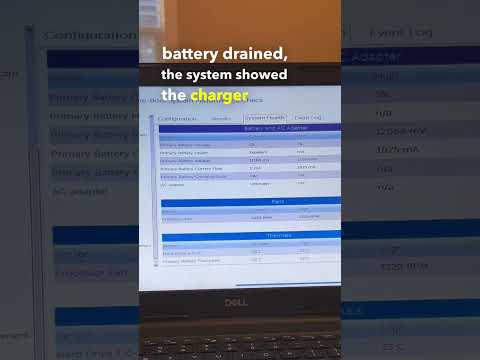
- Check the Laptop's Battery: Sometimes, a completely drained battery can prevent the laptop from turning on, even when plugged in. Let the laptop charge for at least an hour before attempting to turn it on. Some laptops have a separate battery reset button that might be worth checking.
Preventing Future Charger Failures: Proactive Measures
Prevention is always better than cure, right? We sure think so! So, let's look at some simple steps you can take to prolong the life of your laptop charger and prevent future headaches:
- Handle with Care: Avoid bending or sharply kinking the power cord. Treat it with the sensitivity you would give a fragile flower.
- Avoid Overheating: Don't leave your charger covered or in direct sunlight. Allow for adequate airflow.
- Use a Surge Protector: Protect your charger (and your laptop) from power surges with a good-quality surge protector.
- Unplug When Not in Use: While this might not make a huge difference, unplugging the charger when it’s not in use reduces the risk of damage from electrical storms.
- Clean Regularly: Dust and debris can accumulate over time, which can impact the charging process.
When to Seek Professional Help: Knowing Your Limits
Alright, we've explored all the DIY solutions. But there comes a time when tackling the problem yourself is no longer viable. Here are some scenarios where it's best to seek professional help:
- Persistent Problems: If you've tried the reset trick, inspected cables, and tested different outlets without success, it's a sign that something more complex may be occurring.
- Visible Damage: If you see significant damage to your charger (melted plastic, frayed wires, etc.), do not attempt to repair it yourself. This is a safety hazard.
- Laptop Won't Turn On at All: If the laptop is completely unresponsive, even after charging for an extended period, the issue may be with the laptop itself.
The Cost of Replacement: Navigating Charger Shopping
So, your charger is genuinely dead, and you need a new one. It's a necessary evil, but at least you get the chance to look for a newer, better charger.
- Original vs. Third-Party: You have choices here. Original chargers, branded by your laptop's manufacturer, are typically more expensive but often come with a guarantee of compatibility and quality. Third-party chargers can be significantly cheaper, but be cautious. Ensure the charger is compatible with your laptop model and has the necessary safety certifications.
- Voltage and Amperage: Make sure the new charger has the same voltage and amperage as your original charger. These numbers are usually printed on the charger itself or in the laptop's manual. Using the wrong voltage or amperage can damage your laptop.
- Read Reviews: Before purchasing a new charger, read reviews from other customers. This will give you an insight into the charger's reliability and performance.
The Bottom Line: Staying Connected
Dealing with a dead laptop charger can feel like a digital emergency. But with the knowledge and the simple trick we've shared, you have a fighting chance of bringing your charger back to life. Remember to troubleshoot systematically, consider the potential causes, and don’t be afraid to seek professional help if needed. Knowledge is power, and you now have the power to keep yourself connected.
Final Thoughts: A Note of Encouragement
Losing power is never fun. It can be frustrating, inconvenient, and downright annoying, but more often than not, there's a solution within easy reach. Hopefully, this guide has provided you with the answers and the confidence to get your laptop up and running again. Now go forth and conquer
HP Laptop Camera Nightmare? FIX It NOW! (Windows 10)What To Do If Your Laptop Is Plugged In But Not Charging
By PCMag What To Do If Your Laptop Is Plugged In But Not Charging by PCMag
Dell Inspiron won't charge cheap easy fix tech pc technology shorts

By Salem Techsperts Dell Inspiron won't charge cheap easy fix tech pc technology shorts by Salem Techsperts
Laptop not charging Laptop charger repair

By Ingkong's Creation Laptop not charging Laptop charger repair by Ingkong's Creation
Title: This Laptop Won't Charge shorts pc computer pcrepair dell
Channel: Matt's Computer Services
This Laptop Won't Charge shorts pc computer pcrepair dell by Matt's Computer Services
Working With Laptop
Is Your Laptop Charger DEAD? (This 1 Trick Fixes It!)
We’ve all been there. The frantic search, the desperate glances at the dwindling battery icon, the sinking realization: your laptop charger has given up the ghost. The world shrinks; deadlines loom. Fear not! Before you resign yourself to an immediate replacement purchase, let us explore a surprisingly simple, often overlooked solution, a true lifesaver in the digital age. This guide delves into the common culprits behind charger failures and, most importantly, reveals this one trick – a potential game-changer – to resurrect your seemingly defunct laptop charger.
Understanding the Silent Killer: Identifying the Problem
First, a crucial step: diagnosing the problem. Jumping to conclusions is rarely productive. A "dead" charger might not be the actual issue. Power problems can stem from several sources. Consider these possibilities before you begin:
- The Outlet: Is the outlet itself functional? This might seem obvious, but it is a frequent point of failure. Test it with a lamp or another device to ensure it's providing power.
- The Power Cord: Inspect the detachable power cord (the one that plugs into the wall) for any visible damage – cuts, fraying, or kinks. A compromised cord is a significant safety hazard and a common source of intermittent power issues. Try a replacement cord from another device with the same specifications to see if this is the issue.
- The Laptop's Charging Port: Look closely at the laptop's charging port. Is it clean, or is it clogged with debris or bent pins? Use a can of compressed air to remove dust and dirt. If the pins are bent, professional repair is generally needed.
If you’ve eliminated these possibilities, then focus on the charger itself. Physical damage, overheating, and internal component failure are the most common causes of power adapter demise. A careful, visual inspection is, therefore, in order.
The Visual Examination: A Detailed Inspection of Your Charger
Take a good look at your charger. Turn the charger over, and examine its physical components.
- The Exterior Casing: Look for cracks, bulges, or signs of melting on the plastic housing. This indicates overheating or physical stress. Any of these should immediately compel you to stop using the charger.
- The Connector: Examine the connector that plugs into your laptop. Are the pins straight and clean? Is there any discoloration or melting around the connector, indicating arcing or overheating?
- The Cord Junctions: Pay close attention to the points where the cord connects to the charger brick and the connector. These areas are prone to bending and stress, the origins of internal wire breaks. Carefully flex these areas and observe any anomalies.
A detailed visual examination is essential. If you spot any of these signs, the charger's lifespan might be over. However, if the charger appears outwardly intact, our one trick might offer a solution.
The Secret Weapon: The Power Cycle and the Often-Missed Reset
Here begins the magic: the singular technique that can, in many cases, revive a seemingly dead laptop charger. This method resets the internal electronics. Here’s how to do it:
- Disconnect everything: Unplug the charger from both the wall outlet and your laptop.
- Wait patiently: Allow the charger to sit disconnected for a minimum of thirty minutes. This gives the internal components a chance to completely discharge. For severe cases, and to guarantee a complete electrical reset, consider waiting up to an hour.
- The Reverse Connection: After waiting, plug the charger directly into the wall outlet first. Do not connect it to your laptop yet. This initial step is important for establishing a clean power supply.
- Final Connection: After a brief moment (30 seconds is sufficient), plug the charger into your laptop.
- Observe and Assess: At this point, monitor your laptop's charging indicator.
If the charging light activates, congratulations! You’ve likely resurrected your charger. However, don’t celebrate prematurely; the charging process needs to be thoroughly evaluated.
Assessing the Revival: Critical Checks After the Reset
Assuming the charging light has come on, the process requires additional checks to confirm that the charger is operating effectively:
- Charging Speed: Does your laptop charge at its typical rate? A slow charging speed might indicate lingering issues or component damage.
- Temperature: Monitor the charger's temperature. Is it excessively warm during charging? Overheating can signal that the charger is on its last legs.
- Battery Level Fluctuation: Observe the battery level. Does it steadily increase or drop unexpectedly during charging? Fluctuations suggest an unstable power supply.
If you encounter any of these problems, it is a strong indicator that your charger requires replacement or professional repair.
When the Trick Doesn't Work: Recognizing the Limits
Realism is critical. The power cycle reset is not a miracle cure. It works best in cases where the charger's internal electronics have locked up or are experiencing minor software glitches. Here are circumstances where this trick is unlikely to work:
- Physical Damage: If the charger has visible external damage (cracks, burned areas, bent pins), the reset is unlikely to be effective.
- Internal Component Failure: If internal components have failed, particularly capacitors or transformers, the reset cannot fix the issue.
- Water Damage: Exposure to moisture can cause irreversible damage. The reset will not rectify this problem
- Age and Wear: Chargers, like all electronics, have a finite lifespan. Extensive wear and tear can lead to inevitable failure.
In these situations, replacement or professional repair becomes the only viable option.
Preventative Measures: Extending Your Charger's Life
Preventative efforts can significantly prolong your charger's longevity. Keep these in mind:
- Proper Storage: When not in use, store your charger in a cool, dry location. Avoid extreme temperatures and direct sunlight.
- Avoid Bending: Never aggressively bend or twist the charger cable. This can cause internal wire breaks.
- Gentle Plug-In/Unplug: Always grasp the connector itself when unplugging the charger from the laptop, not the cord.
- Surge Protection: Use a surge protector to shield your charger from power surges.
- Ventilation: Ensure adequate ventilation around the charger brick. Do not cover it while charging.
Implementing these strategies will help keep your charger working.
The Last Resort: Considering Replacement Options
If the power cycle reset, the visual examination, and preventative steps fail, the time has come to address replacement. Here are important considerations:
- Original vs. Third-Party: Consider an original charger made by the original laptop manufacturer. While more costly, they ensure compatibility and optimized performance. Third-party chargers can provide economical alternatives, but ensure that they meet the same voltage and amperage specifications.
- Specifications: Confirm that the replacement charger matches the voltage and amperage requirements printed on your laptop or existing charger. Using an incompatible charger can damage your laptop.
- Warranty: Purchase chargers with a warranty. This protects you in case of premature failure.
Remember, replacing a charger is a straightforward process.
Conclusion: Power to the People (and Their Laptops)
Dealing with a dead laptop charger can be frustrating. Armed with the knowledge of potential problems, the one trick reset method, and preventative maintenance, you can substantially improve your chances of quickly reviving your charger and keeping your digital life running smoothly. By taking the time to examine the problem carefully, you can potentially save time, money, and the stress of a laptop unexpectedly dying. The secret weapon, the power cycle reset, awaits. Put it to the test!
