keyboard on lenovo yoga laptop not working

Title: Lenovo Yoga 7i Keyboard Not Working FIX - How To Fix Lenovo Keyboard Not Working Windows 11
Channel: Tothepoint Tutorials2
Lenovo Yoga 7i Keyboard Not Working FIX - How To Fix Lenovo Keyboard Not Working Windows 11 by Tothepoint Tutorials2
lenovo yoga laptop keyboard not working, lenovo tablet laptop keyboard not working, lenovo yoga laptop keyboard stopped working, lenovo yoga laptop keyboard locked, why is the keyboard on my lenovo laptop not working, what to do if laptop keyboard is not working lenovo
Lenovo Yoga Keyboard Dead? FIX It NOW! (Emergency!)
My Lenovo Yoga Keyboard Died! SOS! Don't Panic, We've Got This
Alright, fellow Lenovo Yoga aficionados, let's be honest. A dead keyboard is a digital disaster. It’s a frustrating experience. So, you're staring at a blank screen? You're probably screaming internally. I get it. Your Yoga's keyboard has gone dark. Panic mode initiated? Hold that thought. We're going to fix this, assuming it's fixable. Keep breathing. Don’t throw your laptop out the window just yet.
Troubleshooting Tango: Immediate Steps to Take
First things first, stay calm. Deep breaths are essential. Because sometimes, the solution is surprisingly simple. Let’s start with the fundamentals. Ensure your Yoga is charged. Therefore, low battery is the first suspect. Sometimes a simple reboot works wonders. Try a hard reset. Unplug your laptop. Next, hold down the power button for about 30 seconds. Release it. Then, plug it back in. Power it on. Did it work? If not, there is hope.
External Keyboard SOS? Your Temporary Lifeline
The digital world can be cruel. So, let's assume your internal keyboard remains unresponsive. Grab an external keyboard, if you have one. A USB keyboard is ideal. Connect it to your Yoga. Now, try typing. Does the external keyboard function? If it does, great! You can continue your work. This indicates the problem lies with the internal keyboard. Furthermore, it eliminates other hardware issues.
Keyboard Driver Dilemmas: A Hidden Culprit
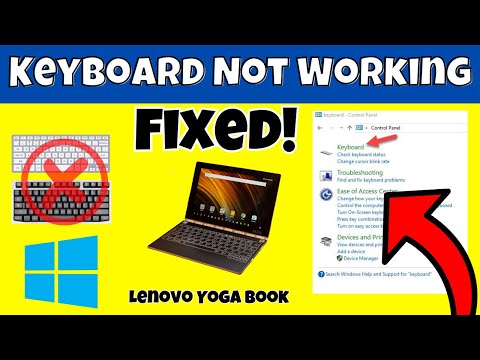
Driver issues can cause keyboard malfunctions. Consequently, outdated or corrupted drivers are common causes. Let's troubleshoot this critical area. Access the Device Manager. Search the Windows search bar. Type "Device Manager". Then click the result. Locate the "Keyboards" section. Expand the menu with the arrow. Right-click on your keyboard. Select "Update driver." Choose "Search automatically for drivers". Follow the instructions. Restart your laptop. Still no luck? It's time for a deeper dive.
Digging Deeper: Keyboard Hardware Examinations
Hardware problems require deeper investigations. First, carefully inspect the keyboard. Look for obvious damage. Look for anything that might be blocking the keys. Check for liquid spills, and inspect its surface. Sometimes, simple debris can be the cause. Use compressed air gently. Clean around and under the keys. If it got wet, allow everything to dry completely. Next, check the keyboard cable. Locate the keyboard cable connection inside your laptop. If you are comfortable, open your laptop (disconnecting the battery first is vital for safety). Check that the cable is securely connected. If it is loose, re-seat it. If this feels too risky, seek professional help.
Warranty Wisdom: When to Seek Professional Help
Is your Yoga under warranty? If yes, leverage it. Contact Lenovo support immediately. They can offer troubleshooting tips. Moreover, they'll guide you through the repair process. Don't void your warranty by attempting repairs. Therefore, let the professionals handle it. However, if your warranty has expired, options still exist.
Professional Repairs: The Expert Route
Sometimes, you must call the experts. Look for certified Lenovo repair centers. They have the expertise. They also have the necessary tools. These technicians can diagnose your keyboard problem. They'll suggest the proper solutions. It might involve a keyboard replacement. It could involve other repairs. In short, let them handle the intricate stuff.
Preventative Measures: Keeping Your Keyboard Healthy
Prevention is always better. So, how do you protect your keyboard? Avoid eating or drinking near your laptop. This is crucial. Dust regularly with a soft cloth. Do not use harsh chemicals. If your hands are greasy, wash them before using your Yoga. Regularly update your operating system and drivers. Keep your software up to date. Finally, invest in a keyboard cover.
The Final Word: You're Not Alone!
A dead keyboard can be a stressful ordeal. But you're not alone in battling this tech struggle. I’ve been there. It’s frustrating. Remember to stay calm, and follow the troubleshooting steps. Moreover, seek professional help when necessary. Above all, your Yoga is fixable! With these tips, you'll get back to typing in no time. Now, go forth and conquer the keyboard crisis! Good luck. Keep the faith!
Laptop Keyboard Dying? 😱 FIX It NOW! (Easy Steps)Lenovo Yoga Keyboard Dead? FIX It NOW! (Emergency!)
Hey there, fellow tech travelers! Ever felt that heart-stopping moment when your trusty Lenovo Yoga's keyboard just… dies? You're in the middle of something crucial – maybe a deadline looms, a creative project is flowing, or you're just trying to binge-watch your favorite show – and BAM! Suddenly, silence. Screen goes blank. The cursor just sits there, mocking you. We've all been there, right? Don't panic! We're going to dive deep into what could be causing this infuriating problem and, more importantly, how to get your Lenovo Yoga keyboard back in action, pronto. Think of this as your emergency tech lifeline. Consider this guide your digital defibrillator. Let’s get that keyboard typing again!
1. The Silent Killer: Why Did My Keyboard Go Kaput?
First things first, let's explore the potential culprits. Think of this like a detective investigating a crime scene. Identifying the cause is the first, essential step. Like a bad detective movie, we are looking at the usual suspects: software glitches, hardware issues, and even a good ol' fashioned user error. Let's break it down:
- Software Sabotage: A corrupted driver, a rogue update, or a simple operating system hiccup can wreak havoc on your keyboard's functionality. It's like your computer's brain is misinterpreting the signals from the keyboard.
- Hardware Headaches: This is the more serious possibility. Maybe the keyboard itself has physically broken down. Spilled coffee (we've all been there!), a damaged connector, or internal component failure can all lead to a dead keyboard.
- Sleepy Sensors: Sometimes, your keyboard just needs a little nudge to wake up. This can happen if it's been inactive for a while or if there's a conflict with power management settings.
- External Keyboard Conflict: If you're plugged in an external keyboard and the Yoga keyboard isn't working, it can be a conflict between the two devices.
2. Quick Fixes: First Steps to Keyboard Revival
Before we start disassembling anything, let's try some quick, easy fixes. These are your "try-it-before-you-fry-it" solutions:
- Restart Your Yoga: This is the digital equivalent of turning your car off and on again. A simple reboot can often clear up temporary glitches. It's like a mental reset for your laptop.
- The Power Button Savior: Hold down the power button for a full minute, this clears any temporary power-related issues. A digital equivalent of hitting the reset button.
- Check the Connection (If External): If you're using an external keyboard, ensure it's properly connected. Unplug it and plug it back in. Try a different USB port.
- Driver Check-Up: Go to your Device Manager (search for it in the Windows search bar). Look for your keyboard under "Keyboards." Are there any yellow exclamation marks? If so, it means there's a driver issue. Try updating or reinstalling the driver.
3. Diving Deeper: Troubleshooting Software Issues
If the quick fixes didn't work, it's time to get a little more hands-on. Let's dig into those software woes:
- Driver Detective:
- Update Drivers: Right-click the keyboard in Device Manager and select "Update driver." Let Windows search for updated drivers automatically.
- Reinstall Drivers: If the update doesn't work, try uninstalling the driver and then restarting your Yoga. Windows will usually reinstall a fresh driver.
- The Troubleshooter Tool: Windows has a built-in troubleshooter. Type "troubleshoot" in the search bar. Select "Keyboard" from the list and run the troubleshooter. It can often detect and fix common keyboard problems.
- System Restore: If the problem started recently and you suspect a software change caused it, try a System Restore. This will revert your system to a previous state when the keyboard was working. Be careful with this one, as you may lose some programs installed after the restore point.
4. Hardware Hurdles: When It's Time to Get Physical
Alright, if software solutions failed, it's likely a hardware issue. This is where things get a bit trickier, but don't worry, we'll guide you:
- External Keyboard Test: This is a crucial diagnostic step. Plug in an external USB keyboard. If it works, it confirms the issue is likely with your Yoga's internal keyboard.
- The Connector Conundrum: Check the internal connection of the keyboard inside your laptop. Often, opening up your Yoga, and carefully disconnecting and reconnecting the keyboard cable resolves the issue. (Caution: Only do this if you're comfortable and have the right tools, and be sure to turn off and unplug the laptop beforehand!). Look for a broken or misaligned cable.
- The Spill Situation: If you spilled liquid on your keyboard (again, we've all been there!), act fast! Shut down the Yoga immediately, unplug the power, and try to dry it thoroughly. Rice isn’t a magical fix, but it can absorb some moisture. Professional cleaning may be necessary.
- Professional Help: If you're not comfortable with hardware repairs, or if you've tried everything else, it's time to call in the pros. Take your Yoga to a reputable repair shop. They can diagnose the problem and replace the keyboard if needed.
5. Power Management Puzzles: Waking Up a Sleepy Keyboard
Sometimes, your Lenovo Yoga's keyboard might be put to "sleep." Here's how to wake it up:
- Check Power Settings: Go to your power settings and ensure that your keyboard isn't set to be turned off to save power.
- Wake-Up on Keypress: In your BIOS/UEFI settings, look for an option to enable "wake on keypress." This will allow your keyboard to wake up the Yoga from sleep mode. Access these settings upon startup, commonly by pressing keys like F2, F12, or Delete immediately after turning the laptop on.
6. Lenovo-Specific Solutions: Tailoring the Approach
Let's tailor these solutions to the Lenovo Yoga specifically.
- Lenovo Vantage: Lenovo’s proprietary software, Vantage, might offer keyboard-related settings and troubleshooting tools. Explore the software for options.
- Lenovo Support Website: The Lenovo support website is your friend. Search for your specific Yoga model and look for troubleshooting guides or FAQs related to keyboard issues. You might even find specific BIOS updates that address keyboard problems.
- Warranty Wonders: Does your Yoga still have a warranty? Contact Lenovo support directly. They might offer free repairs or replacements.
7. Preventing Future Keyboard Catastrophes: Proactive Measures
It's no fun when your keyboard stops working. Let's take some steps to prevent it from happening again in the future:
- Keep it Clean: Dust, crumbs, and other debris can accumulate under your keys and cause problems. Regularly clean your keyboard with compressed air or a soft brush.
- Watch Out for Spills: Be extra cautious around liquids. Consider using a keyboard cover if you're prone to spills.
- Keep Software Updated: Regularly update your operating system, drivers, and other software. These updates often include bug fixes and performance improvements.
- Handle with Care: Don't be too rough with your keyboard. Avoid excessive force or pressure on the keys.
8. The DIY Disassembly: (Proceed with Caution!)
If you're comfortable with it, removing the keyboard is a possibility. Always back up your data first. YouTube is your friend here; search for videos on how to disassemble your specific Yoga model.
- Safety First: Before you start, turn off your laptop, unplug the power adapter, and remove the battery (if possible).
- Tools of the Trade: You'll need a small Phillips head screwdriver, a plastic prying tool, and patience.
- Follow the Guide: YouTube is an excellent resource. Find a video specific to your Yoga model.
- Take Your Time: This is not a race. Go slowly and carefully to avoid damaging any components.
9. Back to Life: Keyboard Replacement
If the keyboard is damaged beyond repair, it’s time for a replacement.
- Identify Your Model: Make sure you order the correct replacement keyboard for your specific Yoga model.
- Find a Reputable Supplier: Purchase from a trusted source, to ensure quality and compatibility.
- Install the New Keyboard: Follow the instructions from the repair video. Take your time to ensure everything is connected properly.
10. Software Conflicts and Compatibility
Sometimes, other programs can interfere.
- Close Unnecessary Programs: Close any resource-intensive programs running in the background.
- Check for USB Conflicts: Try plugging the keyboard into a different USB port.
11. The BIOS/UEFI: Advanced Settings
Occasionally, your keyboard settings will need to be adjusted in your BIOS/UEFI
- Access the BIOS: The method for accessing your BIOS/UEFI depends on your Yoga model. Usually, you press a specific key (Like F2 or Del) during startup.
- Check Keyboard Settings: Look
Lenovo Yoga Book Keyboard Not Working laptop keyboard some keys not working
By Ultimate PC Guide Lenovo Yoga Book Keyboard Not Working laptop keyboard some keys not working by Ultimate PC Guide
Lenovo laptop keyboard stop work, fix solution tested yoga y540 15 17

By Henrique Lima Lenovo laptop keyboard stop work, fix solution tested yoga y540 15 17 by Henrique Lima
How To Fix Lenovo Keyboard Not Working Windows 10

By Cap Trong Nam - How To How To Fix Lenovo Keyboard Not Working Windows 10 by Cap Trong Nam - How To

Title: Fix Lenovo Keyboard Not Working Windows 11 - 5 Solutions 2025
Channel: TechFixIT
Fix Lenovo Keyboard Not Working Windows 11 - 5 Solutions 2025 by TechFixIT
Change Wifi Settings
Lenovo Yoga Keyboard Dead? FIX It NOW! (Emergency!)
It's the moment of digital dread: you reach for your Lenovo Yoga keyboard, ready to unleash your creative fire, compose that crucial email, or simply navigate the digital world, and…nothing. The screen remains stubbornly blank, the cursor unresponsive. Panic starts to simmer. Don't despair! We understand. A dead keyboard on your Lenovo Yoga laptop is a frustrating experience, a digital roadblock that demands immediate attention. This guide provides you with a comprehensive, step-by-step approach to diagnose and, crucially, fix your Lenovo Yoga keyboard. We'll explore the most common culprits, offer proven solutions, and equip you with the knowledge to reclaim control. Consider this your digital resuscitation guide for your beloved Yoga.
Initial Troubleshooting: Before You Dive In
Before we embark on a deeper exploration, let's establish a foundational troubleshooting checklist. These preliminary steps might seem basic, but they often hold the key to a swift keyboard revival.
- The Obvious Checks: Is the laptop powered on? Yes, truly. Check the power adapter connection and ensure the device is fully charged. A drained battery can mimic keyboard issues.
- External Keyboard Test: Do you have access to an external USB keyboard? Plugging one in is a rapid diagnostic test. If the external keyboard works, the internal keyboard is highly suspect. If the external keyboard also fails, the problem likely lies elsewhere (operating system, software, etc.).
- The Restart Remedy: A simple restart fixes countless technological woes. Restart your Lenovo Yoga. This clears temporary glitches and reloads essential system processes. Sometimes, a reboot is all that’s needed.
- Check the Num Lock key: Has the Num Lock key been pressed? While this might seem obvious, it has a significant impact on keyboard functions.
- Review the Fn Key: The Fn key can affect what your keyboard actions are. Ensure the Fn key hasn't inadvertently activated or deactivated functions.
Software Conflicts: The Digital Gremlins
Sometimes, the issue isn’t physical hardware; it’s the realm of the operating system and installed software. Conflicts here can disrupt keyboard functionality.
- Driver Updates: The Foundation: Outdated or corrupted keyboard drivers are a frequent cause. Access the Device Manager (search for it in the Windows search bar). Expand the "Keyboards" section. Right-click on your keyboard device (it might be listed as "HID Keyboard Device" or similar) and select "Update Driver." Choose "Search automatically for drivers." Let Windows find and install the latest drivers. Restart your laptop after the installation.
- Driver Rollback: A Step Back: If the keyboard issue began after a recent driver update, consider rolling back to the previous driver. In Device Manager, right-click the keyboard, select "Properties," go to the "Driver" tab, and click "Roll Back Driver."
- Uninstall and Reinstall: A Fresh Start: If updating or rolling back doesn't work, try uninstalling and reinstalling the driver. In Device Manager, right-click the keyboard, select "Uninstall device." Then, restart your Lenovo Yoga. Windows should automatically reinstall the driver upon startup.
- Software Interference: Certain software, particularly those designed for accessibility or keyboard customization, can occasionally clash with the keyboard. Consider temporarily disabling such software to see if it resolves the issue. This is especially relevant if you've installed custom keyboard mapping software.
- Malware Scan: The Security Check: Run a thorough scan with your antivirus software. Malware can sometimes interfere with system functions, including keyboard operation. Ensure your antivirus is up-to-date before running the scan.
Hardware Hurdles: Deep Dive into the Physical Components
If software solutions fail, it's time to delve deeper into the physical hardware of your Lenovo Yoga. This requires a bit more technical aptitude but is frequently achievable with careful execution.
- Keyboard Ribbon Cable: The Vital Link: The keyboard connects to the motherboard via a ribbon cable. This cable can become loose or damaged. Accessing the keyboard cable generally requires removing the bottom panel of your Lenovo Yoga. Important: Consult your Lenovo Yoga's specific service manual (available online) before attempting this. Disconnect the battery before you start. Once you've accessed the cable, carefully check the connection. Is it securely seated? If it appears loose, gently re-seat it. Inspect the cable for any signs of damage (tears, bends, etc.). If damage is visible, the cable may need replacing.
- Keyboard Replacement: The Ultimate Remedy: If all other troubleshooting steps have failed, the keyboard itself may be faulty. This is a common occurrence. Fortunately, replacing a keyboard is often more straightforward than it seems. Obtain a replacement keyboard specifically designed for your Lenovo Yoga model. Again, consult your laptop's service manual for precise disassembly instructions. Carefully remove the old keyboard, paying attention to the mounting screws and any connecting clips. Install the new keyboard, ensuring all connections are secure.
- Liquid Damage: a Grim Reality: Liquid spills are a keyboard's worst enemy. If your Lenovo Yoga has encountered liquid, the damage can range from minor corrosion to complete keyboard failure (and potentially damage to other components). Immediately shut down the laptop and disconnect the power if a spill occurs. If you are comfortable doing so, disassemble the laptop (again, refer to the service manual) and examine the keyboard and surrounding components for signs of liquid damage. Clean any affected areas with isopropyl alcohol and a soft brush. Allow it to dry completely before reassembling the laptop. If liquid damage is severe, keyboard replacement or even more extensive repairs might be necessary.
- Trackpad/Touchscreen Interference: In some instances, problems with the trackpad (mouse) or touchscreen may inadvertently affect keyboard function. Disable the trackpad temporarily (often via a dedicated key or a setting in the BIOS) to see if the keyboard begins to work correctly. If so, the trackpad is likely the source of the issue and requires repair or replacement.
- BIOS Settings: The Motherboard Interface: The BIOS (Basic Input/Output System) manages the fundamental operations of your laptop. Incorrect BIOS settings can sometimes interfere with keyboard functionality. Access your BIOS by repeatedly pressing a specific key (typically Del, F2, F12, or Esc) during startup. Consult your Lenovo Yoga's manual to determine the correct key. Navigate the BIOS menus (use the arrow keys and Enter/Return keys) and look for settings related to keyboard or USB devices. Ensure these settings are enabled and configured correctly. Avoid making any changes you don't understand. Incorrect BIOS modifications can render your laptop unusable.
Preventive Measures: Protecting Your Keyboard's Future
Taking proactive steps can extend the lifespan of your Lenovo Yoga keyboard and reduce the likelihood of future problems.
- Regular Cleaning: Dust and debris can accumulate under the keys, hindering performance. Regularly clean your keyboard with compressed air and a soft, lint-free cloth. Consider using a keycap puller to remove keys for more thorough cleaning.
- The Spill Shield: Use a keyboard skin or protector to shield your keyboard from spills. Even a small amount of liquid can cause significant damage.
- Gentle Handling: Avoid excessive force when typing. While Lenovo Yoga keyboards are generally robust, excessive pressure can damage the keys or the underlying mechanisms.
- Safe Transport: When transporting your laptop, avoid placing heavy objects on the keyboard, which can lead to key damage or internal component stress.
- Software Maintenance: Keep your operating system and software up-to-date. Updates often include bug fixes and performance enhancements that can improve keyboard performance.
When to Seek Professional Help
While this guide empowers you with a range of solutions, some situations warrant professional intervention.
- Severe Hardware Damage: If the keyboard has sustained significant physical damage (e.g., a broken key, major liquid damage), and you are not comfortable performing repairs, a professional technician is recommended.
- Complex Software Issues: If software conflicts are complex or you suspect a deeply rooted software problem, a professional technician can provide expert diagnosis and resolution.
- Uncertainty and Risk Aversion: If you are uncomfortable with any of the hardware troubleshooting steps, or if you are concerned about potentially damaging your laptop, seek professional assistance.
Conclusion: Reclaiming Your Keyboard and Your Digital Life
A dead Lenovo Yoga keyboard can be incredibly disruptive. By systematically following the steps outlined in this guide, you're equipped to tackle the issue head-on. From simple restarts to in-depth hardware inspections, you now possess the crucial knowledge to diagnose and resolve the problem. Remember to be methodical, patient, and, above all, persistent. With a little effort and the right tools, you can resurrect your keyboard and get back to doing what you do best: creating, communicating, and exploring the digital world.
