headphone jack not working laptop test

Title: Fix Earphones Headphone Not Working On Windows 11
Channel: ITGuy360
Fix Earphones Headphone Not Working On Windows 11 by ITGuy360
Laptop Headphone Jack Dead? This SHOCKING Test Will Reveal WHY!
Laptop Headphone Jack Blues: Unmasking the Silent Culprit
Have your favorite tunes suddenly gone silent? Is your laptop's headphone jack refusing to cooperate? You may have a problem on your hands. It's frustrating, isn't it? Let's dive into this tech mystery. We'll explore the potential culprits.
The Unseen Enemy: Dust and Debris
First, consider the mundane. Dust and debris are surprisingly common foes. Tiny particles love to invade. They often settle in the headphone jack. These particles can disrupt the connection. They might cause intermittent sound. Cleaning is often the first step. Try using compressed air. Gently blow into the jack. Ensure power is off. This loosens any stuck particles. Follow this with a small brush. A clean toothbrush works well. You need to patiently dislodge the grime. Be delicate, always. You can also use a toothpick. But you must exercise extreme caution. Ultimately, it is your choice. Be thorough in your cleaning.
Software Snafus: The Silent Controller
However, sometimes the problem is internal. Software glitches sometimes cause audio issues. Sound drivers are essential for audio. They manage communication between the computer and the jack. Outdated, corrupted drivers can create problems. It is crucial to check your drivers. Go to your device manager. Locate "Sound, video and game controllers." Right-click the audio device. Then select "Update driver." Windows will search for the latest versions. Reboot your machine. See if it fixes the problem. Furthermore, consider the operating system. Sometimes, the OS itself is at fault. Updates may introduce bugs. These bugs could affect your sound. Try rolling back to a previous version. The changes might bring your audio back.
Hardware Hurdles: Digging Deeper
Now, let's discuss hardware issues. A damaged headphone jack is a possibility. Frequent plugging and unplugging can cause wear. This wear and tear might lead to a break. Sometimes, the internal soldering breaks. This is a much more serious problem. To check, use another pair of headphones. Try a different cable. Does sound work with these? If not, the jack might be at fault. It might require professional repair. If you're technically inclined, dismantle your laptop. Carefully inspect the jack. Look for loose connections. Never attempt this if you are unsure. Otherwise, you may cause permanent harm. Contact a qualified technician.
Internal Diagnostics: Going the Extra Mile
Further investigation may be necessary. Start by testing the audio in safe mode. Safe mode loads a bare-bones OS. It loads without many drivers. This can help isolate the source. If sound works in safe mode, the problem lies within the usual drivers or software. Conversely, if the sound is still absent, the issue could be hardware. Another step is the BIOS check. Access your BIOS settings on startup. Many laptops have a sound test built-in. This test bypasses the OS. If the sound works in the BIOS, that shows OS issues. If there’s no sound, it's likely hardware.
External Interference: The Unseen Threat
External factors might also be responsible. Magnetic interference exists. Electrical interference can disrupt audio signals. Other electronics can create noise. Keep other devices away from your laptop. Try using a different power outlet. This may help isolate the issue. Furthermore, bluetooth devices sometimes cause disruptions. Disable Bluetooth temporarily. Then retest your headphone jack.
Troubleshooting Tips: A Recap and Further Steps
So, what's your next move? Consider the following tips. Don't panic, first of all. Start with simple solutions. Cleaning is the easiest fix. Update your drivers ASAP. However, back up your files first. Then, thoroughly test. Try different headphones and cables. Test in safe mode. Seek expert advice if needed. Look for warranty information. Sometimes, the warranty will cover repairs.
Final Thoughts: Reclaiming Your Sound
Dealing with audio issues is a pain. But, don't despair. We trust these steps will help. You might find the resolution you need. In the end, troubleshooting requires patience. Following these tips helps pinpoint the problem. You now have the arsenal to tackle the problem. Soon, your headphones will be singing again. Enjoy the music!
Laptop Keyboard Dead? 😱 FIX IT NOW! (Easy Steps)Laptop Headphone Jack Dead? This SHOCKING Test Will Reveal WHY!
Hey tech adventurers! Ever had that heart-stopping moment when you plug in your headphones, ready to lose yourself in your favorite tunes or dive into a crucial video call, only to be met with… silence? The laptop headphone jack, that seemingly simple little portal to audio bliss, has betrayed you! We’ve all been there, staring blankly at our screens, wondering what sorcery has rendered our beloved audio output useless. Fear not, fellow sound enthusiasts! Today, we’re going on a deep dive to uncover the mysteries of the defunct headphone jack. We'll arm you with tests, insights, and a healthy dose of tech-savviness to diagnose, and hopefully, revive your audio lifeline. Get ready to crack the code and say goodbye to audio frustration!
1. The Silent Treatment: Recognizing the Symptoms of a Dead Headphone Jack
First things first, let's identify the enemy. A dead headphone jack doesn't always announce its demise with a dramatic bang. Sometimes, it's a slow, insidious decline. Here are some telltale signs that your laptop's audio output might be on its last leg:
- Complete Silence: This is the most obvious. You plug in your headphones, and… nothing. No hiss, no crackle, just the quiet hum of your laptop's fan.
- Crackling or Static: Intermittent audio, static noise, or crackling can signal a loose connection or internal damage. Sounds like scrambled eggs cooking inside!
- Muffled Sound: Audio that is distorted, quiet, or sounds as if it’s coming from a mile away. It's like listening to your favorite song underwater.
- Intermittent Audio: The sound cuts in and out, disappearing and reappearing at random intervals. It's like a technical temper tantrum.
- Headphones Not Recognized: Your laptop simply refuses to acknowledge that you've plugged in headphones. It may still be playing through the built-in speakers.
If you're experiencing any of these, you're likely dealing with a headphone jack that's either on its way out or already gone. Don't panic just yet! We have some tests to run and a few tricks up our sleeves.
2. The Power of Elimination: Basic Troubleshooting Steps To Try Before the Tears!
Before you declare your laptop doomed, let's run through some simple troubleshooting steps. Think of it like a tech-savvy detective clearing the suspects before focusing on the real culprit.
- The Obvious Check: Is your headphone jack really plugged in correctly? Sometimes the simplest answer is the right one. Make sure the plug is fully inserted.
- Volume Check: Are your laptop’s volume levels turned down or muted? Don’t laugh; it happens! Check the system volume and also the volume controls within any media players you are using.
- Different Headphones: Try a different pair of headphones. Your current headphones might be the issue, not the jack itself. It's like blaming the car when it's just a flat tire!
- Restart is Your Friend: Restart your laptop. This can often fix minor software glitches that might be interfering with audio output. It's the tech equivalent of “turning it off and on again.”
- Driver Check: Make sure your audio drivers are up to date. Go to Device Manager (search for it in the Windows search bar or find it in System Information), expand "Sound, video, and game controllers," right-click on your audio device, and select "Update driver."
If you've gone through these steps and still no sound, it's time to dig a little deeper.
3. The Deeper Dive: Advanced Tests to Diagnose the Problem
Alright, time to roll up our sleeves. These tests will help us pinpoint the root cause of the headphone jack failure.
- Test the Speakers: Try playing audio through your laptop’s built-in speakers. This helps determine if the audio problem is affecting the entire sound system. If the speakers work, but the headphones don't, the jack might be the primary issue.
- The "Other Ports" Test: Try plugging your headphones into another device with a headphone jack (like your phone or another laptop). If the headphones work fine there, then your laptop's jack is definitely a suspect.
- Check the Physical Connection: Use a magnifying glass (or the camera on your phone) to closely inspect the inside of the headphone jack. Look for any visible obstructions, bent pins, or signs of physical damage. A tiny piece of debris can wreak havoc!
- Software Conflict Hunt: This is a sneaky one. Sometimes, conflicting audio software can mess things up. Try uninstalling any recently installed audio-related programs and see if that resolves the issue.
4. The Anatomy of a Jack: Understanding how Headphone Jacks Work
To truly understand the problem, we need to understand how the system functions. The headphone jack is a vital link between your laptop's sound card and your headphones.
- The Sound Card: This is the brain of your audio system, responsible for converting digital audio signals into analog signals that your headphones can understand.
- The Connectors: The headphone jack typically has multiple connectors (usually three or four). They correspond to the left and right audio channels, and the ground connection (which completes the circuit).
- The Switch: When you insert a headphone plug, a tiny switch inside the jack is activated. This switch tells the laptop to reroute the audio signal from the internal speakers to the headphone jack.
5. Dirty Secrets: Common Causes of Headphone Jack Issues
Now we get to the juicy stuff – the why. Here are some common culprits behind a dead headphone jack:
- Physical Damage: This is the most common. Dropping your laptop, yanking the headphone plug too hard, or repeatedly plugging and unplugging headphones can damage the internal connections. Think of it like constantly bending a paperclip – eventually, it breaks.
- Dust and Debris: Dust, lint, and other debris can accumulate inside the jack, disrupting the connection and affecting audio quality.
- Software Glitches: A faulty driver update or a conflict between audio software can cause the headphone jack to malfunction.
- Hardware Failure: In rare cases, the headphone jack itself (or the sound card) can simply fail due to wear and tear or a manufacturing defect. Like a car's engine, some things eventually break.
- Liquid Damage: Spilling liquid near the jack, even a small amount, can corrode the internal components and cause a short circuit. Yikes!
6. The Shocking Test: The Multimeter's Revelation!
This is a bit more advanced, but if you're feeling brave, you can use a multimeter to test the headphone jack's connections. This is a test that requires some electrical knowledge. If you aren't familiar with using a multimeter or working with electronics, it's best to skip this step. This test can reveal whether the jack is receiving power and if the connections are intact.
- Safety First: Always disconnect your laptop from the power source before performing any electrical tests.
- Set the Multimeter: Set your multimeter to measure resistance (Ohms) or continuity.
- Probe the Jack: Carefully insert the multimeter probes into the jack's connectors (you'll need a diagram of the jack's pin layout). Refer to your laptop's service manual or online resources to identify the correct pins.
- Resistance Readings: Look for resistance readings between the various pins. Open circuits (infinite resistance) suggest a broken connection.
7. Cleaning the Jack: The Dust Bunny Assassin
Sometimes a simple cleaning can save the day. Here’s how to clean your dirty headphone jack:
- Compressed Air: Use a can of compressed air to blow out any dust, lint, or debris from the jack. Aim the nozzle directly into the jack and give it a few short bursts.
- Cotton Swab (Cautiously): If you're comfortable, you can carefully use a cotton swab to remove stubborn debris. Dampen the swab with a tiny bit of isopropyl alcohol (make sure it's completely dry before inserting it). Be gentle!
- Avoid Metal Objects: Never insert metal objects (like paperclips) into the jack, as they could cause a short circuit or damage the internal connections.
8. The Software Solution: Driver Updates and Troubleshooting
Sometimes, the problem stems from software. Let's look at how to troubleshoot and update audio drivers:
- Update Drivers: Go to Device Manager, right-click on your audio device (usually listed as "Sound, video, and game controllers"), and select "Update driver." Choose the option to search automatically for updated driver software.
- Reinstall Drivers: If updating doesn't work, try uninstalling the audio driver from Device Manager and then restarting your laptop. Windows will often automatically reinstall the driver.
- Troubleshooting Tools: Windows has built-in audio troubleshooting tools. Search for "Troubleshoot sound problems" in the Windows search bar and follow the prompts.
9. External Sound Cards: A Savior in Shining Armor!
If all else fails, an external sound card can be a lifesaver. These devices plug into a USB port and bypass your laptop's built-in sound card.
- Plug and Play: External sound cards are usually easy to set
All Laptop Earphone Jack Not Working Problem Fix100macniteshlaptop2023virulshorts

By Mac Nitesh All Laptop Earphone Jack Not Working Problem Fix100macniteshlaptop2023virulshorts by Mac Nitesh
FIXED windows 10 no sound from headphones 2025 windows 10 no sound headphones

By Etechniz FIXED windows 10 no sound from headphones 2025 windows 10 no sound headphones by Etechniz
Fix sound not coming through headphones windows 10 2025

By Etechniz Fix sound not coming through headphones windows 10 2025 by Etechniz
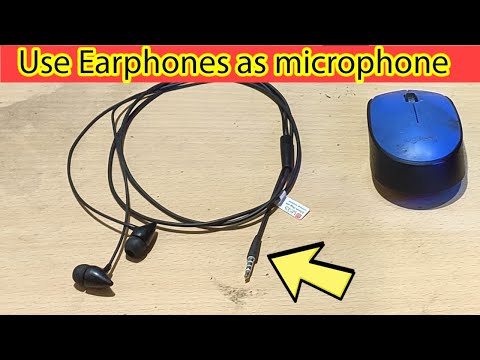
Title: How to use earphones as mic on pc windows 10
Channel: IT Magics
How to use earphones as mic on pc windows 10 by IT Magics
Wifi On Laptop
Laptop Headphone Jack Dead? This SHOCKING Test Will Reveal WHY!
Have you ever experienced the frustrating silence – that eerie void where your favorite music, podcast, or audio drama should be emanating from your laptop? The culprit? A seemingly defunct headphone jack. The frustration mounts, the troubleshooting begins, and hours can vanish into the digital ether. We've all been there. But before you write off your laptop's audio capabilities as a lost cause, let's delve into the potential root causes behind a dead headphone jack, uncovering the often-overlooked culprits. We're not just talking about simple fixes; we're revealing the why and, more importantly, the how to reclaim your audio bliss.
Initial Diagnosis: Ruling Out the Obvious
Before we launch into the more complex possibilities, let's ensure we haven’t overlooked the fundamentals. Sometimes the simplest solutions are the most effective.
The Headphone Check: Is It Really the Jack?
This sounds rudimentary, but it’s the first and often most easily resolved issue. Test your headphones on another device: a smartphone, another laptop, a tablet. This quickly tells us whether the problem resides in the headphones themselves. The answer is a simple, but frequently overlooked, step. Different types of headphones may malfunction. Ensure you are using standard headphones to rule them out; some other headphones may not be compatible.
The Software Shuffle: Volume, Mute, and Drivers
Next, examine your laptop's software. Go to your sound settings and ensure the volume isn't muted or turned down to zero. This may seem obvious, but it happens! Double-check the Windows sound mixer or the sound settings in your operating system (Windows, macOS, or Linux). Also, check the application-specific volume controls. The application you are trying to use may have mute activated. Finally, verify that your audio drivers are up to date. Outdated or corrupted audio drivers are a common cause of audio issues. Visit your laptop manufacturer's website or the Device Manager to update them. Sometimes, a recent driver update can create problems, and the best solution may be to roll back to a previous version.
Physical Inspection: Dust, Debris, and Damage
Take a close look at the headphone jack itself. Use a strong light; ensure the inside is free of dust, lint, or other obstructing debris. You can use a can of compressed air to dislodge anything that might be hindering the connection. Carefully inspect the jack's physical appearance. Is it bent, cracked, or otherwise damaged? Physical damage is a clear indicator of a hardware issue.
Delving Deeper: Uncovering the Hidden Culprits
If the basics don't solve the problem, it's time to investigate the more nuanced, yet equally common, reasons behind a defunct headphone jack.
The Software Scourge: Conflicting Applications and Audio Settings
Sometimes, software conflicts can wreak havoc with your audio. If you recently installed or updated any audio-related software, such as virtual audio mixers, audio recording programs, or music production tools, these applications might be interfering with your headphone jack's functionality. You can try temporarily disabling these applications or uninstalling them to see if the headphone jack starts working. In addition, some advanced audio settings, like exclusive mode settings within the Windows sound control panel, can sometimes cause issues. Experiment with these settings; they can sometimes reset the audio.
The Hardware Hiccup: Internal Connections and Component Failures
Laptop headphone jacks are connected internally to the motherboard. The physical connection itself could be loose, damaged, or corroded. This is more likely to occur with older laptops. Examine the connections when opening up your laptop. Internal components can also fail. The audio codec chip, responsible for processing your audio signal, could be malfunctioning. This is more complex and may require professional repair or, in some cases, a motherboard replacement if that is a possible option.
The Port Protection Paradox: Water Damage and Corrosion
Water damage is a silent killer of electronics. Even if you believe your laptop has not been exposed to liquids, condensation or environmental humidity can sometimes work their way into the headphone jack and cause corrosion. The same can happen with dust. Look for any signs of corrosion inside the port itself or on the surrounding components. This is difficult to address and often indicates permanent damage to the hardware.
The Shocking Test: Unveiling the Truth with Specific Steps!
Now, for the "shocking test" promised in the title. This isn't about drama; it's about a systematic approach to pinpointing the problem.
The Diagnostic Disconnect: External vs. Internal Audio
One of the best tests relies on determining where the audio is failing. Connect external speakers or a headset via USB or Bluetooth. If the external audio works, while the headphone jack remains silent, the problem likely lies with the jack itself or the internal audio components. If both the headphone jack and external audio fail, the issue may be more widespread, indicating a problem with the sound drivers or a failure in the audio processing unit.
The BIOS Bypass: The Safe Boot Scenario
Restart your laptop and enter the BIOS setup menu (often by pressing Delete, F2, F10, or another key during startup – consult your laptop's manual). The BIOS runs before the operating system. Therefore, if the audio works in the BIOS, it indicates a software problem. If it doesn't produce sound, it confirms the hardware problem.
The Live Boot Leap: Running a Different Operating System
Create a bootable USB drive with another operating system, such as a Linux distribution. Boot from this USB drive. If the headphone jack works in this alternative operating system, you've confirmed that the issue exists within your primarily installed OS installation. This helps verify driver compatibility or software conflicts within your primary OS.
The Component Conundrum: Auditing the Physical Components
If you're comfortable with electronics and have access to the necessary tools, you may consider opening your laptop (after disconnecting from the power supply and removing the battery). Carefully examine the headphone jack's physical connection to the motherboard. Look for any loose solder joints, damaged wires, or signs of corrosion. Do not attempt this without a professional; this activity can damage your laptop beyond repair.
Troubleshooting Tactics: From Easy Fixes to Expert Assistance
Now that you've uncovered the potential causes, and perhaps even run the "shocking tests," it's time to put these findings into action.
The Driver Download Dilemma: Reinstalling and Updating
As mentioned previously, outdated or corrupted drivers can disrupt audio functionality. The simplest fix is to visit your laptop manufacturer's website, download the latest audio drivers, and install them. If you're having problems, try uninstalling the drivers completely first, then restarting your laptop, and allowing Windows to reinstall them automatically. Ensure that the correct drivers are selected for your specific model laptop.
The System Restore Solution: Rolling Back Changes
If the headphone jack stopped working after a recent software update or the installation of a new application, try using System Restore to revert to a previous state before the problem began. This can often resolve software conflicts and restore audio functionality. It's an easy fix, but don't forget any data created after this point.
The Third-Party Tool Test: Exploring Alternative Audio Solutions
Several third-party audio management programs can sometimes override or correct audio settings. Experiment with a free or trial version to see if it can work.
The Professional Path: Seeking Expert Repair
If none of the above steps resolve the problem, it's time to consider professional assistance. A qualified technician can diagnose hardware issues, repair or replace the headphone jack, or address more complex problems with the audio codec or motherboard.
Prevention is Key: Protecting Your Audio Future
While problems can happen, you can take preventative steps to reduce the likelihood of your headphone jack failing.
The Proactive Protection Plan: Avoiding Damage
- Avoid subjecting your laptop to extreme temperatures or humidity.
- Be careful not to drop your laptop or subject it to physical impact.
- Always insert and remove headphone jacks gently.
- Consider using a protective case for your laptop.
The Routine Review: Maintaining Audio Health
- Regularly clean the headphone jack with compressed air.
- Keep your operating system and drivers up to date.
- Consider a dedicated audio-only USB sound card for better audio delivery.
Conclusion: Reclaiming Your Audio Experience
A dead headphone jack can be a significant inconvenience, but by systematically diagnosing the potential causes, conducting the proper tests, and taking the appropriate steps, you can often restore your laptop's audio capabilities. From simple software fixes to more complex hardware repairs, we hope this comprehensive guide has provided you with the knowledge and tools necessary to troubleshoot the problem and get your headphones pumping out the sound again. Enjoy the music.
