why won t my hp laptop camera work
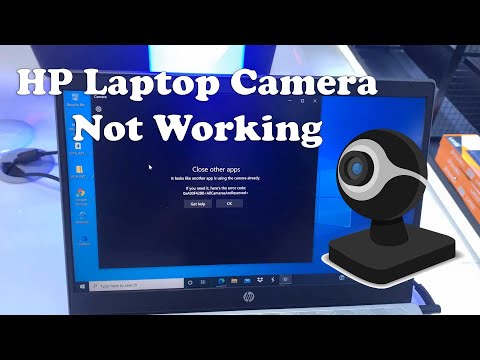
Title: How To Fix HP Laptop Camera Not Working In Windows 10
Channel: Cap Trong Nam - How To
How To Fix HP Laptop Camera Not Working In Windows 10 by Cap Trong Nam - How To
why won t my hp laptop camera work, why doesn t my hp laptop camera work, why isn't my hp laptop camera not working, why won't my camera work on my hp laptop, why is the camera on my hp laptop not working, why isn't my hp laptop camera working
HP Laptop Camera Dead? FIX It NOW!
HP Laptop Camera Blues? Breathe Easy, Solutions Ahead!
Have you ever found yourself staring blankly at a black screen during a video call? It’s a frustrating experience. Your HP laptop camera might be playing hide-and-seek. Don't panic! Fixing it is often simpler than you think. We understand the importance of a functioning camera. Therefore, we’ll explore several potential solutions. We'll get that camera back online.
Is Your Camera Truly Dead? A Quick Diagnostic Check
First, before diving headfirst into troubleshooting, let's eliminate the obvious. Initially, ensure the camera isn’t simply disabled. Look for a physical switch on your laptop. Sometimes, it's a sliding mechanism. Alternatively, explore function keys. Pressing the Fn key and the camera icon simultaneously might toggle it. Subsequently, check the camera's indicator light. Is it illuminated? In addition, try using the camera in other applications, like Zoom or Skype. If the issue persists across multiple platforms, the problem is likely more involved.
Software Conflicts and Their Quirks
Software clashes can wreak havoc. Often, a recently installed program might be interfering. Specifically, check your system’s recent installations. These could include antivirus software or security applications. For instance, it could be a privacy setting gone rogue. Consequently, revisit those recent installations. Uninstalling them, moreover, might reveal the culprit. Instead, if that fails, consider a system restore. This will revert your computer to an earlier working state. Be cautious; this will erase recently added data. Back up crucial files before proceeding. Also, updating your drivers is essential. It ensures compatibility with the hardware.
Driver Dilemmas: The Technical Tango
Faulty or outdated drivers are frequent offenders. To begin, access your Device Manager. You can search for it in the Windows search bar. Navigate to "Cameras" or "Imaging devices." Expand the menu. Next, right-click your HP laptop camera. Select “Update driver.” Afterward, choose "Search automatically for drivers." Windows will then attempt to locate and install the newest drivers. However, if that fails, you can manually update them. Visit the HP support website. Search for your laptop model. Download the latest camera drivers from there. Furthermore, reinstalling the drivers can be beneficial. Uninstall the camera driver. Then, restart your laptop. Windows will automatically reinstall it. Besides, ensure your operating system is up-to-date. Software updates often include driver improvements.
Privacy Settings: The Silent Guardians
Privacy settings impact your camera's functionality. Consequently, review your Windows privacy settings. Search for "Camera privacy settings" in the search bar. Ensure "Allow apps to access your camera" is enabled. Furthermore, check individual app permissions. Make sure the apps you use, such as Zoom or Skype, have camera access. In addition, verify your antivirus software isn't blocking access. Some programs have built-in privacy features. These settings might inadvertently disable the camera. Adjust your antivirus settings accordingly.
Hardware Hurdles: A Deeper Dive
Occasionally, a hardware fault is the source of the problem. However, before you start panicking, try a simple restart. This refreshes your system. Subsequently, check for loose connections. If you are comfortable, open your laptop (consult your manual). Inspect the camera cable. On the other hand, if your laptop has an external webcam, ensure it is properly connected. Nevertheless, consider a more advanced solution. Seek professional repair. An experienced technician can diagnose and fix hardware issues more effectively.
Troubleshooting Recap: A Step-by-Step Guide
First, confirm the camera isn't disabled physically. Second, check for software conflicts. Third, update or reinstall your camera drivers. Fourth, review your privacy settings. Finally, consider hardware-related problems. Moreover, if all else fails, contact HP support. They can offer tailored assistance.
Final Thoughts: Smile for the Camera!
A non-functioning camera is a nuisance. However, the solutions are usually straightforward. You can often get the camera working again. Ultimately, by following these steps, you should be back to video chatting. Enjoy your HP laptop camera. Let no more video calls be missed.
Work From Home? This Laptop Will CHANGE Your Life!HP Laptop Camera Dead? FIX It NOW!
Hey there, tech travelers! Ever been in the middle of a crucial video call, ready to dazzle with your wit and charm, only to be met with a black screen? Yep, we’ve all been there. That dreaded moment when your HP laptop camera decides to play dead. It’s frustrating, it’s embarrassing, and sometimes, it can feel like the internet gods are conspiring against you. But breathe easy, because we're going to dive deep into why your HP laptop camera might be giving you the cold shoulder and, more importantly, how to resurrect it!
1. The Silent Treatment: Recognizing the Camera’s Absence
First things first: let's confirm that your camera is actually deceased. It’s like checking for a pulse, digital style. Don't just assume, actually test it! Try opening your preferred video conferencing app – Zoom, Microsoft Teams, Skype, or the built-in camera app on your HP laptop. If all you see is a blank screen or an error message screaming "No camera found," then we’ve got a problem. But don't panic; pinpointing the issue is step one of the resurrection process!
2. Is It Really Dead? The Simple Checks First
Before you launch into complex troubleshooting, which can feel like dismantling a clock to check the time, let's take a few quick, easy steps. Think of these as low-hanging fruit.
- The Physical Switch: Some HP laptops have a physical privacy switch that disables the camera. It's typically located on the side or above the camera lens. Double-check it! It's the digital equivalent of forgetting to plug your phone into the charger.
- The Camera Light: Is the little light next to your camera lit up? If it’s on when you aren't trying to use the camera, that could be a sign of a software conflict.
- Reboot, Reboot, Reboot: I know it's the classic, cliché fix, but a simple restart can work wonders. Think of it as a digital reset button. Closing all running processes and initiating it again may kick it back to action.
- Try Another App: Test your camera in another application. Sometimes, a specific app might have a glitch, while others work just fine. A change of scenery may give you some ideas.
3. Diving into Device Manager: Your Camera’s Command Center
If the basic checks haven't worked, we need to dig a little deeper. The Device Manager is your laptop's behind-the-scenes control room. It lists all the hardware connected to your computer, including the camera.
- Accessing Device Manager: Right-click the Windows Start button and select “Device Manager.”
- Identifying the Camera: Look for “Cameras,” “Imaging devices,” or a similarly named category. If you see your camera listed with a yellow exclamation mark or a downward-pointing arrow, it’s a red flag!
- Troubleshooting within Device Manager: Right-click your camera and select "Troubleshoot." Windows will attempt to fix any driver issues automatically. If the camera is disabled, you'll have the option to enable it.
4. Driver Dilemmas: The Software Soldiers
Your camera relies on "drivers" – essentially, the software that allows it to talk to your operating system. Corrupted, outdated, or missing drivers are a common cause of camera malfunctions.
- Update Your Drivers: In Device Manager, right-click your camera and select "Update driver." Choose "Search automatically for drivers." Windows will search for the latest driver online.
- Roll Back Your Drivers: If the problem started recently, the newest driver might be the culprit. Go back to Device Manager, right-click your camera, select "Properties," then go to the "Driver" tab and click "Roll Back Driver.”
- Reinstall Your Drivers: If updating or rolling back doesn't work, uninstall the camera driver in Device Manager. Then, restart your laptop. Windows will often automatically reinstall the driver upon startup.
5. Software Conflicts: The Digital Squabbles
Sometimes, other software can interfere with your camera's functionality. Think of it like a crowded dance floor where everyone wants the same spotlight.
- Check Running Applications: Close any programs that might be using the camera, such as other video conferencing apps, virtual backgrounds, or screen recording software.
- Privacy Settings: Head to your Windows privacy settings (search “privacy settings” in the Start menu). Make sure that apps are allowed to access your camera. (Settings > Privacy & Security > Camera).
- Antivirus Interference: Some antivirus programs might block camera access. Check your antivirus settings to ensure that your camera isn’t being blocked.
6. The BIOS Blues: A Hardware Heartbeat
Okay, now we're entering advanced territory! The BIOS (Basic Input/Output System) is the firmware that initializes your computer's hardware. In rare cases, a BIOS setting might be causing trouble.
- Accessing BIOS: Restart your HP laptop and repeatedly press a key (usually F2, Delete, or Esc) during startup to enter the BIOS setup. The specific key varies depending on your HP model.
- Check Camera Settings: Within the BIOS, look for settings related to the integrated webcam. Make sure it’s enabled. Consult your HP laptop's manual or support website regarding the specific BIOS options.
- Caution: Tinkering with the BIOS can be risky if you're not careful. Make sure to back up any settings before making changes.
7. Software Conflicts: The Digital Squabbles
Sometimes, the camera can be disabled within an app itself.
- Check Application Settings: Make sure the camera is enabled in the settings of the application you're using (Zoom, Skype, etc.). There's usually a camera icon or video setting you can toggle.
- Permissions: Double-check the application's permissions within your operating system settings to ensure it has access to your camera.
8. Windows Updates: The Constant Evolution
Windows updates often include driver updates and bug fixes that can resolve camera issues.
- Check for Updates: Go to Settings > Windows Update and click "Check for updates." Install any pending updates and restart your laptop.
9. Hardware Hurdles: The Physical Examination
If all software-related solutions fail, it might be a hardware problem.
- Visual Inspection: Carefully inspect the camera lens for any damage or obstructions. Clean the lens with a soft, lint-free cloth.
- External Webcam: If your HP laptop has an external webcam port, try connecting an external webcam to verify if the issue is with the built-in camera or the operating system.
- Professional Help: If the camera hardware is damaged, you may need to contact HP support or take your laptop to a repair shop.
10. Factory Reset: The Nuclear Option (Use with caution!)
As a last resort, you could consider a factory reset of your HP laptop. This will erase all your data and reinstall Windows, bringing your laptop back to its out-of-the-box state.
- Backup Your Data: Before you do anything, back up all your important files!
- Initiating the Reset: Go to Settings > System > Recovery. Then, select "Reset this PC."
- Choose Your Options: You'll be given options to either keep your files or remove everything. Follow the prompts to complete the reset.
11. The Camera Light Doesn't Turn On
If the camera light is stubbornly off there might be driver issues.
- Update the camera and/or video card driver: If there is a video card driver update, install it.
- Check for recent driver changes: If there were any recent changes, it might be the culprit.
12. Using the Troubleshooter
Windows has a built-in troubleshooter that can assist you with various PC issues.
- Open Settings.
- Click on System.
- Select Troubleshoot.
- Click on Other troubleshooters.
- Select the Camera option and run the troubleshooter.
13. Consider External Cameras
If your laptop camera is permanently damaged, or fixing it proves too tricky, an external webcam is a straightforward solution.
- Easy Setup: External webcams are simple to connect via USB.
- Enhanced Quality: You may find the added video quality helpful.
14. The Camera Stopped Working After An Update
Updates, ironically, can sometimes cause problems.
- Roll Back an Update: If you suspect a recent update, go to "Update history" in settings and uninstall the latest update.
15. Contact HP Support
If all else fails, it's time to call in the professionals.
- HP Support Website: Head to the HP support website, find your laptop model, and look for troubleshooting guides or contact options.
- Warranty Check: Make sure your laptop is still under warranty.
Closing Thoughts: Camera Conquered!
So there you have it, friends! A comprehensive guide to tackling that pesky HP laptop camera problem. We’ve covered everything, from the simple switch to diving deep into the Device Manager. Remember, the key is patience and
HP Mini Speed Demon: Unleash Your Laptop's Hidden Power!How To Fix HP Laptop Camera Not Working In Windows 10 and Windows 11

By TechFixIT How To Fix HP Laptop Camera Not Working In Windows 10 and Windows 11 by TechFixIT
FIXED - Camera Not Working in Windows 11 Laptop or PC

By Techie Leopard FIXED - Camera Not Working in Windows 11 Laptop or PC by Techie Leopard
How To FIX Camera NOT Working on Windows 10 Problem

By Softbay How To FIX Camera NOT Working on Windows 10 Problem by Softbay

Title: 100 SOLVED NEW 2024 - We cant find your camera ERROR CODE 0xA00F4244 in Windows 1011- NEW 2024
Channel: How To Fix Tech
100 SOLVED NEW 2024 - We cant find your camera ERROR CODE 0xA00F4244 in Windows 1011- NEW 2024 by How To Fix Tech
Wifi On Laptop Phone
HP Laptop Camera Dead? FIX It NOW!
Modern life hinges on seamless digital communication. The ability to video conference, record memories, and stay connected through visual means is fundamental. When an HP laptop camera fails, it can disrupt workflows, fracture social connections, and impede the very essence of a digital existence. This article provides a comprehensive, step-by-step guide to diagnosing and resolving camera malfunctions on your HP laptop, ensuring your connection to the digital world remains unbroken. We believe in empowering you, not overwhelming you, with technical jargon. Let’s get your camera back online.
Initial Troubleshooting: The Quick Checks to Ensure It's Not a Simple Fix
Before diving into advanced diagnostics, eliminate simple oversights. These initial checks can often resolve the issue swiftly, saving you valuable time and stress.
The Physical Switch: Many HP laptops feature a physical privacy switch that disables the camera. This switch is often located on the side of the laptop or integrated into the design around the camera lens. Ensure this switch is in the "on" position. If you’ve recently purchased your HP laptop, familiarize yourself with its specific features.
Camera Applications: Has the camera application been selected? Some applications, like video conferencing programs, require explicit camera selection. Double-check your chosen application’s settings to confirm the correct camera is selected. Within the application’s settings, you should see a dropdown menu for the "Camera" or "Video Input" options. Make sure your integrated webcam is chosen, if not, select the appropriate device option.
System Restart: A simple restart can often resolve temporary software glitches that might be preventing camera functionality. Save any open work, close all applications, and restart your laptop. Upon rebooting, test the camera again. This often clears temporary files, processes, and other potential issues.
Driver Conflicts: Outdated, corrupted, or incorrectly installed drivers are a common cause of camera problems. We'll go through extensive driver diagnostics later.
Software Solutions: Addressing Camera Driver and Application Conflicts
If the initial checks prove unsuccessful, we move into more in-depth software solutions. These solutions target the core elements controlling the camera's operation.
Driver Updates via Device Manager: The Device Manager provides crucial insights into your hardware’s state. Access it by typing "Device Manager" into the Windows search bar or by right-clicking the Start button and selecting Device Manager. Within Device Manager, expand “Cameras” or “Imaging devices.” If your camera is listed, right-click on it and select "Update driver." Choose "Search automatically for drivers." Windows will search for and install the latest drivers, which could rectify the problem.
Roll Back Driver: If the camera stopped working after a recent driver update, you might consider rolling back to a previous, working driver. Right-click on the camera device in Device Manager, select “Properties,” and then navigate to the “Driver” tab. If the "Roll Back Driver" button is available, use it. This reverts to the previously installed driver which will resolve compatibility issues.
Uninstall and Reinstall Drivers: More drastic, but often effective, is uninstalling and reinstalling the camera drivers. In Device Manager, right-click on your camera under “Cameras” or “Imaging devices” and select "Uninstall device." Restart your laptop. Windows will automatically attempt to reinstall the drivers upon restarting.
Camera App Permissions: Ensure the camera application has permission to access the camera. Go to Windows Settings (search for "Settings" in the Windows search bar) and click on "Privacy & security," then "Camera." Make sure the toggle is turned on for "Let apps access your camera." Additionally, review individual app permissions under the "Choose which Microsoft Store apps can access your camera" section.
Windows Update: Outdated Windows versions can cause compatibility issues with hardware devices. Run Windows Update by searching for "Windows Update" in the Windows search bar. Install all available updates, including optional ones. Restart your laptop after installing updates.
Hardware Diagnosis: Addressing Potential Physical Camera Issues
While software is frequently the culprit, hardware problems can also disable your camera. We'll explore potential hardware causes and corresponding solutions.
Camera Lens Inspection: Check the camera lens for any obstructions, such as dust, debris, or fingerprints. Carefully clean the lens with a soft, lint-free cloth. Avoid using harsh chemicals or abrasive materials. Sometimes a smudge can create a perception of complete malfunction.
External Webcam Test (If Applicable): If you own a USB webcam, connect it to your laptop. If the external webcam works correctly, the problem may lie specifically with the built-in laptop camera. If the external webcam fails to work either, the problem may be more related to the drivers and the applications installed
Laptop Lid Angle: In some HP laptop designs, the camera connection is affected by the laptop lid's angle. Try slightly adjusting the lid's position. If the camera functions at a specific angle, the issue could be a loose connection or a faulty internal wiring. This might be a sign of a hardware failure that requires some technical skills.
Internal Camera Cable Check (Advanced Users ONLY): This step involves disassembling your laptop, which could void your warranty. If you feel confident, and your warranty has expired, you can attempt this step. Locate the camera cable within the laptop. It's a delicate ribbon cable that connects the camera module to the motherboard. Check for any disconnections or physical damage. If you find a loose connection, carefully reseat the cable. If the cable looks damaged, you might need to replace it or the camera module.
Camera Replacement (Professional Help Recommended): In severe cases, the camera itself might be defective. Replacing the camera module is a more complex hardware repair and is often best handled by a qualified technician. Contact HP support or a reputable repair center.
Troubleshooting Specific Error Messages and Codes
Error messages provide valuable clues. They guide you to the root of the camera problems.
“No camera found” or “Camera not detected”: This typically indicates a driver issue or a hardware connection problem. Revisit driver updates, reinstallation, and cable connection checks. Rule out any physical obstructions.
Error code 0xA00F4244
: This error suggests that no camera is connected or detected by Windows. Double-check your camera’s connections, or explore driver management solutions.Error Code 0xA00F4271
: This error indicates a problem related to media access. Verify that the camera is not being used by another application simultaneously. Close unnecessary applications and try again. Check the camera's permissions.
Advanced Solutions: Registry Tweaks and System File Checks
If standard solutions have failed, advanced methods might be necessary. These strategies are recommended for users with some technical acumen.
Registry Editor (Use with Caution): Incorrectly modifying the registry can critically impact your system. Back up your registry before making any changes. Open the Registry Editor by typing “regedit” in the Windows search bar. Navigate to
HKEY_LOCAL_MACHINE\SOFTWARE\Microsoft\Windows Media Foundation\Platform. Right-click on an empty area in the right pane and select "New" -> "DWORD (32-bit) Value." Name the value "EnableFrameServerMode." Double-click on the new value and set its value data to "0." Restart your laptop.System File Checker (SFC) Scan: Corrupted system files can impact hardware functionality. Open Command Prompt as an administrator (search for "cmd" in the Windows search bar, right-click, and select "Run as administrator"). Type
sfc /scannowand press Enter. The System File Checker will scan for and attempt to repair corrupted system files. Restart your laptop after the scan completes.
Preventative Maintenance and Best Practices
Protecting your laptop's camera from future issues involves proactive steps.
Regular Driver Updates: Keep your drivers up-to-date. Check for driver updates regularly through the Device Manager or HP Support Assistant.
Antivirus Protection: Ensure your system is protected by robust antivirus software. Malware can sometimes interfere with camera function.
Safe Handling: Avoid dropping or exposing your laptop to extreme temperatures or moisture. These factors can damage internal components.
Privacy Practices: When not in use, physically cover your camera to protect your privacy. This is a simple and effective measure.
When to Seek Professional Help
If you've followed these steps and your camera remains non-functional, it's time to seek expert assistance.
HP Support: Contact HP's customer support for assistance with your specific laptop model. They may be able to provide model-specific solutions.
Local Repair Shops: Take your laptop to a reputable computer repair shop. A technician can diagnose and repair hardware issues.
Warranty Coverage: If your laptop is still under warranty, take advantage of the warranty. Contact HP support or place your request with the retailer of the original purchase.
By methodically following this guide, you can effectively troubleshoot and resolve camera issues on your HP laptop. Remember to start with the simplest solutions and gradually move towards more advanced troubleshooting techniques. Armed with this knowledge, you have a much greater chance of recovering that essential digital connection.
