dell xps laptop power switch not working os

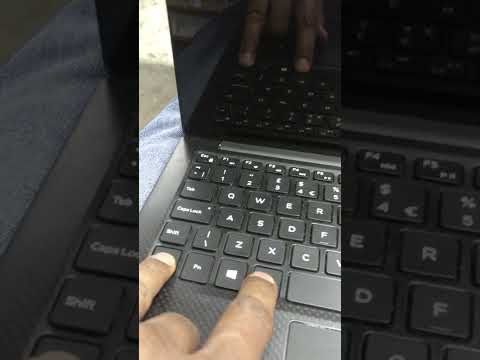
Title: How to Power On Laptop Without Power Button Without Power Button Laptop OnMacNitesh
Channel: Mac Nitesh
How to Power On Laptop Without Power Button Without Power Button Laptop OnMacNitesh by Mac Nitesh
Dell XPS Power Button Dead? 😱 FIX IT NOW!
Dell XPS Power Button Blues? Don't Panic! A Survival Guide
Ah, the dread! You reach for your trusty Dell XPS, eager to dive into work, games, or a late-night movie. Then, nothing. The power button stares back, lifeless, unresponsive. Your heart sinks. Fear not, fellow XPS owner! This isn't necessarily the end of the world. In fact, we can likely resurrect your precious machine. Let's navigate this together.
Is It Really Dead? Troubleshooting the Obvious
Before you declare a digital emergency, let's rule out the simple culprits. After all, sometimes the solution is delightfully straightforward. First, ensure the power cord is securely plugged into both your Dell XPS and the wall outlet. Seriously! It happens more often than you think. Then, confirm the outlet itself is providing power. Try plugging another device into that same outlet to be sure.
Next, inspect the power adapter brick. Look for any signs of damage, loose connections, or a glowing (or non-glowing) light indicating power. Sometimes, a faulty adapter masquerades as a dead power button. Also, a completely drained battery can sometimes mimic a dead power button. Furthermore, leave your XPS plugged in for at least a few hours to charge. So, sometimes a little patience solves everything.
The Battery Blues: A Potential Culprit
Many Dell XPS models feature internal batteries. These can, unfortunately, fail. If your laptop still will not turn on, the battery might be preventing startup. Therefore, try removing the battery (if possible for your specific model). Then, plug the laptop directly into a power outlet. Attempt to power it on again. Does it work? If so, the battery is likely the issue. You'll probably need a replacement battery.
The Power Button Itself: A Delicate Dance
Now let's address the power button's immediate functionality. Firstly, give it a gentle cleaning. Dust or debris can occasionally interfere with its operation. Use a can of compressed air, cautiously, to blow away any potential obstructions. Be gentle, as brute force is rarely the answer.
Next, consider a soft reset. Unplug the laptop from all power sources, including the adapter and any connected devices. Next, press and hold the power button for at least 30 seconds. This drains any residual power. After a minute, plug the laptop back in and try powering it on again. You may be surprised by the results.
Internal Investigation: The CMOS Battery
If the power button still refuses to cooperate, we venture a little deeper under the digital hood. Many laptops possess a CMOS battery. It’s a small, coin-shaped battery that retains system settings. Moreover, a depleted CMOS battery can sometimes prevent the laptop from starting.
Therefore, if you are comfortable opening the laptop (proceed with caution!), you can locate and replace the CMOS battery. If you aren't comfortable doing this, seek professional help. However, always remove the main battery and unplug the power adapter before opening your XPS. Search for instructions specific to your Dell XPS model online before you proceed.
The BIOS: A Silent Guardian (Maybe Not Today)
The BIOS (Basic Input/Output System) is the firmware that initializes your computer during startup. Occasionally, a corrupted BIOS can hinder the power-on process. Accessing and potentially resetting the BIOS is a more advanced step. This usually requires a functional power button, unfortunately. Still, some models offer a BIOS recovery option via a specific key combination or a USB drive. Research your specific Dell XPS model to learn more.
External Displays and External Problems
Sometimes, your XPS might seem dead. However, it’s simply outputting the image to an external display or monitor. Consequently, connect your laptop to an external monitor (if you have one). Sometimes an external monitor will display information.
Software Glitches and Boot Problems
Rarely, a driver issue or software conflict can prevent startup. This is less likely if the power button is completely unresponsive. Still, it's worth mentioning for troubleshooting purposes. If, by some miracle, you can see a light, or the machine gives any sign of life, this could be a possibility.
When to Call in the Experts
Sometimes, home remedies simply aren't enough. If you have tried all the above troubleshooting steps. So, then it's time to seek professional help. A local computer repair shop or Dell's support services are your best bets. Moreover, do not hesitate to reach out. They possess the expertise and, more importantly, the specialized tools to diagnose the issue.
Prevention is Key: Maintaining Your XPS
Preventative maintenance goes a long way. Regularly clean your laptop, especially the air vents. This prevents overheating, a common cause of hardware failures. Also, ensure your software is up-to-date. Finally, always handle your XPS with care, avoiding physical shocks.
Laptop Camera Dead? 😱 FIX This NOW!Dell XPS Power Button Dead? 😱 FIX IT NOW!
Alright, tech lovers! Picture this: you're ready to dive into a late-night gaming session, finish an important project, or simply browse the web. You hit that power button on your sleek, beautiful Dell XPS, and…nothing. Black screen. Dead silence. Panic sets in, doesn't it? Believe me, we've all been there. The feeling of utter helplessness when your trusty laptop seemingly gives up the ghost is a special kind of dread. But breathe easy, because more often than not, a dead Dell XPS power button isn't a death sentence. It's more like a temporary hiccup, a minor inconvenience that, with a little know-how, we can conquer together. Think of this article as your personal tech superhero, ready to swoop in and rescue your XPS from the digital abyss. Let’s roll up our sleeves and get this machine back to life!
1. The Dreaded Black Screen: Understanding the Problem
Before we start throwing solutions at the problem like confetti at a parade, let's understand why the power button might be failing. It’s like diagnosing a patient before prescribing medicine. Is it a simple glitch, a software hiccup, or something more serious? The power button on a Dell XPS, just like any electronic component, can experience issues. It could be a physical problem with the button itself, something internal like a connection issue, or a software conflict that's preventing the system from booting. Sometimes, it's as simple as a drained battery playing tricks on you. Other times, it's a bit more complex, involving the motherboard or other crucial components. But don't let the complexity intimidate you! We'll tackle this step-by-step.
2. First Steps: The Obvious Checks…and Why They Matter
Before we dive into the deep end, let’s start with the basics. It's like checking if your car has gas before calling a mechanic. These initial checks are often the simplest fixes, and they save us time and potential headaches.
- Check the Power Cord: Sounds silly, I know, but it’s amazing how often the simplest things are overlooked. Is your power cord securely plugged into both the laptop and the wall outlet? Try a different outlet, just in case.
- Inspect the Power Adapter: Does the power brick have an LED light? Does it light up when plugged in? If not, your adapter might be the culprit. Borrow a friend's adapter to test if possible.
- Listen for Sounds: Even if the screen is black, listen carefully. Do you hear any fans spinning? Any faint beeps? These clues can help narrow down the issue. It's like listening for a heartbeat to determine if a person is alive or not.
- External Monitor Check: Connect your XPS to an external monitor. Maybe the display is the problem, and your laptop is actually booting up just fine.
3. The Hard Reset: A Digital Reset Button
If the basic checks don't work, it's time for a "hard reset". This is like hitting the reset button on a video game console. It forces the laptop to shut down completely and clears any temporary memory issues.
- Unplug Everything: Disconnect the power adapter, and remove any USB devices or external drives. This is crucial to avoid any potential conflicts.
- Hold the Power Button: Press and hold the power button for at least 30 seconds. This drains any residual power from the system.
- Plug it Back In: Reconnect the power adapter (only) and try to turn on the laptop again.
Fingers crossed! Sometimes this simple trick is all it takes.
4. Battery Blues: Removing and Reinstalling (If Possible)
If your Dell XPS isn’t sealed shut (some modern models are!), you might be able to remove the battery. This can sometimes reset the system and clear any battery-related issues.
- Consult the Manual: Always refer to your Dell XPS's manual for detailed instructions on how to safely remove the battery. Safety first!
- Remove the Battery: Once you've located the battery, carefully disconnect it.
- Hold the Power Button (Again): Press and hold the power button for 30 seconds to drain any remaining power.
- Replace the Battery: Reinstall the battery, plug in the power adapter, and try to power on the laptop.
5. The BIOS Problem: Can The BIOS Be The Culprit?
This is a little more advanced, but not something to be entirely afraid of. The BIOS (Basic Input/Output System) is the software that tells your computer how to boot up. Sometimes, a corrupted BIOS can cause boot issues, including problems with the power button.
- Attempt BIOS Recovery: Dell often includes a BIOS recovery feature. Consult your Dell XPS manual to learn how to access this feature (usually involving holding specific keys during startup). This method is similar to restoring a phone to factory settings.
- Check the Dell Support Website: Download the latest BIOS update from the Dell support website, but only if you are comfortable with a BIOS flash. Incorrectly flashing the BIOS can damage your laptop.
6. The Charging Light: What's It Trying to Tell You?
Pay close attention to the charging light, if your XPS has one. It can offer valuable clues.
- Solid Light: This often indicates the laptop is charging normally.
- Blinking Light: This can suggest a problem with charging, battery, or power adapter.
- No Light: Indicates a power issue.
- Consult the Manual: The manual explains what each color/blinking pattern means.
7. The Boot Menu: Accessing and Using It
The boot menu allows you to select the device from which to start your computer. Accessing the boot menu can eliminate the possibility of a bad hard drive that won’t allow the PC to start.
- Restart and press the boot key. Usually, this is F12, but it’s best to check the Dell manual.
- Select a device. Select the device you intend to use, like the hard drive or USB.
- If successful, then the problem is elsewhere. If not, then there’s a problem with the device.
8. Software Conflicts: When Your Software Turns on You
Sometimes, software conflicts can prevent your laptop from booting. This is rare, but it happens, especially if you just installed software.
- Safe Mode: Try booting into Safe Mode. This is a stripped-down version of Windows with minimal drivers. Press F8 or Shift+F8 repeatedly as your XPS boots, to access the Safe Mode options.
- System Restore: If Safe Mode works, consider using System Restore. This will revert your system to an earlier point in time, potentially fixing the issue.
9. Internal Inspection (Proceed with Caution!)
If you're comfortable with it, and are qualified to do so, you could open up your laptop. This is the last resort, and you’ll want to make sure you have done all the above checks.
- Do you have your tools? You will need screwdrivers, a small pry tool, and perhaps anti-static wrist straps.
- Consult the Manual: Always refer to your Dell XPS's manual for detailed disassembly information.
- Check Connections: Look for loose connections or signs of damage to the power button cable.
- Clean the Button: The contacts of the switch could become dirty, so cleaning them might work.
- BE CAREFUL: This voids your warranty and you can cause more damage.
10. When to Call in the Experts: Don't Go It Alone
Sometimes, the problem is beyond our DIY capabilities. Don't worry – it's okay to admit defeat!
- Warranty: If your laptop is still under warranty, definitely contact Dell support. They can provide assistance or arrange for repairs.
- Local Tech Repair: Find a reputable computer repair shop. They have the skills and tools to diagnose and fix more complex issues.
11. Prevention is Key: Avoiding Future Power Button Problems
While you can't completely eliminate the risk of a dead power button, you can take steps to minimize it. It's like taking good care of your car to prevent problems down the road.
- Keep it Cool: Avoid exposing your laptop to extreme temperatures. Heat can damage internal components.
- Gentle Handling: Don't drop your laptop, and avoid putting excessive pressure on the power button.
- Software Updates: Keep your operating system and drivers updated. These updates often include bug fixes.
- Clean Regularly: Dust can accumulate and cause overheating. Use compressed air to clean out vents and fans.
12. The Power Button's Role: Beyond On and Off
Think about how you interact with your laptop. The power button is your direct line to your digital life. It's the gateway to your work, entertainment, and social connections. When it fails, you lose that connection, at least temporarily.
13. The Simplicity of the Solution: Often Easier Than You Think
The solutions to a dead power button on your XPS can be surprisingly simple. Often, it's something as basic as a loose connection or a drained battery. It's like the old saying, "sometimes the answer is staring you right in the face."
Toshiba Laptop Keyboard Disaster! (Solved!)Dell xps 13 black screen issue -fix
By Fixing News Dell xps 13 black screen issue -fix by Fixing News
any laptop power button switch strip repair laptop power button not working solution tips

By Enjoy Info any laptop power button switch strip repair laptop power button not working solution tips by Enjoy Info
DELL Laptop with Broken Power Button
By Technesia DELL Laptop with Broken Power Button by Technesia

Title: Disable Power On Lid Open Dell Laptop Official Dell Tech Support
Channel: Dell Support
Disable Power On Lid Open Dell Laptop Official Dell Tech Support by Dell Support
Change Wifi Settings
Dell XPS Power Button Dead? 😱 Revive Your Laptop Today!
Encountering a lifeless Dell XPS, its power button unresponsive, can be a heart-stopping experience. Your lifeline to work, entertainment, and connection suddenly vanishes. But before you resign yourself to despair, know that solutions often exist. This guide, crafted with meticulous detail, offers a comprehensive roadmap to troubleshoot and, ideally, resurrect your Dell XPS from the brink of electronic oblivion. We’ll explore potential causes, detailed diagnostic steps, and practical remedies – essentially equipping you with the knowledge to become your own laptop's savior.
Step 1: Initial Assessment - Ruling Out the Obvious
Before diving into complex diagnostics, let us perform a rigorous, yet simple, initial assessment. This preliminary triage often uncovers the root cause swiftly, saving you valuable time and potential frustration.
External Power Source Verification
The power button might be functional, but a complete lack of power can mimic a dead button.
- Confirm Wall Outlet Functionality: Plug a known working device (a lamp, for example) into the same outlet to verify it's providing power.
- Inspect the Power Adapter: Examine the Dell XPS power adapter for any physical damage – frayed wires, cracks, or loose connections.
- Try a Different Adapter (If Available): If you have access to a compatible Dell XPS adapter, substitute it to rule out adapter failure. Compatibility is key; ensure the voltage and amperage match your laptop's specifications. These specifications are generally found on the adapter itself or on a sticker on the bottom of your XPS.
- Observe the Adapter LED: Many Dell XPS adapters have an LED indicator. Does it illuminate when plugged into the outlet? If not, this could indicate a faulty adapter.
Power Cable Connectivity Check
Loose connections can disrupt power delivery.
- Secure Connection to Laptop: Ensure the power adapter cable is firmly and fully inserted into the XPS laptop's power port.
- Inspect Port for Debris: Carefully examine the power port on your XPS for any obstructions, such as dust, lint, or bent pins. Using a flashlight can be extremely helpful here. A non-conductive tool, such as a toothpick or a compressed air canister, can be used to clean the port gently.
Battery Considerations
A drained or malfunctioning battery can sometimes prevent the laptop from powering on.
- Attempt Power On Without Battery: Remove the battery (if possible; some XPS models have internal batteries, requiring more advanced procedures) and attempt to power on the XPS using only the AC adapter.
- Battery Charge Status (If Possible): If your XPS has an external battery, or if you can briefly power it on, observe the battery indicator. A flashing or steady orange light might indicate a charging issue.
Step 2: Advanced Diagnostics - Delving Deeper into the Problem
If the initial assessment yields no results, we'll proceed with more advanced troubleshooting. These methods require greater attention to detail, and in some cases, a degree of technical expertise.
The Hard Reset Procedure
A hard reset can clear any temporary glitches that might be preventing the XPS from powering on.
- Disconnect all Peripherals: Unplug the power adapter, and disconnect any connected devices, such as USB drives, external monitors, printers, and anything else connected to the laptop.
- Hold the Power Button: Press and hold the power button continuously for at least 30 seconds.
- Reconnect Power Adapter: Plug the power adapter back in.
- Attempt Power On: Press the power button to see if the XPS now starts.
Checking the Power Button Circuit
The power button itself might be faulty.
- Visual Inspection: Carefully examine the power button for any physical damage – a stuck button, cracks, or signs of wear and tear.
- BIOS/CMOS Battery Verification: A depleted CMOS battery can sometimes cause power-on issues. Finding where the CMOS battery is located on the motherboard is usually not hard, but it does require opening the laptop. Research your XPS model’s service manual online.
- Motherboard Analysis: This is a more advanced step and ideally should be performed by a qualified technician. A multimeter can be used to test the continuity of the power button circuit.
Display Troubleshooting
Sometimes the system is powering on but there is no display.
- Press the Power Button: After pressing the power button, listen attentively for any fan noise or hard drive activity. This can be a good indicator that the system is, at least, partially booting.
- External Monitor Test: Connect an external monitor to your XPS via HDMI or DisplayPort. If the external monitor displays the boot screen, but your laptop’s display remains blank, the screen itself, the display cable, or the GPU could be at fault.
- Brightness Adjustment: Even with a working display, the brightness might be turned down to minimum. Test the brightness keys.
- Listen for Beep Codes: If your XPS is producing beep codes, these can indicate hardware problems. Consult your XPS service manual for beep code interpretations.
Step 3: Potential Hardware Solutions - When Repair is Necessary
If the diagnostic steps point to hardware failure, repair or component replacement becomes necessary.
Battery Replacement
If the battery is the culprit, replacement is usually a straightforward process.
- Research Compatible Batteries: Identify the correct replacement battery for your specific Dell XPS model. Websites like Dell's official website and reputable retailers often offer compatible replacements.
- Follow the Manual: Consult your XPS service manual for detailed battery replacement instructions. This will guide you safely through the process.
- Proper Disposal: Dispose of the old battery responsibly, following local regulations for electronic waste.
Power Adapter Replacement
A faulty power adapter can be easily replaced.
- Check the Specifications: Carefully match the voltage, amperage, and connector type of your original adapter when purchasing a replacement.
- Purchase from Reputable Sources: Buy from Dell's official website, or a trusted retailer to ensure quality and compatibility.
Motherboard Repair or Replacement
Motherboard issues are often more complex and may require professional help.
- Seek Professional Assistance: Contact a qualified computer repair technician. They will have the expertise and tools to diagnose and potentially repair motherboard issues.
- Component Replacement: Technicians perform component-level repairs on the motherboard, which can be a cost-effective solution.
- Motherboard Replacement: In severe cases, motherboard replacement might be necessary – a more costly but sometimes unavoidable option.
Power Button Replacement
If the power button itself is defective, replacement is possible, but may require some technical skill.
- Look Up the Service Manual: Research the service manual for your specific XPS model. This manual provides comprehensive instructions on how to replace components, including the power button.
- Order the Part: Obtain a replacement power button from a reputable source.
- Careful Disassembly: Follow the service manual instructions meticulously when disassembling the laptop to access and replace the power button.
- Reassembly and Testing: After replacing the power button, reassemble the laptop carefully and test the functionality of the power button and all other functions.
Step 4: Preventing Future Issues - Proactive Measures
Preventative measures can reduce the likelihood of future power button failures and extend the lifespan of your Dell XPS.
Proper Handling and Care
- Avoid Drops and Impacts: Handle your XPS with care, and prevent drops and impacts that could damage internal components.
- Gentle Closure of Lid: Close the laptop lid gently to avoid putting stress on the power button.
- Adequate Ventilation: Ensure adequate ventilation to prevent overheating.
- Avoid Extreme Temperatures: Avoid exposing your XPS to extreme temperatures, which can affect battery performance and component reliability.
Software and Driver Maintenance
- Keep Drivers Updated: Regularly update your device drivers, especially graphics card and chipset drivers, through the Dell Support website or Windows Update.
- Regularly Scan for Malware: Run a reputable antivirus and anti-malware program to protect your system and prevent software conflicts that could affect the power button.
- Operate under Optimal Environmental Conditions: Avoid operating the laptop in areas with excessive dust, moisture, or extreme temperatures.
Regular Maintenance
- Scheduled Maintenance: Schedule professional servicing for your laptop periodically to ensure that it remains in perfect condition.
- Cleaning and Dust Removal: Clean your XPS regularly, focusing on removing dust from vents and fans to promote proper cooling.
- Data Backup: Regularly back up your important data to prevent data loss.
In conclusion, a dead Dell XPS power button can seem catastrophic. However, with a methodical approach to troubleshooting, coupled with the detailed steps outlined in this guide, you significantly increase your chances of reviving your laptop. By understanding the potential causes and taking proactive measures, you can hopefully restore your Dell XPS and keep your digital life running smoothly for years to come.
