volume buttons not working on laptop windows 11
Title: Fix In 3 Seconds - Volume Control Keys, Mute Button Not Working Microsoft Surface Pro Windows
Channel: Mechanical Mike
Fix In 3 Seconds - Volume Control Keys, Mute Button Not Working Microsoft Surface Pro Windows by Mechanical Mike
volume buttons not working on laptop windows 11, why is my volume button not working windows 10, why are the volume buttons on my laptop not working
Windows 11 Volume Nightmare? FIX Your Broken Buttons NOW!
Windows 11 Volume Agony? Silence the Chaos and Restore Audio Sanity!
Ever found yourself wrestling with the volume controls on your Windows 11 machine? It's a frustrating experience, isn't it? You’re not alone. Many users encounter maddening volume issues, from unresponsive sliders to disappearing audio entirely. The good news? You are certainly not doomed to a life of muted frustration. Prepare to banish those audio gremlins and reclaim your listening pleasure. We will troubleshoot this issue together. You can have your sound back now.
The Audio Abyss: Unmasking the Culprits behind Volume Vexation
Before diving into solutions, identifying the underlying causes is crucial. After all, a proper diagnosis is half the battle. Many factors contribute to volume problems. Consequently, pinpointing the root issue steers us toward the correct fix. Firstly, driver conflicts are notorious troublemakers. Outdated, corrupted, or incompatible audio drivers can wreak havoc. Secondly, hardware glitches are a possibility. Faulty speakers, headphones, or sound cards can also lead to muted misery.
Beyond the Obvious: Exploring Hidden Audio Landmines
Sometimes, the solution lies beyond the usual suspects. For instance, system updates, both Windows and third-party applications, can inadvertently alter audio settings. Therefore, always check your recent activity; that is, your installations or updates. Moreover, consider background processes. Resource-hungry applications can sometimes interfere with audio functionality. Finally, don’t overlook simple settings errors. It's easy to overlook a crucial mute button or the wrong output selection. With that, we'll start troubleshooting.
Step-by-Step Salvation: Your Guide to Audio Repair
Ready to restore your sonic bliss? Here's a straightforward guide to vanquishing those volume woes.
1. Driver Detective: Updating and Reinstalling Audio Drivers
This is a common first step in troubleshooting. First, access Device Manager. You can do this by right-clicking the Start button. Then, select "Device Manager." Look for "Sound, video, and game controllers." Expand this section. Right-click your audio device and choose "Update driver." Select "Search automatically for drivers." However, if Windows can’t find an update, manually download the correct driver from the manufacturer’s website. If updating fails, try uninstalling and reinstalling the driver. Right-click your audio device again, and choose "Uninstall device." Then, reboot your computer. Windows will typically reinstall the driver automatically.
2. Volume Mixer Mastery: Balancing the Audio Universe
The Volume Mixer controls the sound volume of all applications. Navigate to the system tray, and click the speaker icon. Then, click "Mixer". Ensure individual application volumes are not muted. Also, ensure the volume levels are appropriately set. You might discover an application's specific volume is turned down.
3. Hardware Hazard Hunt: Testing Your Audio Devices
Rule out hardware faults. Connect different speakers or headphones. Test them on your computer. If the problem persists across multiple devices, the issue is probably software-related. Try connecting your audio devices to a different computer. This can help isolate if the issue is with the device or the system.
4. Service Savvy: Restarting the Windows Audio Service
Sometimes, the Windows Audio service fails. This essential service manages all audio functions. Press the Windows key and R. Type "services.msc" and press Enter. Find "Windows Audio" in the list. Right-click it and choose "Restart." This often revitalizes the audio system.
5. Update Alert: Keeping Your System Current
Regular updates are essential for smooth performance. Check for both Windows updates and updates for your audio drivers. Windows updates, often include driver updates. Therefore, ensure you're running the latest version of Windows 11.
6. Troubleshooter Tactics: Letting Windows Help You
Windows has a built-in troubleshooter. It's a simple but often effective tool. Go to Settings > System > Troubleshoot > Other troubleshooters. Run the "Playing Audio" troubleshooter. The troubleshooter will scan for common audio problems. It then attempts to resolve them.
7. Third-Party Interference: Reviewing Recent Installations
Did the audio troubles begin after installing a new program? Uninstall or roll back recent installations. Some applications affect audio settings. This helps determine the culprit.
8. Audio Output Assurance: Selecting the Right Device
Ensure Windows is using the correct audio output device. Right-click the speaker icon in the system tray. Select "Open Sound settings". Under "Output," make sure the correct speakers or headphones are selected.
9. BIOS/UEFI Check: Rare but Worth Considering
In rare cases, BIOS/UEFI settings can impact audio. Reboot your computer and enter the BIOS/UEFI setup (usually by pressing Del, F2, or another key during startup; check your motherboard manual). Ensure your audio device is enabled within the BIOS/UEFI. Be cautious when changing BIOS/UEFI settings. Make sure you understand the changes.
Reclaiming Your Sound: A Symphony of Success
Following these steps carefully should resolve most Windows 11 volume problems. Remember, patience is key. Troubleshoot systematically. Test each solution individually. If one method doesn’t work, then move to the next. Don't give up. In most cases, you will restore your audio functionality. Ultimately, you will have your audio back. Now, enjoy your music, videos, and games without interruption. The silence is over! Now enjoy the sound of success.
HP Laptop Mouse Dead? This FIX Will SHOCK You!Windows 11 Volume Nightmare? FIX Your Broken Buttons NOW!
We've all been there, haven't we? You're in the middle of a crucial Zoom call, head bobbing to your favorite tunes, or immersed in a gaming session, and suddenly… silence. You frantically reach for the volume buttons, only to find they're as responsive as a grumpy cat on a Monday morning. Sound familiar? If you're wrestling with a Windows 11 volume nightmare, you're definitely not alone. And trust me, we feel your pain! But don't despair; we're here to navigate through the digital wilderness and bring your audio back from the brink of oblivion. Consider this your ultimate survival guide to conquering the volume woes in Windows 11.
1. The Symphony of Silence: Understanding Your Volume Problems
Before we dive into solutions, let's understand the enemy. Your volume issues in Windows 11 can range from a simple mute button glitch to complex driver conflicts. It's like orchestrating a symphony gone wrong. Maybe a single instrument (your volume) is out of tune, or perhaps the entire orchestra (your sound system) has gone rogue. Are your volume buttons unresponsive? Is the volume mixer showing zero activity? Is the sound cutting out intermittently? Identifying the specific symptoms is the first step towards a cure. We'll explore a few of the common culprits.
2. The Silent Culprit: Checking the Basics (Yes, That Mute Button!)
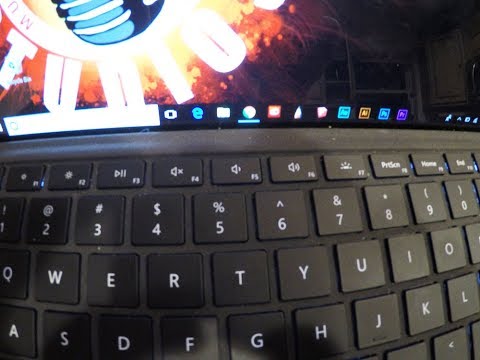
Okay, I know, I know. It sounds ridiculously obvious. But sometimes, the simplest solutions are the ones we overlook in a panic. Have you checked the physical mute button on your keyboard or laptop? Is it accidentally engaged? It's like forgetting you're wearing your glasses when you're searching for them. Give it a click. Really. Then, look closer at the sound icon in your system tray. Is it muted? A little icon with a line through it will instantly reveal if it's the problem. Sometimes, the solution to the volume problem is staring right at you!
3. The Volume Mixer Mystery: Unveiling Hidden Knobs
Windows 11's Volume Mixer is your command center for audio. Think of it as a control panel for individual applications. Different apps might have their own volume levels. Let’s say your music player is blasting, but your game is whisper-quiet. The mixer lets you fine-tune each app’s volume. To access it, right-click the sound icon in your system tray and select "Open Volume Mixer." Are any individual applications muted or set to an extremely low volume? Often, the problem isn't Windows itself, but specific programs hogging the audio spotlight.
4. Driver Disasters: Your Sound Card's Silent Struggle
Drivers are the unsung heroes (or villains) of your computer. They’re the software that allows your hardware to "talk" to Windows. Outdated, corrupted, or incompatible audio drivers can wreak havoc on your sound. Imagine trying to hold a conversation with someone who speaks a different language – that’s what it’s like when your drivers and hardware have a communication breakdown. To check and update your audio drivers, follow these steps:
- Right-click the Start button and select "Device Manager."
- Expand "Sound, video, and game controllers."
- Right-click your audio device (e.g., your sound card) and select "Update driver."
- Choose "Search automatically for drivers." Windows will attempt to find and install the latest drivers. If that doesn't work, you might want to visit the manufacturer’s website for the most up-to-date versions.
5. Troubleshooting the Troubleshooters: Letting Windows Help
Windows 11 comes with built-in troubleshooters designed to diagnose and fix common problems. It's like having a built-in IT guy! Give the "Playing audio" troubleshooter a shot. It can automatically detect and attempt to repair audio issues. To access it:
- Right-click the sound icon in your system tray.
- Select "Troubleshoot sound problems."
- Follow the on-screen instructions.
6. Checking Connections: The Cable Conundrum
This might seem elementary, but trust me, it gets skipped. Are your headphones, speakers, or any other audio devices properly connected? Is the cable plugged in securely? Sometimes, a loose connection is all it takes to throw a wrench in the works. Double-check your connections, just to be sure. It's like making sure all the cords are securely plugged in.
7. Sound Settings Scrutiny: Navigating Your Control Panel
Dive into the Control Panel's sound settings. This is where you can manage your playback and recording devices. Ensure the correct device is selected as the default. Also, make sure all the audio enhancements are off. Sometimes, Windows tries too hard to be helpful and ends up sabotaging your audio.
- Search for "Sound" in the Windows search bar.
- Select "Sound settings."
- Check the "Output" and "Input" sections.
8. The Software Showdown: Conflicts and Conflicts
Are you running any audio-enhancing software, like equalizers or virtual surround sound applications? If so, they might clash with your Windows 11 settings. Try disabling them temporarily to see if they're causing the volume problem.
9. Reinstalling the Audio Driver: A More Aggressive Strategy
If updating the driver didn't work, consider uninstalling and then reinstalling it. This is a more aggressive approach that sometimes clears up stubborn issues. Follow these steps:
- Open "Device Manager."
- Expand "Sound, video, and game controllers."
- Right-click your audio device and select "Uninstall device."
- Restart your computer. Upon restart, Windows should automatically attempt to reinstall the driver. If not, you can manually reinstall it from the manufacturer’s website.
10. Rollback to a Previous Driver: A Time Machine for Audio
If the latest driver is causing problems, you can revert to a previous version. This is your audio time machine.
- Open "Device Manager."
- Expand "Sound, video, and game controllers."
- Right-click your audio device and select "Properties."
- Go to the "Driver" tab.
- If the "Roll Back Driver" button is active, click it.
11. Hardware Issues: When the Problem Is Physical
Unfortunately, sometimes the problem isn't software. If you've tried everything, the issue might be with your physical audio device – your speakers, headphones, or sound card. Test your audio devices on another computer to rule out hardware failure. Is it the cable, the actual headphone jack, something inside the speaker?
12. Check for Updates: Windows and Beyond!
Ensure both Windows 11 and any related software (like your audio drivers or a music player) are up to date. Updates often include bug fixes and performance improvements that could solve your volume problems. It's like getting a software tune-up to make sure the music plays smoothly.
13. BIOS Updates: The Foundation of Your System
While less common, updating your computer's BIOS (Basic Input/Output System) can sometimes resolve compatibility issues. BIOS manages your hardware, and an outdated BIOS can occasionally cause audio problems. This is a more advanced step, so do your research and follow the manufacturer's instructions carefully. It's like giving your computer's core programming a check-up.
14. System Restore: Turning Back Time
If the volume issues started recently, consider using System Restore to revert your computer to a previous state. Be aware that this might undo recent changes to your system.
15. Reaching out for Help: Contacting Support
If all else fails, don't hesitate to seek professional help. Contact your computer manufacturer's or audio device manufacturer's support for assistance. They might have specific troubleshooting steps or the solution to your unique setup. Sometimes, another set of eyes (or ears) is just what you need.
Closing Thoughts
Dealing with Windows 11 volume issues can be frustrating, but remember; you're not alone. By systematically working through these steps, from the simple checks to the more advanced fixes, you can often regain control of your audio and get your sounds back. Now, go forth and conquer that volume nightmare! You’ve got the tools, the knowledge, and the power!
FAQs: Your Burning Questions Answered
My volume buttons still aren't working even after trying everything. What else can I do?
If you've exhausted the troubleshooting steps, consider a clean Windows 11 installation as a last resort. This can resolve deep-seated software conflicts. However, back up your data first.
Could third-party software cause these problems?
Absolutely. Audio-enhancing software, equalizers, and programs that modify audio settings can sometimes conflict with your Windows settings. Try disabling such programs temporarily to see if they resolve the issue.
How do I know if my sound card is broken?
Test your sound card by connecting different speakers or headphones, or by trying it on another
How to Fix Windows 11 Volume Control or Volume Button Not Working on PC

By Tech Analytic 360 How to Fix Windows 11 Volume Control or Volume Button Not Working on PC by Tech Analytic 360
Function key for Brightness not working on Windows 1110

By TheWindowsClub Function key for Brightness not working on Windows 1110 by TheWindowsClub
Windows 11 Volume Not Working - Volume Button Not Working Windows 11
By How to Fix Your Computer Windows 11 Volume Not Working - Volume Button Not Working Windows 11 by How to Fix Your Computer

Title: Laptop Volume Button Not Working Windows 11
Channel: Solvetic English
Laptop Volume Button Not Working Windows 11 by Solvetic English
Laptop Wifi Hotspot
Windows 11 Volume Nightmare? Reclaim Audio Control with These Essential Fixes!
The frustration is palpable. You reach for the volume slider, the familiar icon a beacon of control, only to be met with…nothing. Audio sources that should be booming are silent, or worse, stuck at a deafening level. Windows 11, while promising a sleek and modern experience, can occasionally present a veritable "volume nightmare." But fear not! We are experts in untangling these audio knots, and we're here to guide you back to sonic serenity. Forget frustrating glitches – let's restore your audio functionality and ensure a seamless listening experience.
Pinpointing the Culprit: Identifying Your Volume Issues
Before diving into solutions, let's understand the common culprits behind erratic volume behavior. Is the problem system-wide, affecting all applications, or is it limited to a specific program? Does the volume fluctuate unexpectedly, or is it completely unresponsive? Does the volume mixer appear to be working, showing audio levels moving even when you can’t hear anything? The answers to these questions will streamline our troubleshooting efforts.
Isolating the Source: Software vs. Hardware
First, determine if the problem originates from software or hardware. Test your audio output with different devices: headphones, external speakers, or a separate monitor with integrated speakers. If the volume works correctly on one device but not another, the issue likely lies with the hardware itself, perhaps a faulty connection or driver incompatibility. If the problem persists across multiple devices, we have a software-related issue on our hands, and we have numerous solutions to try.
Examining the Volume Mixer
The Windows 11 volume mixer is a detailed dashboard that provides granular control over individual application volumes. This is the first place to check. Open the volume mixer by right-clicking the speaker icon in the system tray (lower-right corner) and selecting "Open Volume mixer." Check that individual application volumes are not muted or set to an extremely low level. Sometimes, an application might have muted itself accidentally, leading to the illusion of system-wide audio failure.
The First Steps: Simple Fixes to Restore Your Audio
Before resorting to more complex solutions, exhaust the simple checks. These often resolve the most common volume problems.
Restarting Your System: The Digital Reset Button
It sounds cliché, but a simple system restart can work wonders. A restart clears temporary files, restarts services, and often resolves minor software glitches that can interfere with audio functionality. Shut down Windows completely, wait a few seconds, and then power it back on. This simple refresh can often work where complicated solutions fail.
Checking Physical Connections: The Basics
Are your speakers or headphones properly connected? Ensure your audio output device is securely plugged into the correct port on your computer. Double-check the connection to the power outlet for external speakers and make sure the power switch is on. A loose cable is a frequent offender.
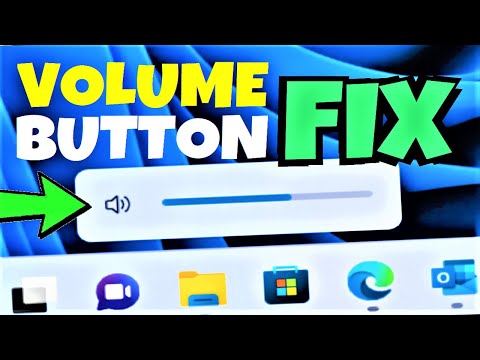
Volume Control: The Obvious Check
Make certain your master volume, controlled by the speaker icon in the system tray, isn't muted or set to a very low level. Drag the slider up to a comfortable listening level. It sounds basic, but it's easily overlooked.
Digging Deeper: Advanced Troubleshooting Techniques
If the fundamental checks don't resolve the volume issue, let's dive into more advanced troubleshooting.
Driver Verification and Updates: The Audio Gatekeepers
Outdated, corrupted, or missing audio drivers are a common source of volume problems. Here’s how to check:
- Access Device Manager: Right-click the Start button and select "Device Manager."
- Expand Sound, video and game controllers: Look for your audio devices (e.g., Realtek High Definition Audio, Intel Display Audio).
- Check for Errors: Any device with a yellow exclamation mark or a red "X" has a problem. Right-click the device and select "Properties" for more details.
- Update Drivers: Right-click the audio device and select "Update driver." Choose "Search automatically for drivers." Windows will attempt to find and install the latest drivers.
- Manual Driver Installation: If the automatic update fails, visit your computer manufacturer's website or the website of your audio device manufacturer (e.g., Realtek) to download the latest drivers specifically for your Windows 11 version. After downloading, install the driver manually.
Audio Service Management: The Behind-the-Scenes Controller
Windows audio relies on specific services to function. Ensure these are running correctly:
- Open Services: Press the Windows key + R, type "services.msc," and press Enter.
- Locate Audio Services: Find these services:
- Windows Audio
- Windows Audio Endpoint Builder
- Verify Service Status: Double-click each service. Ensure the "Startup type" is set to "Automatic" and the "Service status" is "Running." If a service isn't running, click "Start." If it's running, try "Restart."
- Dependencies: In the properties of each service, check the "Dependencies" tab. Ensure the dependent services are also running.
Troubleshooting Audio Playback: Windows' Built-in Assistant
Windows offers a built-in troubleshooter designed specifically for audio playback issues:
- Open Settings: Press the Windows key + I to open the Settings app.
- Navigate to System > Troubleshoot.
- Select Other troubleshooters.
- Run the Playing Audio troubleshooter. Windows will automatically detect and attempt to fix audio problems.
Addressing Third-Party Interference: Eliminating Conflicts
Certain applications might interfere with audio functionality. This includes audio enhancement software, virtual audio devices, or even poorly designed applications.
- Disable Audio Enhancements: Right-click the speaker icon in the system tray, select "Sounds," and go to the "Playback" tab. Select your default audio device, click "Properties," then go to the "Enhancements" tab. Uncheck any enabled enhancements.
- Check for Conflicting Software: Disable any audio-related third-party software, one at a time, to see if that resolves the issue.
- Uninstall and Reinstall: If you suspect a specific program, consider uninstalling and reinstalling it.
Advanced Solutions: When Standard Fixes Aren’t Enough
If you have endured all of the above, and your volume-related problems persist, consider these more advanced approaches.
System File Checker (SFC): Checking for System Corruption
Sometimes, corrupted system files can cause audio problems. The System File Checker (SFC) tool can scan for and repair these files:
- Open Command Prompt as Administrator: Search for "cmd" in the Start menu. Right-click "Command Prompt" and select "Run as administrator."
- Run the SFC Scan: Type
sfc /scannowand press Enter. This process can take a while. - Restart Your Computer: After the scan completes, restart your computer.
DISM (Deployment Image Servicing and Management): Repairing the Windows Image
If SFC doesn't resolve the issue, the DISM tool can be used to repair the Windows image itself:
Open Command Prompt as Administrator: Follow the same steps as above.
Run DISM Commands: Type the following commands, pressing Enter after each:
DISM /Online /Cleanup-Image /CheckHealthDISM /Online /Cleanup-Image /ScanHealthDISM /Online /Cleanup-Image /RestoreHealth
These commands can also take a considerable amount of time to complete.
Restart your computer after the DISM process is finished.
BIOS/UEFI Updates: The Foundation of Your System
Outdated BIOS/UEFI firmware can sometimes cause hardware compatibility issues, including related to audio.
- Check Your Motherboard Manufacturer's Website: Visit the official website for your computer's motherboard manufacturer.
- Locate BIOS/UEFI Updates: Find the BIOS/UEFI updates for your specific motherboard model.
- Follow the Update Instructions: Carefully follow the manufacturer's instructions for updating your BIOS/UEFI. This is a critical process, so proceed with extreme caution. Incorrect updates can render your system unusable.
Preventative Measures: Keeping Your Audio System Running Smoothly
After resolving your current problem, consider these tips to help prevent future volume issues:
Regular Driver Updates:
Make it a habit to check for driver updates regularly. Keep your audio drivers up-to-date to ensure optimal performance and compatibility.
System Maintenance:
Periodically run maintenance tasks like disk cleanup and defragmentation (if using an HDD) to keep your system running smoothly.
Software Compatibility:
Be mindful of the software you install. Ensure compatibility with Windows 11 before installing any audio-related utilities.
Conclusion: Taking Back Control of Your Audio Experience
Dealing with Windows 11 volume problems can be incredibly frustrating. But by methodically working through these solutions, starting with the simplest checks and progressing to more advanced troubleshooting, you should be able to isolate and resolve the root cause of the problem. The goal is a system that delivers crystal-clear audio. Take back control of your audio, and enjoy your content!
