keyboard not working on macbook laptop
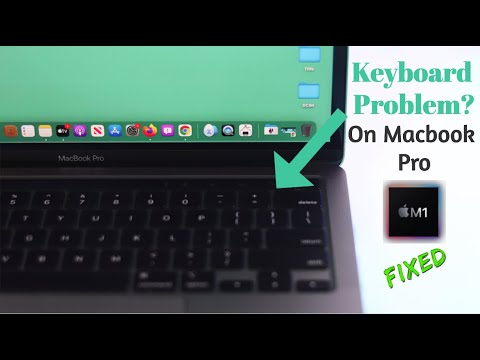
Title: Fixed- Macbook Pro M1 Keyboard Not Working
Channel: Fix369
Fixed- Macbook Pro M1 Keyboard Not Working by Fix369
keyboard not working on macbook laptop, keyboard not working on macbook air, keyboard not working on macbook air m2, keys not working on macbook pro, keyboard light not working on macbook pro, keyboard not working macbook air m1, keyboard and trackpad not working on macbook pro, keyboard and trackpad not working on macbook pro 2015, some keys not working on macbook air, some keys not working on macbook pro
MacBook Keyboard Disaster! (Solved!)
MacBook Keyboard Chaos: Triumph Over Sticky Keys!
It happened to the best of us. You're in the zone, fingers flying across the keyboard, crafting the next great American novel (or, you know, just answering emails). Then, disaster strikes! A key sticks. Another one repeats. Suddenly, your sleek, beloved MacBook transforms into a frustrating, unresponsive paperweight. I have been there, trust me. But fear not, fellow Mac enthusiasts. The MacBook keyboard nightmare can be conquered.
The Sticky Symphony of Frustration: Recognizing the Problem
First things first: acknowledge the enemy. What exactly are you dealing with? Is it a single, stubborn key? Or a cascade of repeating letters that's turning your carefully crafted sentences into gibberish? Perhaps the dreaded "ghost typing" is plaguing your every keystroke. All of these issues point toward a keyboard problem. Identifying the specific symptoms is key. It helps you understand the gravity of the situation. Also, it guides you toward the correct solution.
Dust Bunnies and Crumbs: Unveiling the Culprits
So, what's causing this digital drama? More often than not, the answer lies in the mundane. Crumbs, dust, and other tiny invaders are the usual suspects. These unwelcome guests find their way beneath the keys. There, they wreak havoc on the delicate mechanisms. In my experience, it's usually a forgotten snack or a little bit of dust. Sometimes, liquid spills also contribute. Whatever it is, it's not your fault. But, fortunately, you can address it.
The DIY Detective: Troubleshooting Time
Before you panic, try a few simple fixes. These are often enough to bring your keyboard back to life. First, power down your MacBook. Then, give it a good cleaning. Use canned air, directing the nozzle around each key. Focus on the problem areas. Be careful not to tip the laptop at a big angle. Afterwards, you can use a soft brush too. This can dislodge the stubborn debris.
Level Up Your Cleaning Game: The Advanced Tactics
If the basic cleaning doesn't work, it’s time to up your game. Consider using a slightly damp (not wet!) microfiber cloth. Gently wipe around and between the keys. Make sure the cloth is barely damp. Too much water can cause further damage. Another option involves using a specialized keyboard cleaning kit. These usually include small brushes and cleaning solutions. They can reach those hard-to-get-at crevices. Also, you can use a toothpick or a thin plastic tool. Carefully pry up the edge of the sticky key and remove any visible debris. However, proceed with caution. Avoid using excessive force.
When to Seek Professional Help: Know Your Limits
There are times when the DIY route just isn't enough. If your keyboard problems persist, don’t hesitate. Seeking professional help is sometimes necessary. If you spilled liquid on your keyboard, get help immediately. Liquid damage can corrode internal components. Similarly, if you've tried all the basic fixes and nothing works, it's probably time to contact Apple support. They have the tools and expertise to diagnose and repair (or replace) your keyboard. Sometimes it's better to leave the work to the professionals.
Preventative Measures: Keeping the Chaos at Bay
Prevention trumps cure, right? Well, it’s the same principle here. You can take proactive steps to protect your keyboard. Consider investing in a keyboard cover. These inexpensive accessories create a barrier against crumbs and spills. Regularly clean your keyboard. A quick wipe down every so often is a good habit. Be mindful of what you eat and drink near your MacBook. These simple habits can extend the life of your keyboard.
The Joy of a Functioning Keyboard: Back in the Game!
Once your keyboard is back in tip-top shape, the relief is palpable. Now, you can get back to doing what you do best. Write blog posts! Finish coding projects! Chat with friends! The freedom to type effortlessly is amazing. Remember, a little bit of maintenance and troubleshooting can go a long way. You can conquer that sticky keyboard. Also, you can reclaim your productivity.
Laptop Scroll Wheel Nightmare? FIX IT NOW!MacBook Keyboard Disaster! (Solved!)
Alright, let's be honest. We've all been there. That sinking feeling when your beloved MacBook keyboard starts acting up. Maybe a key sticks, maybe a whole row goes AWOL, or perhaps the dreaded "double typing" phenomenon rears its ugly head. Trust me, we know the feeling – the frustration, the fear, the sudden, overwhelming urge to throw your laptop across the room (we've resisted, thankfully!). But breathe easy, friends! Because this isn't just another rant about the butterfly keyboard saga. This is about solutions, about saving your sanity, and about getting back to typing without wanting to scream.
The MacBook Keyboard Blues: A Symphony of Frustration
Let's paint a picture, shall we? You're in the middle of a crucial document, the deadline looms, and bam! Your "A" key now registers as "AA". Or, even worse, your space bar has decided to stage a silent protest. This, my friends, is the beginning of a MacBook keyboard disaster. It's a symphony of frustration, a chaotic dance of autocorrect gone wild, a digital nightmare. We've all experienced it, haven't we? It's the reason why so many of us have probably Googled, "MacBook keyboard replacement cost" at one point!
Why Oh Why? Understanding the Enemy (Your Keyboard's Weaknesses)
Before we dive into the rescue mission, let's understand the enemy. The most common culprit in the MacBook keyboard drama is, historically, the butterfly mechanism. Introduced with great fanfare, it promised a thinner, more responsive keyboard. But, as we all found out, it was also notoriously prone to dust, crumbs, and other tiny invaders that could wreak havoc. That minuscule particle could literally bring your typing to a screeching halt. Now, the newer scissor mechanism is much improved, but even these can sometimes stumble.
- Dust and Debris: The biggest keyboard killer. Tiny particles, seemingly harmless, get trapped under the keys and disrupt the mechanism.
- Spills (Oh, the Spills!): A rogue coffee spill? A sudden, accidental splash? Liquid is a keyboard's worst nightmare.
- Wear and Tear: Over time, the keys and mechanisms can simply wear out.
- Software Glitches: Sometimes, the problem isn't hardware; it's a software hiccup.
First Aid: Troubleshooting Before You Panic
Before we go full-blown replacement mode, let's try some quick fixes. Think of it as keyboard CPR:
- Restart Your MacBook: Always the first step! It can often clear up software glitches that might be causing the problem.
- Clean the Keyboard: This is crucial. Use compressed air (hold the can upright!), and gently blow around and under the keys. Avoid excessive force.
- Try Key Remapping: In System Preferences > Keyboard, explore key remapping options. You might be able to work around a sticky key by reassigning its function.
- Safe Mode Boot: Booting into Safe Mode can help identify if third-party software is interfering with your keyboard’s functionality.
The Deep Clean: Diving into Keyboard Surgery (Carefully!)
If the simple fixes didn't work, it's time for a deeper clean. This is where you need to be extra careful. Proceed with caution!
- Unplug and Power Off: Safety first! Make sure your MacBook is disconnected from power and turned off.
- Gather Your Tools: You'll need compressed air, a soft brush (like a small paintbrush), and possibly some isopropyl alcohol (90% or higher) and cotton swabs.
- The Gentle Brushdown: Use the soft brush to sweep away any visible debris around the keys.
- The Compressed Air Assault: Use the compressed air to blow out any remaining particles, focusing on the areas around the problematic keys.
- The Alcohol Intervention (Use with Extreme Caution!): If a key is still sticky, you can try dabbing a cotton swab lightly dipped in isopropyl alcohol around the edges of the key. Never soak the key or the surrounding area. Let it dry completely before turning your MacBook back on.
When to Call in the Cavalry: Replacement Options
Sometimes, no matter how much you try, your MacBook keyboard just won't cooperate. It's time to consider replacement options.
- AppleCare and Warranty: If your MacBook is still under warranty or covered by AppleCare, contact Apple support immediately. They'll assess the issue and likely offer a free repair or replacement.
- Authorized Service Providers: If your warranty has expired, consider an authorized Apple service provider. They use genuine parts and have the expertise to fix your keyboard.
- Independent Repair Shops: A reputable independent repair shop can often offer more affordable repair or replacement options. Research and read reviews carefully.
- DIY Keyboard Replacement (For the Brave): There are kits and tutorials available for replacing the keyboard yourself. This can save you money, but it requires technical skill and a willingness to take the risk. We don't recommend this unless you're comfortable with the process!
External Keyboard: A Temporary (or Permanent?) Lifesaver
While you're sorting out your keyboard woes, an external keyboard can be a lifesaver. It allows you to continue working without the frustration of a malfunctioning internal keyboard. Plus, it offers the added benefit of ergonomics, potentially preventing wrist strain. Consider it a temporary fix, or maybe a permanent one! Some people prefer the feel of an external keyboard anyway.
Preventing Future Disasters: Keyboard Care Tips
Once your keyboard is fixed, you'll want to prevent a repeat performance. Here's how:
- Regular Cleaning: Make cleaning your keyboard a habit. A quick blast of compressed air every week or two can go a long way.
- Protective Covers: Consider a keyboard cover (silicone or TPU) to protect against spills and debris. Make sure it doesn't affect typing accuracy.
- Eat Away From Your MacBook: A simple rule, but it helps prevent crumbs from accumulating.
- Be Mindful of Liquids: Keep those liquids away from your precious MacBook!
- Gentle Typing: Avoid pounding on the keys.
Butterfly Keyboard vs. Scissor Keyboard: A Quick Comparison
Let's briefly revisit the two main keyboard mechanisms used in MacBooks:
| Feature | Butterfly Keyboard | Scissor Keyboard | | ---------------- | -------------------------------------- | --------------------------------------- | | Key Feel | Shallow, sometimes inconsistent | More travel, generally more tactile | | Susceptibility | More prone to dust and crumb issues | More resistant to debris | | Durability | Often shorter lifespan | Generally more durable | | Current Models | No longer used in current models | Used in current MacBook Pro and Air models |
The scissor mechanism is a definite improvement over the butterfly keyboard.
Can Software Cause Keyboard Issues?
Absolutely! While hardware problems are the most common, software can play a role. For instance:
- Corrupted System Files: Can cause all sorts of weird behavior, including keyboard malfunctions.
- Third-Party Software Conflicts: Some apps may interfere with keyboard input.
- Outdated Drivers: Though less common on Macs, outdated drivers can sometimes cause problems.
That's why restarting your MacBook, booting in Safe Mode, and keeping your system updated are crucial steps.
Decoding Keyboard Shortcuts: A Productivity Booster
Keyboard shortcuts are your friends! They can significantly speed up your workflow and reduce your reliance on a problematic keyboard. Learn the basics:
- Command + C: Copy
- Command + V: Paste
- Command + X: Cut
- Command + Z: Undo
- Command + S: Save
- Command + Tab: Switch between applications
And many, many more! Explore the "Keyboard Shortcuts" menu in the Apple menu for a comprehensive list.
MacBook Keyboard Replacement Cost: What to Expect
The cost of replacing your MacBook keyboard depends on several factors:
- Warranty Coverage: Free or significantly reduced if your MacBook is under warranty or AppleCare.
- Repair Method: Authorized service provider vs. independent repair shop.
- Model of MacBook: Older models might be less expensive to repair.
- Parts Availability: Depends on the age of your model.
- DIY vs. Professional Repair: DIY will save you money, but incurs the risk.
Expect to pay anywhere from $100 to $500, or even more, depending on these factors. Always get a quote beforehand!
Final Thoughts: Keep Calm and Type On!
So, there you have it! A comprehensive guide to tackling the MacBook keyboard disaster. Remember, you're not alone. We've all been there, and we've all survived. The key is to stay calm, troubleshoot systematically, and choose the solution that's right for you. Whether you're a DIY enthusiast, a warranty warrior, or a professional repair seeker, there is a way to get your MacBook typing happily again. And hey, maybe invest in a good external keyboard, just in case! Now go forth, and let your fingers fly!
Frequently Asked Questions (FAQs)
1. My "E" key is sticking. What's the first thing I should do?
Restart your MacBook! It's the simplest solution and
HP Laptop Fan DEAD? 😱 FIX IT NOW!How to Fix Keyboard Macbook Not Working Repair Keys

By iSolution How to Fix Keyboard Macbook Not Working Repair Keys by iSolution
7 Ways To Fix a Mac Keyboard That Is Not Working Correctly

By macmostvideo 7 Ways To Fix a Mac Keyboard That Is Not Working Correctly by macmostvideo
Macbook Pro Keyboard & Trackpad DEAD A2338 A2337 Why & FIXED

By BobDoesTech Macbook Pro Keyboard & Trackpad DEAD A2338 A2337 Why & FIXED by BobDoesTech

Title: How to Reset SMC on Macbook Pro - Fix loud fans, slow loading, keyboard backlight
Channel: Techable
How to Reset SMC on Macbook Pro - Fix loud fans, slow loading, keyboard backlight by Techable
Laptop Wifi Hotspot
MacBook Keyboard Disaster! (Solved!)
We've all been there. You settle down to write, edit photos, or conquer your to-do list, and then… the keyboard strikes. A sticking key, a non-responsive letter, or the dreaded "ghost" typing – all pointing to the frustrating reality of a MacBook keyboard malfunction. These issues can bring your workflow to a screeching halt, transforming what should be productive time into a battle against your own technology. This comprehensive guide aims to address the most common MacBook keyboard problems, offering solutions and preventative measures to get you back to typing with confidence. We’ll explore the intricacies of your MacBook keyboard, diving deep into troubleshooting steps and potential fixes to ensure your typing experience is seamless and trouble-free.
Identifying the Culprit: Common Keyboard Issues
Before diving into solutions, identifying the specific problem is crucial. MacBook keyboards, while sleek and sophisticated, are often susceptible to certain recurring issues. Understanding these issues allows for more targeted and effective troubleshooting.
Sticky Keys: The most prevalent complaint. Keys feel sluggish, unresponsive, or appear to “stick” when pressed. This is frequently caused by debris, dust, or liquid residue accumulating beneath the keycap and around the scissor mechanism.
Non-Responsive Keys: A key refuses to register keystrokes completely. This can be due to hardware failure, software glitches, or even a disconnected keycap.
Ghost Typing: The MacBook types characters randomly or repeats characters without being pressed. This can be incredibly irritating, as it introduces numerous errors and necessitates constant editing.
Liquid Damage: Any amount of liquid spilled on your MacBook keyboard can wreak havoc. This is often the most severe and potentially costly issue. The immediate impact can be short circuits, corrosion, and the breakdown of the internal components.
Keycap Failure: A keycap may come loose, break, or simply become non-functional. This can happen due to repeated use, accidental impacts, or general wear and tear.
Backlight Issues: The keyboard's backlighting may malfunction, displaying uneven illumination, flickering, or complete failure. This can significantly impede visibility, especially in low-light environments.
Cleaning and Maintenance: The First Line of Defense
Regular cleaning and maintenance are essential for preventing many keyboard issues. Just as you would clean your car or your home, your MacBook keyboard needs routine care.
Gentle Compressed Air: The primary weapon against dust and debris. Use a can of compressed air to blow out any particles trapped under the keycaps. Direct the nozzle at an angle beneath the keys and in the spaces between them. Avoid tilting the MacBook excessively to prevent dislodged debris from falling further into the device.
Microfiber Cloth: The primary tool for cleaning the keycaps. Use a slightly damp (not wet) microfiber cloth to carefully wipe down the key surfaces. Avoid excessive moisture; the goal is to remove surface grime, not soak the keyboard.
Isopropyl Alcohol (IPA): For stubborn residue. Use a cotton swab dipped in 70% or 90% IPA to clean around the keycaps. Apply sparingly and avoid dripping liquid into the keyboard. Make sure the MacBook is powered off and unplugged during this process. Allow the alcohol to evaporate completely before turning the device back on.
Keycap Removal (Proceed with Caution!): If a key remains sticky after the above steps, you may carefully remove the keycap for a deeper clean. Use a specialized keycap puller tool (available online and at computer stores) to lift the keycap straight up. Clean the scissor mechanism and the keycap's interior with IPA and a cotton swab. Reattach the keycap by aligning it properly and pressing down until it clicks into place. Only attempt this if you are comfortable with the procedure, as improper reassembly can damage the keyboard. Refer to online tutorials for your specific MacBook model for precise instructions.
Software Solutions: Ruling Out Digital Glitches
Sometimes, the problem isn’t hardware-related, but a software glitch. These are generally simpler to resolve than hardware issues and can often be fixed at home.
Restart Your MacBook: The first and simplest step. A full restart can clear temporary files, resolve conflicting processes, and reset the keyboard drivers.
Check Keyboard Settings: Navigate to System Preferences (or System Settings in newer macOS versions) > Keyboard. Ensure all settings are configured correctly. Review the "Modifier Keys" option to check for any accidental remapping.
Update macOS: Software updates frequently include bug fixes and driver improvements. Ensure your macOS is up-to-date. Go to System Preferences (or System Settings) > Software Update to check for available updates.
Run Diagnostics: Apple provides built-in diagnostic tools. Restart your MacBook and hold down the "D" key during startup. Follow the on-screen prompts to run a diagnostic test. This can help identify any hardware-related problems.
External Keyboard Test: Connect an external keyboard. If the external keyboard functions correctly while the built-in keyboard malfunctions, it strongly indicates a problem with the MacBook’s internal keyboard.
Hardware Troubleshooting: Addressing the Physical Issues
If cleaning and software solutions don't fix the problem, the issue may be hardware-related. These solutions may require more advanced skills and sometimes professional assistance.
Keycap Replacement: If a keycap is broken, missing, or damaged, replacement is possible. You can purchase replacement keycaps online from reputable vendors. Follow online tutorials specific to your MacBook model for installation instructions. Be prepared to be careful when replacing keycaps.
Logic Board Inspection (Liquid Damage): If liquid damage is suspected, immediately power off the MacBook, unplug it, and seek professional help. Liquid can cause significant damage to the logic board and other components. A qualified technician can assess the damage, clean the logic board, and replace damaged parts. Avoid turning the MacBook on until it has been thoroughly inspected and repaired by a professional.
Keyboard Replacement: In cases of severe damage or widespread keyboard failure, replacement may be the only option. This can involve replacing the entire keyboard assembly. This is a complex procedure and typically requires professional service. Consider the cost of repair versus the cost of a new or refurbished MacBook.
Professional Repair: If you are not comfortable disassembling your MacBook or performing any other hardware repairs, seek assistance from an Apple-certified service provider or a reputable third-party repair shop. They have the expertise, tools, and knowledge to diagnose and fix complex keyboard issues.
Preventative Measures: Keeping Your Keyboard Healthy
Taking proactive steps can significantly extend the life of your MacBook keyboard and minimize the likelihood of future problems.
External Keyboard: Consider using an external keyboard, especially if you spend long hours typing. This can reduce wear and tear on the built-in keyboard.
Keyboard Cover: A keyboard cover is an inexpensive and easily accessible safeguard against spills, dust, and debris. Choose a cover made from a thin, flexible material that does not interfere with typing.
Keep Food and Drinks Away: Avoid eating or drinking near your MacBook. Accidental spills are a major cause of keyboard damage.
Regular Cleaning: Make keyboard cleaning a routine part of your device's maintenance schedule. Even a quick wipe-down with a microfiber cloth can make a significant difference.
Gentle Typing: Avoid excessive force when typing. Overly aggressive key presses can damage the keyboard mechanism over time.
Carry Case Protection: When transporting your MacBook, use a protective case or sleeve to prevent damage from impacts or pressure.
The Bottom Line: A Proactive Approach to Keyboard Health
MacBook keyboard problems can be frustrating, but they are rarely insurmountable. By understanding the common issues, implementing preventative measures, and following these troubleshooting steps, you can keep your keyboard functioning optimally and enjoy a more productive and satisfying typing experience. If problems persist, don't hesitate to seek professional assistance. Proactive care is your best defense against keyboard disasters. Regular maintenance and vigilance will keep your MacBook keyboard in prime working condition, allowing you to focus on what matters most – your work, your creativity, and your digital life.
