why does my mic not work on my laptop

Title: Fix Microphone Not Working on Windows 10
Channel: The Geek Page
Fix Microphone Not Working on Windows 10 by The Geek Page
why does my mic not work on my laptop, why is my microphone not working on my laptop lenovo, why does my headset mic not work on my laptop, why does my microphone not work on my hp laptop, why does my microphone not work on my dell laptop, why is my mic not working on my dell laptop, why is my headset mic not working on my laptop, why is my airpods mic not working on my laptop, why is my external mic not working on my laptop, why is my microphone not working on my dell laptop
Laptop Mic Dead? 😱 FIX This NOW!
Laptop Mic Troubles? Don't Panic! Let's Get You Heard.
Is your laptop microphone suddenly silent? A dead mic can be frustrating. Especially if you need to join a video call. Or maybe you're recording a voice memo. Don't worry, though. So many fixes are available. We will explore these solutions right now.
Diagnosing the Silent Treatment: Initial Checks.
First, let's do some simple troubleshooting. These steps can solve the problem quickly. Ensure your microphone isn't muted. There's usually a mute button on the device. Check the audio settings in your operating system. Make sure the correct microphone is selected. Also, confirm the volume isn't set too low. Now is the time to check the physical connections. Are your headphones or external mic plugged in correctly? Perhaps the problem lies there.
Software Shenanigans: A Deep Dive into Settings.
Assuming the basic checks failed, let's delve deeper. The problem might be software-related. We can examine the drivers next. Outdated or corrupted drivers often cause sound issues. Navigate to your device manager. Look for your microphone under "Sound, video and game controllers." Right-click on the microphone and select "Update driver." Let Windows search for an update. If that doesn't work, download the latest drivers from the manufacturer’s website. Next, examine the audio settings within the specific application. Zoom, Skype, or any other app might have its own audio configuration. Review the 'Input' settings within each software application. Ensure the correct microphone is assigned.
The Hardware Hustle: Investigating Physical Issues.
Sometimes, the problem lies with the physical hardware. So, let's start a hardware investigation. Check the microphone port for any damage. A loose connection can cause problems. If you're using an external microphone, it may be defective. Try it on another device. If it doesn't work, it likely needs replacing. Perhaps the internal microphone has failed. In this case, you might need professional repair. Don't overlook the possibility of software conflicts. Certain programs can interfere with your mic.
Windows Audio Troubleshooter: Your Digital Lifesaver.
Windows includes a built-in audio troubleshooter. In fact, it's a useful tool. You can access it through the Control Panel or Settings app. The troubleshooter detects and attempts to fix common audio problems. Run the troubleshooter. Follow the on-screen instructions. Often, it automatically resolves the issue. The troubleshooter can also provide valuable insights.
Permission Problems: Unlocking Your Microphone Access.
Privacy settings can sometimes block microphone access. Therefore, check your privacy settings. Go to "Privacy" in Windows settings. Then, click on "Microphone." Ensure that "Microphone access" is enabled. Also, allow apps to access your microphone. Specifically, enable access to the apps you use. Sometimes, an application needs your permission. If you find an app blocked, address it.
External Microphones: A Different Ballgame.
Using an external microphone? Troubleshooting steps differ slightly. Make sure it’s properly connected. Check the physical connections, like a USB port. Ensure the microphone has power. Test it on another computer. If it works elsewhere, the problem lies with your laptop. If it's a USB mic, try a different USB port. Moreover, try a different USB cable.
Driver Dilemmas: A Deeper Dive into Updates.
We’ve already touched on driver updates. Furthermore, let's revisit this critical step. Incorrect drivers can cause severe problems. Locate the latest drivers for your microphone. Download them from the manufacturer’s website. Uninstall your current driver. Then, install the new, updated driver. Restart your computer. Now, test your microphone again.
The Headphone Jack: A Troublesome Culprit.
Sometimes, the headphone jack can cause problems. If the jack is faulty it could affect the microphone. If your headphones use a combined audio jack, this might be the issue. First, clean the headphone jack with compressed air. Try plugging in your headphones again. If audio works, but the mic still doesn't, the issue is elsewhere.
Factory Reset: A Last Resort Solution.
If all else fails, a factory reset is your ultimate option. This process returns your laptop to its original state. Back up your important files. A factory reset removes everything on your hard drive. Access the recovery options in your operating system. Choose the reset option. Follow the on-screen instructions to complete the process. Afterward, test your microphone again.
Contacting Support: When You Need Expert Help.
If you’ve tried everything, consult with tech support. Contact your laptop manufacturer. Describe the problem in detail. They can offer specialized solutions. You may need a professional repair. Don't hesitate to seek expert assistance.
Final Thoughts: Back to Clear Audio!
A non-functional microphone is a pain. Thankfully, you have several troubleshooting options. We've covered a lot of ground today. Remember to check everything systematically. You should be back to clear audio soon enough. Good luck, and happy recording!
Laptop to TV HDMI FAIL? This SHOCKING Fix Works!Laptop Mic Dead? 😱 FIX This NOW!
Hey there, fellow tech enthusiasts! Has your laptop mic suddenly decided to go on strike? You're in the middle of a crucial Zoom call, ready to record that killer podcast, or just catching up with your bestie, and poof – silence. It’s a frustrating situation, isn't it? Like having a car without an engine. Don't worry; we've all been there. And trust me, most of the time, the solution isn't a trip to the repair shop. More often than not, it's a simple fix that you can do yourself. We're going to dive deep into the common culprits and, more importantly, arm you with the knowledge to get that precious microphone working again. So, buckle up, because we're about to revive your audio!
1. The Awkward Silence: Recognizing the Symptoms of a Dead Laptop Mic
Before we start wielding digital screwdrivers, how do you know your laptop's microphone is actually dead? It's like diagnosing a patient. Are you getting complete silence? Or perhaps a crackling sound, muffled audio, or a low volume that barely registers? Maybe the problem isn't the microphone itself but something else entirely. We'll walk through the telltale signs so you can be absolutely sure what we're dealing with. Let's diagnose this issue before we jump into solutions. Think of it like this: you wouldn't treat a cold with surgery, right?
2. Check the Obvious: Basic Troubleshooting Steps
Let's start with the low-hanging fruit. These are the quick checks that can often solve the issue without requiring any technical wizardry.
Mute Button Madness: Is your microphone muted? Sounds silly, I know, but it's the most common culprit! Many laptops have a physical mute button, often with an accompanying LED light. Look closely for a button that looks like a microphone with a line through it. Also, check the software controls (Zoom, Google Meet, Skype, etc.) for a mute button. Double and triple-check – it's easy to accidentally click!
Volume Levels: Adjust the volume in your operating system settings. Make sure the input volume (microphone) isn't set to zero or too low. Sometimes, a rogue update can reset your sound settings.
Restart, Restart, Restart: Turn it off and on again. I’m not kidding! Restarting your laptop can clear up a lot of temporary glitches, just like getting a good night's sleep after a stressful day.
3. Diving Deeper: Examining Your Sound Settings
If the basics haven't done the trick, let's delve a little deeper into your sound settings. This is where the real detective work begins.
Windows Sound Settings: Right-click the speaker icon in your system tray (the bottom-right corner of your screen). Select "Open Sound settings." Make sure the correct microphone is selected as the input device. Check the input volume to ensure it’s not muted or set too low.
Mac Sound Settings: Go to System Preferences > Sound > Input. Again, ensure the correct microphone is selected and the input volume is adjusted appropriately.
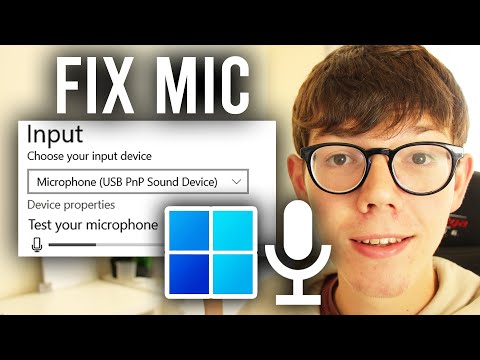
Test Your Microphone: Most operating systems have a built-in way to test your microphone. In Windows, you can use the “Test your microphone” feature in the Sound settings. On a Mac, you can use the dictation feature in System Preferences. This is like giving your mic a practice run.
4. Driver Drama: Are Your Microphone Drivers Up to Date?
Drivers are the software that allows your operating system to "talk" to your hardware. Outdated or corrupted drivers can be the bane of your existence when it comes to peripherals like microphones.
Updating Drivers in Windows: Search for “Device Manager” in the Windows search bar. Expand the "Audio inputs and outputs" section. Right-click on your microphone device and select "Update driver." Choose "Search automatically for drivers."
Updating Drivers on a Mac: Macs typically handle driver updates automatically through the operating system updates. Make sure you're running the latest version of macOS.
Reinstalling Drivers as a Last Resort: If updating doesn't work, you can try uninstalling and then reinstalling the microphone drivers. This can sometimes fix corrupted driver issues.
5. App Permissions: Letting Your Apps Hear You
Did you know you need to grant permission to apps to use your microphone? This is a security feature designed to protect your privacy.
Windows App Permissions: Go to Settings > Privacy > Microphone. Make sure the "Microphone access for this device" is turned on and that the specific apps you want to use your microphone with have permission to access it.
Mac App Permissions: Go to System Preferences > Security & Privacy > Microphone. Ensure that the apps you want to use are checked to have microphone access.
6. Hardware Hurdles: Is Your Microphone Physically Defective?
Sometimes, the problem isn't software-related. It could be a hardware malfunction.
External Microphone Test: If you have an external microphone, connect it and see if it works. If it does, you've narrowed the problem down to the built-in microphone.
Dust and Debris: Check the microphone port on your laptop for any dust or debris that might be blocking it. Give it a gentle clean with a can of compressed air.
Physical Damage: Inspect the microphone itself for any visible signs of damage.
7. The Bluetooth Conundrum: Dealing with Wireless Microphone Issues
If you're using a Bluetooth microphone, there can be additional factors at play.
Bluetooth Connection: Ensure your Bluetooth microphone is properly paired and connected to your laptop.
Battery Life: Make sure your Bluetooth microphone has enough battery power.
Interference: Bluetooth signals can be susceptible to interference from other devices. Try moving your laptop closer to the microphone or moving it away from potential sources of interference like Wi-Fi routers.
8. Software Conflicts Explained: Apps Clashing for Audio Dominance
Sometimes, conflicting software can lead to microphone issues.
Multiple Audio Programs: If multiple audio applications are open simultaneously, they can sometimes fight for control of the microphone. Try closing any unnecessary applications.
Audio Enhancement Software: Certain audio enhancement software can sometimes interfere with the microphone. Temporarily disable any such software to see if it resolves the issue.
9. Troubleshooting Specific Apps: Zoom, Skype, and Google Meet
Each application has its own settings, which can sometimes be the source of the problem.
Zoom: Check your audio settings within Zoom (Settings > Audio) and make sure the correct microphone is selected.
Skype: Similar to Zoom, check your Skype audio settings (Settings > Audio & Video).
Google Meet: Within Google Meet, you can adjust your microphone and speaker settings by clicking on the three dots in the bottom right corner during a meeting, then selecting “Settings,” then “Audio.”
10. Sound Card Sabotage: Problems with Your Laptop’s Audio Card
Your laptop's sound card can also be the culprit.
Outdated Sound Card Drivers: The principles here are similar to updating microphone drivers (see section 4). Make sure your sound card drivers are up to date.
Sound Card Issues: In rare cases, the sound card itself could be malfunctioning. Consider contacting your laptop manufacturer or a repair shop.
11. System Restore: Rolling Back to a Previous State
If you recently made changes to your system, a system restore can be a lifesaver.
Restoring to a Prior Point: This will undo recent changes and can sometimes revert corrupted drivers or problematic software installations.
Beware Data Loss: Be aware that system restore can sometimes lead to data loss, so make sure you back up your important files first.
12. External Microphones: A Quick and Easy Solution
If all else fails, an external microphone is a straightforward workaround.
USB Microphones: These are easy to plug and play.
Headset Microphones: Many headsets have integrated microphones.
Quality Considerations: While an external microphone can be a solution, consider the quality and your needs.
13. Factory Reset: A Last-Resort Approach
As a last resort, you may consider a factory reset.
Data Backup: Always back up your important files before performing a factory reset, as it will erase everything on your hard drive.
Reset in Windows: Go to Settings > Update & Security > Recovery > Reset this PC.
Reset on a Mac: Restart your Mac and hold down Command + R until you see the Apple logo. Then, follow the on-screen instructions to reinstall macOS and reset your device.
14. Seeking Professional Help: When to Call in the Experts
Sometimes, you need to raise the white flag.
Laptop Repair Shops: These shops have the tools and expertise to diagnose and repair hardware problems.
Manufacturer Support: Contacting the manufacturer of your laptop can sometimes provide additional troubleshooting steps or warranty information.
15. Maintenance Matters: Preventing Future Microphone Headaches
Taking preventative measures can save you a lot of headaches in the future.
Regular Driver Updates: Keep your drivers up to date.
Cleanliness: Keep your laptop clean and
Mic not working on PC FIX 2025 QUICK AND EXPERT STEP TO FIX mic not working on PC

By Etechniz Mic not working on PC FIX 2025 QUICK AND EXPERT STEP TO FIX mic not working on PC by Etechniz
How To Fix Mic Not Working On PC - Full Guide
By GuideRealm How To Fix Mic Not Working On PC - Full Guide by GuideRealm
How to Fix Low Microphone Volume - make your mic louder in Windows 1011 2025 Working
By GMODISM How to Fix Low Microphone Volume - make your mic louder in Windows 1011 2025 Working by GMODISM
Title: How To Fix Mic Not Working On PCLaptop in Windows 11 2025
Channel: EasyTechGeek
How To Fix Mic Not Working On PCLaptop in Windows 11 2025 by EasyTechGeek
My Laptop Work
Laptop Mic Dead? 😱 FIX This NOW!
Losing the ability to communicate clearly through your laptop's microphone can feel like a digital emergency. Whether you're in a crucial video conference, recording a podcast episode, or simply chatting with loved ones, a non-functional mic creates immense frustration. We understand the panic that sets in. But before you resign yourself to a week of typing and hand gestures, take a deep breath. We're here to guide you through a comprehensive troubleshooting process guaranteed to pinpoint the issue and get your laptop's microphone back to peak performance. Forget generic advice; we’re delving into the specifics to ensure a swift resolution. Let’s restore your virtual voice!
Step 1: The Obvious Checks – Eliminating the Simplest Problems
Before diving into more complex solutions, let's start with the fundamental checks. These might seem elementary, but they're often the culprits behind a silent microphone.
A. Volume Levels: Are You Heard?
This is the digital equivalent of making sure your speakers are plugged in. Navigate to your laptop's sound settings. (The process varies slightly depending on your operating system. Primarily, you need to right-click on the speaker icon in your system tray and select "Open Sound settings" or "Sound." Alternatively, use the search bar in Windows or Spotlight search on a Mac to type "Sound settings.")
- Input Devices: Look for the "Input" section, where your microphone is listed. Ensure the correct microphone is selected (this is especially important if you have multiple microphones connected, like a headset microphone or an external USB mic).
- Volume Slider: Check the input volume slider. Is it fully up? If it’s at zero, your microphone won’t pick up any sound. Drag the slider to the right, towards the maximum level, and speak into your microphone. Observe the visual meter; does it register the sound of your voice? If not, we move on.
B. Mute Button Madness: The Accidental Silent Treatment
The mute function is both a blessing and a curse. Many laptops have a physical mute button on the keyboard (often with a microphone icon). Examine your keyboard closely. Is this button illuminated, indicating the microphone is muted? If so, press it to unmute your microphone. Also, review software-specific mute buttons. Apps like Zoom, Microsoft Teams, and even your operating system have their own mute controls. Ensure these buttons are not activated.
C. Physical Connections: The Headset and its Hurdles
If you're using a headset, inspect all physical connections.
- Properly Plugged In: Ensure the headset is securely plugged into the correct jack. Some laptops have separate jacks for headphones and microphones, indicated by specific symbols. Make certain you are using the correct port for your microphone.
- Damaged Cables: Carefully examine the headset's cable. Look for any visible damage, such as breaks, tears, or frayed wires. If the cable is damaged, it could be preventing the microphone from functioning.
- Headset Compatibility: Confirm that your headset is compatible with your laptop. Some newer headsets may have specific connection requirements. Consult your headset's documentation.
- Microphone Placement and Obstructions: Ensure the microphone boom is correctly positioned in front of your mouth and is not being blocked by any obstructions, such as your hand or clothing.
Step 2: Digging Deeper – Software and Driver Troubleshooting
If the basic checks don’t resolve the issue, it is time to explore software-related problems.
A. Driver Update Delights: Keeping Your Software Updated
Outdated or corrupted drivers are a frequent cause of microphone malfunctions.
- Device Manager (Windows):
- Right-click the Windows Start button and select "Device Manager."
- Expand the "Audio inputs and outputs" section.
- Locate your microphone device (often listed as "Microphone" or your headset's manufacturer and model).
- Right-click the microphone device and select "Update driver." Choose "Search automatically for drivers." Windows will attempt to find and install the latest drivers.
- If that fails, try "Browse my computer for drivers" and select "Let me pick from a list of available drivers on my computer." Choose a different driver from the list if available (this will show older versions).
- System Preferences (macOS):
- Click the Apple logo in the top-left corner of your screen and select "About This Mac."
- Click "Software Update."
- Follow the prompts to check for and install any system updates, which commonly include updated audio drivers.
- You can also try uninstalling and reinstalling your microphone driver.
B. Application Permissions: Letting Apps Access Your Mic
Many applications require explicit permission to access your microphone.
- Windows:
- Go to "Settings" -> "Privacy" -> "Microphone."
- Ensure that "Microphone access for this device" is turned "On."
- Under "Let apps access your microphone," toggle the switch to "On."
- Review the list of apps and ensure the problematic application has permission to use the microphone.
- macOS:
- Go to "System Preferences" -> "Security & Privacy" -> "Privacy" -> "Microphone."
- Ensure that the application you’re trying to use has a checkmark next to it, granting it permission to use the microphone.
C. Troubleshooting within Specific Applications
Each application has its own audio settings that you might need to adjust.
- Zoom: Click "Settings" (usually represented by a gear icon). Navigate to the "Audio" settings. Verify that the correct microphone is selected under "Microphone." Test your microphone within the Zoom settings to ensure it's functioning.
- Microsoft Teams: Click your profile picture and select "Settings." Navigate to the "Devices" settings. Select your microphone under "Microphone." Conduct a test call or meeting to check if it is working.
- Other Applications: Consult the application's documentation or settings menu for specific audio configuration instructions.
Step 3: Advanced Diagnostics – When Things Get Tough
If the prior steps have not fixed the issue, follow suit with advanced troubleshooting.
A. Testing with Alternative Applications: Determining the Culprit
To isolate the problem, test your microphone with different applications. If the microphone works in one application but not another, the problem likely lies within the non-functional application's settings or permissions. If the microphone fails in all applications, the problem is likely a hardware or system-level issue.
B. System Restore (Windows): Rolling Back to a Working State (Windows only)
If you suspect a recent software installation or system change caused the problem, try using System Restore to revert your system to a previous state when the microphone functioned correctly.
- Type "Create a restore point" in the Windows search bar and open the System Properties window.
- Click "System Restore."
- Follow the prompts and choose a restore point from before the microphone issue began.
C. Check for Microphone Issues with Hardware Troubleshooter
Many laptops include a built-in hardware troubleshooter.
- Windows:
- Go to "Settings" -> "System" -> "Troubleshoot" -> "Other troubleshooters."
- Locate and run the "Recording Audio" troubleshooter. Windows will attempt to detect and fix microphone-related problems.
- macOS:
- While macOS does not have a dedicated built-in troubleshooter for the microphone, performing updates and ensuring proper settings is the best path.
Step 4: Hardware Considerations – The Final Frontier
If all software solutions have failed, the microphone may be experiencing a hardware malfunction.
A. External Microphone Test: Isolating the Issue
The best way to determine whether your built-in microphone is defective is to connect an external microphone (e.g., a USB microphone or a headset with a microphone). If the external microphone works, the problem is likely with your laptop's internal microphone hardware.
B. Hardware Inspection: Physical Damage
Carefully inspect your laptop's microphone area. On most laptops, this is typically a small hole or series of holes located near the webcam. Is there any visible damage, such as dirt or debris blocking the microphone's access? Clean the area gently with a soft, dry cloth or compressed air. Be exceedingly gentle.
C. Professional Repair: Seeking Expert Help
If you've exhausted all other options and the microphone still doesn't work, it's time to consider professional repair.
- Contact the Manufacturer: Your laptop's manufacturer can provide guidance and repair options.
- Local Repair Shops: Search for reputable computer repair shops in your area.
- Warranty: Check if your laptop is still under warranty; this may cover the cost of repair.
By methodically following these steps, you should be able to diagnose and resolve your laptop microphone issue. Remember to be patient and thorough; the solution is waiting to be discovered. No more silent conferences; get back to conversing with clarity!
