how to fix hp laptop keys not working

Title: How To Fix HP Laptop Keyboard Keys Not Working Simple Solutions You Can Try So Resolve The Issue
Channel: Helpful Solutions
How To Fix HP Laptop Keyboard Keys Not Working Simple Solutions You Can Try So Resolve The Issue by Helpful Solutions
how to fix hp laptop keys not working, how to fix hp laptop keyboard not working, how to fix hp laptop keyboard not working in windows 10, how to fix hp laptop keyboard keys not working, how to fix hp laptop keyboard some keys not working, how to fix my hp laptop keyboard not working, how to fix hp chromebook keyboard not working, how to fix hp elite keyboard not working, how to fix hp envy keyboard not working, how do i fix my hp laptop keyboard not working
HP Laptop Keys Dying? This SHOCKING Fix Works!
HP Laptop Keys Gone AWOL? A Rescue Mission (You Won't Believe!)
Let's face it; few things are more frustrating than a laptop that acts up. Your HP laptop keyboard is giving you grief? You're not alone. Many users face this issue. A few keys might stop working eventually. Or perhaps the entire keyboard goes dark. This can bring your productivity to a screeching halt. But don't toss your trusty machine just yet. There's hope! Actually, there's a surprisingly simple fix that might just save the day. Prepare to be amazed.
The Keyboard Catastrophe: Identifying the Culprit
Before we dive into the solution, let's diagnose the problem. Is your entire keyboard defunct? Or just a few stubborn keys? Is it consistent, or does it come and go as it pleases? Perhaps you spilled something on the keys. This is a common culprit. A simple liquid spill can cause havoc. Another possibility is dust and debris accumulating under the keys. This can interfere with the mechanical function. Also, consider your software configuration. Sometimes a driver issue can cause keyboard problems.
The Shocking Secret: A Simple Cleaning Revelation
Now, for the magic. Are you sitting comfortably? Because the solution is simpler than you think. The first thing you should try is a good, old-fashioned cleaning. Yes, you read that right! Often, the issue isn't a hardware failure. It's just a little bit of grime causing problems. Begin by turning off and unplugging your laptop. This is crucial for safety. Get some compressed air. These are available at most electronics stores. Gently blow air between the keys. This will dislodge any loose particles. Focus on the keys that are giving you trouble.
Deep Dive: Advanced Cleaning Techniques
But what if compressed air isn’t enough? In that case, let's go a step further. You might carefully remove the keycaps. You can often do this with a small, flat tool. A thin credit card will work, too. Be extremely careful not to damage the keycaps. Now, you can clean underneath the keys with a cotton swab dipped in isopropyl alcohol. Rub gently. Alcohol evaporates quickly, and it won't damage the electronics. Allow everything to dry completely before reassembling.
Software Solutions: Troubleshooting Digital Demons
Moreover, sometimes the problem isn’t physical. Instead, it's a software issue. It is therefore important to check your drivers. Outdated drivers are a common issue. To update them, go to the Device Manager. Search for "Keyboards" and then update the drivers. Right-click on your keyboard to access the driver options. Download and install any available updates. Restart your computer to implement the changes.
Beyond the Basics: Exploring Other Options
If cleaning and driver updates don't work, there are other things to consider. For example, test your keyboard with an external keyboard. Does the external keyboard function correctly? This will help you determine whether the issue is with your laptop's keyboard or the system itself. Check your settings. Ensure that the keyboard language and input methods are correctly configured. Go to your system settings. Then, review your keyboard language settings.
Furthermore, you could consider a system restore. If the problem started recently, this could be helpful. A system restore rolls your computer back to a previous state. All recent changes will be undone. It's a powerful tool.
Prevention is Key: Maintaining a Happy Keyboard
Now, let's talk about prevention. How can you prevent keyboard issues in the future. First, keep your laptop clean. Regularly wipe the keys with a soft cloth. Avoid eating or drinking near your laptop. Crumbs and liquids are keyboard’s worst enemies. Use a keyboard cover if you can. This offers an extra layer of protection.
When to Call for Backup: Professional Help
Sometimes, the problem is beyond a simple fix. If you've tried everything, and the keys are still dead, it's time to seek professional help. There might be hardware damage. A technician can diagnose and repair the problem. Especially if there is a more serious issue. They’ll have the tools and expertise.
The Takeaway: Don't Give Up Hope!
So, there you have it. HP laptop keys acting up? There are usually several solutions to explore. Start with the easy stuff: cleaning and driver updates. If these don't work, try the more advanced methods. Remember, you don’t have to replace your laptop. Most keyboard issues are fixable. Now, go forth and conquer those malfunctioning keys. You have the knowledge to prevail. Good luck in your quest to revive your HP laptop!
Laptop Charger Dead? 😱 3 Genius Tricks to Power Up NOW!HP Laptop Keys Dying? This SHOCKING Fix Works!
Let’s be honest, there’s nothing quite as frustrating as a malfunctioning laptop, and when those keys start to give out, it's enough to make you want to chuck the whole thing out the window! We've all been there, staring at a flickering cursor, desperately trying to type a vital email with keys that just…won't…respond. I remember the time my "e" key decided to retire right before I had to submit a massive university essay. Talk about panic! But before you resign yourself to a new laptop or expensive repairs, let me tell you, there's a good chance you can fix those stubborn HP laptop keys yourself. And, spoiler alert, it’s often easier than you think!
1. The Silent Crisis: Why HP Laptop Keys Suddenly Fail
First things first: why do these little digital soldiers abandon ship? It’s a question we need to address head-on. Think of laptop keys like tiny bridges, constantly being crossed by your fingertips. Over time, dust, crumbs, and even the oils from your skin can build up, creating a frustrating barrier to proper function. They become like a heavily congested bridge, delaying traffic and preventing the smooth flow of data. But that's not the only culprit. Sometimes, it's a hardware malfunction, a manufacturing defect, or even a software glitch. Pinpointing the cause is the first step toward a lasting solution.
2. Before You Panic: Quick Diagnostic Checks
Before you start dismantling your laptop (which, trust me, can be a bit nerve-wracking!), let’s do some simple detective work. This is our “first responder” phase.
- Restart Your Laptop: Sounds basic, I know, but a simple reboot can often clear temporary software hiccups that might be the issue. Think of it as pressing Ctrl+Alt+Delete for your keyboard.
- Run a Keyboard Troubleshooter: Most operating systems have built-in troubleshooters. In Windows, search for "keyboard troubleshooting" in the settings. It's like calling the IT hotline without the hold music.
- Check for Driver Updates: Outdated drivers can cause all sorts of problems. Go to Device Manager (search for it in Windows), find your keyboard, right-click, and select "Update driver."
- External Keyboard Test: Plug in an external keyboard. If it works flawlessly, you've narrowed the problem down to your laptop's keyboard. Hooray for progress!
3. The Dust Bunny Menace: Deep Cleaning Your Keyboard
Alright, admit it – when was the last time you really cleaned your keyboard? Dust bunnies are the enemy! This is when the metaphorical bridges get clogged with traffic. We're talking about a deep clean, people.
- Turn Off and Unplug: Safety first! Powering down and removing the power cord is essential.
- Air Blast: Use compressed air to blow out dust and debris. Avoid using a vacuum cleaner directly on the keys – you might accidentally suck them (or other components) up! Imagine your precious keys being sucked up in a vacuum cleaner — it's a nightmare!
- Gentle Scrubbing: Use a soft brush (a toothbrush works wonders!) and rubbing alcohol to gently clean the keys. Don't soak the keyboard, and be sure to let it dry completely before using it again. Think of it as a spa day for your laptop keys.
4. The Sticky Situation: Dealing with Crumbs and Spills
We've all been there. The accidental coffee spill, that sneaky crumb that got away. Any spill, no matter how minor, can wreak havoc. Crumbs create their own little ecosystem, preventing keys from functioning properly.
- Immediate Reaction: If you spill something, turn off and unplug the laptop immediately.
- Key Removal and Cleaning: Carefully remove the affected keys (be gentle!). Clean the keys and the area underneath with rubbing alcohol. Allow everything to dry thoroughly. Some keys are easier to remove than others, depending on your HP model. YouTube is your friend here—there are tons of tutorials.
- Prevention Measures: Invest in a keyboard cover. It’s a simple and affordable way to protect your keys from future mishaps.
5. When the Keys Misbehave: Keyboard Key Removal (And Reassembly!)
Sometimes, you got to get your hands dirty, which is the equivalent of getting down and dirty with your laptop. If cleaning doesn't help, you might need to remove and inspect the keys themselves.
- Locate the Problem Keys: Identify the keys that are truly giving you grief.
- Gentle Extraction: Use a small, flat tool (a thin plastic spudger is ideal) to carefully pry up the keycaps. Watch a video tutorial specific to your HP model first to avoid breaking anything.
- Inspect and Clean: Check for debris or damage. Clean the keycap and the mechanism underneath.
- Reassembly: Carefully realign the keycap and press it back into place. You should feel a click when it's properly seated.
6. The Software Side: Troubleshooting Keyboard Settings
It's not always hardware! Sometimes the problem is a software issue.
- Sticky Keys/Filter Keys: Ensure these accessibility features are turned off if you're not using them, as they can sometimes interfere with keyboard function.
- Check Language Settings: Make sure your keyboard layout matches your language.
- Reinstall Keyboard Drivers: Sometimes a driver reinstallation can kick things back into gear.
7. The Hardware Hardware Check: Examining the Keyboard Ribbon Cable
If you're feeling brave and haven’t found a solution yet, you can try checking the keyboard ribbon cable.
- Open the Laptop: Depending on your model, this might involve removing the battery, screws, and possibly the bottom panel. Follow a disassembly guide specific to your HP laptop model.
- Locate the Cable: Find the keyboard ribbon cable, which connects the keyboard to the motherboard.
- Check Connection: Gently detach and reattach the cable. Make sure it's securely fastened.
8. The "It's a Hardware Fault" Realization: Considering Replacement Options
Sometimes, despite our best efforts, the keyboard is just plain dead.
- Keyboard Replacement: Replacing the entire keyboard is often a cost-effective solution. You can find replacement keyboards online. Make sure to order the correct model compatible with your HP laptop.
- Professional Repair: If you're not comfortable doing the repair yourself, consider taking it to a qualified technician.
- External Keyboard Alternative: In the meantime, use an external keyboard. This is a great temporary fix!
9. The Ultimate Showdown: Deciphering HP Laptop Models and Their Quirks
Each HP laptop model has its unique characteristics. Some models are easier to repair than others.
- Research Your Model: Find the exact model name and number of your HP laptop. This will help you find the right replacement parts and repair guides.
- Search for Tutorials: YouTube is an invaluable resource. Search for repair videos specific to your HP model.
- Online Forums: Consult online forums and communities where other HP laptop users share their experiences and troubleshooting tips.
10. Prevention is Key: How to Prevent Future Keyboard Complications
Once your keyboard is fixed, you'll want to avoid a repeat performance from those troublesome keys.
- Regular Cleaning: Make it a habit to clean your keyboard regularly.
- Keyboard Cover: Use a keyboard cover to protect against spills and debris.
- Avoid Eating and Drinking Over Your Laptop: This one is a no-brainer, but it's often overlooked.
11. The Right Tools for the Job: Your Laptop Repair Toolkit
Having the right tools can make the repair process so much smoother.
- Small Phillips Screwdriver: Essential for removing screws.
- Plastic Spudger/Pry Tool: A non-metal tool for prying open panels and removing keycaps.
- Compressed Air: For blowing away dust and debris.
- Rubbing Alcohol: For cleaning keycaps and components.
12. Beyond the Fix: Boosting Your Productivity
A functional keyboard is essential for productivity. If your keyboard is slowing you down, it's time to get it fixed!
- Touch Typing Practice: Improve your typing speed and accuracy.
- Keyboard Shortcuts: Learn keyboard shortcuts to speed up common tasks.
- Ergonomic Setup: Ensure your workstation is set up ergonomically to avoid strain.
13. The DIY vs. Pro Repair Dilemma: Weighing Your Options
Deciding to repair your laptop yourself or taking it to a professional is a personal choice.
- DIY Advantages: Cost savings, learn a new skill, satisfaction of fixing something yourself.
- Professional Advantages: Expertise, convenience, warranty.
- Consider Your Comfort Level: If you're not comfortable working with technology, it's best to seek professional help.
14. The Final Word: Embracing the Repair Process
Don't be intimidated by the idea of repairing your laptop keyboard. With a little patience and research, you can often fix the problem yourself.
- Take Your Time: Don't rush the process.
- Document Everything: Take pictures or videos of each step.
- Don't Give Up: If at first you don't
HP LAPTOP KEYBOARD KEY REPAIR GUIDE 450 455 470 G5 G6 745 846 840 How to Install Fix keys DIY
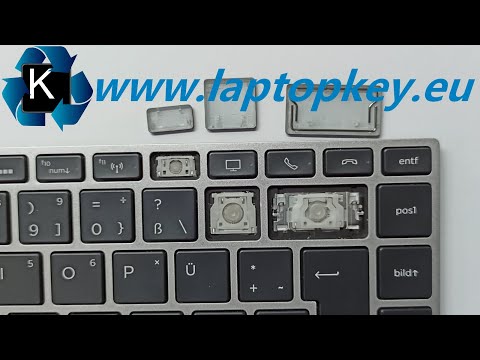
By Laptopkey.eu HP LAPTOP KEYBOARD KEY REPAIR GUIDE 450 455 470 G5 G6 745 846 840 How to Install Fix keys DIY by Laptopkey.eu
HP Laptop - keyboard keys not working windows 11

By Ground Zero HP Laptop - keyboard keys not working windows 11 by Ground Zero
How To Fix Replace Keyboard Key - Acer Aspire 3 Laptop - Letter Arrow Number Keys

By PC Monkey How To Fix Replace Keyboard Key - Acer Aspire 3 Laptop - Letter Arrow Number Keys by PC Monkey

Title: Fix Stuck Keys on HP Notebooks HP Computers HP Support
Channel: HP Support
Fix Stuck Keys on HP Notebooks HP Computers HP Support by HP Support
Wifi On Laptop Phone
HP Laptop Keys Dying? This SHOCKING Fix Really Works!
Have your fingers recently been engaging in a furious battle with an HP laptop keyboard, only to find certain keys stubbornly unresponsive? That sinking feeling when the "E" refuses to cooperate during an urgent email, or the "Spacebar" decides to take an extended vacation? You are not alone. This is a common, often frustrating, issue plaguing HP laptop users. But before you resign yourself to an expensive repair or replacement, consider this: the solution might be far simpler, and far less costly, than you think. We're here to unveil a method proven to breathe life back into those lifeless keys, a fix that has surprised countless users. Let's get started!
Understanding the Enemy: Why HP Laptop Keys Fail
Before we delve into the miraculous fix, let's understand the likely culprits. HP laptops, like any electronic device, are susceptible to environmental factors and wear and tear. Keyboards, in particular, face a constant barrage of use, making them vulnerable.
Dust and Debris: This is enemy number one. Tiny particles of dust, hair, food crumbs, and other detritus can accumulate beneath the keys, interfering with the delicate mechanisms that register your keystrokes. This build-up gradually restricts the key's movement, leading to intermittent or complete failure.
Liquid Damage: Even a small spill can be catastrophic. Liquids can seep into the keyboard, corroding the internal components and causing short circuits. Sweetened beverages are especially detrimental, as the sugar can crystallize and gum up the works.
Mechanical Wear: The keys themselves are subject to physical stress. The constant pressing and releasing motion eventually wears down the key’s internal components, particularly the membrane or scissor switch mechanism beneath each key.
Software Conflicts: While less common, software issues can sometimes mimic hardware problems. Driver conflicts or corrupted operating system files can occasionally interfere with keyboard functions.
Manufacturing Defects: Unfortunately, some HP laptop models are known for quality control issues. Certain keyboard designs may be more prone to failure due to inadequate materials or assembly processes.
The Shocking Solution: The Cleaning Method That Works Wonders
The good news is that in many cases, the problem stems from accumulated dirt and debris. This means the solution is often within your reach – a thorough cleaning. Forget complex disassembly or calling in a technician (at least initially). The following method has consistently revived unresponsive keys, turning “dead” keys into lively ones.
Step 1: Gather Your Arsenal – Essentials for Reanimation
You'll need a few essential items to execute this key-reviving maneuver:
- Compressed Air: The unsung hero of the cleaning world. Choose a can specifically designed for electronics. Ensure it has a straw nozzle for precise application.
- Isopropyl Alcohol (90% or higher): This is the crucial cleaning agent. Avoid lower concentrations, as they contain more water and can damage the keyboard.
- Cotton Swabs: For applying the alcohol and gently cleaning around the keys.
- A Soft, Lint-Free Cloth: For wiping down the keyboard surface and drying any excess moisture.
- A Small, Pointed Object (optional): A toothpick or a thin plastic spudger can be helpful for dislodging stubborn debris. Avoid metal objects, which can cause scratches.
- Patience: This is vital. Don’t rush the process.
Step 2: The Air Assault – Unleashing the Power of Compressed Air
This is the first line of defense. The goal is to blast away loose debris trapped beneath the keys.
- Power Down and Unplug: Before you start, switch off your HP laptop and disconnect the power adapter. This is a non-negotiable safety measure.
- Invert and Shake (Gently): Hold your laptop at a 45-degree angle and gently shake it. This can help dislodge larger particles.
- The Air Blast: Insert the straw nozzle into the key gaps. Direct short bursts of compressed air into and around the unresponsive keys. Cycle through each problematic key multiple times.
- Go Back and Forth: Aim the airflow at various angles. Target the key's perimeter and the center.
Step 3: The Alcohol Intervention – Precision Cleaning for Sticky Situations
If compressed air alone doesn’t do the trick, it's time to move on to the more potent isopropyl alcohol treatment.
- Apply Alcohol to the Cotton Swab: Dip a cotton swab into the isopropyl alcohol. Ensure it's damp but not dripping. You want a controlled application, not a flood.
- Gentle Application: Carefully insert the damp swab around the edges of the sticky key. GENTLY apply pressure, and rotate the swab. You are trying to loosen and lift any sticky residue.
- Key Activation: While applying the alcohol, press the key repeatedly. This helps the alcohol penetrate the mechanism.
- The "Wipe-Down": Before the alcohol dries, use a dry cotton swab or a soft cloth to wipe away any excess liquid or dislodged debris. Be meticulous.
- Repeat as Needed: It may take several rounds of alcohol treatment to fully restore functionality. Persevere!
Step 4: The Patience Phase – Allowing Time for Recovery
- Air Dry: After cleaning, leave the laptop switched off for several hours, preferably overnight. This allows any residual alcohol to evaporate completely. Do not turn it on until the keyboard is thoroughly dry.
- The Test: After the drying period, power up your HP laptop and test the previously unresponsive keys. Hopefully, they will be working.
- Additional cycles: If the keys still fail, repeat steps 2 and 3, paying extra attention to the key’s edges and mechanism.
Troubleshooting Tips and Advanced Techniques
- Sticky Keys: If keys are simply sticky, focus on applying the isopropyl alcohol around the key edges and pressing the key repeatedly.
- Persistent Failures: For particularly stubborn keys, you might consider removing the keycap itself. This is usually possible by gently prying it off with a small, thin object. Carefully clean the keycap and the mechanism beneath. (Use extreme caution, and research the specific model of your HP laptop).
- Professional Assistance: If, after several attempts, the keys remain unresponsive, it’s time to seek professional help. A qualified technician can diagnose any more serious issues, such as internal component damage, or they may suggest keyboard replacement.
Prevention is King: Proactive Measures for Keyboard Longevity
The best way to avoid these problems is, of course, to prevent them in the first place.
- Regular Cleaning: Make a habit of cleaning your HP laptop keyboard regularly. Use compressed air weekly or bi-weekly to dislodge any accumulating dust and debris.
- Protect the Keyboard: Consider using a keyboard cover. These inexpensive items protect your keyboard from spills and dust, and they can prolong its life.
- Eat and Drink with Caution: Avoid eating or drinking near your laptop, to remove the risk of spills.
- Gentle Use: Avoid excessive force when typing. Over time, repeated forceful key presses can accelerate wear.
- Stay Updated: Ensure your laptop's drivers are up-to-date. Although uncommon, outdated drivers can sometimes affect keyboard performance.
Conclusion: A Keyboard Comeback is Possible!
The dreaded situation of dead or unresponsive keys on your HP laptop doesn't automatically mean you have to run for an expensive repair or replace the keyboard altogether. By applying this powerful cleaning method, you likely have a viable and efficient way to revive those lifeless keys. Remember to be patient, thorough, and persistent, and you can potentially save yourself time, money, and the frustration of a non-functional keyboard. You can get typing again quickly, and work on the things that matter.
