does office lens work on laptop
Title: Walk through guide to using Office lens
Channel: James Kieft - Edtech Reviews
Walk through guide to using Office lens by James Kieft - Edtech Reviews
Office Lens on Laptop? This SHOCKING Trick Works!
Unlocking Office Lens on Your Laptop: The Secret You've Been Missing!
Right, let's get straight to it. You’ve probably encountered Microsoft’s Office Lens. It’s a handy scanner app for your phone. But what if you want to experience its magic on a bigger screen? Is Office Lens on your laptop even possible? The answer, my friend, is a resounding YES! And the trick? It's surprisingly simple.
The Unexpected Power of Office Lens: Beyond Your Phone
We all know the scenario. You need to scan a document. The convenience of your phone's camera is undeniable. But wrestling with tiny screens and awkward angles? It’s less than ideal. Furthermore, what if you prefer using your laptop's keyboard and mouse? Luckily, bypassing these limitations is easier than you think.
Harnessing the Cloud: Your Gateway to Laptop Scanning
Here’s the genius move. Office Lens seamlessly integrates with the cloud. Specifically, it plays nicely with Microsoft OneDrive. To get started, capture your document using the Office Lens app on your phone. Next, the app automatically uploads your scanned image to OneDrive. From there, your laptop steps in.
Step-by-Step: Bringing Office Lens to Your Laptop
So, how do you make this work? Let's break it down. Firstly, open the Office Lens app on your smartphone. Secondly, capture the document you need. Thirdly, ensure the app saves the scan to your OneDrive. After this, log into your OneDrive account on your laptop. You can do this directly through your web browser. Consequently, your scanned document appears. It's now accessible on your larger screen.
Elevating Productivity: Why This Matters
This seemingly small trick carries significant weight. Think about it. No more squinting at tiny phone screens. Additionally, you have the superior processing power of your laptop. You can also easily edit and organize your documents. Thus, you save time and boost your efficiency. Indeed, it truly is a game-changer.
Fine-Tuning Your Scans: Laptop Editing Magic
OneDrive offers more than just access. It allows for edits. Immediately after uploading, you can open your scanned document. Then, utilize your laptop's editing features. You can crop, rotate, and adjust the image. Plus, you can even add text overlays. For example, you could annotate your scans directly.
Beyond Documents: Unleashing Office Lens Versatility
The possibilities extend beyond simple documents. Consider capturing whiteboards, receipts, and business cards. Using Office Lens on your phone and accessing it on your laptop opens up a world of possibilities. Think about digitizing lecture notes quickly. Also, it streamlines your expense tracking. Therefore, the advantages are clear.
Troubleshooting: Common Hurdles and Solutions
Occasionally, things might not go perfectly. But don't worry, solutions exist. If your images aren't syncing, double-check your internet connection. Also, confirm you are logged into the same Microsoft account on both devices. Still facing issues? Verify that your OneDrive storage isn't full. If needed, consider clearing some space.
Office Lens and Laptop: The Ultimate Power Couple
So, there you have it. Leveraging Office Lens on your laptop is not just possible. It’s also incredibly beneficial. You've learned how to effortlessly scan documents and access them on a larger screen. From now on, embrace the expanded functionality. You can say goodbye to small screens. Hello to increased efficiency!
Boosting Your Workflow: Practical Applications
Think about how effortlessly you can integrate scanned documents into your work. Attach them to emails immediately. Include them in presentations and reports seamlessly. You can also archive important information with ease. The benefits are truly numerous.
Embrace the Efficiency: Start Scanning Today!
Why wait? The process is simple and quick. Begin using this method now. You will quickly realize the advantages of Office Lens on your laptop. In other words, upgrade your workflow instantly. It is a smart choice.
Conclusion: The Future of Scanning in Your Hands
In conclusion, the combination of Office Lens and your laptop is powerful. It offers convenience, increased productivity, and a smoother workflow. Now, you are aware of this hidden trick. Go forth and conquer your document woes! You're now equipped for success.
Surface Laptop 2 Touchpad DEAD? FIX This NOW!Office Lens on Laptop? This SHOCKING Trick Works!
Hey everyone, it’s been a while, hasn’t it? Remember that time I was wrestling with that mountain of receipts after my trip to Italy? Yeah, not my finest moment. But you know what was a fine moment? Discovering a super sneaky, unbelievably easy way to use Office Lens, that amazing little scanner app, on my laptop! Seriously, it's a game-changer, and I’m about to spill all the beans. Forget those clunky scanners of yesteryear – we're diving into the future, folks. Get ready, because this “SHOCKING trick” will have you scanning documents, whiteboards, and anything else you can point your phone at, directly onto your laptop in seconds.
1. The Office Lens Revelation: My Personal Scanning Savior
Let's be honest, who actually enjoys scanning documents? It's right up there with doing taxes, or, well, any chore, right? But then I stumbled upon Office Lens. It's like having a mini-photocopier in your pocket! It’s this miracle app from Microsoft that cleans up images of documents, whiteboards, receipts – you name it. It automatically crops, straightens, and enhances the image, making it look like you used a real, fancy scanner. But, for a long time, I thought it was stuck on my phone only. Ugh.
2. The Catch: Was Office Lens Really Stuck On My Phone?
Here's the rub: officially, Office Lens is designed primarily for mobile devices. You download it on your phone or tablet. You take a picture, and voila! – scanned document magic. But what if, like me, you spend a significant chunk of your life in front of your laptop? Did we have to transfer the image to our computer? Mail it to ourselves? The struggle was real. I considered tethering my phone but, honestly, that felt so yesterday!
3. The Aha! Moment: Uncovering the "SHOCKING Trick"!
So, after a frustrating search, I found it! The secret! I'm talking about a mind-blowing, “Why didn't I think of that sooner?” kind of moment. It's simplicity itself, and it revolves around leveraging the power of… drumroll please… cloud storage! Yep, that's the trick! Now, hold on, don’t roll your eyes. It’s way easier than you think.
4. Setting Up Your Cloud Storage Powerhouse: A Step-by-Step Guide
We're going to assume you have either OneDrive, Google Drive, Dropbox, or any other cloud storage service. If you don’t, it's free and easy to sign up. Think of your cloud storage as your digital delivery service. Here's how we make the magic happen:
- Step 1: Choose Your Cloud Destination: Select the cloud storage service you prefer. I'm a OneDrive fan myself, but the process is similar for all of them.
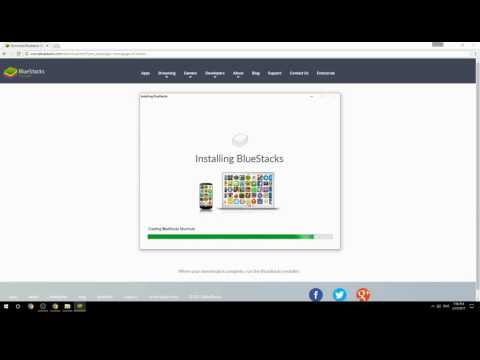
- Step 2: Install the App: Download the cloud storage app on BOTH your phone and your laptop. This is crucial for seamless syncing.
- Step 3: Sign In and Sync: Log into your cloud storage account on both devices. Make sure your device is set to automatically sync your files. This is the important bit!
5. Scan, Sync, and Slay: The Office Lens Workflow Revealed
Now for the fun part! We're going to put our newfound knowledge into action:
- Step 1: Open Office Lens: On your phone, open the Office Lens app.
- Step 2: Capture the Moment: Take a picture of the document, whiteboard, or whatever needs scanning. Use the app to crop and adjust the image as needed.
- Step 3: Save to Your Cloud: In Office Lens, choose the option to save the scanned document directly to your chosen cloud storage location (e.g., OneDrive, Google Drive).
- Step 4: The Sync: Wait a few seconds (or, in some cases, a minute) while your phone syncs the file with the cloud.
- Step 5: Laptop Magic: On your laptop, open the cloud storage app. Your scanned document should magically appear! You can then download it, edit it, share it, or do whatever your heart desires.
6. Ditch the Wires: Embrace Wireless Freedom
This method means no more fiddling with cables, no more transferring files manually, and no more headaches. It's the digital equivalent of tossing your fax machine in the recycling bin. Finally! The burden of all the paperwork can be handled without any more stress.
7. Beyond Documents: Unleashing Office Lens’ Full Potential
Office Lens isn't just for boring documents! Think about all the possibilities:
- Whiteboard Collaboration: Capture notes from brainstorming sessions, classes, or meetings.
- Receipt and Expense Tracking: Easily scan receipts for expense reports.
- Business Cards: Digitize business cards, ready to import into your contact list.
- Menus and Recipes: Save restaurant menus, or family recipes.
8. Enhancing Office Lens Images for Maximum Clarity
To get the best results, remember these tips:
- Good Lighting is Key: Scan in a well-lit environment to prevent shadows.
- Steady Hands: Hold your phone steady to avoid blurry images.
- Experiment with Modes: Office Lens offers different modes (e.g., whiteboards, documents, photos). Choose the right one for the job.
- Crop Wisely: Adjust the cropping to remove unnecessary borders and focus on the document.
9. Integrating with Other Software: Maximizing Efficiency
Once your scanned document is on your laptop, you're not just limited to viewing it. You can:
- Edit in Word or Google Docs: Save your scanned document as a PDF or other editable formats, then open with Microsoft Word or Google Docs.
- Convert to Text (OCR): Use Optical Character Recognition (OCR) to convert your scanned images into editable text.
- Share Easily: Share your scans via email, social media, or cloud-based collaboration tools.
10. Troubleshooting Tips: Common Problems and Solutions
Now and then, things don’t go as planned. Here are a few common troubleshooting tips:
- Syncing Issues: Double-check your Wi-Fi connection and cloud storage settings.
- Image Quality: Ensure good lighting and a steady hand when taking the picture.
- File Format: Verify the file format saved by Office Lens is compatible with your laptop's software.
11. Office Lens Versus Dedicated Scanners: The Showdown
Let's be real, sometimes a dedicated scanner is the right tool for the job. However, let's compare the advantages and the drawbacks of Office Lens on a laptop:
- Office Lens (on a Laptop): Convenient, portable, fast, and budget-friendly.
- Dedicated Scanner: Better for high-volume scanning, more professional-looking scans, potentially faster when a vast number of pages are scanned.
12. Beyond the Basics: Advanced Office Lens Techniques
Want to level-up your Office Lens game? Here are some extra tips:
- Batch Scanning: If you have multiple documents, scan them in batches (using the "Take Another" option).
- Rename Files: Give your scans descriptive file names for easy organization.
- Explore Settings: Play around with the settings options in Office Lens to customize your scanning experience.
13. My Personal Office Lens Success Story
I used this very trick last week when I was organizing old family photos. I was able to quickly scan dozens of photos and save them to my laptop within an hour. It was amazing! The convenience and the image quality were both fantastic, which saved me a great deal of time and money.
14. The Future of Digital Scanning: What’s Next?
I'm excited to see how Microsoft continues to improve Office Lens. I'm also hoping they will release a desktop version or build it directly into the Office suite. I am especially excited to see how OCR technology develops from here. What do you think the future holds for digital scanning?
15. Ready to Scan? Get Started Today!
So there you have it! The “SHOCKING trick” to using Office Lens on your laptop. It’s easy, it’s effective, and it will save you time and the headache of dealing with the burden and complexity of transferring files. So clear off your desk, grab your phone, and get ready to scan! You can do it! Let me know how it goes in the comments!
Closing Thoughts
We've journeyed from a simple app on our phones to a powerful scanning solution on our laptops. I always learn something new, or rediscover something great about technology. As always, happy scanning!
FAQs
1. Does this trick work with other document scanning apps?
Generally, yes! The cloud storage method works with most document scanning apps. The core concept is using cloud storage to sync between your phone and your laptop.
2. Is the image the same quality as a dedicated scanner?
Office Lens (and other similar apps) is pretty great, but a dedicated scanner is often better for high-quality, professional scans, especially
Bluetooth Headphones & Laptops: The SHOCKING Connection Secret!Use Office Lens in the Camera App on Surface
By oztabletpc Use Office Lens in the Camera App on Surface by oztabletpc
How to Download & Use Office Lens on your Computer. Valid for Windows 7810
By Jason Tan How to Download & Use Office Lens on your Computer. Valid for Windows 7810 by Jason Tan
How to use Microsoft Lens PDF Scanner

By Kevin Stratvert How to use Microsoft Lens PDF Scanner by Kevin Stratvert

Title: Using Office Lens
Channel: Computer Applications Technology with Mr H
Using Office Lens by Computer Applications Technology with Mr H
Laptop Working
Here's the title you need to write your article about: "The Ultimate Guide to Planning a Trip to Kyoto, Japan"
The Ultimate Guide to Planning a Trip to Kyoto, Japan
Kyoto, the former imperial capital of Japan, breathes a unique air of historical significance and timeless beauty. A city where ancient temples whisper secrets of the past, geishas gracefully glide through lantern-lit streets, and meticulously manicured gardens offer a tranquil escape, Kyoto invites travelers to a sensory experience unlike any other. This comprehensive guide provides everything you need to craft an unforgettable journey to this remarkable city.
Phase 1: Pre-Trip Preparations – Laying the Foundation for Your Kyoto Adventure
Before even dreaming of the serene bamboo forests or the vibrant kimono displays, meticulous planning is essential. The initial phase sets the stage, ensuring a smooth and enriching experience from the moment you arrive.
Securing Your Travel Documents and Visa Requirements
First and foremost, confirm your passport's validity. It should be valid for at least six months beyond your intended stay in Japan. Determine visa requirements based on your nationality. Citizens of many countries, including the United States, Canada, Australia, and the United Kingdom, can enter Japan for tourism purposes without a visa for stays up to 90 days. However, always verify the specific requirements for your nationality through the Japanese Embassy or Consulate in your country. Keep a copy of your passport and visa (if required) separately from the originals.
Booking Flights and Accommodations – Your Gateway and Sanctuary
With travel documents secured, the next step is securing your flights. Prices fluctuate significantly, so exercise some savvy. Book flights at least three to six months in advance, particularly during peak seasons like cherry blossom season (late March to early April) and autumn foliage season (late November to early December). Compare prices across various airlines and consider connecting flights, as these can sometimes offer significant savings.
Next, find accommodations that match your budget and preferences. Kyoto offers a diverse range of options, from traditional ryokans (Japanese inns) that offer an immersive cultural experience to modern hotels, cozy guesthouses, and budget-friendly hostels. Consider your location preferences. Staying near Kyoto Station provides easy access to transportation, while locations in Gion or Higashiyama place you closer to historical districts. Research the neighborhoods, considering proximity to attractions, restaurants, and public transportation.
Packing Essentials – What to Bring for the Kyoto Climate
Packing wisely is crucial for comfort and convenience. Kyoto experiences distinct seasons, with hot and humid summers, cool and colorful autumns, and cold winters that can sometimes bring snow.
- Clothing: Pack layers to adapt to fluctuating temperatures. Comfortable walking shoes are a must. Include a mix of casual and slightly dressier attire, particularly if you plan to visit temples or traditional restaurants.
- Accessories: Sunglasses, a hat, and sunscreen are essential, especially during spring and summer. A small umbrella or a lightweight rain jacket will prepare you for unexpected showers.
- Electronics: Bring a universal adapter to charge your devices. A portable Wi-Fi router or a local SIM card will help you stay connected.
- Other essentials: Pack any necessary medications, a phrasebook or translation app, and a small backpack for day trips.
Planning Your Itinerary – Mapping Your Adventures
Kyoto offers an overwhelming array of attractions. Planning your itinerary allows you to maximize your time and experience the best of the city. Prioritize the attractions you most want to see. Consider grouping attractions based on their location to optimize travel time.
- Key Landmarks: Include the iconic Kinkaku-ji (Golden Pavilion), Fushimi Inari-taisha Shrine (with its thousands of vermilion torii gates), Kiyomizu-dera Temple, and Arashiyama Bamboo Grove in your itinerary.
- Cultural Experiences: Allocate time for a traditional tea ceremony, a geisha district stroll in Gion, and a visit to a local craft market.
- Day Trips: Consider day trips to nearby Nara (famous for its friendly deer) or Uji (known for its matcha tea).
- Flexibility: Build some flexibility into your itinerary to accommodate unexpected discoveries or changes in plans.
Phase 2: Navigating Kyoto – Getting Around and Getting Oriented
Once you arrive in Kyoto, the city's efficient public transportation system makes exploration straightforward.
Understanding Kyoto's Transportation Network
Kyoto boasts a well-developed transportation network, including trains, subways, buses, and taxis.
- Trains: The JR (Japan Railways) lines are convenient for accessing many major attractions and for travel to and from other cities.
- Subways: The two subway lines (Karasuma and Tozai) are useful for navigating the city center.
- Buses: Kyoto's bus system is extensive and covers a wide area. However, it can be crowded, particularly during peak hours. Consider purchasing a day pass for unlimited bus travel.
- Taxis: Taxis are readily available but can be expensive. Use them for short distances or when public transportation is unavailable.
Mastering the Kyoto Bus System
Kyoto's bus system can seem daunting initially, yet it becomes easy with practice.
- Bus Routes: Familiarize yourself with the major bus routes and stops. Use the city's bus route maps and navigation apps for guidance.
- Boarding: Board the bus from the back door.
- Paying the fare: Pay the fare upon exiting the bus, either by inserting the exact change into the fare box or by using your day pass.
- Announcements: Bus announcements are in Japanese and English. Pay attention to the stops announced and request your stop in advance.
Utilizing the Japan Rail Pass (If Applicable)
If your itinerary includes extensive travel throughout Japan, consider purchasing a Japan Rail Pass. This pass allows unlimited travel on most JR trains, including the shinkansen (bullet train). Calculate whether purchasing a Japan Rail Pass is cost-effective compared to individual train tickets.
Embracing the Bicycle – An Alternative Mode of Exploration
For a more intimate experience of the city, rent a bicycle. Kyoto offers numerous rental shops, and cycling is a pleasant way to explore areas like the Philosopher's Path, the Kamogawa River, and the Arashiyama district. Be aware of traffic regulations and designated cycling lanes.
Phase 3: Immersing Yourself in Kyoto – Exploring Attractions and Cultural Experiences
With travel arrangements completed, it’s time to truly explore Kyoto. This phase delves into the heart of what makes the city so special.
Exploring Kyoto's Iconic Temples and Shrines – A Journey Through Spirituality and History
Kyoto's temples and shrines are the soul of the city. Each structure offers a unique glimpse into Japan's rich history and spiritual heritage.
- Kinkaku-ji (Golden Pavilion): This shimmering temple covered in gold leaf is a must-see. It reflects beautifully upon the surrounding pond.
- Fushimi Inari-taisha Shrine: Walk through the thousands of vibrant red torii gates that wind up the mountain.
- Kiyomizu-dera Temple: Marvel at the wooden stage offering panoramic views of the city.
- Ryoan-ji Temple: Contemplate the Zen rock garden, a testament to simplicity and contemplation.
- Ginkaku-ji (Silver Pavilion): Experience the serene beauty of this temple and its meticulously designed gardens.
Wandering Through the Historic Districts – Where Tradition Thrives
Kyoto's historic districts offer a glimpse into the city’s past.
- Gion: Stroll through Gion, the geisha district, and try to catch a glimpse of a geiko or maiko (apprentice geisha) gracefully walking along the traditional wooden streets.
- Higashiyama: Explore the preserved streets lined with traditional wooden machiya houses, craft shops, and tea houses.
- Arashiyama: Wander through the bamboo grove, visit the Tenryu-ji Temple, and enjoy the scenic beauty of the Togetsukyo Bridge.
Experiencing Traditional Japanese Culture – Tea, Gardens, and Art
Immerse yourself in Kyoto's cultural heritage:
- Tea Ceremony: Participate in a traditional tea ceremony and experience the rituals involved in preparing and serving matcha tea.
- Japanese Gardens: Explore the meticulously landscaped gardens, such as those at Ryoan-ji Temple or Tenryu-ji Temple.
- Craft Markets: Visit the Nishiki Market, Kyoto’s kitchen, to sample local delicacies.
Indulging in Kyoto Cuisine – A Culinary Adventure
Kyoto is a food lover’s paradise:
- **Kaiseki: ** Indulge in kaiseki, a traditional multi-course haute cuisine meal.
- Kyoto-style Ramen: Sample the unique flavors of Kyoto-style ramen.
- Local Specialties: Savor local specialties like yudofu (boiled tofu), obanzai (Kyoto-style home cooking), and matcha desserts.
- Food Markets: Explore Nishiki Market for local produce and snacks.
Phase 4: Practical Tips – Enhancing Your Kyoto Experience
These crucial tips are essential for a smoother, more enjoyable journey.
Communication and Language – Navigating the Japanese Language
While English is spoken in tourist areas, learning a few basic Japanese phrases enhances interactions. Download a translation app to assist with communication or use a phrase book.
