brightness and volume keys not working on hp laptop

Title: How To Fix Brightness And Volume Keys Not Working On HP Laptop Windows 11
Channel: Geo Statology
How To Fix Brightness And Volume Keys Not Working On HP Laptop Windows 11 by Geo Statology
brightness and volume keys not working on hp laptop, brightness keys not working on hp laptop, why are my volume and brightness keys not working dell
HP Laptop Brightness & Volume DEAD? FIX THIS NOW!
HP Laptop Brightness & Volume Blues? Let's Get You Back in Control!
Have you ever been there? You're engrossed in something crucial on your HP laptop, and suddenly, the brightness feels like a subterranean cave. Or worse, the audio decides to take a permanent vacation. It’s a digital nightmare, isn’t it? Rest assured, you are definitely not alone. Many HP laptop users face frustrating brightness and volume issues. Fortunately, fixing these problems is often easier than wrestling a rogue cable.
The Silent Treatment: Troubleshooting Volume Woes
Imagine this scenario: You're trying to watch a video, and nothing but silence greets you. It is incredibly irritating! Before you panic, take a deep breath. Let’s systematically tackle the volume dilemma together.
First, scrutinize the obvious. The most common culprit? The mute button, of course. Ensure your mute button is not engaged. Locate the volume icon, usually found in the system tray (bottom right corner of your screen). Click it, and verify the volume slider isn't set to zero. Double-check those settings. Next, inspect those physical buttons on your keyboard. Many HP models have dedicated volume controls. Experiment by pressing them. See if the volume level changes.
Still no sound? Let's delve deeper. Maybe the audio drivers are playing up. Device drivers are crucial software components. They allow your operating system to communicate with your hardware. Navigate to your Device Manager. You can find this by searching for “Device Manager” in the Windows search bar. It may be located in the control panel, as well.
Expand the "Sound, video, and game controllers" section. Do you see any devices with a yellow exclamation mark? This indicates a driver problem. Right-click the affected device and select “Update driver.” Let Windows search online for updated drivers. Sometimes, a simple restart can magically restore functionality. Therefore, close everything and reboot your computer. Still no sound?
Consider external factors, too. Sometimes, the issue arises with the speakers themselves. They simply are failing. The speakers may be disconnected somehow, as well. Try plugging in headphones. If you get sound through them, you've likely isolated the problem. It is then a problem with the built-in speakers. If your headphones are also silent, the fault probably lies elsewhere.
Illuminating the Darkness: Brightness Busting Strategies
Now, let's address the issue of dimness. Nothing is more frustrating than a screen you cannot see! A dark screen can seriously hamper productivity. So, let’s shed some light on this.
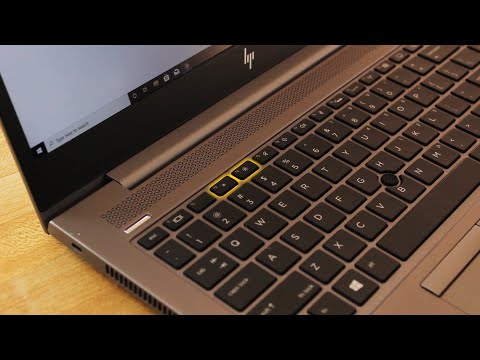
Just as with the volume issue, let's start with the basics. Locate the brightness keys on your keyboard. They typically exist on the function row (F1, F2, etc.) and are often symbolized by a sun icon. Be sure to press the "Fn" key along with the brightness keys. This activates their functionality. This could be the issue. Try adjusting the brightness using these keys.
If that does not work, then check your power settings. Your laptop's power plan influences screen brightness. Go to your power settings in the Control Panel. Choose "Power Options." Review your selected power plan. Ensure the screen brightness isn't set too low. Adjust the brightness levels for both battery and plugged-in modes. Experiment to find what works best for you.
Windows also offers an “Adaptive Brightness” feature. This feature automatically adjusts your screen brightness based on ambient light. Sometimes, this can malfunction. It might be making the screen darker than it should be. Disable it and see if that fixes the issue.
Next, consider driver issues. Once again, head back to Device Manager. Expand the "Display adapters" section. Identify your graphics card. Right-click it and select "Update driver." This will help upgrade it.
Going Beyond the Basics: Advanced Solutions
If the standard solutions fail, explore some more technical avenues. It is time to utilize other methods.
Consider updating the BIOS. The BIOS (Basic Input/Output System) is the firmware that boots your computer. Outdated BIOS versions can sometimes cause hardware compatibility issues. Visit the HP support website. Find your specific laptop model and download the latest BIOS update. Proceed with caution. The BIOS update process can be risky. Follow HP's instructions precisely.
If you have recently installed any new software, it may have an affect. Some applications are known to interfere with system settings. Try uninstalling recent installations. See if that resolves the issue. Also check for any viruses or malware. These could cause unexpected behavior. A good antivirus scan is a wise idea.
If you are still battling the brightness and volume issues, then seek professional help. There may be underlying hardware problems. A professional technician can diagnose and repair your laptop. Don’t hesitate to reach out to HP support directly. They can offer specific troubleshooting tips and solutions tailored to your model.
Final Thoughts: Reclaiming Your Digital Experience
Facing brightness and volume issues on your HP laptop is a drag. However, by systematically troubleshooting and following these steps, you can often regain control. Do not despair when problems arise. Remember, patience and persistence pay off. Sometimes, the fix is simple and straightforward. Other times, it takes a bit more digging. Hopefully, you won't need to resort to the latter. Take it one step at a time. Before long, you'll be enjoying your HP laptop to the fullest again. Now, go forth and enjoy a fully functional laptop!
HP Windows 8.1 WiFi Nightmare? FIX IT NOW!HP Laptop Brightness & Volume DEAD? FIX THIS NOW!
Okay, let's be real. There's nothing quite as frustrating as settling down to watch your favorite show, blast some tunes, or get some serious work done, only to find your HP laptop's brightness is dimmed to oblivion, and the volume is quieter than a church mouse whispering secrets. It's a digital nightmare, and honestly, it can make you want to chuck the whole thing out the window (don't do that!). But before you resign yourself to a life of squinting and straining to hear, breathe a sigh of relief, because we're diving deep into how to fix this. We've all been there, right? I remember once, during a huge deadline, my brightness decided to take a permanent siesta. Talk about panic! But after a bit of troubleshooting, I emerged victorious. And you can too!
1. The Initial Diagnosis: What’s REALLY Going On?
Before we start ripping things apart (digitally, of course!), let’s figure out what’s causing this tech tantrum. Is it a software glitch, a hardware issue, or something else entirely? Think of this as your doctor's appointment for your laptop. We need to ask the right questions. Is both brightness and volume affected, or just one? Is this happening constantly or intermittently? Does it happen on battery power, plugged in, or both? These seemingly small details are crucial clues. This will help us narrow down where to start our detective work.
2. Quick Fixes: The "Have You Tried Turning It Off and On Again?" Approach
Let's start with the simple stuff – the digital equivalent of checking if you've got the lightbulb screwed in right. Often, the solution is embarrassingly easy.
- Restart Your Laptop: Yep, the classic. This can magically fix a multitude of sins, from rogue software to temporary glitches. Think of it as a digital reset button.
- Check the Function Keys: Most HP laptops have dedicated function keys (Fn keys, usually) combined with other keys (like the F1-F12 keys) to adjust brightness and volume. Make sure you're pressing the correct keys. Look for a sun icon for brightness and a speaker icon for volume. Try holding down the Fn key while adjusting these.
- Confirm Volume Isn't Muted: This seems obvious, but we've all done it! Check the speaker icon in the system tray (bottom right corner of your screen) and ensure it isn't muted. The little speaker icon shouldn't have a red "X" through it. Adjust the volume slider as well.
- Check the Brightness Slider: Similarly, in the system tray, you can often find a quick access to the brightness slider. Ensure that it’s not set to the minimum setting.
3. Software Solutions: Diving Into the Operating System
If those quick fixes didn't do the trick, it's time to get our virtual toolkits out and tinker with the software.
- Update Your Drivers: Outdated drivers can be sneaky culprits. To update them:
- Right-click the Start menu and select "Device Manager."
- Expand "Sound, video and game controllers" and "Display adapters."
- Right-click on your sound and display devices and select "Update driver." Choose the "Search automatically for drivers" option.
- Check for Windows Updates: Make sure your operating system is up-to-date. Go to Settings > Update & Security > Windows Update and install any available updates. Sometimes, updates include driver fixes.
- Troubleshoot Brightness and Volume: Windows has built-in troubleshooters. Search for “Troubleshoot settings” in the search bar and run the troubleshooters for both "Playing Audio" and "Display" if they are available.
4. Delving Deeper: Audio & Display Settings
Sometimes, the problem lies within your system’s settings. Don't worry; it's not as technical as it sounds!
- Audio Settings: Right-click the speaker icon in the system tray. Select “Open Sound settings.” Make sure your output device is selected correctly and that the volume levels for different apps aren’t set too low.
- Display Settings: Right-click on your desktop and select “Display settings.” Adjust the brightness slider. Make sure “Night Light” isn't unintentionally activated, as it can sometimes dim the screen.
5. Hardware Hurdles: Is There a Physical Problem?
Okay, so software isn't the problem. It's time to consider the hardware. This is where things can get slightly more complicated, but don't panic!
- External Devices: Disconnect any external speakers, headphones, or monitors. See if the issue persists only with the laptop's built-in speakers/display. Sometimes, a faulty external device can confuse the system.
- Clean Your Screen (and Vents!): A dirty screen might seem dimmer, even if it's not. Also, blocked vents can cause the laptop to overheat, which can lead to strange behavior. Make sure the laptop's cooling system is working correctly.
- Inspect the Keyboard: Check for any physical damage to the function keys used for brightness and volume control.
- Check The Display Panel: In cases where the brightness is dimmed permanently, and the brightness cannot be adjusted, it is highly possible that the LCD backlight is faulty.
6. Power Plans and Settings: The Battery Tango
Your power plan settings can sometimes interfere with brightness and volume.
- Power Options: Go to Control Panel > Hardware and Sound > Power Options. Check your current power plan (e.g., Balanced, Power Saver, High Performance). Sometimes, the Power Saver plan might dim the display to conserve battery. Try switching to a different plan.
- Power Saving Mode: Review the Advanced Settings in the Power Options. Make sure your power saving settings are not interfering with your chosen settings for brightness and volume.
7. The Perplexing BIOS: A Journey to the Root
Okay, we're getting serious. If the problem persists, you might need to venture into your BIOS (Basic Input/Output System) settings. This is the core of your laptop's hardware.
- Accessing the BIOS: This varies depending on your HP model. Usually, you'll need to repeatedly press a specific key (like Esc, F2, F10, or Del) during startup. Check your HP laptop’s manual for the correct key.
- Resetting BIOS Settings: Inside the BIOS, look for an option to “Load Setup Defaults” or “Reset to Defaults.” This can sometimes resolve conflicting settings. Be careful not to change anything else unless you know what you're doing.
8. Application Interference: The Software Saboteurs
Some applications could be interfering:
- Background Apps: Close any unnecessary applications, especially those that access your audio or display.
- Check for Specific Software: Uninstall any recently installed software (especially audio controlling or display-modifying software), that you believe is causing the problem. Sometimes, third-party programs can override your system's settings.
9. Windows Safe Mode: Isolating the Problem
Safe Mode loads Windows with a bare minimum of drivers and services. This helps determine if a third-party driver or software is causing the issue.
- Entering Safe Mode: Restart your laptop and repeatedly press the F8 or Shift+F8 key (again, the specific key might vary, so consult your HP documentation). Select “Safe Mode” from the options.
- Test Brightness and Volume: If Brightness and Volume are working in Safe Mode, the problem is likely a driver or software conflict.
10. System Restore: Rolling Back to a Previous State
If the problem started recently, a System Restore might be a good solution.
- Accessing System Restore: Search for "Create a restore point" in the Windows search bar. Click "System Restore."
- Choose a Restore Point: Select a restore point from before the issue began. Follow the on-screen instructions. This will revert your system to a previous state.
11. The Nuclear Option: Reinstalling Audio and Display Drivers
If nothing else works, you can try to reinstall your sound and display drivers.
- Uninstall Drivers: In Device Manager (as described above), uninstall your sound and display devices.
- Restart Your Laptop: Windows will attempt to reinstall the drivers automatically.
- Manual Installation: If Windows doesn't automatically reinstall them, try visiting the HP support website, entering your laptop model, and downloading the latest drivers.
12. Factory Reset: When All Else Fails
This is the digital equivalent of a clean slate, and is a more extreme, but always an option.
- Back Up Your Data! This will erase everything on your laptop.
- Accessing the Reset: Go to Settings > Update & Security > Recovery. Click “Reset this PC.” Follow the on-screen instructions.
13. Seeking Professional Help: Call in the Cavalry
Sometimes, the problem is more than you can handle.
- HP Support: Contact HP support. They can provide specific troubleshooting steps for your model.
- Local Repair Shop: If the problem seems hardware-related, a qualified technician can diagnose and repair the issue.
14.
Duet Display on MULTIPLE Laptops? This SHOCKING Trick WORKS!FIX HP Laptop Brightness Key Not Working in Windows 11, 10, 8, 7

By P&T IT BROTHER FIX HP Laptop Brightness Key Not Working in Windows 11, 10, 8, 7 by P&T IT BROTHER
HP Laptop Brightness Keys Not Working FIX
By Graphically Challenged HP Laptop Brightness Keys Not Working FIX by Graphically Challenged
Volume Button Not Working - Reverse Function Keys and Multimedia Keys F1-F12

By Filip Tech Volume Button Not Working - Reverse Function Keys and Multimedia Keys F1-F12 by Filip Tech

Title: Fix In 3 Seconds - Volume Control Keys, Mute Button Not Working Microsoft Surface Pro Windows
Channel: Mechanical Mike
Fix In 3 Seconds - Volume Control Keys, Mute Button Not Working Microsoft Surface Pro Windows by Mechanical Mike
Laptop Wifi Connect
Title: Unveiling the Art of Authentic Italian Pasta: A Culinary Journey from Farm to Table
We, the guardians of culinary tradition, often find ourselves adrift in a sea of misinformation and diluted interpretations. Today, we embark on a pilgrimage, a journey back to the heart of Italian pasta, where the embrace of heritage and the whisper of time guide every strand. We aim to strip away the superficial layers and unveil the true essence of this beloved dish, revealing secrets that elevate mere sustenance into an unforgettable experience. Join us as we delve into the granular details, exploring the nuances that separate the authentic from the imitation.
The Sacred Trinity: Flour, Water, and Passion
Our odyssey begins with the fundamental components: flour, water, and, most importantly, a boundless passion. The quality of the flour is paramount. Forget the bleached, processed options that dominate supermarket shelves. We advocate for the use of high-quality, finely milled semola di grano duro, or durum wheat semolina. This type of flour delivers a robust, textured pasta that holds its shape during cooking and absorbs sauces flawlessly. The subtle, nutty notes of the wheat are essential to the final experience. It is not just a base; it is a foundation of flavor.
The water, simple yet vital, should be pure and cold. The ideal ratio of flour to water is a delicate dance, a balance that the experienced pasta maker discerns through the feel of the dough. Kneading is a meditative ritual, and the goal is to achieve a smooth, elastic dough that yields to pressure but retains its integrity. This process demands patience and attention, allowing the gluten to develop and the flavors to meld. Each knead is a statement, a silent affirmation of the commitment to authentic pasta-making.
Passion, however, is the true catalyst. It fuels the dedication to hand-rolling, the meticulous shaping, and the pursuit of perfection in every iteration. It transcends mere technique and translates into a profound respect for the ingredients, the process, and the culinary heritage. Without this core ingredient, even the finest flour and purest water will fall short of producing pasta that truly sings.
Shaping the Soul: Exploring Diverse Pasta Formats
The beauty of Italian pasta lies in its diversity. Each shape, from the humble spaghetti to the intricate farfalle, is a testament to regionalism and culinary ingenuity. Selecting the correct pasta for a particular sauce is an art form in itself, a conversation between the pasta and the accompanying ingredients.
Spaghetti: Perhaps the most globally recognized format, spaghetti's slender, cylindrical form calls for lighter sauces, such as aglio e olio (garlic and oil) or a delicate tomato sauce. Its simplicity allows the other ingredients to shine, creating a harmonious symphony of flavors.
Fettuccine: Flat and wider than spaghetti, fettuccine is ideally suited for cream-based sauces or those heavily bound, such as Alfredo sauce or a rich mushroom ragu. The wider surface area provides ample space for the sauce to cling, ensuring that each bite is brimming with flavor.
Penne: The iconic tubular shape of penne, with its angled ends, is a versatile canvas for a wide array of sauces. From a hearty arrabbiata to a vibrant pesto, penne's ridges capture the sauce, ensuring an explosion of taste in every mouthful.
Farfalle: Also known as bow-tie pasta, farfalle's intricate shape is visually appealing and great for trapping sauces. Its delicate formation pairs well with lighter sauces, vegetables, and seafood, creating a delightful textural contrast.
Orecchiette: Shaped like small ears, orecchiette is a southern Italian specialty that truly shines with vegetables and hearty sauces. The concave shape perfectly cradles the sauce, delivering a burst of flavor with each bite.
The Maestro's Touch: Masterful Cooking Techniques
The cooking process is where the raw potential of the pasta is realized. The key is to cook the pasta al dente, meaning "to the tooth." This implies that the pasta should retain a slight firmness, a subtle resistance to the bite. Overcooked pasta becomes mushy and loses its integrity, while undercooked pasta can be chalky and unpleasant.
Begin with a large pot of boiling, salted water. The water should be generously salted to season the pasta from the inside out. The ratio of water to pasta is critical; the pasta must be free to move in the water, preventing clumping and uneven cooking.
Gently introduce the pasta to the boiling water, stirring immediately to prevent sticking. Cook the pasta according to the package instructions, but begin testing for doneness a few minutes before the suggested time. The ideal texture can only be judged through taste and feel.
Once al dente, drain the pasta quickly, reserving a small amount of the cooking water. This starchy water serves as a secret weapon, adding body and helping the sauce cling to the pasta. Immediately toss the pasta with the prepared sauce, adding a splash of the reserved cooking water if needed to create a cohesive emulsion. This final integration is where alchemy happens.
Sauces: The Symphony of Flavors
The sauce is the soulmate of the pasta, and the possibilities are endless. From the simplicity of a fresh tomato sauce to the complexity of a slow-cooked ragu, the perfect sauce elevates the pasta to a new dimension.
Tomato Sauce: The foundation of many Italian dishes, a good tomato sauce begins with ripe, flavorful tomatoes. San Marzano tomatoes, renowned for their sweetness and low acidity, are the gold standard. The sauce should be gently simmered with onions, garlic, and herbs, allowing the flavors to meld and deepen.
Pesto: A vibrant green sauce from Liguria, pesto is a symphony of fresh basil, pine nuts, garlic, Parmesan cheese, and olive oil. The ingredients are traditionally ground together in a mortar and pestle, though a food processor can also be used. Its freshness is essential to its appeal.
Carbonara: A deceptively simple dish, carbonara consists of pasta, eggs, guanciale (or pancetta), Pecorino Romano cheese, and black pepper. The key is to create a creamy, emulsified sauce without scrambling the eggs. The rendered fat from the guanciale adds richness and depth.
Ragù Bolognese: A slow-cooked meat sauce from Bologna, ragù Bolognese is a labor of love. It is made with ground meat (traditionally a mixture of beef, pork, and veal), vegetables, tomatoes, and wine. The long, slow cooking process allows the flavors to develop and the meat to become tender.
The Ritual of Serving and Enjoying
The final step is the presentation and, most importantly, the enjoyment. Serve the pasta immediately, garnished with fresh herbs, a drizzle of olive oil, or a dusting of grated cheese. The presentation should be elegant but unpretentious, reflecting the simplicity and authenticity of the dish.
Gather your loved ones around the table and create an experience of shared culinary joy. Each bite should be savored, a moment of appreciation for the ingredients, the process, and the rich heritage. There is no greater reward than the pleasure of sharing this experience.
Beyond the Plate: Embracing the Italian Culinary Philosophy
Authentic Italian pasta is more than just a meal; it embodies a philosophy. It represents a respect for tradition, a celebration of fresh ingredients, and a commitment to culinary excellence. It is a reminder that simple pleasures, when executed with care and passion, can bring immeasurable joy.
So, we encourage you to embark on your own pasta journey. Explore the nuances, experiment with different shapes and sauces, and, above all, embrace the spirit of la dolce vita, the sweet life. Let this culinary odyssey be a reminder of the power of authentic traditions to elevate the ordinary into the extraordinary.
