microphone on hp laptop not working

Title: How To Fix HP Microphone Not Working
Channel: lapfix
How To Fix HP Microphone Not Working by lapfix
microphone on hp laptop not working, hp laptop microphone not working windows 11, hp laptop microphone not working in teams, hp laptop microphone not working microsoft teams, hp laptop mic not working windows 11
HP Laptop Mic Dead? 😱 THIS Fix Works Every Time!
HP Laptop Microphone Troubles: Solve It Now!
Have you encountered those frustrating moments? Your HP laptop microphone suddenly decides to stage a disappearing act. You find yourself muttering into the void during important video calls. The desperation is real, isn't it? Don't worry, you are not alone. Many HP laptop users experience this issue. However, breathe easy; there's a solution. It might not be as daunting as it seems.
Diagnosing the Silent Treatment: Initial Checks
First, let’s perform some quick diagnostic tests. We'll rule out the obvious culprits. Is the microphone physically connected? Often, a loose connection causes issues. Double-check the headphone jack. Sometimes, it can disrupt the microphone's function. Moreover, ensure the microphone isn’t muted. Look for a mute button on your keyboard. Also, examine your application settings. Many apps have their own microphone settings. Ensure your microphone is selected as the default input device. Lastly, restart your laptop. This simple step solves many tech glitches.
Delving Deeper: Software and Driver Solutions
Now, let's venture into the digital realm. Perhaps the problem lies within the software. Your audio drivers might be outdated or corrupt. Therefore, we must update them. Go to the Device Manager. Find "Sound, video and game controllers". Right-click your audio device. Select "Update driver". Choose the option to search automatically for the updated driver software. If updates are available, install them. If this doesn’t work, consider uninstalling the driver. Restart your laptop. Windows might automatically reinstall a working version. Furthermore, check your privacy settings. Sometimes, applications don't have microphone access. Go to your privacy settings. Then, permit apps to access your microphone.
Audio Settings: A Fine-Tuning Approach
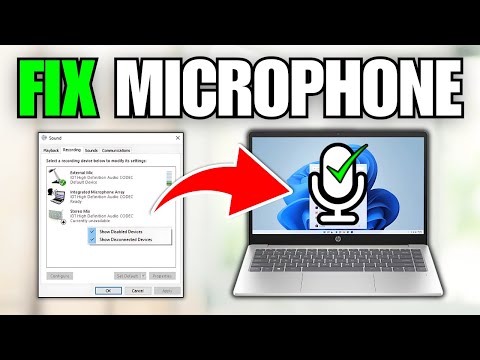
Let's get into some nuanced troubleshooting. We'll tweak your audio settings. Right-click the speaker icon in your system tray. Select "Sounds". Go to the "Recording" tab. Make sure your microphone is enabled. If it isn't, right-click it and choose "Enable". Then, set your microphone as the default device. Right-click your microphone. Select "Properties". Examine the "Levels" tab. Ensure the microphone volume isn't set too low. Likewise, check the "Enhancements" tab. Experiment with disabling any enhancement features. Sometimes, they interfere with the microphone's performance. After each adjustment, test your microphone. See if the audio issue resolves itself.
Hardware Hurdles: Investigating the Physical Components
In some cases, the problem is not software. The hardware itself may be at fault. It's time to investigate the physical components. If your laptop has an external microphone jack, test it. Plug in an external microphone. Does this work? If so, the problem might lie with your internal microphone. Carefully inspect the microphone's physical location. Sometimes, dust or debris can clog the microphone. Very gently, use compressed air to clean the microphone. Be extremely cautious. Avoid damaging any internal components. If your laptop is still under warranty, contact HP support. A hardware issue might require professional repair.
Troubleshooting Tips and Tricks: More Solutions
Let's explore some additional solutions. They may seem minor, but they are very effective. Update your operating system. Older OS versions sometimes have compatibility issues. Also, scan your system for malware. Malware can disrupt system functionalities. Furthermore, run the Windows troubleshooter. Type "Troubleshoot settings" in the search bar. Select "Troubleshoot". Then, navigate to "Hardware and Sound". Run the "Recording Audio" troubleshooter. It will automatically detect and fix common audio issues. Consider creating a new user profile. Sometimes, user profile corruption causes problems. If none of the above solutions work, consider a system restore. This returns your laptop to a previous working state.
The Ultimate Solution: When All Else Fails
Perhaps the problem proves too complex to solve at home. If you've tried every method, reach out to HP support. They have specialized expertise. They can diagnose the problem effectively. Moreover, consider professional repair services. A qualified technician has the skills. They can diagnose and fix complex microphone issues. Don't hesitate to seek professional help. You might just save yourself a lot of time and frustration.
Prevention is Key: Long-Term Microphone Health
Future-proof your laptop’s microphone. Implement some preventative measures. Regularly update your drivers. These updates often include performance improvements. Also, keep your laptop clean. Dust and debris can cause hardware issues. Invest in a good pair of headphones with a built-in microphone. It can be useful for important calls. Finally, be mindful of where you store your laptop. Avoid extreme temperatures and humidity. These conditions can impair the microphone’s functionality.
Conclusion: Conquering the Microphone Woes
So, you've mastered the art of microphone troubleshooting. You’ve learned how to diagnose, fix, and prevent issues. Now, you're ready to conquer any microphone problem. Remember this guide. Follow these steps. You'll confidently restore your HP laptop's microphone. Now, go forth and communicate with ease. You are now well-equipped for all your audio interactions. Happy troubleshooting!
Is Your Toshiba Laptop's DVD Drive DEAD? (Shocking Fix Inside!)HP Laptop Mic Dead? 😱 THIS Fix Works Every Time!
Hey there, fellow tech travelers! Ever been in the middle of a super important Zoom call, a crucial online presentation, or just trying to catch up with your best friend, only to realize… your HP laptop mic is dead? 😱 Talk about a heart-stopping moment! Trust me, we’ve all been there. That sinking feeling when you realize your voice is lost in the digital abyss is a real mood killer. But don’t panic! Before you toss your laptop out the window (we’ve been tempted!), let’s dive into some tried-and-true fixes that actually work. We’re going to bring your HP laptop’s microphone back to life, and we're going to do it with a smile. So, grab a cup of coffee, settle in, and let's get this party started!
1. The Obvious Suspect: The Mute Button (Seriously, Check!)
Okay, okay, before we get into the super-techy solutions, let’s address the elephant in the room: the mute button. I know it sounds silly, but you wouldn't believe how many times the simplest solutions are the ones we overlook. It's like searching for your keys while they're in your hand! Check your HP laptop keyboard. Does it have a dedicated mute button (often with a microphone icon)? Is it lit up? Is the little orange light glaring at you? If it is lit, that means your mic is muted. Tap that button and give it a try. Crisis averted! Sometimes, the solution is as simple as a quick click.
2. Volume Woes: Is Your Mic Even Listening?
Next up, let’s crank up the volume, but this time, we're talking about the microphone's input volume. Imagine your mic as a tiny little ear; if the volume is set too low, it won’t be able to “hear” anything, and therefore, it won't transmit your voice.
- How to check and adjust your mic volume:
- Go to the Windows Search bar (the little magnifying glass icon) and type “Sound settings.”
- Click on "Sound settings" from the results.
- Under the "Input" section, select your microphone (it should list your HP laptop's built-in microphone if you haven't attached an external one).
- Make sure the volume slider is pushed to the right – ideally, at least halfway or more.
- Test the microphone by speaking into it and watching the bar beside the volume slider move. If it doesn't move, we've got a problem.
- If you still can’t hear anything, select “Troubleshoot” under the Input to begin the troubleshooting process. This built-in tool can often identify and fix basic issues.
We're basically giving your mic a sonic boost!
3. The Driver Dilemma: Updating Your Audio Actors
Think of drivers as little instructions that tell your computer how to communicate with your hardware components – including your microphone. If these instructions are outdated or corrupt, your mic might be playing a silent movie. It’s like trying to understand a foreign language without a translator!
- Updating your microphone drivers:
- Again, hit that Windows Search bar and type “Device Manager.”
- In the Device Manager window, look for “Sound, video and game controllers." Click on the arrow to expand the section.
- Right-click on your HP laptop's microphone (it might be listed by its specific model, like "Realtek High Definition Audio").
- Select "Update driver."
- You'll be given two options: "Search automatically for drivers" or "Browse my computer for drivers." Choose the first option, let Windows do its thing, and see if it finds and installs an update.
- If that doesn’t work, try uninstalling the driver and then restarting your laptop. Windows will often reinstall the driver automatically when you reboot.
Updating your drivers is like giving your microphone a fresh set of instructions – and a much-needed performance boost!
4. Application Permissions: Giving Your Apps the Green Light
Imagine you're trying to enter a secret club, but the bouncer won't let you in. That's what can happen when your apps don't have permission to use your microphone. It’s like being stranded at the velvet rope!
- Checking application microphone permissions:
- Go to Settings (you can find this by clicking the gear icon in the Start menu).
- Click on “Privacy.”
- Select “Microphone” from the list on the left-hand side.
- Make sure the "Microphone access for this device" setting is turned ON.
- Also, check the list of apps below and ensure that the apps you want to use your microphone with (like Zoom, Skype, or any other communication software) have permission to access it.
Make sure your apps have the VIP access they need!
5. Hardware Hairs? (Checking for Physical Issues)
Okay, let’s talk reality, because, sometimes, things get physical. It's like a stubborn piece of lint in your ear!
- Physical Checks:
- Microphone Port Check: if you are using an external mic or headset, make sure the port is clean (no dust or debris) and the connection is secure.
- Earphone Port Check: If you are using a headset, it may not be connected properly. Try plugging in the headset again. Try another pair of headphones.
- Examine for damage: Sometimes, accidents happen. Check the area around the microphone (often near the webcam) for any obvious signs of damage – cracks, bumps, or anything out of the ordinary. If you're using an external mic, inspect the cable.
Sometimes, the solution is as simple as a good cleaning or a slight adjustment.
6. Restarting Your Laptop: The Classic "Turn It Off and On Again"
This may seem like a cliché, but restarting your laptop is the digital equivalent of a reboot for your brain. It can often fix a whole host of temporary glitches and software conflicts that might be causing your microphone to malfunction. It's like hitting the reset button on your laptop’s nervous system!
7. The Troubleshooter: Let Windows Be Your Detective
Windows has a built-in troubleshooting tool that's often surprisingly effective. Think of it as your digital detective, sniffing out the source of the problem.
- Running the Windows Troubleshooter:
- In the Windows Search bar, search for “Troubleshoot settings.”
- Click on "Troubleshoot settings."
- Scroll down to "Other troubleshooters."
- Find "Recording audio" and click "Run."
- Follow the on-screen instructions. Windows will try to identify and fix any microphone-related issues.
Let Windows do its detective work!
8. Rollback Driver: If Recent Updates Caused The Trouble
Sometimes a new driver update can be the cause of the problem. It’s like getting a new recipe, only to find out it doesn’t work.
- Rolling back your microphone driver:
- Go back into Device Manager (as described in step 3).
- Right-click on your microphone device.
- Select "Properties."
- Go to the "Driver" tab.
- If the "Roll Back Driver" option is available, click it. This will revert to the previous driver version.
It's like hitting the undo button on your microphone!
9. Checking for External Interference: Noise is the Enemy!
Is your microphone picking up something it shouldn't? Background noise can be a real problem, and sometimes, it can even seem like your mic isn't working when, in reality, it's just drowned out by other sounds.
- Troubleshooting background noise:
- Test in a quiet environment: Try using your microphone in a completely silent room.
- Check for nearby speakers: Make sure your laptop isn't too close to other speakers that might be causing feedback.
- Adjust microphone settings: In your sound settings, look for noise cancellation options or a built-in equalizer to reduce unwanted noise.
Let’s silence the noise and focus on your voice!
10. External Microphone Test (If Applicable): Is It the Laptop’s Mic?
If you have access to an external microphone (a headset, a USB mic, etc.), try using it. This can help you determine whether the problem lies with your HP laptop’s built-in microphone or something else entirely. It's like a second opinion from a trusted friend.
- Testing with an external microphone:
- Plug the external microphone into your laptop.
- Select the external microphone as the input device in your sound settings (as described in step 2).
- Test the microphone to see if it works.
- If the external mic works, the issue is likely with your laptop's built-in microphone. If it doesn’t, the problem might be with your sound settings or drivers.
Pinpointing the source of the problem!
Work Laptop Formatting: The SHOCKING Secret Nobody Wants You To Know!
How To Fix Microphone Not Working on HP Laptop
By Your Fix Guide How To Fix Microphone Not Working on HP Laptop by Your Fix Guide
How To Fix HP Laptop Microphone Not Working In Windows 10 and Windows 11
By TechFixIT How To Fix HP Laptop Microphone Not Working In Windows 10 and Windows 11 by TechFixIT
Fix Microphone Not Working on Windows 10

By The Geek Page Fix Microphone Not Working on Windows 10 by The Geek Page

Title: How to troubleshoot the microphone on your HP Notebook in Windows 11 HP Support
Channel: HP Support
How to troubleshoot the microphone on your HP Notebook in Windows 11 HP Support by HP Support
Laptop Working
Here's the title for your article: The Ultimate Guide to Planning a Sustainable Garden: From Concept to Harvest
The Ultimate Guide to Planning a Sustainable Garden: From Concept to Harvest
Embarking on the journey of cultivating a sustainable garden is a rewarding endeavor, one that connects us deeply with the natural world. This comprehensive guide serves as your compass, navigating you from the initial spark of an idea to the bountiful harvest, all while minimizing your environmental footprint and maximizing your yield. We will delve into every facet of sustainable gardening, providing you with the knowledge and inspiration to transform your space into a thriving haven of biodiversity and nourishment.
I. Laying the Foundation: Site Assessment and Planning
The cornerstone of any successful sustainable garden is a thorough site assessment. Begin by observing your land. Pay close attention to sunlight exposure. Most vegetables require at least six hours of direct sunlight daily. Note the areas that receive the most and least sun throughout the day, factoring in seasonal variations. This knowledge will dictate which plants will thrive in which locations. For example, heat-loving tomatoes and peppers will flourish in the sunniest spots, while leafy greens and herbs might prefer a shadier environment.
Next, analyze your soil. Soil health is paramount. Invest in a soil test to determine the pH level, nutrient content, and organic matter composition. This valuable data will inform your amending strategy. You can obtain soil tests from local agricultural extension offices or reputable laboratories. If your soil is heavy clay, consider incorporating organic matter like compost, well-rotted manure, or shredded leaves to improve drainage and aeration. Sandy soil benefits from similar additions to enhance water retention.
Water availability is another crucial consideration. Observe your existing water sources. Do you have access to a readily available water tap? Consider rainwater harvesting, which is a highly sustainable practice. Install rain barrels to collect water from rooftops. This free, soft water is ideal for irrigation and reduces your reliance on municipal water supplies.
Finally, consider the overall layout. Sketch out your garden plan, mapping out the locations of your raised beds, pathways, and other features. Incorporate elements that promote biodiversity, such as native flowering plants to attract pollinators and beneficial insects.
II. Building Healthy Soil: The Engine of Sustainability
The health of your soil is the engine that drives your sustainable garden. Healthy soil teems with life, from beneficial bacteria and fungi to earthworms and other microorganisms. These organisms work in concert to break down organic matter, release nutrients, and improve soil structure.
The cornerstone of healthy soil is organic matter. Compost is your best friend. Make your own compost using kitchen scraps, yard waste, and other organic materials. A well-managed compost pile is a dynamic ecosystem, transforming waste into a rich, dark, and nutrient-dense soil amendment.
Another excellent soil amendment is cover cropping. Cover crops are plants grown specifically to improve soil health. They can be sown in the off-season or between rows of vegetables. Cover crops prevent soil erosion, suppress weeds, fix nitrogen (in the case of legumes), and add organic matter to the soil when they are tilled under. Examples include:
- Legumes: Clover, alfalfa, fava beans (nitrogen-fixing)
- Grains: Rye, oats, wheat (improve soil structure)
- Brassicas: Radishes, mustard (suppress weeds and improve soil drainage)
Mulching is another vital practice. Mulch helps to retain moisture, suppress weeds, regulate soil temperature, and add organic matter as it decomposes. Choose from a variety of mulching materials, such as straw, wood chips, shredded leaves, or compost.
III. Choosing the Right Plants: Embracing Biodiversity and Local Adaptation
Selecting the right plants is essential for a successful and sustainable garden. Prioritize plants that are well-suited to your local climate and growing conditions. Start by researching your USDA plant hardiness zone. This zone provides information on the average minimum winter temperatures in your area.
Consider planting a diverse range of plants, including vegetables, herbs, fruits, and flowers. Diversity provides multiple benefits. It creates a more resilient garden ecosystem, reducing the risk of pest and disease outbreaks. It also attracts pollinators and beneficial insects, which are essential for pollination and natural pest control.
Prioritize native plants whenever possible. Native plants are adapted to the local climate and soil conditions, making them low-maintenance, drought-tolerant, and beneficial to local wildlife. They also often require less water and fertilizer than non-native plants.
When selecting vegetable varieties, consider succession planting. This involves planting crops at intervals throughout the growing season to extend the harvest period. For instance, you could plant lettuce every two weeks to ensure a continuous supply of fresh greens.
IV. Sustainable Watering Practices: Conserving Precious Resources
Water conservation is a central tenet of sustainable gardening. Employ several strategies to minimize water usage and maximize water efficiency.
A. Drip Irrigation: Drip irrigation delivers water directly to the roots of plants, minimizing water loss through evaporation and runoff. This targeted approach is highly efficient and reduces the risk of fungal diseases caused by wet foliage.
B. Soaker Hoses: Soaker hoses are another excellent option for efficient watering. They slowly release water along their length, soaking the soil and providing consistent moisture to plant roots.
C. Mulching: As mentioned earlier, mulching helps to retain soil moisture, reducing the need for frequent watering.
D. Rainwater Harvesting: Utilize rain barrels or larger cisterns to collect rainwater for irrigation. This free water is ideal for plants and reduces your reliance on municipal supplies.
E. Water Wisely: Water deeply and less frequently, encouraging deep root growth. Water early in the morning to minimize evaporation and allow foliage to dry before nightfall.
V. Natural Pest and Disease Management: Embracing Ecosystem Health
Sustainable gardening embraces natural pest and disease management strategies, minimizing the use of synthetic pesticides and herbicides.
A. Companion Planting: Companion planting involves strategically planting different crops together to benefit each other. Some plants repel pests, while others attract beneficial insects. For example:
- Marigolds: Repel nematodes and other pests.
- Basil: Repels aphids and attracts beneficial insects.
- Carrots: Deter onion flies.
B. Attracting Beneficial Insects: Create a habitat that attracts beneficial insects, which are natural predators of common garden pests. Plant a variety of flowering plants to provide nectar and pollen, essential resources for beneficial insects.
C. Crop Rotation: Rotate crops annually to disrupt pest and disease cycles. Avoid planting the same crops in the same location year after year.
D. Handpicking Pests: Regularly inspect your plants for pests. Handpick pests, such as caterpillars and squash bugs, and dispose of them.
E. Organic Pest Control: If pests become a significant problem, consider using organic pest control methods:
- Insecticidal Soap: Effective against aphids, mites, and other soft-bodied insects.
- Neem Oil: A broad-spectrum insecticide that is effective against a wide range of pests.
- Bacillus thuringiensis (Bt): A biological insecticide that is effective against caterpillars.
VI. Harvesting and Maintaining Your Sustainable Garden: A Continuous Cycle
The harvest is the culmination of your efforts, the reward for your dedication and care, and also the beginning of the next cycle of growth. Harvest your crops at their peak ripeness, when they are most flavorful and nutritious.
A. Harvesting Techniques: Use appropriate harvesting techniques for each crop. For example, cut lettuce leaves individually as needed, or harvest whole heads of lettuce. Pick tomatoes when they are fully colored and slightly soft to the touch.
B. Post-Harvest Handling: Handle your harvested crops gently to avoid bruising. Store your produce properly to maintain its freshness and quality.
C. Continued Soil Health: Continue to amend your soil with compost and other organic matter. Practice crop rotation to maintain soil health and prevent pest and disease problems.
D. Observation and Adaptation: Observe your garden throughout the growing season. Note any problems that arise, such as pest infestations, disease outbreaks, or nutrient deficiencies. Adjust your gardening practices as needed to address these issues. Maintain detailed records of your garden activities, including planting dates, watering schedules, and harvest yields. This information will help you refine your gardening practices in subsequent years.
Planning a sustainable garden is an ongoing process of learning, adapting, and refining your techniques. By following the principles outlined in this guide, you can create a thriving and productive garden that nourishes you, your family, and the environment. Embrace the joy of connecting with nature, cultivating your own food, and leaving a lighter footprint on the planet.
