what to do if laptop charging port is not working

Title: Dell Inspiron won't charge cheap easy fix tech pc technology shorts
Channel: Salem Techsperts
Dell Inspiron won't charge cheap easy fix tech pc technology shorts by Salem Techsperts
what to do if laptop charging port is not working, what to do if laptop usb port is not working, what to do when laptop charger port is not working, what to do if my laptop charging port is not working, can the charging port on a laptop be fixed, how to fix the charging port on laptop
Laptop Charging Port Dead? This SHOCKING Fix WORKS!
Laptop Charging Port Catastrophe? A Surprisingly Simple Savior!
Let’s face it; tech troubles are a fact of life. We rely on our laptops for everything, and a dead charging port can feel like a personal crisis. Suddenly, deadlines loom, connections are severed, and the digital world feels miles away. But hold on! Before you resign yourself to expensive repairs or even a new machine, there might be hope. This isn’t just any quick fix; this is a potential lifesaver.
The Dreaded Dead Port: Recognizing the Symptoms
First, let's identify the enemy. Is your laptop refusing to charge? Maybe the charging indicator is stubbornly dark, or the battery percentage is frozen. Perhaps the charging cable wiggles loosely in the port. These are often telltale signs. In other instances, your laptop charges only when the cable is held at a specific angle. Moreover, you may notice that the charging port itself looks damaged. The issue might also be inside, involving the delicate connections within the port.
Troubleshooting Before the Panic Sets In
Before you completely lose it, let’s try some basic troubleshooting. Firstly, inspect your charging cable. Look for any visible damage, such as frayed wires. Then, try a different outlet. Sometimes, the problem isn't with the laptop at all. Consider trying a different charger, if you have one compatible. In addition, inspect the port itself using a flashlight. Look for any debris or obstructions.
The Surprisingly Effective Cleaning Technique: Unclogging the Culprit
Now, let’s get down to the real fix. This trick has saved countless laptops from the scrap heap. Instead of a complex repair, the solution often lies in a simple cleaning. However, before you grab anything, remember safety first. Always disconnect your laptop from any power source. After doing this, you can proceed.
What you’ll need: A non-metallic tool, such as a thin, plastic dental pick, or a toothpick. Furthermore, you'll need some compressed air. This will help you dislodge anything you can't remove manually.
Gently insert the plastic pick into the charging port. Carefully probe around the edges and inside. You're basically trying to dislodge any accumulated dust, lint, or debris. Do this with patience. Be gentle to avoid damaging the internal connectors. You'll be surprised by how much gunk can accumulate in those little ports. In particular, pet hair is a common offender.
After you’ve loosened the debris, use the compressed air. Direct short bursts of air into the port. This will help to blow out any loosened particles. Repeat the process of picking and blowing until the port appears clean. Afterwards, re-inspect the port thoroughly.
Beyond the Basics: When Cleaning Isn’t Enough
Unfortunately, sometimes cleaning just won't cut it. If you tried cleaning and still face the charging issue, the problem may be more complex. At that point, it's time to consider other potential issues. It could be a faulty charging cable. Maybe the charger itself has failed. There might be an issue with the laptop's internal charging circuitry.
Seeking Professional Intervention: Knowing When to Call for Reinforcements
If your laptop is still not charging after cleaning, it might be time to seek professional help. Do not hesitate to take your laptop to a qualified technician. This is particularly true if you suspect internal damage or if you’re not comfortable with further troubleshooting. A professional will diagnose the problem accurately. They can then provide appropriate repair options. You might need a new charging port installed, or they might need to replace more complex internal components.
Preventative Measures: Keeping Your Port Healthy
Prevention is always better than cure. Therefore, take some simple steps to protect your charging port. Try to avoid harsh conditions where moisture and dust are prevalent. When not in use, store your laptop in a protective case. Be careful when plugging and unplugging the charging cable. Avoid excessive force or pulling on the cable. Consequently, this will help prolong the life of your port. Periodically inspect your charging port for any signs of damage.
The Bottom Line: Don't Give Up Hope!
A dead charging port can seem like a major problem. But remember, you’re not alone. Many people face this issue. In many cases, a simple cleaning might be the only fix required. So, before you rush to replace your laptop or spend a great fortune on repair, try the cleaning method. If you're lucky, you'll have a fully charged laptop in no time. With a bit of patience and a few simple steps, you might just breathe new life into your indispensable device. So, ready your tools and get ready to save your laptop. Good luck!
Zenbook Dead? Fix Your Laptop's Power Cord NOW!Laptop Charging Port Dead? This SHOCKING Fix WORKS!
Hey there, fellow tech travelers! Ever stared at your laptop screen, a black void mirroring your inner panic because the darn thing won't charge? We’ve all been there. That little charging port, the lifeline of your digital world, suddenly becomes a stubborn, unresponsive brick. It's like a vital organ just decided to call it quits. But before you resign yourself to the expensive abyss of a brand-new laptop or the frustrating dance with customer service, hold on! We're about to uncover a shockingly simple fix that might just resurrect your beloved machine from the digital graveyard.
1. The Dreaded Black Screen: When Your Laptop Refuses to Drink
Let's be honest, the moment the battery indicator dives into the red and your laptop starts whimpering about low power, a certain dread creeps in. But when that screen goes completely black, it's a whole different level of panic. You're left staring at a silent monolith, a window to your world suddenly shuttered. Is it the charger? The battery? The motherboard summoning its own digital grim reaper? The possibilities swirl like a tornado. Don't worry, we're going to cut through the noise and target what's often the culprit: the finicky charging port.
2. Diagnosing the Digital Drought: Is It Really the Port?
Before we bust out the metaphorical defibrillator, we need to make sure the charging port is the actual problem. It's like diagnosing a patient: you don't just leap into surgery without understanding what's wrong! Let’s run through a few quick checks to confirm our suspicion:
- Try a Different Charger: Obvious, but essential. Borrow a charger (with the correct voltage and amperage) from a friend or go down to the local electronics store. Rule out the possibility that your current charger simply gave up the ghost.
- Examine the Port Closely: Grab a flashlight and peer into the charging port. Are there any obvious signs of damage? Bent pins? Debris blocking the connection? Think of it like examining a lock before trying to pick it – you need to understand the mechanism.
- Battery Indicator Woes: If your laptop briefly shows the charging icon or has an indicator that the LED light turns on when connected to the charger. it probably is not the charging port.
If you've exhausted these checks and still find your laptop refusing to cooperate, the charging port is likely the prime suspect.
3. Dust Bunnies, the Silent Killers: Why Cleaning Matters
Think of your laptop’s charging port like a tiny, high-tech cave. Over time, it collects dust, crumbs, and who-knows-what-else. This build-up acts as an insulator, preventing a good electrical connection. It's like trying to shout through a pillow – the signal simply can't get through clearly. Cleaning is often the first (and sometimes only) step needed to restore the connection.
4. The Gentle Cleanse: Tools and Techniques for a Dust-Free Port
We’re not talking about a deep clean like you give your bathroom! We're focusing on a delicate cleanse. Here’s how to do it without causing further damage:
- The Air Blast: A can of compressed air is your best friend here. Direct the nozzle into the port and give it short, controlled bursts. Think of it like a digital exorcism, banishing the evil spirits of dust and debris. But be careful; don't tilt the can, or you will spray the liquid in the port.
- The Soft Touch: A toothpick or a plastic dental pick can gently dislodge stubborn debris. Never use metal tools, as they can short-circuit the port. Think of it as delicate surgery; you don't want to cause more harm than good.
- The Alcohol Scrub (Optional): If you're comfortable, you can dip a cotton swab in isopropyl alcohol (90% or higher) and gently clean the contacts. Let it dry completely before plugging in the charger. This is like using a digital antiseptic to ensure the port is clean.
5. The Wiggle Test: A Simple Trick That Sometimes Works Wonders
Okay, so the port is clean. But still no juice? Try the wiggle test. Plug in the charger and very gently wiggle the charging cable around. Does the charging icon flicker? Does the light turn on/off on your laptop? This can indicate a loose connection within the port itself. This might indicate a damaged charging port. However, wiggling the cable around could damage the charging port even more, so do the test carefully.
6. Beyond the Wiggle: If the Connection Is Loose
If the wiggle test provides your laptop with power, it's time to face the reality: the charging port might be damaged. Depending on your comfort level with electronics and the laptop's warranty status, you have a few options:
- Seek Professional Help: Take your laptop to a trusted repair shop or your laptop provider.
- Consider DIY Repair: If you're tech-savvy, you can purchase a replacement charging port.
- External Charging Solutions: Purchase a charging adapter, or consider an external battery bank to recharge your device.
7. The DIY Route: Replacing the Charging Port (For the Brave!)
This is not for the faint of heart, but if you’re comfortable with a screwdriver and a soldering iron, replacing the charging port yourself can be rewarding (and save you some serious cash). Research guides specific to your laptop model. There are a plethora of videos online.
It is a delicate operation. It involves disassembling your laptop, removing the old port, soldering in the new one, and reassembling everything properly. Don't attempt this if you're not comfortable or if your laptop is still under warranty. In the case of a non-functioning laptop charging port, it is best to seek professional help.
8. Preventing Future Dry Spells: Charging Port Care 101
So, you've revived your laptop. Don't fall back into bad habits! Here are some tips to keep your charging port healthy and happy for years to come:
- Gentle Plug-ins: Don't force the charging cable in or out.
- Dust Regularly: Use compressed air to clear out the port every few months.
- Avoid Extreme Temperatures: Don't charge your laptop in scorching heat or freezing cold.
- Invest In a Good Charger: Buy a charger from a reputable brand.
- Proper Storage: Keep your laptop and its charging cable stored in a safe place.
9. The Myth of the "Quick Fix" Apps: Why Software Can't Fix Hardware
You might have stumbled upon software claiming to "fix" a dead charging port. These are likely scams or, at best, useless. Software cannot physically repair hardware damage. Think of it like a car with a flat tire: no amount of clever coding will inflate that tire.
10. When Should You Throw in the Towel? The Point of No Return
Sometimes, the damage is simply beyond repair. If you've tried everything, including professional repairs, and your laptop continues to refuse to charge, it's time to consider the possibilities.
- Costly Repairs: If the repair cost exceeds the value of the laptop.
- Motherboard Problems: If the charging port issue is linked to motherboard damage.
- Beyond Budget: Considering the price of a new laptop versus continued repairs.
11. Power Banks and External Chargers: A Temporary (or Permanent) Solution
If you're in a pinch, external charging solutions like power banks and universal chargers can keep your laptop running. They're like giving your laptop an emergency transfusion.
12. The Price of Neglect: Ignoring Early Warning Signs
Ignoring symptoms, such as slow charging or frequently disconnected charging cables, can worsen the problem.
13. Laptop Charging Port vs. Other Ports: A Tale of Two Connections
Distinguish the charging port from other ports, such as USB-C, which might offer charging capabilities as a secondary function.
14. The Future of Charging: Wireless and USB-C Innovations
Stay current with technologies, such as USB-C and wireless charging, which may become the standard for laptop charging.
15. Final Thoughts: You Are Not Alone
Remember, we've all been there. A dead charging port feels like a tech tragedy, but it's often a fixable one. By following these steps, you might just save your laptop from an early grave. The most important thing is not to panic, but to methodically diagnose the issue. Hopefully, with a little care and a few simple tools, you will have your laptop back up and running in no time.
Closing Section
So go forth, my fellow tech adventurers! Armed with knowledge and a dash of digital courage, you are now ready to tackle the dreaded dead charging port. Remember, it is always wise to follow the steps provided, and don't be afraid to seek professional help. With a little bit of tech magic, you may be able to breathe new life into your digital companion, saving time, money, and, most importantly, your sanity.
FAQs
1. What if cleaning the charging port doesn't work?
If cleaning doesn't do the trick, the charging port might be physically damaged. Consider testing the port for damage via a specialist.
**2. Can I use
Laptop Keys Dying? SHOCKING Fix You NEED to See!How to FIX Any Laptop Not Charging while plugged in

By GMODISM How to FIX Any Laptop Not Charging while plugged in by GMODISM
What To Do If Your Laptop Is Plugged In But Not Charging
By PCMag What To Do If Your Laptop Is Plugged In But Not Charging by PCMag
How to fix USB ports if not working USB ports not working Laptop ports not working USB problem
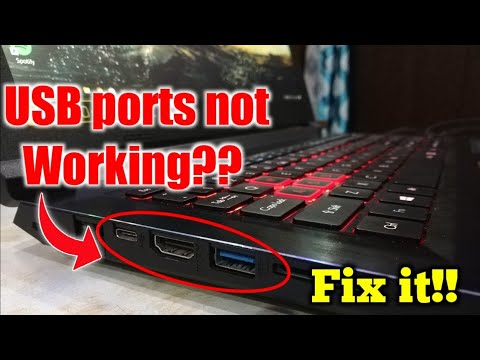
By Techs and Facts How to fix USB ports if not working USB ports not working Laptop ports not working USB problem by Techs and Facts

Title: Plugged In, Laptop Battery Not Charging Windows 1011 Solution 2 Methods
Channel: Microsoft Sarker
Plugged In, Laptop Battery Not Charging Windows 1011 Solution 2 Methods by Microsoft Sarker
Laptop Working
Here is the title: The Ultimate Guide to Restoring Antique Furniture: Techniques, Tools, and Timeless Beauty
The Ultimate Guide to Restoring Antique Furniture: Techniques, Tools, and Timeless Beauty
The stories held within antique furniture whisper of bygone eras, speaking to craftsmanship, family history, and the enduring allure of beauty. To restore such pieces is not merely a task; it's an act of preservation, a reverent conversation across time. This guide serves as a comprehensive companion, providing the technical knowledge, practical advice, and passionate insights necessary to breathe new life into your treasured antique furniture, transforming them from forgotten relics into cherished heirlooms.
Understanding Your Antique: The Foundation of Successful Restoration
Before lifting a single tool, a thorough understanding of your antique is paramount. This initial stage is crucial, acting as the bedrock upon which your entire restoration project will be built. Observe meticulously, document thoroughly, and learn everything you can about the piece’s history, construction, and the materials employed.
- Identifying the Wood: The wood species used offers invaluable clues about the piece's origin and age. Oak, mahogany, walnut, and cherry were popular choices across various historical periods, each possessing unique characteristics impacting restoration techniques. Examine the grain, color, and density. Consult guides on wood identification, comparing these features to known wood species used during the presumed era of the furniture's creation. Often, the wood's grain pattern reveals hidden details about the piece's past. Is it quarter-sawn? This is a significant detail. Its presence often indicates the piece was made at a specific time.
- Examining the Construction: The methods employed to join the wood—mortise-and-tenon, dovetails, dowels, or screws—provide clues about the age and quality of the furniture. Dovetail joints, particularly those finely crafted, often signify high-quality pieces. Mortise-and-tenon joints, used extensively in chairs and tables, reveal structural integrity. Carefully assess the joinery’s integrity; are there gaps, loose connections, or signs of previous repairs?
- Deciphering the Finish: The original finish is a key aesthetic element. It protects the wood, imparts color, and contributes significantly to its overall look. Common finishes include shellac, varnish, lacquer, and oil-based paints. Determining the original finish is critical to ensure the appropriate restoration approach. Examine the surface for cracks, flaking, or cloudiness. A shellac finish, for example, may exhibit “crazing,” a network of fine cracks.
- Researching the Piece's History and Identifying Its Style: Whenever possible, determine the piece's provenance. Knowing its possible origin, and the period during which it was crafted, will inform appropriate restoration decisions. Research the maker, if known. Examine catalogs, auction records, and style guides associated with specific historical periods (e.g., Victorian, Art Deco, Federal). This knowledge helps to understand the piece’s value, originality, and the period-appropriate techniques utilized during its creation.
- Taking Detailed Photographs and Notes: Before commencing any restoration work, document the piece meticulously. Take photographs from every angle, paying close attention to the condition of the wood, finish, hardware, and any existing damage. Create detailed notes describing each aspect of the piece and documenting its current state. These visual and written records will serve as invaluable references throughout the process and will guide decisions along the path to restoration.
Essential Tools of the Antique Furniture Restorer
A well-equipped workshop is fundamental. The right tools, used correctly, will ensure that your restoration efforts are successful and that the original character and value of the furniture are preserved.
- Stripping Tools:
- Heat Gun: The heat gun is essential for softening old finishes, enabling their removal with minimal damage to the underlying wood. Direct the heat over the surface, keeping the gun moving to avoid scorching.
- Chemical Strippers: For stubborn finishes. Opt for low-VOC (Volatile Organic Compounds) strippers to minimize health risks. Always work in a well-ventilated area and wear appropriate personal protective equipment (PPE) such as gloves, eye protection, and a respirator.
- Putty Knives and Scrapers: For removing softened finishes. Use various sizes and shapes to suit the contours of the furniture. Be gentle to avoid scratching the wood.
- Woodworking Tools:
- Sanding Blocks and Sandpaper: Sanding is a critical step. Use a variety of grits, starting with coarse and progressing to fine. Always sand with the grain.
- Clamps: Clamps are used to hold parts together during glue-ups and repairs. Various forms, including bar clamps, pipe clamps, and spring clamps, are invaluable.
- Chisels: Essential for removing old glue, shaping wood, and fine-tuning joints.
- Mallet: Used with chisels to control the force applied.
- Hand Planes: Smoothing surfaces and shaping edges and profiles.
- Drill and Drill Bits: For drilling holes of various sizes, including pilot holes for screws.
- Repair and Refinishing Tools:
- Wood Fillers and Putty: Used to fill in cracks, holes, and imperfections. Select fillers that match the wood species and consider the finish intended.
- Glues: Wood glues, such as yellow glue (PVA) and hide glue, are used for bonding wood parts. Choose hide glue for historically accurate and reversible repairs.
- Brushes and Rags: Essential for applying finishes. Use high-quality brushes and lint-free rags.
- Sandpaper, steel wool, and polishing cloths: For surface preparation and finishing.
- Safety Equipment: Always prioritize safety!
- Gloves, Safety Glasses, and a Respirator: Protect yourself from the harmful fumes and dust.
- Workspace Ventilation: Ensure proper ventilation to remove harmful fumes.
- Fire Extinguisher: Have a fire extinguisher within reach.
Restoration Techniques: A Step-by-Step Guide
Each piece presents unique challenges, but these general steps provide a framework for successful restoration.
- Surface Preparation:
- Remove Hardware: Carefully remove all hardware (knobs, hinges, pulls). Document the hardware's position and consider its preservation or replication.
- Cleaning: Gently clean the piece. Avoid harsh cleaners. Use a mild soap and water solution or a specialized furniture cleaner designed for antiques.
- Stripping the Finish: Employ the appropriate method (heat gun or chemical stripper). Work in sections, following the manufacturer's instructions. Be patient.
- Sanding: Sand the wood to remove the old finish, prepare the surface for a new finish, and repair the wood. Follow the grain, starting with a coarser grit and refining to a finer grit.
- Repairing the Wood:
- Filling Cracks and Holes: Use wood filler or epoxy to fill in imperfections. Allow the filler to dry completely before sanding it smooth.
- Re-gluing Joints: Disassemble loose joints, clean out the old glue, apply new glue, and clamp the joint securely until the glue dries. Consider using hide glue for historically accurate restorations.
- Replacing Missing Parts: If necessary, fabricate or source replacement parts. Matching the wood species, style, and construction methods adds authenticity.
- Applying the New Finish:
- Choosing the Right Finish: Select a finish that is appropriate the piece's era and style. Shellac, varnish, lacquer and oil-based finishes were commonly used in the past.
- Applying the Finish: Follow the manufacturer’s instructions. Apply thin, even coats, allowing each coat to dry thoroughly. Sand lightly between coats to ensure smoothness.
- Rubbing Out the Finish: Use fine-grit sandpaper, steel wool, and polishing compounds to achieve a smooth, lustrous finish.
Specialized Techniques for Antique Restoration
Certain issues demand specialized knowledge and techniques.
- Veneer Repair: Veneer, a thin layer of decorative wood applied to a substrate, can be fragile and prone to damage. Carefully assess the damage, and employ techniques such as regluing loose veneer, filling voids, and matching grain patterns, as well as applying appropriate finishing techniques.
- Marquetry Restoration: Marquetry is the art of creating decorative patterns with pieces of wood. Repair is complicated and detailed. Replicating the original design is essential, by replicating the original’s artistry and preserving its character.
- Upholstery Restoration: The process of restoring upholstered furniture requires care and attention to detail. The frame must be structurally sound, the springs must be secure, and the padding must be appropriate for the furniture's era. Choose fabrics that are suitable for the style of the piece.
- Inlay Work: Intricate inlay work requires the careful replacement of missing pieces. This often involves sourcing matching materials, cutting them to shape, and gluing them into the piece.
The Timeless Beauty of Hand-Applied Finishes
The final finish is extremely important. It is the culmination of all your work. A well-executed finish protects the wood and enhances its natural beauty.
- French Polishing: A traditional finish that creates a high-gloss, shimmering surface. It involves applying multiple thin coats of shellac, rubbing each coat to achieve its shine. It is a time-consuming process, but its results are matchless.
