how to get your webcam to work on a laptop

Title: Fix Camera Not Working Windows 10 Windows Webcam Not Working Laptop camera not working
Channel: EasyTechGeek
Fix Camera Not Working Windows 10 Windows Webcam Not Working Laptop camera not working by EasyTechGeek
how to get your camera to work on laptop, how to get your camera to work on lenovo laptop, how to get your camera to work on dell laptop, how to get my camera to work on hp laptop, how to get my camera to work on lenovo laptop, how to get my camera to work on dell laptop, how to get my camera to work on my asus laptop, how do i get my webcam to work on my laptop, how do you get your camera to work on your laptop
Laptop Webcam Nightmare? FIX IT NOW! (Easy Steps)
Here's the rewritten article:
Laptop Webcam Woes? Conquer the Digital Blurry!
Let's face it; your laptop's webcam is often the gatekeeper to your digital world. It's how you connect, collaborate, and, let’s be honest, show off your latest online purchase. But what happens when that gatekeeper stutters? Suddenly, you’re battling a blurry image, a distorted view, and a general feeling of technological inadequacy. It's irritating, isn't it? Don't fret. Today, we'll embark on a journey to banish those webcam blues.
The Pixelated Predicament: Understanding the Problem
Before we dive into fixes, let's briefly understand the usual suspects. A blurry webcam image is generally the result of a few key issues. It might be a simple dust-up on the lens. Or maybe the lighting isn't cooperating. It's also possible the webcam itself isn't performing its best. In some cases, the issue stems from outdated drivers or even the software settings themselves. So, where do we begin to untangle this digital knot?
Dust Bunnies and Lens Smudges: The First Line of Defense
First things first: Check the lens. It's the most common culprit. Often, a simple smudge, fingerprint, or speck of dust can dramatically impact image quality. Therefore, gently wipe the webcam lens with a microfiber cloth. This is the go-to solution for immediate clarity. Consequently, avoid using harsh chemicals or paper towels, as these can damage the lens. In fact, a quick, careful cleaning often solves the issue immediately.
Lighting: The Silent Movie Star
Next, address the lighting situation. A poorly lit environment can make your webcam look terrible, irrespective of the device. For instance, ensure you're facing a light source. Natural light is ideal. Position your laptop so that light illuminates your face. Conversely, avoid having the light source directly behind you. This will create a silhouette, and nobody wants that. Subsequently, experiment with different lighting angles. Also, consider investing in a small ring light. These can drastically improve video quality.
Driver Dilemmas: The Software Sidekick
Now, let's tackle the software side. Outdated drivers are often the source of performance hiccups. Thus, it's crucial to keep your webcam drivers updated. So, here's how to do it: Go to your device manager (search for it in your Windows search bar). Expand the "Cameras" or "Imaging devices" section (the wording may vary). Right-click on your webcam. Select "Update driver." Follow the on-screen instructions. Afterwards, restart your laptop, and test your webcam again. Furthermore, if updating doesn't work, consider uninstalling and reinstalling the drivers. That can sometimes resolve the problem.
Software Settings: Tweaking for Triumph
Your webcam software settings can also make a difference. Access the settings of your chosen video conferencing app or webcam software. Then, look for options to adjust brightness, contrast, and sharpness. Moreover, you may want to enable "automatic adjustment" features. This feature helps optimize the image based on your current lighting conditions. Play around with these settings until you find a balance that suits your needs. Ultimately, this is a matter of personal preference.
The Grand Finale: Testing and Troubleshooting
So, you’ve cleaned the lens, adjusted your lighting, and fiddled with drivers and settings. It's time to test your webcam. Therefore, open your video conferencing app of choice (Zoom, Skype, Google Meet, etc.). Make a test call. Regardless, you can also use the built-in camera app on your laptop to preview the image. Is it clearer now? Great! However, if the problem persists, you may need to troubleshoot further.
Advanced Troubleshooting: Delving Deeper
If the above solutions don't work, consider these advanced steps. First, ensure your webcam isn’t being used by another application simultaneously. Close any other apps using your webcam. Additionally, check for any physical obstructions. Consequently, make sure nothing is blocking the lens. Furthermore, consider the possibility of a hardware malfunction. If none of the above works, your webcam might require replacement. This is a less common scenario. Nevertheless, it's a possibility to consider.
Embracing the Clarity: Final Thoughts
Webcam issues are frustrating, but they're usually solvable. Considering all options, with a bit of patience and these simple steps, you can reclaim your digital image. Don't let a blurry webcam ruin your online interactions. In conclusion, by following these easy fixes, you’ll be back to looking your best in no time.
Facebook Laptop Meltdown? Fix It NOW!Laptop Webcam Nightmare? FIX IT NOW! (Easy Steps)
Let's be honest, we've all been there. You're prepping for that crucial video call – maybe it's a job interview, a family chat, or that all-important online game night – and bam! Your laptop webcam decides to throw a virtual tantrum. The image is blurry, the sound is choppy, or worse, it's just a black screen staring back at you. It's a laptop webcam nightmare, and frankly, it's infuriating! But don't despair; we're going to banish those webcam woes and get you looking and sounding your best in no time. We'll dive into the problem, dissect it, and then, together, we'll fix it.
1. Recognizing the Webcam Rebellion: Symptoms of Digital Dismay
Before we can fix anything, we need to pinpoint what's actually going wrong. The symptoms of a webcam gone rogue can be as varied as the faces on your screen. Is it a constant battle with blurriness, like trying to see through a foggy window? Perhaps the image is distorted, stretching you like a funhouse mirror, making you look like you've aged overnight. And the sound? Is it robotic, as if your voice has been processed by a particularly grumpy alien? Or maybe, the most frustrating of all, it's just a blank, black screen. This is the ultimate webcam insult. Identifying the specific problem is our first vital step.
2. The Usual Suspects: Common Webcam Culprits
Often, the issue isn't some complex, hidden glitch. More often than not, the cause is something simple. Think of it like this: is your car sputtering because it needs a full engine overhaul, or is it just out of gas? Let's investigate the usual suspects:
- Driver Drama: Outdated, corrupted, or missing webcam drivers are a common culprit. They're like the operating system of your webcam, and if they're not working correctly, your camera won’t either.
- App Interference: Are other apps using (or trying to use) your webcam at the same time? Think of it as a crowded stage, with too many performers vying for the spotlight.
- Privacy Pandemonium: Have you accidentally disabled your webcam through your laptop’s settings? This is a sneaky one, like a hidden switch.
- Lighting Lament: Poor lighting can make even the best webcam look awful. Think of it as directing a play in a dark theatre; nobody can see a thing!
- Hardware Havoc: While less common, there’s always a chance of a hardware malfunction.
3. Troubleshooting Time: Diagnosing the Digital Dilemma
Now we play detective. Let’s walk through some quick diagnostic steps to narrow down the problem:
- Restart the Machine: This might seem basic, but it’s often the simplest solution. Just like rebooting yourself after a bad day.
- Test with Different Apps: Does the problem persist whether you're using Zoom, Skype, or your laptop's built-in camera app? If the problem is consistent across the board, it likely points towards a system-wide issue rather than an app-specific one.
- Check the Camera Settings: Make sure your webcam is selected as the input device in your video conferencing tools. It's like choosing your favourite camera.
- Lighting Matters: Is it a well-lit room? Adjust those lights!
4. Driver Detective Work: Updating and Reinstalling Drivers
Drivers are to the webcam as the conductor is to the orchestra. They bring everything together. Here's how to ensure yours are up to par:
- Device Manager Dive: Search for "Device Manager" in your Windows search bar.
- Camera Quest: Expand the "Cameras" or "Imaging devices" section. Your webcam should be listed here.
- Driver Update: Right-click on your webcam and select "Update driver." Choose "Search automatically for drivers." Windows will attempt to find the latest version.
- Reinstallation Route: If updating doesn't work, right-click on your webcam again and select "Uninstall device." Then, restart your laptop. Windows should automatically reinstall the drivers when you boot back up.
5. App-Induced Chaos: Managing Applications Sharing Your Webcam
Many apps want a piece of your webcam pie, but this can lead to conflicts. It's like too many cooks in the kitchen. Close any applications that might be using your webcam, especially if they’re running in the background. This often clears up any conflict.
6. Privacy Panic: Re-Enabling the Webcam (If It's Been Disabled)
Laptops often have privacy settings that can disable your webcam. Find your privacy settings. This can vary depending on your operating system. Often, it's located in the "Settings" app. Ensure the webcam is enabled in these settings.
7. Shedding Some Light: Perfecting Your Webcam Lighting
Lighting is everything. Think of it like a good cinematographer. Ensure you're facing a well-lit area. Natural light from a window in front of you is often ideal. Avoid backlighting, as it can make you look like a silhouette! Supplement your lighting (if necessary) with a ring light or a desk lamp pointed at your face.
8. The Hardware Hurdle: What to Do If the Webcam Is Actually Broken
If you've exhausted all software solutions and the problem persists, it might be a hardware issue. This is a bit like checking under the hood of your car and finding a major problem.
- External Webcam: Consider using an external webcam. They're often higher quality than built-in ones and are a cost-effective solution.
- Laptop Repair: If you want to keep using the built-in webcam, you may need to take your laptop to a repair shop.
- Replacement: If your laptop is older, replacement with a new one might be a better option.
9. Audio Adventures: Ensuring Your Microphone Works Too!
While we’re at it, let's check your microphone. A great video call is defined by both audio and visual quality. In your video conferencing app settings, make sure your microphone is selected and working. Run a test if you can. Sound good? Great! If not, you know what to do.
10. Internet Interference: The Importance of a Stable Connection
A choppy internet connection can ruin a video call just as effectively as a bad webcam. Check your net speed with an online speed test. Consider switching to a wired connection, if possible.
11. Software Struggles: Updating or Reinstalling Video Conferencing Apps
Sometimes, the issue isn't your webcam, but rather the video conferencing software itself. Make sure your app is up-to-date. If problems persist, try reinstalling the app.
12. Power Saving Problems: Adjusting for Optimal Performance
Some laptops have power-saving features which can dim the webcam to conserve battery. Check your power settings and disable these if you prioritize webcam performance.
13. Cleaning the Lens: Removing Dust and Debris
It sounds silly, but a dirty lens is an easy fix. Just like cleaning your glasses. Gently wipe the webcam lens with a soft cloth.
14. Seeking Expert Aid: When to Call in the Professionals
If you've tried everything and still no luck, it might be time to seek professional help. A local tech repair shop can diagnose and often repair hardware issues. Don’t be afraid to ask for help!
15. The Final Flourish: Preventive Measures for a Smooth Webcam Experience
Once you’ve fixed your webcam, consider these tips for keeping it in tip-top shape:
- Regular Driver Updates: Keep those drivers current!
- App Vigilance: Be mindful of which apps are using your webcam.
- Cleanliness: Wipe your lens regularly.
- Lighting Awareness: Always be ready to adjust your lighting.
Closing Thoughts: Back to the Screen!
So there you have it! We've navigated the treacherous waters of laptop webcam woes and, hopefully, emerged triumphant. Your webcam should now be working smoothly, ready to deliver clear video and audio to your audience. Remember, most webcam problems are easily fixable, so don't let them ruin your day. Armed with these simple steps, you're now equipped to conquer any future webcam challenge. Go forth and video call with confidence!
Principal Keywords: Webcam, Fix, Laptop, Problem, Driver, Troubleshooting
SEO Headline: Fix Your Laptop Webcam: Simple Steps to a Clear Image!
Pathway: How to Fix Webcam
Meta Summary: Is your laptop webcam blurry or not working? Learn to fix webcam problems with these easy steps. Download the right Driver and get a clear image today.
Image Alt Text: A person smiling confidently during a video call.
Laptop Clock Stopped? This SHOCKING Fix Will Blow Your Mind!How to turn on webcam and camera in Windows 10 Simple
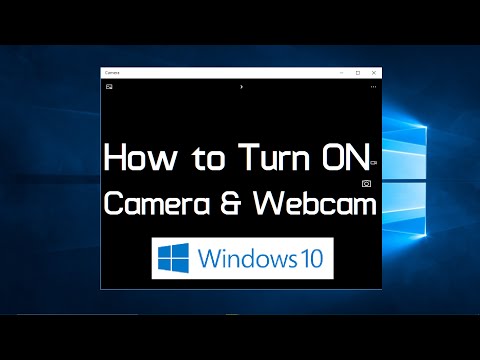
By Feb28 How to turn on webcam and camera in Windows 10 Simple by Feb28
Use your camera as a webcam

By Rillo Use your camera as a webcam by Rillo
FIXED - Camera Not Working in Windows 11 Laptop or PC

By Techie Leopard FIXED - Camera Not Working in Windows 11 Laptop or PC by Techie Leopard

Title: Fix Camera Not Working on Windows 10 & 11 LaptopsPCs
Channel: Sandeep Singh
Fix Camera Not Working on Windows 10 & 11 LaptopsPCs by Sandeep Singh
Laptop Working
Laptop Webcam Nightmare? FIX IT NOW! (Easy Steps)
The grainy video. The awkward angles. The persistent feeling that you’re broadcasting your personal life to the world, unfiltered. If you're nodding along, you're likely intimately familiar with the laptop webcam nightmare. But fear not, fellow digital denizens! We are here to offer a lifeline. This isn’t just a quick fix; it’s a comprehensive guide to banishing webcam woes and stepping into a world of crisp, clear video calls and confident online presentations. Let's turn that pixelated frustration into a polished, professional experience.
Understanding the Culprit: Why Is Your Webcam so Bad?
Before we dive into solutions, let's pinpoint the usual suspects. The laptop webcam, often a tiny, overlooked component, is a marvel of miniaturization. However, its limitations are real. Cost constraints mean the sensor and lens are often basic. Furthermore, the built-in setup is frequently optimized for cost rather than quality. Under ideal lighting conditions, you might get by, but even a subtle shift in your environment can reveal its deficiencies.
Beyond the hardware, software and driver issues frequently crop up. Outdated drivers, conflicting programs and incorrect settings can all contribute to the blurry, distorted image that plagues so many users. This is before we even consider the impact of your internet connection, which can throttle video quality if bandwidth is limited.
Step 1: The Great Driver Check & Software Tune-Up
The foundation of any good tech solution is a healthy software ecosystem. Let's ensure your webcam’s drivers and software are up to the challenge.
Driver Updates: The First Line of Defense. Navigate to your laptop's device manager (search for it in your Windows search bar or access through the control panel). Locate your webcam entry (usually under ‘Imaging devices’ or ‘Cameras’). Right-click on your webcam and select ‘Update driver.’ Choose 'Search automatically for drivers'. Windows will attempt to locate and install the most recent drivers.
Manufacturer-Specific Driver Downloads. Windows' generic drivers are a good starting point, but manufacturer-specific drivers often offer refined performance and features. Visit your laptop manufacturer's website (e.g., Dell, HP, Lenovo) and download the latest webcam drivers for your specific model.
Software Conflicts: Ensure no other applications are actively using your webcam simultaneously. Close unnecessary programs, especially those that might be accessing the camera in the background (e.g., video editing software, virtual camera apps, or even certain social media platforms).
Webcam Software Settings: Many webcams come with their software. This software may allow for settings adjustment. Launch the webcam software (if available) and explore the settings. Look for options related to resolution, brightness, contrast, white balance, and noise reduction. Experiment with these settings to find the optimal configuration for your environment.
Step 2: Lighting Fundamentals: Your Secret Weapon
Lighting is the unsung hero of a good webcam experience. Poor lighting is the number one reason your webcam looks terrible. Forget about studio-quality setups; you can dramatically improve your video quality with a bit of strategic illumination.
The "Window" Rule. The most straightforward approach is to position yourself facing a window during daylight hours. Natural light is soft, flattering, and free. Make sure the window is in front of you, not behind; otherwise, you'll be backlit, and your face will appear as a silhouette.
DIY Lighting Hack: The Ring Light Substitute. If natural light isn't always available, or if you need more control, consider a DIY ring light solution. A simple desk lamp or two, positioned on either side of your monitor, can dramatically improve your image quality. Diffuse the light with a piece of white paper or a lightweight fabric (e.g., a bedsheet).
Adjusting Brightness and Contrast. Many webcam software applications or built-in settings allow you to adjust the brightness and contrast of your video feed. If your image is washed out (too bright), decrease the brightness setting. If your image is too dark, increase the brightness. For fine-tuning, adjust contrast to find the best balance between shadows and highlights.
Avoid Backlighting Catastrophes. Avoid placing yourself in front of a bright light source (windows, lamps) without any light illuminating your face. Backlighting will create a silhouette, making it difficult for viewers to see you.
Step 3: Position, Angle, and Presentation: Mastering the Webcam Shot
Beyond the technical aspects, your physical setup significantly impacts your webcam experience, helping you look your best and present yourself professionally.
Eye-Level is Key. The optimal webcam position is at or slightly above eye level. This prevents the unflattering "looking-up-your-nose" perspective. Use a laptop stand, books, or a monitor riser to achieve the correct height.
Framing Your Shot. Frame yourself from the chest up, leaving some headroom above your head. This allows viewers to see your face and upper body without feeling cramped or cut off.
Clean Up Your Background. A cluttered background is distracting. Minimize distractions by aiming for a clean, uncluttered background. The simplest solution is a blank wall, but a well-organized bookshelf or tasteful artwork can work wonders.
Camera Angle Matters. Try different camera angles to find the most flattering perspective. Experiment with tilting the webcam slightly upwards or downwards, depending on your facial features.
Good Posture. Sit up straight, maintain good posture, and avoid slouching. This conveys confidence and professionalism.
The Microphone Matters. Most laptops embed microphones, but their quality can vary. Always speak clearly and avoid loud noises. Consider investing in a dedicated microphone for improved audio – a separate microphone will dramatically improve your audio.
Step 4: Bandwidth Boost: Streamlining Your Video Connection
The best webcam in the world won't help if your internet connection is struggling. A stable, reliable connection ensures smooth video calls and presentations.
Test Your Internet Speed. Use websites like Speedtest.net to measure your upload and download speeds. Video calls require a decent upload speed; your service provider should be able to provide the minimum upload speed required for video conferencing.
Close Unnecessary Background Apps. Many applications use your internet connection in the background, consuming bandwidth. Close any programs that might be hogging bandwidth (e.g., large file downloads, online games, music streaming).
Hardwire Your Connection. Whenever possible, connect your laptop to your router using an Ethernet cable. This provides a more stable and reliable connection than Wi-Fi.
Optimize Your Wi-Fi. If you must use Wi-Fi, ensure your laptop is close to the router. If you're experiencing signal issues, consider moving closer to the router or repositioning it. Make sure that other family members or colleagues are not using the internet at the same time, especially for bandwidth-intensive activities.
Step 5: Advanced Techniques & Troubleshooting
For those seeking further enhancement, or who've hit a snag, here are some advanced solutions and troubleshooting tips.
Virtual Backgrounds: A Double-Edged Sword. Virtual backgrounds can be a great way to hide a messy room. Note that they can be affected by poor lighting or processor availability. Experiment with this feature, but do not use virtual backgrounds as a substitute for a well-lit environment.
External Webcam Upgrade. The best solution is to upgrade the webcam. For serious video users, consider investing in an external webcam. External webcams offer vastly superior image quality. These external devices often come with their software and offer more advanced features.
Troubleshooting Common Problems. If you encounter a specific issue, like a black screen, a distorted image, or audio problems, search online for solutions specific to your webcam model. The manufacturer's website or online forums are good resources.
Restart Your Laptop. The age-old solution indeed works. Restarting your laptop can often resolve temporary software glitches that might be affecting your webcam.
Check for Hardware Issues. In rare cases, the webcam itself may have a hardware defect. If you've tried all other troubleshooting steps and your webcam still doesn't work, contact your laptop manufacturer for assistance.
Conclusion: Embrace the Webcam Renaissance
The days of the pixelated webcam nightmare are definitively over. By following these simple steps, from optimizing your setup to mastering lighting techniques, you can transform your webcam experience. Now, you're equipped to project confidence, clarity, and professionalism in your online interactions. Go forth, make those video calls, and create content that shines!
