hp pavilion g7 laptop fan not working

Title: HP PAVILION G6 FAN NOT WORKING
Channel: Borvi Tech
HP PAVILION G6 FAN NOT WORKING by Borvi Tech
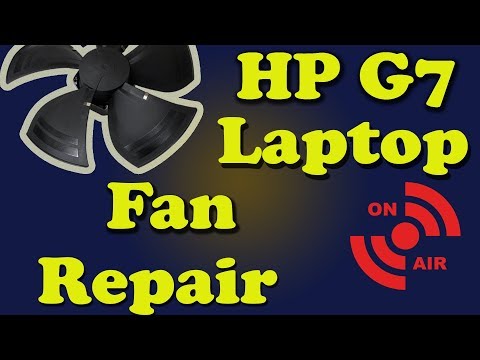
HP Pavilion G7 Fan Failure? FIX IT NOW! (Easy Steps)
HP Pavilion G7 Fan Blues? Conquer the Silence and Breathe Easy Again!
Have you heard that unsettling whirring sound lately? Maybe it's a grinding, a complete absence of noise, or perhaps a desperate, high-pitched scream emanating from your trusted HP Pavilion G7? If so, chances are your laptop's fan is staging a rebellion. Don't fret! Before you envision a laptop-shaped paperweight, take a moment. Because, as a seasoned tech enthusiast, I can confirm that fan failure, while alarming, isn’t necessarily a death sentence.
Recognizing the Symptoms: Is Your Fan Truly Failing?
First, let's diagnose the situation. Does your laptop feel dramatically warmer than usual? This is often the first sign. Then, consider what you should be hearing. A healthy fan hums gently, keeping things cool. Conversely, no sound at all is usually indicative of a problem. A completely silent system during intensive tasks like photo-editing is a significant red flag. Any unusual noises, like clicks, rattles, or the aforementioned screaming, also point to trouble. Therefore, listen carefully. In addition, consider performance. Is your laptop running slower, even during basic tasks? Overheating can cause throttling, making your system crawl. Ultimately, these are usually the signs – the clues.
Tools of the Trade: What You'll Need Before You Begin
Before we proceed, gather your arsenal. You'll need a few essential items. First, you'll need a Phillips head screwdriver, ideally with a variety of sizes. This is important for opening the laptop and accessing the fan. Second, a can of compressed air is your friend. It's indispensable for cleaning dust and debris. Subsequently, have a clean, well-lit workspace ready. Furthermore, a small, non-magnetic brush is useful for loosening stubborn particles. Finally, be sure to have a good book or a pleasant background soundtrack ready for when you are performing the task.
Step-by-Step: Breathing New Life into Your Fan
Now, let's get down to business! First, ensure your HP Pavilion G7 is completely shut down and unplugged. Remove the battery for added safety as well. Next, carefully flip the laptop over. Locate the screws securing the bottom panel. Use your screwdriver and unscrew the needed panels. Some laptops have a single access panel. Others will have multiple. Consult your laptop's manual if you are unsure.
Carefully remove the panel. You’ll now see the internal components. Locate the fan. It’s often near the heat sink and processor. Gently disconnect any cables attached to the fan. These cables are often secured with small connectors only. Be exceptionally cautious when removing the connectors.
Now, grab your can of compressed air. Direct the nozzle at the fan blades and give it a few short bursts. Rotate the fan gently with your finger as you do so. This will help dislodge any built-up dust or debris. If the fan is particularly dirty, use your small brush to gently loosen stubborn particles. After cleaning, reassemble everything.
Reattach the fan’s power connector. Replace the bottom panel. Screw it back into place. Reinsert the battery, if you removed it. Plug your laptop back in and power it on. Listen carefully. Hopefully, the fan is now humming contentedly.
Troubleshooting: What If the Fan Still Fails?
If, after this valiant effort, the fan remains silent, don’t despair. However, the fan itself might be the issue. Therefore, it is time to consider alternative troubleshooting avenues. Firstly, consider replacing the fan. This is a more involved repair. You'll need to source a replacement fan specifically designed for your HP Pavilion G7. You can often find these online. Secondly, search for detailed disassembly videos. These videos can provide visual guidance.
Thirdly, sometimes, a faulty motherboard can cause fan issues. This is a more complex problem. You might need professional assistance from a qualified technician. Consequently, this isn’t a fix-it-yourself scenario. However, before you consider expensive repairs, try a BIOS update. Outdated BIOS software can sometimes interfere with fan control.
Prevention is Key: Keeping Your Fan Happy Long-Term
Prevention is always better than cure. So, adopt some simple habits to prolong your fan’s lifespan. Firstly, regularly clean your laptop. Dust is your fan’s enemy. Therefore, aim to clean your laptop every few months. Use compressed air to clear out dust. Secondly, avoid using your laptop on soft surfaces. Sofas, beds, and carpets can restrict airflow and cause overheating. Finally, consider a laptop cooling pad. These external devices provide additional cooling.
Final Thoughts: Don’t Let Fan Failure Defeat You!
Dealing with a failing fan can be frustrating. However, with patience and these straightforward steps, you can often revive your HP Pavilion G7. Therefore, remember to proceed cautiously. If you are unsure, seek professional help. Most importantly, take pride in your ability to troubleshoot. You’ve conquered a common tech issue. After all, you’ve shown your laptop who’s boss! Now, enjoy the peace of mind that comes with a cool, quiet, and functional machine.
Unleash Your Productivity: The Top Laptops for Effortless WorkHP Pavilion G7 Fan Failure? FIX IT NOW! (Easy Steps)
Hey there, fellow tech enthusiasts! Ever felt that sinking feeling when your laptop starts sounding like a jet engine preparing for takeoff? Yeah, we've all been there. And if you're rocking an HP Pavilion g7, you've probably experienced the dreaded HP Pavilion G7 fan failure. It's a common issue, but thankfully, it's usually fixable without needing to raid the piggy bank for a new machine. We’re going to dive deep, hands-on, and get that fan purring (or, you know, not screaming) again. Let's get started!
1. The Annoying Truth: Why Your HP Pavilion G7 Fan Is Going Haywire
Before we get our hands dirty, let’s talk about why this happens. Imagine your laptop's insides are like a tiny, bustling city. Processors, graphics cards – they're all working hard, generating heat. The fan is the city's air conditioning system, working tirelessly to keep everything cool and prevent a meltdown. Over time, dust, debris, and even the natural wear and tear of components can cause the fan to malfunction. Think of it like a hamster on its wheel – eventually, it's going to get stuck, or the wheel itself will need a tune-up. In the case of the g7, it could be a clogged vent, a faulty fan motor, or even a simple software glitch.
2. Recognizing the Symptoms: Is It Actually a Fan Problem?
Before you start dismantling anything, let's make sure the culprit is, in fact, the fan. Several symptoms could indicate a fan failure. Listen closely for these telltale signs:
- Excessive Noise: This is the most obvious. Does your laptop sound like a vacuum cleaner or a particularly unhappy lawnmower? That’s usually a dead giveaway.
- Overheating: Place your hand near the vents (carefully!). If it's noticeably hot, the fan probably isn't doing its job.
- Sudden Shutdowns: Your laptop could be shutting down unexpectedly to protect itself from overheating. This is a serious sign.
- Performance Issues: Lagging or sluggish performance, especially during graphically intensive tasks (like gaming or video editing), can also be a consequence of overheating.
If you're experiencing a combination of these symptoms, it's highly likely your HP Pavilion g7 fan needs some attention.
3. Gathering Your Arsenal: What You'll Need to Get Started
Alright, soldier, time to gear up! Don't worry, we're not performing brain surgery here. You'll need these essentials:
- A Phillips head screwdriver: Preferably a small, specialized set, as laptop screws can be tiny.
- Compressed air: This is your best friend for blasting away dust.
- A soft brush: An old paintbrush or a dedicated electronics brush works wonders.
- Thermal paste (optional): If you're replacing the fan or disassembling the heatsink, you might need this.
- A clean workspace: Spread out a towel or sheet to protect your laptop and keep everything organized.
- Patience: This isn't a race!
4. Power Down and Prep: The Ultimate Shutdown Checklist
Safety first, people! Before we even think about opening up your laptop, we need to make it completely safe. Here's your checklist:
- Shut Down: Fully shut down your HP Pavilion g7. Don't just put it to sleep or hibernate.
- Unplug: Disconnect the power adapter.
- Remove the Battery: This is crucial. Locate the battery release switch (usually on the bottom) and remove the battery.
- Static Protection: If you have an anti-static wrist strap, use it. If not, ground yourself by touching a metal object before you start working. This will help prevent damage to sensitive components.
5. Cracking the Case: Gaining Access to the Fan Component
This is where the fun begins! Carefully, with patience, you have to start dismantling your device. It may feel overwhelming to start, but with the right approach, it shouldn't be too complicated.
- Locate the Access Panel: Flip the laptop over. You should see a panel (or several) that grants access to the fan. This panel is commonly held in place using only a few screws. Some models have a single panel for the fan and other internal components. However, other models demand that you remove the entire bottom of the laptop. If unsure, use the service manual to identify the appropriate panel.
- Remove the Screws: Gently unscrew the panel. Note the screw sizes and positions – it is best to make a drawing. If the screws are different sizes, you'll want to remember where each one goes.
- Carefully Remove the Panel: After removing the screws, carefully lift the panel away. It may be held in place with clips, so don't force anything.
6. Dust Off! The Power of Compressed Air and Brushes
Now that the panel is open, you’ll see the fan, likely caked in dust bunnies. This is where your cleaning supplies come to play.
- Use Compressed Air: Direct short bursts of compressed air into the fan and its surrounding components. Aim the nozzle into vents and crevices to dislodge dust.
- Brush Away the Grime: Gently use your soft brush to loosen any stubborn dust or debris.
- Repeat: Keep going until the fan blades and surrounding area are clean.
7. Check The Fan, Is it Properly Working?
The fan should be able to rotate freely. It is useful to spin it with your finger and see if it runs without any hesitation. If you encounter any resistance, that is a surefire sign of an issue. You may notice a clicking sound or uneven rotation.
8. The Deep Dive: Fan Replacement (If Necessary)
If cleaning doesn’t do the trick, you might need to replace the fan. This is a little more involved, but still manageable.
- Disconnect the Fan Cable: The fan is connected to the motherboard via a small cable. Gently unplug it. Note how the cable is oriented.
- Remove the Screws: Unscrew the fan from the heatsink or bracket.
- Find a Replacement: Search online for an HP Pavilion g7 fan replacement. Make sure it's compatible with your specific model (there are many variations).
- Install the New Fan: Attach the new fan, connect the cable, and reassemble everything in reverse order.
9. Heatsink Inspection: (A Bit More Advanced)
If you're replacing the fan or the fan still isn't working, you might need to inspect the heatsink. This metal component dissipates heat from the CPU and GPU.
- Remove the Heatsink: (This is model-specific, so consult your service manual.) Unscrew the heatsink.
- Clean and Reapply Thermal Paste: Remove the old thermal paste from the CPU and GPU using isopropyl alcohol and a soft cloth. Apply a small amount of new thermal paste (a pea-sized dot) to the center of each chip.
- Reassemble: Reattach the heatsink, ensuring it's firmly seated.
10. Software Solutions: The Hidden Culprits
Sometimes the problem isn’t hardware. Software can cause overheating, too.
- Check Your Task Manager: Are any processes hogging your CPU? Close any resource intensive programs you aren’t using.
- Update Drivers: Outdated drivers can sometimes cause performance problems. Update your graphics drivers and other relevant drivers.
- Look for Malware: Run a virus scan. Malware can put a strain on your system.
11. Putting It Back Together: The Reverse Engineering Process
Carefully put everything back together, following these steps:
- Reattach the panel.
- Make sure the screws are tightly held in place.
- Ensure that everything is where it belongs.
- Insert the battery.
12. Boot Up and Test: The Moment of Truth
Now for the moment of truth!
- Connect the power adapter.
- Power on your laptop and listen to the fan. Does it sound normal?
- Check the temperature: Monitor the temperature using a temperature-monitoring program.
- Run tests: Run some demanding applications to confirm the fan is working.
13. Preventing Future Problems: Maintenance Tips
Proactive maintenance can prevent fan failures in the future.
- Clean Regularly: Dust your laptop's vents regularly with compressed air.
- Use a Laptop Cooler: These external pads with fans can help keep your laptop cool.
- Avoid Dusty Environments: Reduce dust exposure.
14. When to Seek Professional Help
Sometimes, the problem is beyond your abilities. Don't hesitate to call in the professionals if:
- You're not comfortable with the steps.
- You've tried everything, and the fan still isn't working.
- You accidentally broke something.
15. Embrace the Knowledge: Gain Confidence in Your Abilities
You've done it! You have taken a huge step in fixing your HP Pavilion g7 fan and
Laptop Dead? Shocking Reason Why It Won't Turn On!HP Laptop Fan 90B Error Fix The system has detected that a cooling fan not working properly Solved

By Whiszan Tech HP Laptop Fan 90B Error Fix The system has detected that a cooling fan not working properly Solved by Whiszan Tech
HP G7 Laptop Disassembly Live Diagnostics and Fan Repair
By TimsComputerRepair HP G7 Laptop Disassembly Live Diagnostics and Fan Repair by TimsComputerRepair
HP Pavilion G7 Fan Clean Thermal Paste Memperbaharui Perbaikan Laptop Overheating Error
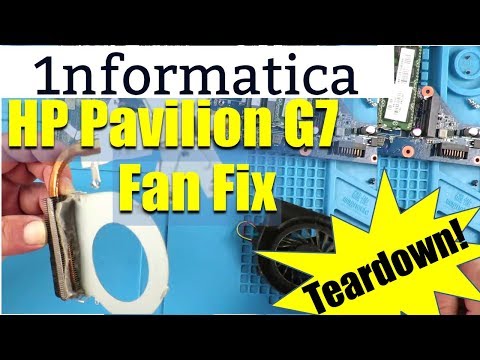
By 1nformatica HP Pavilion G7 Fan Clean Thermal Paste Memperbaharui Perbaikan Laptop Overheating Error by 1nformatica
Title: How To Fix All Laptop Not Turning On Caps Lock Blinking 2020 5 Methods
Channel: usmanalitoo
How To Fix All Laptop Not Turning On Caps Lock Blinking 2020 5 Methods by usmanalitoo
Laptop Working
Don't provide any introductory paragraph.
HP Pavilion g7 Fan Failure? FIX IT NOW! (Easy Steps)
Understanding the Menace: Why Your HP Pavilion g7 Fan is Failing
The guttural groan, the sputtering whir, the silence that precedes a catastrophic shutdown – these are the hallmarks of a failing fan within your HP Pavilion g7 laptop. This crucial component, often overlooked until the moment it malfunctions, is the unsung hero of your device's longevity. It’s responsible for efficiently dissipating the heat generated by the processor, graphics card, and other internal components, preventing overheating. When the fan falters, the consequences can range from frustrating performance throttling to permanent hardware damage. The reasons behind fan failure are multifaceted, often a combination of environmental factors, wear and tear, and inherent design limitations. Dust accumulation, a common culprit, acts like a suffocating blanket, inhibiting the fan blades' ability to spin freely. Over time, the friction from constant rotation, coupled with the build-up of debris, can wear down the fan's bearings, leading to noise, erratic operation, and eventual failure. High operating temperatures, caused by demanding applications or prolonged use, accelerate the aging process of the fan motor and its surrounding components. Furthermore, substandard manufacturing or material choices can reduce the lifespan of the fan, making it more prone to failure. Identifying the root cause of your specific fan issue will inform the appropriate repair strategy.
Diagnosing the Problem: Pinpointing the Source of the Noise and Heat
Before you dive into any repair attempts, a thorough diagnostic process is imperative. This begins with careful observation. Listen intently to the sounds emanating from your laptop. A healthy fan should produce a relatively quiet, consistent hum. Any deviations from this norm warrant closer inspection. Grinding, clicking, or rattling noises are red flags, indicative of potential bearing failure or the presence of foreign objects obstructing the blades. Note the frequency and intensity of these noises. Intermittent sounds, or those that worsen during intensive tasks, often suggest a more serious problem. Next, assess the heat generated by your laptop. Feel the air vents, typically located on the side or rear of the device; excessive heat, even during moderate use, signals that the fan is struggling to adequately cool the system. You can also utilize software tools to monitor internal temperatures. Many free and readily available programs, such as HWMonitor or SpeedFan, can provide real-time readings of CPU and GPU temperatures. These readings are invaluable in determining whether the fan is failing to maintain optimal operating temperatures. If the temperatures are consistently high, even when the laptop is idle, then the fan is likely malfunctioning. The combination of unusual noises and elevated temperatures firmly establishes fan failure as the culprit.
Step-by-Step Repair: Disassembling and Cleaning Your HP Pavilion g7
Now comes the hands-on portion – the repair. This procedure involves several steps and requires patience and meticulousness. Always disconnect the power adapter and remove the battery before beginning any internal work.
Gather Your Tools: You'll need a Phillips head screwdriver, a small, flat-head screwdriver, a can of compressed air, and potentially a non-static brush or a soft cloth. An optional but helpful addition is thermal paste, which will be utilized later.
Unscrew the Access Panel: Locate the access panel on the underside of your laptop. This panel usually provides access to the hard drive, RAM modules, and sometimes, the fan. Use the Phillips head screwdriver to remove the screws securing the access panel. Carefully lift the panel off, taking care not to damage the plastic tabs.
Identify and Disconnect Components: Within the access panel, you might not have immediate access to the fan. You may need to remove other components. The hard drive is usually easy to identify and detach by removing its screws, disconnecting the SATA cable, and gently sliding it out. The RAM modules are secured by clips on either side; release these clips, and the modules will pop up, allowing for their removal.
Locate the Fan Assembly: The fan assembly is usually a black plastic housing that's connected to the motherboard. There will likely be more screws to remove. Also, you might need to unplug a small connector that’s attached to the fan and plugged into the motherboard.
Remove the Fan: Carefully remove the screws securing the fan assembly to the laptop chassis and the motherboard. Gently lift the fan assembly out, taking note of how it fits, so that you can reassemble it without issue.
Gentle Cleaning: Once you have removed the fan, the cleaning can commence. Take the can of compressed air and carefully direct short bursts into the fan blades and the surrounding heatsink. This will dislodge the dust and debris that accumulate over time. Be careful not to overdo the use of compressed air or direct the spray towards the fan blades from an angle.
Heatsink Cleaning: The heatsink, typically a network of metal fins, is designed to draw heat away from the processor and graphics card. Use the compressed air to clean the heatsink as well, ensuring that any dust is thoroughly removed.
Optional Thermal Paste Application: Once the heatsink is removed, you may notice the old thermal paste which often gets dried up. The thermal paste is utilized to improve heat transfer between the processor or graphics card and the heatsink. Use a clean, non-static cloth or a plastic scraper to carefully remove the old thermal paste from the processor and heatsink surfaces. Then, apply a small amount of new thermal paste, about the size of a grain of rice, to the center of the processor.
Reassembly: Reverse the disassembly process and carefully reassemble all components. Secure the fan assembly with the screws and reconnect the fan connector to the motherboard. Replace the RAM modules, hard drive, and access panel.
Beyond the Basics: Advanced Troubleshooting and Replacement
If simple cleaning doesn’t resolve the issue, further investigation is required. Try the following:
Deep Cleaning with a Brush: For stubborn dirt, sometimes the compressed air isn't enough. If you have access, very carefully use a soft-bristled brush to remove any remaining debris from the fan blades and heatsink fins. Be very careful not to damage the fan blades.
Fan Bearing Lubrication: With the fan removed, and with great consideration for the possibility of further damaging the fan, you could attempt to lubricate the fan bearings. Locate the small sticker on the back of the fan. Carefully peel back the sticker to reveal the fan's bearing. Apply a small amount of specialized fan lubricant. Don't use household lubricants.
Fan Replacement: In some cases, the fan might be beyond repair, due to extreme wear or other damage. The fan might require replacement. Search online for a replacement fan for your specific model of HP Pavilion g7, noting that there are different versions. Ensure that the replacement fan has the same specifications and connector as the original.
Motherboard Inspection: If you have a persistent issue or if you are experiencing a complete failure, the motherboard could potentially be failing and causing a problem. Inspect the motherboard for any visible damage, such as blown capacitors. This might be a sign of a very serious problem.
Preventative Maintenance: Keeping Your Fan Healthy
Preventative measures are the best defense against fan failure and are an essential component of laptop management. Implementing these simple habits can significantly prolong the life of your laptop's cooling system.
Regular Cleaning: Regularly clean your laptop's vents and fan. Aim to do this every three to six months, or more frequently if you use your laptop in dusty or dirty environments.
Surface Placement: Avoid using your laptop on soft surfaces such as beds or carpets. The laptop, when placed on the surface, can block the vents and restrict airflow. This can cause the laptop to overheat, which in turn increases the strain on the fan.
Temperature Control: Use a laptop cooling pad, especially when performing intensive tasks or when using your laptop in warm environments. These pads supply an extra layer of cooling.
Software Optimization: Close unnecessary applications that consume significant processing power. Using task manager can help identify these programs. Regularly update your software.
Temperature Monitoring: Regularly monitor the internal temperatures of your laptop using monitoring software. If you notice a temperature increase, it might be time to address the issue.
Professional Service: Consider having your laptop professionally cleaned and serviced every year or two.
Following these steps, you can keep your laptop running smoothly.
