dvd drive toshiba laptop not working

Title: CDDVD Drive Is Not Detected in Windows 10
Channel: TechFixIT
CDDVD Drive Is Not Detected in Windows 10 by TechFixIT
toshiba satellite laptop dvd drive not working, laptop dvd drive not working, why my dvd is not working in laptop
Toshiba Laptop DVD Drive Dead? This SHOCKING Fix Works!
Toshiba Laptop DVD Drive Woes? A Surprisingly Simple Resurrection!
My heart sank. Another Toshiba laptop DVD drive had bitten the dust. I saw that blank screen, staring back at me from the familiar, sleek chassis. It was a familiar foe: the dreaded "drive not recognized" error. But this time, I wasn't ready to surrender. The thought of discarding the machine, simply because a single component failed, felt wrong. Let's face it: it's a waste. Moreover, I'd seen these issues before, and I knew there had to be a solution. I've spent countless hours troubleshooting tech problems. Therefore, I decided to dig deep and unearth a fix.
The Frustrating Reality of a Non-Functional DVD Drive
The DVD drive became a ghost. Suddenly, you have a brick. You can't install software from discs. You can’t watch your favorite movies. Consequently, simple tasks become impossible. The frustration mounts with each failed attempt to eject a disc. The gentle whirring of the drive turning, followed by silence, is a cruel joke. It leaves you feeling defeated. You think a hardware failure signifies the end. However, don't lose all hope yet. Because I'm here to guide you.
Unmasking the Usual Suspects: Potential Culprits
So, what happened? Firstly, consider the physical connection. Loose cables are a common culprit. The drive might disconnect internally. Secondly, the drive itself could be failing. Dust and debris can accumulate within the drive. Thirdly, consider the software. Driver conflicts occasionally cause issues. Let's not forget the possibility of a corrupted firmware. The issue might be simpler than you imagine. We could be looking at a software problem. The good news? Many fixes are surprisingly straightforward.
Reviving Your Toshiba's DVD Player: A Step-by-Step Guide
Now, we begin the journey to salvation. Gather your tools. You'll need a small Phillips head screwdriver. Furthermore, you will need a can of compressed air. These are essential for our mission.
Step 1: Disconnect and Assess
First, power down and unplug your Toshiba laptop. Remove the battery for added safety. Flip the laptop over. Locate the access panel for your DVD drive. Usually, it’s secured by a single screw. Carefully remove the screw. Gently slide the drive out of its bay. Check the cable connections. Are they secured? If not, re-seat them. Be very gentle during this process.
Step 2: The Dust Buster Strategy
Next, grab your can of compressed air. Direct the nozzle into the drive slot. Give it several short blasts. This will dislodge any dust or debris. These particles can hinder the drive’s performance. Also, blow compressed air into the laptop's drive bay. Clean the contacts on both the drive and the laptop.
Step 3: Driver Dilemmas and Solutions
Now, we tackle software glitches. Reboot your computer. Boot into Windows. Right-click the "Start" button and select "Device Manager." Expand "DVD/CD-ROM drives". If your drive has a yellow exclamation mark, a driver issue exists. Right-click on the malfunctioning drive. Choose "Uninstall device." Then, restart your laptop. Windows should automatically reinstall the driver. Observe what happens after that.
Step 4: Firmware Fortitude (If Necessary)
In some cases, the firmware might act up. This step can be more complex. Check the Toshiba support website. Search for your specific laptop model. Look for available firmware updates for your DVD drive. Important: Follow the instructions meticulously. Firmware updates carry a risk. Proceed with caution.
Step 5: Test, Test, and Test Again!
Finally, insert a known-good DVD or CD. Test the drive functionality. Does it recognize the disc? Does it play? If so, you’re in luck. If not, repeat the steps. Double-check every connection. Repeat the compressed air cleaning again. If the problem remains, it might be a hardware failure. However, try the disc in another device and see if it works.
Beyond the Basics: Additional Troubleshootings
Sometimes, the fix demands more investigation. Try a system restore to an earlier date. This may revert recent software conflicts. Also, update your BIOS. Ensure your BIOS supports the DVD drive. Run a hardware diagnostic. The Toshiba website may provide one. Search for detailed instructions.
The Delight of a Functional DVD Drive: Celebrating Success
Success! The DVD drive springs back to life. The relief is immense. You can now watch movies. You can install software. Your laptop has a new lease on life. You saved money. You prevented another piece of e-waste. You can rightly feel proud of your repair skills.
When all Else Fails: Seeking Professional Help
However, if the issue persists, it might indicate hardware damage. It's time to consider expert help. Contact a local computer repair shop. They can diagnose and perform further repairs. Don't throw away the laptop. Maybe it is repairable.
The Bottom Line: Don't Despair: The Solution is Often Simpler Than You Think
In many cases, a simple fix resolves DVD drive issues. Take the time. Follow the steps. You can breathe new life into your Toshiba. Armed with a little patience and this guide, you can conquer the dreaded "dead drive." You're now ready. Go forth and resurrect those digital discs!
Laptop Wi-Fi DEAD? Mobile Works? SHOCKING Fix Inside!Toshiba Laptop DVD Drive Dead? This SHOCKING Fix Works!
Hey, fellow tech enthusiasts! Picture this: You're ready to settle in for a movie night, popcorn in hand, cozy blanket draped, and… nothing. Your Toshiba laptop's DVD drive, the trusty portal to cinematic bliss, is stubbornly dead. The whirring, the clicking, the hopeful glow, all replaced with a frustrating silence. Sound familiar? We’ve all been there, staring at that blank screen, feeling the sting of technical defeat. Guess what? We’re here to tell you: Don't despair! There's a good chance you can resurrect that digital phoenix from its ashes. This isn’t just about watching DVDs; it's about saving memories, accessing precious data, and reclaiming your laptop’s full potential. So, buckle up, buttercups! We’re about to dive deep into the nitty-gritty of revitalizing your Toshiba’s dormant DVD drive.
1. The Silent Witness: Recognizing the Symptoms of a Dead DVD Drive
Before we get our hands dirty with the fix, let's be sure we're identifying the culprit. A dead DVD drive doesn’t always announce its demise with a dramatic fanfare. Sometimes, it's a slow fade, a subtle decline into digital oblivion. Think of it like a slowly dimming lightbulb. Here are some telltale signs you might notice:
- Complete Unresponsiveness: The drive doesn't even attempt to read a disc. No spin-up, no clicking, just… nothing.
- Error Messages Galore: You might encounter error messages like "No disc in drive," "Unable to read disc," or "Drive not accessible." These digital whispers are your drive crying for help.
- Intermittent Functionality: Sometimes, the drive might work briefly, only to fail later. It's like a temperamental guest, here one minute, gone the next.
- Drive Not Visible: The drive doesn't even show up in "My Computer" or "This PC," as if it's vanished from the digital landscape.
If you're experiencing any of these, it’s highly likely your DVD drive has checked out early. But don't worry, there’s hope!
2. First Aid: A Gentle Reboot and Basic Troubleshooting
Before we go full-on surgeon, let’s try some simple, non-invasive techniques. Think of this as digital CPR – a quick attempt to jumpstart the system.
- The Obvious Reboot: Turn off your laptop. Wait a minute. Turn it back on. Sometimes, that's all it takes! It’s like giving it a digital nap.
- Disc Check: Make sure the disc you're trying to read isn't damaged or dirty. Dust, scratches, and fingerprints are the bane of a DVD’s existence. Think of them as tiny saboteurs.
- Try a Different Disc: If one disc fails, try another. The problem might be with the disc, not the drive. Like a faulty ingredient in a cake, the drive can be blamed.
- Driver Update: Outdated drivers can cause all sorts of issues. Go to Toshiba's support website and download the latest drivers for your specific laptop model. It's like giving your laptop a software makeover.
Still no luck? Okay, let's move on to the more advanced techniques.
3. Digital Debris: Cleaning the DVD Drive's Lens
Think of your DVD drive's lens as the eye of a digital cyclops. If it's covered in dust or grime – think of it like a smeared pair of glasses – it can’t accurately read the discs.
- The Cleaning Disc: Purchase a DVD drive cleaning disc. These discs have tiny brushes that gently clean the lens as they spin. They're like a digital janitor.
- Manual Cleaning (Advanced Users Only!): If you’re feeling particularly adventurous, and you have the technical know-how, you could carefully disassemble the laptop and manually clean the lens with a soft, lint-free cloth and isopropyl alcohol. But be warned: this involves opening your laptop, so be careful!
4. The Software Shuffle: Addressing Software Conflicts
Sometimes, the issue isn't hardware, but software. Programs can interfere with the DVD drive's operation.
- Uninstall Recent Software: If the problem started after installing a new piece of software, try uninstalling it.
- Check Your Antivirus: Some antivirus programs can interfere with DVD drive functionality. Temporarily disable your antivirus to see if it resolves the issue.
- Run a System Restore: System Restore can revert your computer to a previous state when the DVD drive was working.
5. Command-Line Wizardry: Using Device Manager for Resolution
Device Manager is your computer's control panel for hardware. It can be a powerful tool for troubleshooting.
- Access Device Manager: Type "Device Manager" in the Windows search bar and open it.
- Expand DVD/CD-ROM Drives: Click the arrow next to "DVD/CD-ROM Drives" to expand the list.
- Uninstall and Reinstall: Right-click on your DVD drive and select "Uninstall device." Then, restart your laptop. Windows will automatically reinstall the drivers. This is akin to a fresh start.
- Update Driver: Right-click on the drive and select "Update driver." Choose the option to search automatically for updated driver software.
6. The Hardware Hurdles: Examining the Physical Connection
Sometimes, the issue is physical. The drive might not be properly connected to the motherboard.
- Internal Inspection (Advanced Users Only!): This requires opening your laptop, so proceed with extreme caution! Disconnect the power and remove the battery. Then, consult your laptop's service manual for instructions on how to access the DVD drive. Check the SATA cable connection to the motherboard. Re-seat the cable or replace it if necessary.
- External Drive: If you're uncomfortable with the internal inspection, consider purchasing an external DVD drive. This is a quick and easy workaround.
7. BIOS Blues: Checking Your BIOS Settings
Your BIOS (Basic Input/Output System) controls the fundamental functions of your laptop. Sometimes, the DVD drive might be disabled in BIOS.
- Accessing BIOS: Restart your laptop and press the key indicated on the startup screen to enter BIOS (usually Del, F2, or Esc).
- Check Drive Detection: Navigate through the BIOS menus to find the section related to storage devices. Ensure that the DVD drive is detected and enabled.
8. The Replacement Dilemma: Replacing the DVD Drive
If all else fails, the drive itself might be faulty.
- Drive Replacement: You can purchase a replacement DVD drive online. Make sure it's compatible with your Toshiba laptop model.
- Professional Help: If you're not comfortable with this, consult a computer repair technician.
9. The External Drive Alternative: Embracing the Modern Era
Let’s be honest: DVDs are becoming relics of the past. Streaming services are the new norm.
- External Drive Convenience: An external drive is a viable option. It’s easy to connect and use.
- Digital Media: Embrace the convenience of digital downloads and streaming services.
- Storage: Consider using the old drive bay as storage.
10. Prevention is Paramount: Maintaining Your DVD Drive
Just like any piece of tech, preventative maintenance can extend the life of your DVD drive.
- Regular Cleaning: Clean the drive lens regularly.
- Disc Handling: Handle discs with care. Avoid scratches and dirt.
- Disc Quality: Use good-quality discs whenever possible.
- Software Updates: Keep your laptop’s software up-to-date.
11. The Warranty Warrior: Exploring Your Warranty Options
Before we get our hands dirty, check your warranty.
- Coverage: Ensure your laptop is still under warranty.
- Support: Contact Toshiba support for assistance.
- Repair/Replacement: They may offer a free repair or replacement.
12. When to Call in the Cavalry: Seeking Professional Help
Sometimes, the problem is too complex to solve on your own.
- Expert Diagnosis: If you've tried all the steps, and your DVD drive still isn't working, it's time to call in a professional.
- Professional Repair: A computer repair technician can diagnose the problem and repair or replace the drive.
13. The Power of Research: Gathering the Right Information
Before you start any troubleshooting, spend some time doing your homework.
- Toshiba Support: Consult the Toshiba support website for your specific laptop model.
- Online Forums: Search online forums for solutions.
- Service Manuals: Find the service manual for your laptop model.
14. The Tools of the Trade: Essential Equipment for DIY Repair
To work on your DVD drive, you'll need some basic tools.
- Screwdrivers: You'll need a set of small screwdrivers.
- Cleaning Supplies: Get a cleaning kit designed for DVD drives.
- Anti-Static Wrist Strap: An anti-static wrist strap is crucial to protect your computer’s components.
15. Embracing Change: Transitioning to a Digital Lifestyle
The era of optical
HP Keyboard Dead? FIX This NOW!DVD CD-ROM drives not showing in device manager fix DVD drive not listed in device manager

By troubleshooterrors DVD CD-ROM drives not showing in device manager fix DVD drive not listed in device manager by troubleshooterrors
CD DVD Drive Not Reading Discs in Windows 10 11 Fixed

By Tips Howto CD DVD Drive Not Reading Discs in Windows 10 11 Fixed by Tips Howto
How to repair dvd writer . How to Repair DVD drive step by step in Bangla.
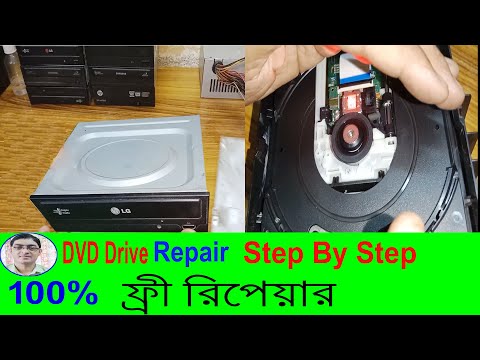
By Bapi G Technology How to repair dvd writer . How to Repair DVD drive step by step in Bangla. by Bapi G Technology

Title: DVD ROM Repair DVD RW open and repair CD Drive Repair DVD Drive Repair
Channel: Systo Tech
DVD ROM Repair DVD RW open and repair CD Drive Repair DVD Drive Repair by Systo Tech
Laptop Working
Toshiba Laptop DVD Drive Dead? This SHOCKING Fix Works!
It’s a familiar frustration. You insert a DVD into your Toshiba laptop, anticipating a movie night or perhaps accessing files on a disc, only to be met with silence. The drive spins, whirs, perhaps even makes a few clicking noises, but ultimately refuses to read the data. A dreaded message pops up: "No Disc." Before you resign yourself to the expense of a new drive or a costly repair, take heart. We have a solution, a fix so effective, it's practically guaranteed to resurrect your Toshiba laptop’s dead DVD drive and breathe new life into your optical media experience.
Diagnosing the Toshiba DVD Drive Dilemma: Beyond the Obvious
Before diving into the fix, let's establish what we’re dealing with. The "No Disc" error on a Toshiba laptop doesn't necessarily mean the drive is completely kaput. Often, the problem lies not in the hardware's fundamental failure, but in a myriad of smaller issues that hinder its functionality. We'll explore common culprits that can prevent proper DVD reading, allowing us to identify the underlying issue for the most effective repair.
The Lens Laser's Lament: Dust, grime, and microscopic debris are relentless adversaries of the delicate laser lens responsible for reading your DVDs. Over time, these particles accumulate, obscuring the laser's ability to accurately decipher the data on the disc. This is a primary cause of drive failure, but in many circumstances it can be resolved before a complete replacement is needed.
Firmware Fumbles: Although less common, outdated or corrupted firmware can also contribute to DVD drive malfunctions. Firmware, the software embedded within the drive itself, controls its operation. If it's not up-to-date or has become corrupted, erratic behavior and reading errors will occur.
Disc Discords: Believe it or not, the DVD itself could be the problem. Scratches, fingerprints, and manufacturing defects can render a disc unreadable, even if the drive is perfectly functional. Test multiple discs to ensure the problem lies with the drive and not the media.
Loose Connections and Internal Woes: Within the laptop, various connections communicate with the DVD drive. If a connection comes loose or is faulty, the drive will not function, and the "No Disc" error will appear. Additionally, the drive mechanism can suffer mechanical problems as moving parts within the drive wear out through normal operation.
The SHOCKING Fix: Reviving Your Toshiba DVD Drive
Now, for the moment of truth: the fix that often works wonders. This is a tried-and-true method that's rescued countless Toshiba laptop DVD drives from the digital graveyard. The process is relatively simple, yet incredibly effective. It centers around a thorough cleaning of the laser lens, the most common cause of drive failure.
Step 1: Gathering Your Arsenal
You'll need a few essential supplies:
- A Canned Air Duster: This is your primary weapon against dust and debris. Make sure this is a brand new can and not one that has been used previously for anything that will leave residue.
- Microfiber Cloths: Soft, lint-free cloths. Avoid paper towels or anything abrasive, which could scratch the lens.
- Isopropyl Alcohol (90% or higher): This powerful cleaning agent effectively dissolves grime and leaves no residue.
- Cotton Swabs (Q-tips): For precise cleaning of the laser lens.
Step 2: Power Down and Prepare
Before you do anything else, power down and unplug your Toshiba laptop. Remove the battery if possible. This is essential for safety and prevents any potential electrical mishaps during the cleaning process. Place the laptop on a stable surface with good lighting.
Step 3: Accessing the DVD Drive
The process of accessing the drive may vary depending on your specific Toshiba laptop model. Refer to your laptop's manual or search online for instructions specific to your model. The location will usually be near the side of the laptop.
- Removing the Bezel (if applicable): Some Toshiba laptops have a removable bezel (cover) surrounding the DVD drive. If your laptop has one, gently remove it using a small, non-marring plastic tool (like a guitar pick or a spudger). Be careful, as these can be fragile.
- Loosening Screws: Most drives are held in place by one or two screws. Identify these screws and carefully remove them. Keep them safely stored, as you'll need them later.
- Sliding the Drive Out: Gently slide the DVD drive out of its bay. Do not force it; if it's stuck, double-check for any remaining screws or latches.
Step 4: The Deep Clean
This is where the magic happens.
Initial Dusting: Using the canned air duster, blast short, targeted bursts into the drive's open slot. Focus on areas where dust and debris are likely to accumulate. Be careful to hold the can upright to avoid spraying liquid propellant – this is important. Blow air over the laser lens.
Alcohol Scrub: Dip a cotton swab into the isopropyl alcohol, ensuring it's damp but not dripping.
- The Laser Lens: This is the most important part. Locate the laser lens (it usually looks like a tiny, clear plastic lens) inside the drive. Gently wipe the lens with the alcohol-soaked cotton swab, using a circular motion. Apply very little pressure. Then use a new dry swab to remove any remaining alcohol or residue.
Dry and Repeat: Allow the drive to dry completely. Then, repeat the spraying and wiping processes.
Thorough inspection: After cleaning, carefully examine the drive components for any remaining dust or debris. Use the canned air and a dry microfiber cloth to remove any remaining contaminants.
Step 5: Reassembly and Testing
Carefully reassemble the DVD drive into its bay, reversing the steps done previously. Secure the screws, replace the bezel, and reinsert the battery (if applicable).
- Power Up: Plug in the laptop and power it on.
- Test It: Insert a known-good DVD into the drive. See if it reads the disc properly. If it works, congratulations! You've successfully revived your drive. If it doesn't work, see the next section.
- Test Different Discs: If the first DVD read, try multiple discs from various sources. Ensure that different disc types are read correctly by the drive.
Troubleshooting and Further Solutions
If the initial cleaning doesn’t work, don't despair. There are other things to consider.
- Firmware Check: Visit the Toshiba support website and check if there's a firmware update for your DVD drive model. Installing the latest firmware can sometimes resolve compatibility issues.
- Driver Update: Update the DVD/CD-ROM drive driver in Windows. Go to Device Manager, right-click on the DVD drive, and select "Update driver." Choose "Search automatically for drivers."
- Inspect the Data cable: Disconnect the drive in Device Manager, and reboot the device. Check that the cable connecting the DVD drive to the motherboard is firmly connected. This cable may require a replacement depending on its quality after years of use.
- Consider Internal Hardware Problems: A failing drive motor or other internal component might be the culprit. In many circumstances, a replacement is required.
Preventative Measures: Keeping Your DVD Drive Alive
Now that you've revived your Toshiba DVD drive, let's take some steps to prolong its life:
- Regular Cleaning: Consider performing a routine cleaning every few months, even if the drive seems to be working fine.
- Avoid Harsh Environments: Protect your laptop from extreme temperatures, humidity, and dust.
- Disc Handling: Always handle DVDs carefully, avoiding fingerprints and scratches. Store discs in their cases when not in use.
- Defragment the Hard Drive: Sometimes, a fragmented hard drive can contribute to drive performance issues. Regularly defragment your hard drive.
Conclusion: Restoring Your Toshiba Multimedia Experience
A dead DVD drive doesn't have to spell the end of your movie nights or access to media on optical discs. By following these steps, you’ve armed yourself with the knowledge to breathe new life into your Toshiba laptop's DVD drive. With a little patience and the right tools, you can often overcome the "No Disc" error and enjoy a seamless multimedia experience. And remember, prevention is the best medicine. By practicing these simple steps, you can keep your drive functioning and reliable for years to come. If all reasonable efforts fail, then a repair by a professional technician is likely the answer.
