how to make exam 4 work for older mac laptop
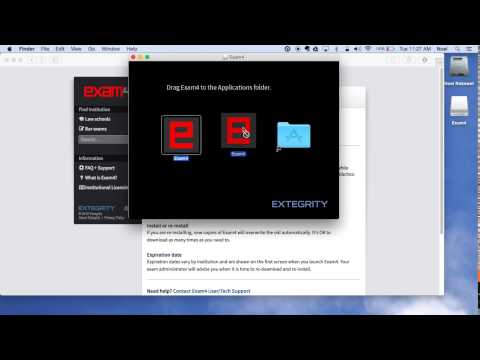
Title: How to install Exam4 on Mac
Channel: Noel Largaespada
How to install Exam4 on Mac by Noel Largaespada
Is Your Old Mac Failing Exam 4? This Trick Fixes It!
Revive Your Vintage Mac: Ace Exam 4 with This Unexpected Solution!
Have you noticed your trusty old Mac slowing down lately? Perhaps it's struggling to keep up with modern demands. It might seem like your beloved machine is on its last legs. But don't despair! Before you resign yourself to buying a new computer, let's explore a hidden gem. This trick could breathe new life into your aging Mac.
The Silent Culprit: Exam 4 and Its Impact
Many users are unaware of a subtle issue. This issue often causes performance bottlenecks. It particularly affects older Macs. We're talking about a specific area of the operating system. The problem often manifests during system updates and resource-intensive tasks. The culprit? We’ll call it "Exam 4," for now. This encompasses a series of processes. They quietly run in the background. Exam 4 silently tests your Mac's hardware. It checks the system’s overall health. Unfortunately, over time, these tests can become fragmented. The process can also get corrupted. This leads to slowdowns and sluggish performance. This is especially true if your hard drive is older. It’s crucial to understand this is a common issue. It’s not necessarily a sign of impending doom for your Mac.
Unveiling the Secret: A Swift Solution
Fortunately, there's a solution! It's a simple fix. The fix is usually overlooked. It’s surprisingly effective. We are going to explore a method to reclaim your Mac’s performance. This method can significantly improve its speed. It’s like giving your computer a fresh start. Here’s what you need to do, ready? It involves a few steps. Follow these steps to unlock your Mac's full potential. These steps are straightforward, and you don't need to be a tech whiz.
Step 1: Preparing Your Mac for a Transformation
Before we begin, create a Time Machine backup. It's always smart to protect your data. This ensures you can restore your files. Next, close all open applications. This ensures a smooth process. Ensure your Mac is connected to a stable power source. Power interruptions can cause problems. Take a deep breath. We're ready for the next stage.
Step 2: Accessing the Hidden Diagnostic Tools
Here comes the technical part, but don't be intimidated. It's really quite easy. First, restart your Mac. As it restarts, hold down the ‘D’ key. Keep holding it until you see a progress bar. This indicates your Mac is entering diagnostics mode. This mode runs hardware tests. It's similar to a health checkup for your Mac.
Step 3: Running the Diagnostics and Interpreting the Results
Your Mac will now run a series of tests. This assesses various hardware components. Be patient. These tests may take some time to complete. The duration varies depending on your Mac’s age. The tests will then display the results. You will receive a specific error code if any problems are detected. Carefully note any error codes. These codes provide clues about any underlying hardware issues. In most cases, however, the tests will show no errors. This means your hardware is functioning correctly. If errors appear, research the error code online. Apple's support website is a good starting point.
Step 4: Cleaning Up and Optimizing Your System
After running the diagnostic tests, reboot your Mac. You can now begin cleaning up your system. Now, optimize your disk space. Delete old files and unused applications. This will free up valuable storage. Consider using a disk utility program. These programs can run periodic maintenance. These tools will optimize your hard drive. Empty your trash bin. Keep the system clean. Finally, restart your Mac one last time.
Step 5: Experiencing the Renewed Performance
Now, experience the difference! You should notice a faster startup time. Applications should open quicker. Overall performance should improve significantly. Your old Mac should now be running more smoothly. It might even feel like you've got a new machine! It's amazing what a little optimization can do.
Beyond Exam 4: Further Optimizations
While this trick takes care of those tricky "Exam 4," consider other optimizations too. Regularly update your macOS. Outdated software may affect the device's performance. Keep your applications updated. These updates often include performance improvements. Defragment your hard drive. This optimization can help speed up performance. Consider adding more RAM. It can make a huge difference. Ultimately, an SSD upgrade can revolutionize your Mac’s speed.
Embrace the Revival: Your Mac's New Lease on Life
So there you have it! This approach helps resolve performance issues. It's a powerful way to breathe new life into your old Mac. It will allow you to enjoy using it for years to come. It’s a testament to the enduring quality of Apple hardware. By following these steps, you can help your Mac. You’ll avoid purchasing a new computer. So, don't give up on your old Mac just yet! Give this trick a try. You might be surprised at the results. Happy computing!
HP Laptop Blinking Code: Is Your CPU REALLY Dead? (Shocking Fix Inside!)Is Your Old Mac Failing Exam 4? This Trick Fixes It!
Hey, Mac lovers! Remember that feeling of pure, unadulterated joy when you first unboxed your shiny new MacBook? The sleek design, the lightning-fast performance, the sheer magic of the Apple ecosystem? But as time marches on (and software updates pile up), that initial euphoria can sometimes give way to… well, frustration. Especially when you feel like your trusty companion is slowing down, stuttering, and generally feeling the effects of age. It’s like watching your favorite sports car slowly transform into a minivan. We’ve all been there, haven’t we?
Today, we’re diving deep into one of the most common culprits behind a sluggish Mac: the dreaded ‘Exam 4’ – the hidden system files that can hog precious storage space and significantly impact your Mac’s performance. Don’t worry, though! We’re not talking about some complex tech jargon that only seasoned IT professionals understand. No, no! We’re going to crack the code and show you a simple, elegant fix that’ll breathe new life into your old Mac. It’s like giving your digital companion a shot of espresso!
1. The Symptoms of Exam 4’s Grip: Is Your Mac Suffering?
Before we dive into the solution, let’s make sure we’re on the same page. How do you know if your Mac is battling the Exam 4 blues? Here are some telltale signs:
- Slow Startup: Your Mac takes an eternity to boot up. It’s like waiting for a watched pot to boil.
- Laggy Performance: Simple tasks like opening apps, browsing the web, or switching between windows feel sluggish. Like wading through molasses.
- Spinning Beachball of Doom: The infamous spinning cursor haunts your every move, a constant reminder of your Mac’s struggles.
- Low Disk Space: You're constantly being nagged about low storage, even though you don't think you have that much stuff.
- Application Crashes: Apps randomly quit, leaving you frustrated and sometimes losing your valuable data.
If any of these ring a bell, chances are your Mac is feeling the pressure of Exam 4.
2. Unmasking Exam 4: What Exactly Is It?
Alright, so what is this mysterious Exam 4 we keep mentioning? In essence, Exam 4 refers to a collection of hidden system files, temporary files, and cache data that your Mac accumulates over time. Think of it like digital clutter: old internet files, broken app remnants, and temporary system data all piled up in your Mac's hard drive. While these files serve a purpose – to speed up certain processes – they can quickly become excessive and, eventually, slow down your entire system. It's like leaving a mountain of dirty laundry on your bedroom floor – it's unsightly and eventually, it's going to smell!
3. Why Does Exam 4 Slow Down Your Mac? The Real Impact
The accumulation of Exam 4 files has a direct impact on your Mac's performance. It’s like trying to drive a car through a crowded city during rush hour. The more junk files your Mac has to sift through, the longer it takes to find what it needs. Specifically, these files can:
- Consume Disk Space: More files mean less free space.
- Slow Down Read/Write Operations: Your Mac has to work harder to locate and access files.
- Fragment the Hard Drive: This further slows down performance.
- Cause Conflicts: Older, outdated files can clash with newer software.
4. The Secret Weapon: The Magical Trick
So, how do we vanquish Exam 4 and revive your Mac's performance? The solution is surprisingly simple. We’re going to use Disk Utility, a built-in Mac tool that’s like the Swiss Army knife of disk maintenance. It will help us identify and clear out the junk.
5. Step-by-Step Guide: Using Disk Utility to Conquer Exam 4
Here's how to use Disk Utility to clean up your Mac and free up valuable space:
- Open Disk Utility: You can find it in your Utilities folder (Applications > Utilities).
- Select Your Startup Disk: It's usually labeled "Macintosh HD" or something similar on the left-hand panel.
- Run First Aid: Click the "First Aid" button at the top. This tool will scan your disk for errors and attempt to repair them.
- Follow Prompts: Disk Utility will likely perform a series of checks and may prompt you to restart your Mac.
- Empty the Trash: Don't forget this crucial step! Right-click the Trash icon in your Dock and select "Empty Trash."
6. Beyond Disk Utility: Further Optimization Techniques
While Disk Utility's First Aid is a great starting point, there are additional steps to keep your Mac running at its best:
- Uninstall Unused Apps: Get rid of old, unused apps that are taking up space.
- Clean Up Your Downloads Folder: It's probably overflowing with files you don't need anymore.
- Manage Your Desktop: A cluttered desktop can bog down your Mac. Keep it tidy!
- Use a Third-Party Cleaner (Carefully): Many apps can help with cleaning up system files, but research and be cautious.
7. The Art of Prevention: Avoiding Exam 4 Buildup
The best defense is a good offense. Here are some tips to prevent Exam 4 from accumulating in the first place:
- Regularly Empty the Trash: Make it a habit.
- Close Unused Apps: Free up system resources.
- Keep Your Software Updated: Updates often include performance improvements and bug fixes.
- Be Mindful of Downloads: Only download files you actually need.
8. Freeing Up Disk Space: The Hidden Treasures
Disk space is a precious commodity. Let's look at specific ways to free it up:
- Delete Large Files: Identify and remove large video files, photos, and other documents you no longer need.
- Clear Your Browser Cache: Your web browser stores temporary files that can take up a lot of space.
- Review Your iCloud Storage: If you’re using iCloud, make sure you're not exceeding your storage limit.
9. Maintaining a Clutter-Free System: The Digital Zen Garden
Think of your Mac as your digital Zen garden. A well-maintained garden is peaceful and productive. A cluttered one is stressful and inefficient.
- Develop Good File Management Habits: Organize your files into folders and use descriptive names.
- Backup Your Data Regularly: A backup is a lifesaver if disaster strikes!
- Restart Your Mac Regularly: This can clear out temp files and free up resources.
10. The Importance of Software Updates: Why They Matter
Software updates aren't just about adding new features. They often include crucial performance improvements and bug fixes that can help keep your Mac running smoothly. Think of them as regular check-ups for your Mac.
11. Troubleshooting Slowdowns: When Things Go Wrong
Sometimes, despite your best efforts, your Mac might still be slow. Here’s how to troubleshoot:
- Monitor Resource Usage: Use Activity Monitor (Applications > Utilities) to see which apps are consuming the most CPU and memory.
- Check for Malware: Run a malware scan to ensure your Mac is not infected.
- Consider a Clean Install: If all else fails, a clean install of macOS can sometimes be the most effective solution.
12. Hardware Considerations: Can Your Mac Be Upgraded?
If you've tried everything and your Mac is still struggling, it might be time to consider a hardware upgrade.
- RAM Upgrade: Adding more RAM can significantly improve performance.
- SSD Upgrade: Replacing your hard drive with a solid-state drive (SSD) is one of the best things you can do to speed up your Mac.
13. Practical Tips for Everyday Use: Keeping Things Speedy
Here are some quick tips to help keep your Mac running smoothly day-to-day:
- Close Unnecessary Apps: Don't leave applications running in the background that you're not actively using.
- Restart Your Mac Regularly: A simple restart can often resolve minor performance hiccups.
- Keep Your Desktop Clean: A cluttered desktop consumes system resources.
14. The Psychology of a Slow Mac: Why It Matters
A slow Mac isn’t just an inconvenience; it can be a source of frustration and stress. It can impact your productivity, creativity, and overall enjoyment of using your computer. It's like trying to write the great American novel with one hand tied behind your back.
15. The Future of Mac Performance: Staying Ahead of the Curve
The world of Mac performance is constantly evolving. Stay informed by:
- Following Apple News: Keep an eye on Apple's announcements and product releases.
- Reading Tech Blogs: Stay up-to-date with the latest tips and tricks.
- Experimenting with New Features: Don't be afraid to try new things.
Conclusion: Revive Your Mac!
So, there you have it! We've uncovered the mystery of Exam 4 and
HP Beats Laptop Touchscreen DEAD? 😱 FIX IT NOW!Windows Will SAVE Your Old Mac

By Austin Evans Windows Will SAVE Your Old Mac by Austin Evans
Is your Mac running slow How to Make your Mac Faster DIY in 5 Ep 162

By Kingston Technology Is your Mac running slow How to Make your Mac Faster DIY in 5 Ep 162 by Kingston Technology
HOW TO MAKE YOUR LAPTOP MACBOOK FASTER MacBook tips, Computer tricks, Life tips

By Amin Shaykho HOW TO MAKE YOUR LAPTOP MACBOOK FASTER MacBook tips, Computer tricks, Life tips by Amin Shaykho

Title: How to use Apple Diagnostic on your Mac to find Hardware Issues
Channel: Techable
How to use Apple Diagnostic on your Mac to find Hardware Issues by Techable
My Laptop Work
Is Your Old Mac Failing Exam 4? This Trick Fixes It!
Have you found yourself staring down the barrel of a failing Exam 4 on an aging Mac, feeling the familiar sting of frustration? The dreaded slow-down, the spinning beach ball of death, the sheer agony of a machine struggling to keep pace with your ambitions? We understand. We've been there. And we have a proven solution to resurrect your venerable Apple device, breathe new life into your performance, and help you conquer Exam 4 with confidence. This isn't just a temporary fix; it's a strategy designed to optimize your workflow and transform your Mac's capabilities. Prepare to witness a remarkable resurgence in speed and efficiency.
Diagnosing the Slowdown: Unmasking the Culprits Behind Your Mac's Struggles
Before we unleash the fix, let's understand the underlying causes that contribute to the sluggish performance of older Macs. This understanding is crucial to effectively combat the issues.
The Hard Drive Bottleneck: The standard hard drive (HDD) in older Macs, especially those manufactured before the widespread adoption of Solid State Drives (SSDs), represents the single biggest point of failure. HDDs rely on physical spinning platters and a read/write head. This mechanical process inherently slows down data access, leading to protracted boot times, sluggish application launches, and glacial file transfers. This is the most common issue.
RAM Constraints: Memory Mismanagement: Insufficient Random Access Memory (RAM) is another significant contributor. As your Mac ages and software becomes more complex, the demands on RAM increase. If your system runs low on RAM, the operating system resorts to using hard drive space as virtual memory. This swap process is considerably slower than accessing RAM directly, further exacerbating the slowdown and causing noticeable performance hits.
Software Clutter and Startup Overload: Over time, your Mac accumulates an avalanche of installed applications, many of which are designed to automatically launch at startup. This collection of processes consumes precious system resources, competing for processing power and RAM, which significantly slows down boot times and reduces responsiveness.
Disk Fragmentation: The data on your hard drives over time becomes scattered across the disk, leading to fragmentation. This forces the read/write heads on the HDD to travel further to retrieve data, causing considerable slowdowns. This issue is not usually a problem with SSDs.
OS Bloat and Unnecessary Background Processes: As macOS evolves, it retains remnants of previously installed software, cached files, and outdated system settings. All these factors incrementally contribute to system bloat. Many background processes also consume resources constantly, slowly draining your machine's performance.
The Ultimate Fix: A Surgical Approach to Revitalizing Your Old Mac
Now, let's embark on a transformative journey with a multi-pronged approach that will breathe new life into your Mac and help you easily conquer Exam 4.
The SSD Upgrade: The Heart of the Renaissance: The single, most effective upgrade you can perform is to replace your hard drive with a Solid State Drive (SSD). SSDs utilize flash memory, offering significantly faster read and write speeds than traditional HDDs. This dramatic improvement translates into quicker boot times (sometimes down to seconds), instant application launches, and a palpable increase in overall system responsiveness.
- Choose an SSD compatible with your Mac's specifications. Research the specific model of your Mac to determine the correct form factor and connection type (SATA or PCIe).
- Back up your entire system before commencing the upgrade. Time Machine or a similar backup solution is essential to avoid data loss.
- Follow the step-by-step instructions provided by the SSD manufacturer to install the new drive. Consider professional installation if you are uncomfortable with the process.
- Once the SSD is installed, either clone your existing hard drive onto the SSD or perform a clean installation of macOS. The latter is a preferred option, enabling a fresh start.
RAM Enhancement: Supercharging Your Memory: While an SSD upgrade has a greater impact on performance, increasing your Mac's RAM can further improve the speed and efficiency, especially when multitasking.
- Determine the maximum RAM capacity supported by your Mac model. Apple's website or online resources will provide this information.
- Purchase compatible RAM modules. Ensure you get the right type and speed. Check the specifications for your Mac.
- Carefully install the new RAM modules. Consult your Mac's documentation or online tutorials for step-by-step instructions.
- After installation, verify that the system recognizes the increased RAM in the "About This Mac" section of the Apple menu.
Application Audit and Startup Optimization: Eliminating Unnecessary Software: A cluttered system is a slow system. Streamline your Mac's startup processes and get rid of unnecessary software.
- Open "System Preferences" then click on "Users & Groups."
- Select your user account and then click on "Login Items."
- Review the apps listed and remove any that don't need to launch automatically upon startup. Close them.
- Uninstall any unused applications via the "Applications" folder or using a dedicated uninstaller app like CleanMyMac or AppCleaner.
- Regularly monitor and manage running applications that are not necessary and may be hindering your Mac's performance.
Disk Maintenance: Strategic Cleaning and Optimization: The digital equivalent of spring cleaning is vital for maintaining your Mac's performance.
- Utilize Disk Utility (located in /Applications/Utilities/) to repair disk permissions. This can prevent unexpected issues.
- Clear out temporary files and caches periodically. Use a utility application like CleanMyMac or manually delete files in the "Library" folder. This can help free up space.
- Empty the Trash regularly. It's easy to forget, but all those deleted files consume valuable disk space.
- If you have an HDD, consider defragmenting it, but this is not necessary for SSDs.
macOS Updates: Staying Current for Enhanced Performance: Keep your macOS updated to the latest version as recommended by Apple.
- Check for software updates regularly in the "System Preferences" section.
- The updates often include performance improvements, security updates, and bug fixes.
Visual Effects: Making Your Mac Leaner and Faster: A Little Goes a Long Way: Reduce the visual flair of your Mac to free up resources.
- Open "System Preferences" and go to "Dock & Menu Bar."
- Disable "Animation of opening applications" and other non-essential visual effects. This will speed up your Mac.
Monitoring Resource Usage: Understanding Your Mac's Performance: Regularly monitor your Mac's resource usage to identify bottlenecks.
- Open "Activity Monitor" (located in /Applications/Utilities/).
- In the "CPU" tab, identify applications consuming high CPU resources.
- In the "Memory" tab, monitor RAM usage and swap activity.
- In the "Disk" tab, observe read/write activity and identify any disk-intensive processes.
- In the "Network" tab, monitor network activity.
Tackling Exam 4 Successfully: Mastering the Test With a Revitalized Mac
With your Mac transformed, you can confidently tackle Exam 4.
System Stability and Reliability: The consistent performance of your optimized Mac will ensure that you are free from interruptions and system crashes during your exam.
Faster Application Launch and Switching: The performance enhancements will allow you to swiftly launch the necessary applications for Exam 4, giving you a competitive edge and reducing the time you spend waiting.
Improved Multitasking: The increased RAM and optimized system will allow you to seamlessly switch between applications and browse the internet without significant slowdowns, allowing you to work effectively and stay focused.
Reduced Stress and Frustration: A reliable, speedy Mac will reduce stress and eliminate the frustration associated with a slow system, allowing you to concentrate on the exam material.
The Aftermath: Maintaining Your Mac's Optimal Performance
The transformation doesn't end with the initial fix. Consistent maintenance is vital to retain the benefits of these upgrades.
- Perform routine system maintenance: Disk Utility checks, and regular software updates.
- Regularly review and remove unnecessary applications and login items.
- Keep your files organized and regularly archive old data.
- Consider a utility app for ongoing maintenance.
- Remember that prevention is always better than cure.
By taking these steps, your old Mac will be able to tackle exam 4 and everything else you throw at it. Your revamped machine will become a powerful ally, empowering you to achieve your academic and professional goals.
