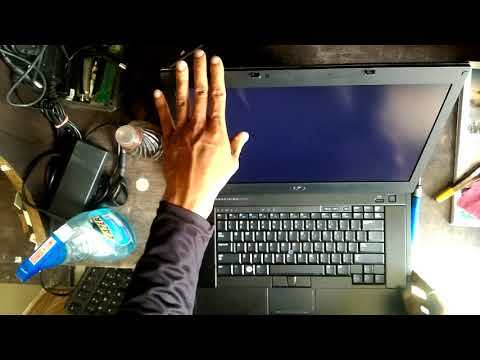
dell inspiron 17 laptop keyboard not working

Title: FIX Dell Keyboard Not Working Windows 10 Dell Inspiron 15 3501
Channel: Cap Trong Nam - How To
FIX Dell Keyboard Not Working Windows 10 Dell Inspiron 15 3501 by Cap Trong Nam - How To
**Dell Inspiron 17 Keyboard Dead? FIX This NOW!**
Dell Inspiron 17 Keyboard Woes? Your Survival Guide Begins Here!
It’s a heart-stopping moment. You’re on a roll, ideas flowing, then—silence. The Dell Inspiron 17 keyboard betrays you. Panic sets in. Fear not! This isn't the end of your productivity. We'll navigate this together. This guide provides solutions. Let's get that keyboard clicking again!
Diagnosing the Digital Malaise: Pinpointing the Problem
Before you start smashing keys (tempting, I know!), let's play detective. Is the entire keyboard unresponsive? Or are specific keys acting up? Knowing this helps with troubleshooting. Perhaps a simple reboot is all it needs. Therefore, restart your laptop immediately. This can often fix temporary glitches. In several instances, this resolves the issue.
Another point of investigation: what happened right before the keyboard decided to take a break? Did you install new software? Then, this could be the culprit. Also, consider if you spilled anything. Liquid damage often leads to keyboard failure. Furthermore, external factors should be considered.
The Software Shuffle: Software-Based Solutions
Let's assume the problem isn’t hardware-related (yet!). We can try some software fixes. First, update your keyboard drivers. Go to Device Manager (search for it in your Windows search bar). Find your keyboard and right-click. Choose "Update driver." Follow the prompts. So, that's a good starting point.
Still no joy? Try uninstalling and reinstalling the keyboard drivers. Repeat the Device Manager process. Instead of "Update driver," select "Uninstall device." Then, restart your computer. Windows should automatically reinstall the driver. Consequently, this can solve driver conflicts.
Sometimes, certain software interferes with keyboard function. You can test this. Boot your Inspiron 17 into Safe Mode. In this mode, Windows loads with minimal drivers and programs. If the keyboard works in Safe Mode, then a third-party program is the likely cause. Hence, consider uninstalling recently installed software.
Hardware Hurdles: Tackling Physical Issues
If software fixes don't work, we must explore hardware possibilities. First, inspect the keyboard physically. Look closely at the keys. Is anything lodged underneath them? Dirt and debris are common keyboard enemies. Use compressed air to dislodge anything stuck.
Also, consider the keyboard ribbon cable. This cable connects the keyboard to the laptop's motherboard. It can become loose. Or, it can be damaged. Therefore, carefully open your laptop (follow a reliable guide; YouTube is your friend!). Then, reseat the ribbon cable. Be extremely gentle!
If you have external keyboard, test it. Does it functions on your Dell? This test confirms that the issue does reside in the internal keyboard. If your external keyboard works, that greatly suggests an internal keyboard problem. Next, focus on the internal one.
The Ultimate Sacrifice: Keyboard Replacement
Sometimes, the keyboard damage is beyond repair. It's a sad truth. A keyboard replacement might be necessary. Fortunately, replacing a keyboard is often easier than you'd think.
Before you buy, research the exact model number. Confirm compatibility. You can find replacement keyboards online. Look at reputable retailers. Follow the instructions for correct installation. Take your time, and be patient.
Additionally, consider taking your laptop to a professional. A computer repair shop can handle the replacement effectively. This is an option. However, it typically involves extra costs.
Preventive Measures: Protecting Your Keyboard
Prevention is always better than cure. You can take steps to protect your Inspiron 17's keyboard. Invest in a keyboard cover. This will shield it from spills and dust. Keep food and drinks away from your laptop. That simple measure can eliminate many problems.
Also, clean your keyboard regularly. Use a soft brush or compressed air. This prevents build-up of dust. Handle your laptop with care. Avoid excessive force on the keys. Consider maintaining a good typing posture.
Final Thoughts: Back to Clicking!
A dead Dell Inspiron 17 keyboard is frustrating. But, with the right approach, you can conquer it. Remember to start simple and troubleshoot methodically. Don't give up! Most keyboard problems have solutions. So, get back to typing! Your digital life depends on it.
HBO GO App: Laptop Bliss? (Download & Stream Now!)Dell Inspiron 17 Keyboard Dead? FIX This NOW!
Hey there tech adventurers! We've all been there – you’re cruising along, mid-email, deep in a project, or maybe just about to hit that epic level in your favorite game, and BOOM! Your Dell Inspiron 17's keyboard goes silent. That heart-stopping moment when you realize you can't type a single blessed letter? Yeah, we feel you. Don't panic! Seriously, take a deep breath. We're going to troubleshoot this together, step-by-step, and get you back in the typing game faster than you can say "Ctrl+Alt+Delete" (which, by the way, is sometimes the first thing to try!).
1. The Silence is Deafening: Recognizing Keyboard Failure
First things first, let's confirm the obvious. Is it really the keyboard, or is something else brewing under the hood? Is your cursor moving? Does your mouse still work? Are other USB devices functioning? If you're getting no response from any key, even basic ones like the Caps Lock or Num Lock, the keyboard is likely the culprit. If, however, a simple restart doesn't fix it, we're definitely dealing with a problem. Let's get to the brass tacks of how to deal with it.
2. Pre-Flight Checklist: Essential Troubleshooting Steps
Before we dive into the deeper stuff, let's run through a few easy fixes. Think of these as your pre-flight checklist, the things you always check before you take off.
- Restart, Restart, Restart! I know, I know, it sounds cliché, but trust me, a simple reboot often resolves many computer gremlins. Think of it like hitting the reset button on your brain – sometimes, all it needs is a fresh start.
- Check the Basics: Ensure there isn't any gunk stuck under the keys. Crumbs, dust, or even spilled liquids can wreak havoc. Grab a can of compressed air and give those keys a good blast.
- External Keyboard Test: This is crucial! Plug in a USB keyboard or use a Bluetooth one (if you have one) and see if it works. If an external keyboard does work, it strongly suggests the problem is with the internal keyboard. If neither keyboard works, the issue could be more serious, like a driver problem.
3. Driver Dilemmas: Updating and Reinstalling Keyboard Drivers
Alright, so restarting didn't do the trick? Let's check those drivers. Think of drivers as the translators between your keyboard and your operating system. If they're outdated or corrupted, your keyboard won't understand the computer's commands.
To access your device manager:
- Windows Key + X: Press these keys simultaneously to access the quick link menu.
- Device Manager: Select "Device Manager" from the menu.
- Keyboard Section: Expand the "Keyboards" section. You should see your keyboard listed there (likely as PS/2 Standard Keyboard or something similar.)
- Update Driver: Right-click on your keyboard and choose "Update driver." Let Windows automatically search for updated drivers.
- Uninstall/Reinstall: If the upgrade fails, right-click again, select "Uninstall device," then restart your computer. Windows should reinstall the driver automatically.
4. Hardware Hurdles: Is the Keyboard Physically Damaged?
Sometimes, the problem isn’t software; it's hardware. Let's face it – life happens. Maybe you spilled coffee, or perhaps a small rogue object got lodged under the keys.
- Visual Inspection: Carefully inspect the keyboard for any signs of damage. Are keys physically broken or detached? Is there any liquid residue?
- Liquid Damage: If you spilled something, immediately power down your laptop and unplug it (and remove the battery if you can). Let it dry completely before attempting to use it again. (This often takes at least 24-48 hours, and maybe even longer depending on the liquid).
- Internal Examination: A skilled technician can open up your Dell Inspiron 17 to examine the keyboard and its connections. Sometimes a loose connector is the culprit.
5. Battery Blues: A Forgotten Culprit?
Believe it or not, a drained or malfunctioning battery can sometimes cause unexpected behavior, including keyboard issues. This is less common, but always worth considering.
- Charge the Battery: Make sure your laptop is fully charged, and then try using the keyboard again.
- Test Without Battery (If Possible): If your model permits it (be careful!), try running your laptop solely on AC power, without the battery inserted. This can help isolate whether the battery is contributing to the problem.
6. BIOS/UEFI Shenanigans: The Low-Level Fix
This is a bit more advanced, so proceed with caution. The BIOS (Basic Input/Output System) or UEFI (Unified Extensible Firmware Interface) is the software that starts your computer before Windows loads. Sometimes, the keyboard is disabled at this low level.
- Access BIOS/UEFI: Restart your computer and repeatedly press a key (often Delete, F2, or F12) during startup to enter the BIOS/UEFI setup. Your Dell manual will tell you which key to use.
- Keyboard Settings: Look for keyboard settings in the BIOS/UEFI. Make sure the keyboard is enabled.
- Reset to Defaults: If you're unsure, try resetting the BIOS/UEFI to its default settings. This can sometimes resolve compatibility issues.
7. System Restore: Rolling Back to a Working State
Did your keyboard start acting up after a recent software update or driver installation? A System Restore can roll your computer back to a previous state, potentially fixing the problem.
- Search for "Create a restore point": In the Windows search bar, type in 'create'. Select "Create a restore point".
- System Restore: Click "System Restore."
- Choose a Restore Point: Select a restore point from before the keyboard problems started.
- Follow the prompts: Complete the restoration process.
8. Malware Mayhem: A Hidden Threat?
While less likely, malware can sometimes interfere with keyboard functionality. Run a thorough scan using your antivirus software. (I personally rely on [insert your favorite AV software here – and if you have multiple, mention them!] for this.)
9. The Ultimate Solution: Keyboard Replacement
If all else fails, the keyboard itself may be the culprit. Replacing the keyboard is a common fix.
- DIY Replacement: You can often find replacement keyboards online, along with tutorials. This requires some technical skill and patience but can save you money. Be sure to check compatibility.
- Professional Repair: Take your laptop to a qualified technician. They can diagnose the problem, replace the keyboard, and ensure everything is working correctly.
10. The Wonderful World of External Keyboards (Temporary or Permanent!)
While you're troubleshooting, or if you're waiting for a replacement keyboard, an external keyboard can be a lifesaver. It’s like having a spare tire – it gets your work done.
- USB Connection: Simply plug a USB keyboard into your laptop.
- Bluetooth Connection: If your laptop has Bluetooth, you can pair a wireless keyboard.
11. Software Conflicts: Identifying the Culprit
Sometimes, conflicts with specific software can cause keyboard malfunctions. This often happens after installing new software or updates.
- Safe Mode: Restart your computer in Safe Mode (usually by pressing F8 repeatedly during startup). If the keyboard works in Safe Mode, a software conflict is likely the cause.
- Uninstall Recent Software: If you suspect a new program, uninstall it and see if the keyboard starts working again.
- Check for Updates: Ensure all your software is up to date.
12. Command Prompt Power: Running System File Checker
System File Checker (SFC) is a built-in Windows tool that can scan for and repair corrupted system files.
- Open Command Prompt as Administrator: Type "cmd" in the search bar, right-click "Command Prompt," and select "Run as administrator."
- Run the Command: Type
sfc /scannowand press Enter. The scan may take a while.
13. Factory Reset: The Nuclear Option (And When to Use It)
A factory reset wipes your computer clean, reinstalling Windows. This is a drastic step but can often resolve deep-seated software problems. Be sure to back up your important data first.
- Access Reset Options: Go to Settings > Update & Security > Recovery > Reset this PC.
- Choose Your Option: Choose "Keep my files" (which tries to preserve your data) or "Remove everything" (which wipes everything).
14. Seek Professional Help: When to Call in the Cavalry
Sometimes, it's best to admit defeat. If you've tried everything and your Dell Inspiron 17 keyboard is still dead, it’s time to consult a professional.
- Qualified Technician: A technician can diagnose the problem accurately and perform any necessary repairs.
- Warranty Check: Check if your laptop is still under warranty. Dell may cover the repair costs.
15. Prevention is Key: Tips for a Happy
Laptop Running Slow? This ONE Trick Will SHOCK You!SOLUTION Some Keys Not Working on Laptop Keyboard

By Tech Express SOLUTION Some Keys Not Working on Laptop Keyboard by Tech Express
Dell laptop keyboard not working repair it helper
By I T HELPER Dell laptop keyboard not working repair it helper by I T HELPER
How to Fix Keyboard Not Lighting Up Official Dell Tech Support

By Dell Support How to Fix Keyboard Not Lighting Up Official Dell Tech Support by Dell Support
Title: Dell laptop keyboard Not Working Fixed Fix Laptop Keyboard Problem
Channel: SMOKERYAK
Dell laptop keyboard Not Working Fixed Fix Laptop Keyboard Problem by SMOKERYAK
Laptop Working
Dell Inspiron 17 Keyboard Dead? FIX This NOW!
Is your Dell Inspiron 17 keyboard suddenly unresponsive? The frustration is real, but before you resign yourself to an external keyboard or, worse, a complete system replacement, understand that a dead keyboard doesn't always equate to irreversible damage. We've compiled a comprehensive guide, meticulously crafted to guide you through a series of troubleshooting steps. Our aim is not just to identify the potential culprit but to provide practical, actionable solutions designed to resurrect your keyboard functionality. Let's get started, and hopefully, have your keyboard working again.
Initial Diagnostics: Is It Really the Keyboard?
Before diving into keyboard-specific fixes, let’s conduct some preemptive checks. Sometimes, the problem isn't where you think it is.
External Keyboard Test: The simplest test. Connect an external USB keyboard. Does it work? If yes, the issue strongly points to your Inspiron 17's internal keyboard. If it doesn't, consider broader system issues—we'll touch on those later.
Boot into BIOS/UEFI: Power on your Inspiron 17 and, repeatedly tap the appropriate key (usually Del, F2, or F12) during startup to enter the BIOS/UEFI setup. Here, the keyboard functionality is crucial. Does the keyboard function within the BIOS environment? If it does, this narrows the problem. It suggests a software or driver conflict within your operating system is at play. If it doesn’t work here either, then the issue is likely hardware-related.
Operating System Login: After restarting, try to use the keyboard at the Windows or Linux login screen. Certain problems won't appear until you're inside the operating system. If it fails at the login screen, but worked in BIOS, the issue is probably with the operating system, its software, or its drivers.
Software Solutions: Your First Line of Defense
If your keyboard functions in the BIOS but fails within the operating system, software conflicts are the likely cause.
Driver Reinstallation: The keyboard driver may have become corrupted or outdated. Here's the process:
- Right-click the Windows Start button and select "Device Manager."
- Navigate to "Keyboards." You might see your Inspiron 17's keyboard listed more than once.
- Right-click each keyboard entry and select "Uninstall device." Confirm the uninstallation.
- Restart your Inspiron 17. Windows will usually automatically reinstall the correct drivers upon restart. Check if the keyboard functions. If not, proceed with the next steps.
Driver Update: Outdated drivers are another frequent problem.
- Go back to "Device Manager."
- Expand "Keyboards."
- Right-click your keyboard and select "Update driver."
- Choose "Search automatically for drivers." Windows will search online for the latest driver.
- Alternatively, visit the Dell support website, enter your Service Tag or model number, and download the latest keyboard drivers from the "Drivers & Downloads" section. Run the downloaded driver installer.
System Restore: Did the keyboard start malfunctioning recently? If so, a system restore to a point before the problem began may be the fix. This will undo recent software and driver changes in the system.
- Type "Create a restore point" in the Windows search bar and open the utility.
- Click "System Restore."
- Follow the prompts, choosing a restore point from when your keyboard was known to be working.
Malware Scan: Malware can interfere with system operations, including keyboard functionality. Run a thorough scan using your preferred antivirus or anti-malware software. Make sure your software is up-to-date before the scan. Full system scans are a must during this process.
Troubleshoot Compatibility: Certain software, particularly those that use keyboard shortcuts, might cause conflicts. Try booting into Safe Mode (repeatedly pressing F8 or Shift+F8 during startup, depending on your operating system version, and selecting "Safe Mode"). If the keyboard works in Safe Mode, a recently installed program is very likely the culprit. Uninstall recently installed software and check if the keyboard works after each uninstall.
Hardware Inspection: Diving Deep
If software fixes fail, we need to investigate hardware. Important: Always power off your laptop and disconnect the power adapter before working inside.
Visual Inspection: Take a close look at the keyboard itself. Are any keys visibly damaged or loose? Are there any spills or debris lodged between the keys? Use a can of compressed air and, if necessary, isopropyl alcohol with a cotton swab to carefully clean between the keys.
Keyboard Cable Connection: This is a critical point of failure for many laptop keyboards.
- Carefully remove the battery; consult your Inspiron 17's service manual (easily found online by searching "Dell Inspiron 17 service manual" + your specific model number) for precise instructions.
- Locate the keyboard's ribbon cable connection to the motherboard. This is often under a small plastic cover or retention clip.
- Gently disconnect and reconnect the ribbon cable. Ensure it's securely seated. Sometimes a loose connection is all it takes.
- Reassemble your laptop and test the keyboard.
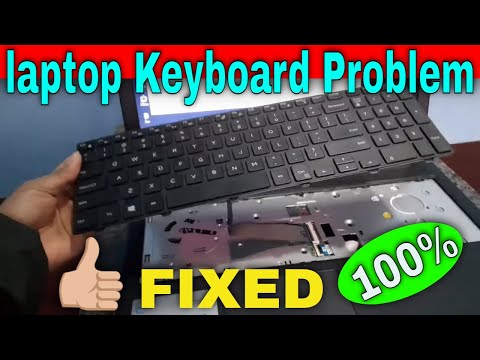
Keyboard Replacement: If the cable connection doesn't work, or if you still suspect keyboard failure, the keyboard itself might need replacing. Refer to your service manual. Replacement keyboards are easy to order online. The service manual will offer explicit instructions on how to remove the old keyboard and install the new one. Replacing a keyboard is a straightforward process involving screws and ribbon cables.
Advanced Hardware Diagnostics and Considerations
Motherboard Issues: In rare cases, the keyboard controller on the motherboard may be faulty. This is less common than a keyboard issue itself but possible. This repair is best left to professionals.
Liquid Damage: Spills are a common keyboard killer. Even if the keys look clean, liquid can seep inside and corrode internal components. If a spill occurred, immediately power off and remove the battery. Don't turn it on until everything has dried completely, ideally for several days, and then attempt to clean the keyboard with isopropyl alcohol or have a professional assess the extent of the damage.
Warranty and Technical Support: Always check your warranty status. If your Inspiron 17 is still under warranty, contact Dell support. They can provide further troubleshooting steps, potentially offer repairs, or provide a replacement. Make sure to have your Service Tag ready.
Third-party Repair: If your warranty is expired, consider a reputable third-party repair service. These services often specialize in laptop repair and have the tools and expertise to diagnose and fix more complex issues.
Preventative Measures: Keeping Your Keyboard Alive
Gentle Use: Avoid excessive force when typing. Bangers and heavy-handed typists are a keyboard's enemy.
Regular Cleaning: Dust and debris are inevitable. Clean your keyboard regularly, using compressed air and a soft cloth. If cleaning is necessary, do not use alcohol above 70%, as it may damage the keyboard’s plastic.
Avoid Food and Drinks: It's a cliché for a reason. Spills are a constant threat. Keep liquids and food away from your keyboard.
Consider a Keyboard Cover: These transparent covers can protect against spills and dust, extending the life of your keyboard.
By systematically working through these troubleshooting steps and following our recommendations, you significantly increase your chances of restoring your Dell Inspiron 17's keyboard functionality. Remember, patience and a methodical approach are key. Don't give up. With a little effort, you could save yourself the cost and inconvenience of a new laptop.
