how to get music onto usb when laptop not working
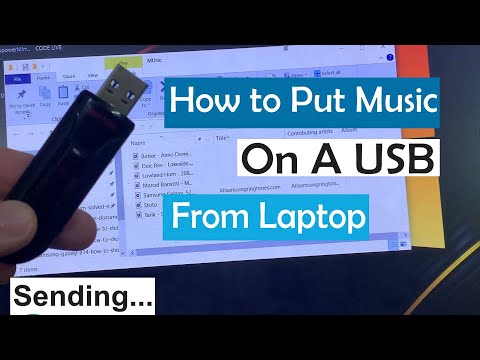
Title: How to Put Music on a USB from a Laptop How to put songs in Pendrive from laptop
Channel: Cap Trong Nam - How To
How to Put Music on a USB from a Laptop How to put songs in Pendrive from laptop by Cap Trong Nam - How To
Laptop Dead? Get Your Music on That USB *NOW*!
Oh No! Your Laptop Died! Here's How to Rescue Your Tunes
The dreaded blue screen. The agonizing spinning wheel. Your laptop, your digital companion, has flatlined. It's a gut-wrenching experience, especially when you realize all your precious music files are trapped inside. Don't panic! There's a lifeline. You can still salvage your tunes.
The Emergency Music Extraction Plan: Don’t Lose That Beat!
First things first, take a deep breath. Assess the situation. Is your laptop completely unresponsive? Try a hard reset. Press and hold the power button for a solid 15 seconds. Then, attempt to restart it. Still nothing? Okay, it's time to move to the next phase. We are going to recover those precious files.
Gather Your Rescue Supplies: The Hero's Arsenal
You’ll need a few essential tools for this mission. Grab a working computer. This is your base of operations. Now, locate a USB flash drive. Make sure it has enough space. You will need enough space for your music library. Finally, find a screwdriver set. This will be helpful depending on your laptop model. These tools form your rescue kit.
Understanding the Terrain: Finding the Music Files
Your next objective is to find your music files. Where did you store them? Most users organize their music in the 'Music' folder. Consequently, check this location first. Another common location is the 'Downloads' folder. However, music might reside anywhere, depending on your usage. You must explore your computer's file structure.
Cracking the Case: The External Drive Approach
Ideally, your laptop has a functioning external drive. If so, connect it to the dead laptop. If the laptop dimly comes alive, you should be able to access your files. From there, you can transfer your music. Copy your music to your target USB drive. Be patient; the process can take time.
Bypassing the Obstacles: Extracting the Hard Drive
If your laptop is completely unresponsive, don't worry. This phase is more technical, yet manageable. Before you begin, power down your laptop. Disconnect the power cable. Lay your laptop on a stable surface. Consult your laptop's manual for instructions. Be sure you know how to open your laptop.
Carefully remove the laptop's casing. Locate the hard drive. It's usually a rectangular component. Gently detach the hard drive from its connection. You'll likely need that screwdriver. Then, connect the hard drive to a USB adapter. These are readily available online. Now, connect the adapter to your working computer. Your hard drive is now an external drive.
Data Retrieval: The Crucial Transfer
Your computer might recognize the hard drive immediately. If not, you might need to install drivers. Once the computer recognizes the drive, navigate to the drive's files. Find your music files folder. Select the music files you need. Copy them to your USB drive. Be sure to double-check everything.
The Final Victory: Music Restored!
Once the file transfer is complete, safely eject the USB drive. Close your computer and disconnect the adapter. Reassemble your laptop, if you removed the hard drive. Plug in your USB drive into your working computer. All your music should now be safe.
Important Considerations: Preventing Future Disasters
This is a rescue mission, but we must also think long-term. Consider backing up your music regularly. Cloud storage services are ideal for this. USB drives offer physical backups. Invest in an external hard drive. This will protect your music from future laptop failures.
Troubleshooting Triumphs: Addressing Potential Glitches
There might be a few hiccups along the way. Your laptop may not have a removable hard drive. You could also be struggling to connect the hard drive to a USB adapter. If you're uncomfortable opening your laptop, seek professional help. A tech expert may cost cash, though it's worth it. These experts are familiar with all the latest tech. Keep trying; with patience, you'll succeed.
The Soundtrack to Survival: Enjoy Your Rescued Tunes!
You have successfully retrieved your music! Celebrate your victory with a listening session. You are victorious. Now, enjoy your favorite music. Remember to back up your precious music. This will offer peace of mind. After all, failure is never an option.
HP Laptop for Work: The ULTIMATE Productivity Powerhouse!Laptop Dead? Get Your Music on That USB NOW!
We've all been there, haven't we? That sinking feeling in your gut when your laptop screen goes black, and the only sound is the whirring of a fan that sounds like it's about to take flight. Panic sets in. Did you save that important document? Are your thesis notes lost forever? But hold on a second. Amidst the chaos, a more pressing, more visceral concern bubbles to the surface: Your music. The digital soul-soothing soundtrack of your life, trapped within the unresponsive machine. Don't despair, music lovers! This guide is your survival kit, your digital lifeboat. We're going to learn how to rescue your precious tunes from the clutches of a dead laptop and transport them safely to the promised land of your USB drive.
1. The Calm Before the Storm: Recognizing the Imminent Disaster
Before your laptop completely throws in the towel, there are usually warning signs: sluggish performance, random crashes, the dreaded "blue screen of death." Think of it as your laptop whispering, "Hey, I might be a goner soon." Recognizing these early indicators is crucial. It's like spotting a rogue wave before it crashes over your sandcastle. Did your laptop start acting like a grumpy old man who's lost his dentures? Then, it's time to act. Listen to those digital murmurs!
2. Why "Now"? The Urgency of Musical Salvation
Why is it so vital to rescue your music now? Because the longer your laptop remains dead, the higher the risk of complete digital oblivion. Think of your data like a house in a fire. Each passing minute increases the chance of everything – including your beloved music – being reduced to ashes. A corrupted hard drive, a fried motherboard, or a complete system failure can wipe everything out. Don't let your musical treasures become another casualty. This isn't some hypothetical, abstract concept. This is about your playlist, your memories, your sonic sanctuary.
3. Gathering Your Resources: What You Need to Kickstart the Rescue Mission
Before we deploy our rescue plan, we need to gather our tools. It's like prepping your medical kit right before an adventure. Here's what you'll need:
- A Functioning Computer (Borrowed or Otherwise): This is your base of operations, your digital command center. This is how you'll access the files.
- A USB Drive (or Two, Just in Case): Ideally, a drive with ample storage capacity for your music library. A digital vault if you will.
- A Friend (or a Technician): Sometimes, a helping hand – or a professional – is invaluable.
4. Identifying the Problem: Diagnosing the Laptop's Demise (and What It Means for Your Music)
Is your laptop completely unresponsive, or can you still get a flicker of life out of it? Can you access the BIOS/UEFI? Or maybe, you can't even see the screen, but you hear the fan spinning? The specific problem dictates your approach. This is a sort of detective work, you see. If the computer seems to be alive (but just not the screen) it may be an issue with the display, and the hard drive might still be spinning. If it doesn't do anything, well, that opens up a whole other scenario. The more information you have, the better your chances of success.
5. The Easiest Route: If Your Laptop Still Has Some Life
If your laptop exhibits some signs of life, you have a significant advantage. If you can boot into a recovery environment, or a minimal operating system, the chances of saving your music are much higher. Think of this as patching a leak in the hull before the ship sinks.
- Backup, Backup, Backup: If you can, copy everything (music, documents, photos, etc.) to your USB drive. This is your first priority.
- Access Your Music Files: Navigate to the folder where your music is stored. It's usually in "Music" under your user profile.
- Copy and Paste: The simplest method. Select your music files, and right-click and copy them to your USB drive.
6. The More Challenging Path: When Your Laptop is Beyond Repair (or You Think It Is)
When the laptop is completely unresponsive, or you can't get into the operating system, you'll need to remove the hard drive from the dead laptop and connect it to another computer. It’s like a heart transplant. Don't worry; even if this sounds stressful, it is usually easier than you might think.
- Opening the Laptop: Research your specific laptop model to find instructions. There are countless videos online. This is important!
- Removing the Hard Drive: Once inside, you'll need to locate the hard drive and disconnect it. Again, instruction varies by model.
- Connecting to Another Computer: You can use a USB hard drive enclosure or a SATA-to-USB adapter to connect the drive. Think of this as getting a new life support system.
- Accessing Your Music: The drive should appear as an external storage device on the working computer. From there, you copy your music files as described earlier.
7. Dealing with Digital Rights Management (DRM): A Potential Roadblock
If you purchased your music from online stores like iTunes or Amazon, it might be protected by Digital Rights Management (DRM). This means you might encounter some restrictions. Like a locked treasure chest, we need a key. Don't panic!
- DRM-Free Music: Your best bet is to always purchase DRM-free music if available.
- Authorized Devices: If you can access your music through the dead laptop still, authorize the new device to play that music!
8. The Playlist Problem: Preserving Your Meticulously Curated Collections
Let's say your music is accessible, but it's more than just MP3s. Let's say you've spent hours curating playlists. We've all been there. Here’s how to rescue those:
- Exporting Playlists: Many music players allow you to export playlists in formats such as M3U or PLS.
- Importing Playlists: Import the exported playlist files into your new music player.
9. Considering Cloud Storage: A Safety Net for Your Musical Soul
What if your laptop goes belly up, and you're starting the process from scratch? Cloud storage services (like Google Drive, Dropbox, or OneDrive) can be lifesavers.
- Automatic Backup: If you backed up your music into the cloud, everything is safe.
- Easy Access: You can access your music from any device—anywhere!
10. Preventative Measures: Safeguarding Your Music for the Future
We've saved your music this time, but let's learn from this experience. How do we avoid this happening again?
- Regular Backups: Regularly back up your entire music library to an external hard drive or the cloud.
- Cloud Syncing: Enable automatic syncing to cloud storage.
- Routine Maintenance: Clean up your laptop's hard drive.
11. Troubleshooting Tips: What to Do If Things Go Wrong
Not everything goes according to plan, so here are some solutions to common problems:
- Drive Not Recognized: Ensure all connections are secure. Try a different USB port or adapter.
- Corrupted Files: If some files are corrupted, try to re-download them, if possible, or search for alternative sources.
- Data Recovery Services: In dire circumstances, consider professional data recovery services.
12. Choosing the Right USB Drive or External Hard Drive
Picking out a USB drive involves so much more than just capacity.
- Storage Space: Consider how much music you own and will own.
- Transfer Speed: Faster drives (USB 3.0 or higher) will save you time.
- Durability: Choose a drive that can withstand the bumps of everyday life.
13. Software Solutions: Music-Specific Tools for Transferring Your Tunes
There are also some software solutions to help in the process:
- Music Management Tools: Programs like MusicBee or foobar2000 allow you to manage and transfer your music easily.
14. The Aftermath: What to Do After Your Music is Safe
The mission has been accomplished, the music saved. But what comes next?
- Import to Your New Device: Load your music into your new laptop, phone, or music player.
- Celebrate!: Reward yourself with a listen of your rescued tunes.
15. The Ultimate Takeaway: Why Backups Are Your Best Friend
The most important takeaway is this: Backups reign supreme. A dead laptop is a stressful situation, but it doesn't have to be a disaster. Back up your precious music!
Final Thoughts
Look, losing your music feels like losing a part of yourself. It's like losing your favorite photo album, the one full of memories. But, with the right knowledge and a little bit of bravery, you can make sure that your musical heart keeps beating. So go forth, rescue your music, and keep the tunes flowing. You got this, music lover!
**
Laptop Lifestyle: Hack Your Workday & Conquer Productivity!Working Solution for USB Drive Not Showing Up USB Device not Recognized in Windows 10
By FIXsage Working Solution for USB Drive Not Showing Up USB Device not Recognized in Windows 10 by FIXsage
How To Put Music On USB From Laptop & PC - Full Guide

By GuideRealm How To Put Music On USB From Laptop & PC - Full Guide by GuideRealm
Get CDJ Ready - Export Playlists From Rekordbox To USB

By Chris M Get CDJ Ready - Export Playlists From Rekordbox To USB by Chris M
Title: How to FIX USB DRIVE not showing up Windows 10 Easy Method
Channel: YourSixStudios
How to FIX USB DRIVE not showing up Windows 10 Easy Method by YourSixStudios
Change Wifi Settings
Laptop Dead? Get Your Music on That USB NOW!
It's a scenario that sends a shiver down the spine of any music lover: your laptop, your digital music library's primary guardian, decides to abruptly and irrevocably cease functioning. The screen flickers, a final, mournful groan escapes from the internal components, and then—silence. The panic sets in. What about your meticulously curated playlists? The rare tracks you painstakingly sourced? The years of digital audio memories that now seem trapped in a digital tomb? This guide serves as your immediate, actionable rescue plan. We're going to navigate you through the process of retrieving your precious music files, ensuring they survive the laptop's untimely demise and live on to be enjoyed on any device with a USB port.
Assessing the Situation: Immediate Actions and Avoiding Further Damage
First and foremost, remain calm. Panic, while understandable, is the enemy of a successful data recovery. Before you do anything, immediately unplug any external power source from your laptop. If you hear any clicking or grinding sounds emanating from the hard drive, do not attempt to power it on again. This is a critical warning sign of potential physical damage to the hard drive platters, and further attempts to access the drive could lead to complete data loss.
The next step depends on the nature of the laptop's failure. If the laptop simply won't boot, but you can still hear the fan whirring or the hard drive spinning (even if sporadically), there's still hope. If the screen is black, but you suspect the system is partially functioning, attempt to connect the laptop to an external monitor. You might be able to see the boot process and access your music files through an external display.
If your laptop is genuinely dead – no signs of life, no fan activity, no spinning hard drive – the situation is more complex. However, do not give up hope. We'll explore options for recovering your music files, even in the most dire circumstances.
Option 1: The Laptop Still (Partially) Functions – Data Retrieval Through a Functional Operating System
If your laptop exhibits any signs of life, this is your first and best bet. The goal is to access the hard drive and copy your music files to a USB drive.
Boot into Safe Mode: Try booting into Safe Mode (often accessed by repeatedly pressing F8 or Shift+F8 during startup, consult your laptop’s documentation). Safe Mode loads a minimal set of drivers and services, which can sometimes bypass the issues causing the laptop to fail. If successful, this grants you temporary access to the hard drive.
Connect an External USB Drive: Insert a USB drive with sufficient storage capacity to hold your entire music library. It's always best to have more storage than needed.
Locate Your Music Files: The location of your music files depends on how you organized them. Common locations include:
- The "Music" Folder: This is the default location for most music files on Windows and is usually found under "This PC" or "My Computer" -> "C Drive (or the drive with Windows installed)" -> "Users" -> Your Username -> "Music".
- iTunes Library: If you used iTunes, your music files are typically located in the "iTunes Media" folder, usually found within your "Music" folder (e.g., "C:\Users\YourUsername\Music\iTunes\iTunes Media").
- Custom Folders: If you created custom folders for your music, you'll need to remember where you stored them.
- Downloads Folder: Sometimes, downloaded music ends up in the "Downloads" folder.
Copy and Paste: Select all your music files (Ctrl+A or Cmd+A), right-click, and select "Copy". Then, navigate to your USB drive, right-click, and select "Paste".
Wait Patiently: The copying process can take a significant amount of time, depending on the size of your music library. Do not interrupt the process. Ensure the laptop remains connected to power during the copy operation.
Verify the Transfer: Once the copying is complete, verify that all your music files are on the USB drive. Open a few files on the USB drive to ensure they play correctly.
Option 2: Hard Drive Extraction – Salvaging Music from a Non-Booting Laptop
If your laptop is completely unresponsive, or if the operating system is corrupted beyond repair, you’ll need to extract the hard drive physically. This is a more advanced procedure, and you should proceed with caution. If you’re uncomfortable performing this task, consider taking your laptop to a qualified computer repair technician.
Gather Your Tools: You’ll need:
- A small Phillips head screwdriver (usually a #0 or #1).
- An anti-static wrist strap (to prevent damage to sensitive components).
- A portable USB hard drive enclosure or a SATA to USB adapter cable.
- A well-lit workspace.
Power Down and Disconnect: Ensure the laptop is completely powered off and disconnected from any power source.
Disassemble the Laptop: This step varies depending on your laptop model. Consult your laptop’s service manual or search for a disassembly guide specific to your model online (YouTube is a great resource). Typically, you’ll need to remove screws from the bottom or sides of the laptop to access the hard drive.
Locate and Remove the Hard Drive: Once you’ve opened the laptop, locate the hard drive. It’s usually a rectangular component connected to the motherboard via a SATA cable. Carefully unscrew the hard drive from its housing and gently unplug the SATA cable.
Connect the Hard Drive to a USB Adapter/Enclosure: Connect the extracted hard drive to your USB adapter or place it into the USB hard drive enclosure. Make sure the connection is secure.
Connect the Hard Drive to a Functioning Computer: Plug the USB adapter/enclosure into a working computer. The computer should recognize the hard drive as an external storage device.
Access and Copy Your Music: Navigate to the hard drive in File Explorer (Windows) or Finder (Mac). The file structure on the hard drive should be intact, enabling you to locate your music files using the same file paths mentioned in "Option 1". Copy your music files to a destination of your choice on the functioning computer.
Option 3: Data Recovery Services – When DIY Isn’t Enough
If the hard drive is physically damaged (e.g., clicking, grinding noises), or if you're unable to access the drive even with the above methods, professional data recovery services are your best bet. These services have specialized equipment and expertise to retrieve data from damaged hard drives.
Research Reputable Services: Look for data recovery companies with a proven track record and positive customer reviews.
Contact the Service and Explain the Situation: Provide as much detail as possible about the laptop's failure and any symptoms you observed.
Obtain a Quote and Understand the Process: Data recovery can be expensive, so get a quote upfront. Understand the recovery process, including the estimated timeframe and the likelihood of successful data retrieval; ask about the specifics of the process.
Submit the Hard Drive: Carefully package the hard drive and submit it to the data recovery service.
Await Results: The data recovery service will analyze the hard drive and attempt to recover your music files. They will typically provide a list of recovered files and the cost of the service.
Protecting Your Music Library: Proactive Measures for the Future
Losing your music library once is a lesson you only need to learn once. Prevent future heartbreak by following these proactive steps:
Regular Backups: This is the most crucial step. Back up your music files regularly to an external hard drive, a cloud storage service (e.g., Google Drive, Dropbox, OneDrive), or both. Automate the backup process whenever possible.
Use a Reliable Music Management Software: Software like iTunes (now Apple Music), MediaMonkey, or MusicBee can help organize your music library, making backups and data recovery easier.
External Hard Drive Best Practices: Store your external hard drive in a cool, dry place. Eject the external hard drive properly before disconnecting it from your computer.
Cloud Storage Solutions: Consider cloud storage as a primary or secondary backup solution. Cloud services offer a convenient and often automatically scheduled backup process.
Maintain Your Laptop: Keep your laptop free of malware and viruses. Regularly run system maintenance tasks. Do not overload your hard drive.
By taking these steps, you can ensure that your music library remains safely preserved, ready for listening whenever and wherever you choose, regardless of your laptop’s fate.
