color not working in center of laptop screen
Title: How To Slove Laptop Screen Problem Laptop Screen Colour Problem How to Fix It
Channel: Ridip Zone
How To Slove Laptop Screen Problem Laptop Screen Colour Problem How to Fix It by Ridip Zone
Laptop Screen's DEAD ZONE? Fix That Color Glitch NOW!
Laptop Screen Nightmares? Vanquish the Color Demons!
Ever stared at your laptop screen, heart sinking, as odd colors and shadowy patches mock your every scroll? You're not alone. Many of us have felt that familiar pang of dread when we see the dreaded "dead zone" or a frustrating color glitch. However, hold tight, because you aren't powerless. We'll embark on a quest to banish those visual villains and restore your screen’s vibrancy.
The Color Calamity: Unmasking the Culprit
Color anomalies, those unwelcome guests on your screen, can manifest in several ways. Perhaps you're witnessing faded colors, or maybe they're completely warped. These visual gremlins can appear in various forms, including discolored patches, distorted hues, or even complete blackouts in certain areas. Sometimes, these problems are subtle, like a slight shift in color balance. Other times, they’re glaring, like a pixelated mess. Consequently, recognizing the specific type of glitch you're battling is crucial.
Screen Diagnostics: Your First Line of Defense
Before you panic, assess the situation. Run some preliminary diagnostics. First, ensure your screen isn't simply suffering from a brightness or contrast issue. Try adjusting these settings in your operating system. Afterward, consider looking at other potential causes.
Driver Dilemmas: Updating for Optimal Performance
Obsolete or corrupted display drivers are notorious for causing color glitches. Thus, consider updating your graphics card drivers. How to do that? It’s easy. Navigate to your device manager within your operating system. Expand the "Display adapters" section, right-click on your graphics card, and select "Update driver." The system will then automatically search for and install the newest drivers. Should that not work, consider manually downloading the latest drivers from your graphics card manufacturer's website.
Hardware Hurdles: Exploring Inner Workings
Sometimes, the issue resides deeper within your laptop's hardware. A loose cable connection between the screen and the motherboard could be to blame. However, as a general rule, opening your laptop exposes the delicate internal components. Therefore, cautiously explore the potential of this fix. If you're comfortable, consider gently reseating the display cable. If not, seek professional assistance from a reputable repair shop.
External Monitor Magic: A Temporary Test
Want to quickly rule out a screen issue? Connect your laptop to an external monitor. If the external display works flawlessly, the problem certainly lies within your laptop's screen. This is a simple, yet effective, diagnostic move.
Calibration Chaos: Fine-Tuning Your Visuals
Color calibration can seem complicated. However, mastering it can make your laptop's visuals more appealing. Modern operating systems provide built-in color calibration tools. These tools involve adjusting gamma, contrast, and color balance to achieve optimal visuals. Also, calibrate through your graphics card software settings.
Software Solutions: Taming the Color Beast
Sometimes, the source of your display woes is software-related. Specifically, certain applications or programs might interfere with color profiles or cause rendering issues. Boot your laptop in "Safe Mode." This mode will run only essential services. Therefore, it can help diagnose whether a third-party application is causing the color problems.
The Thermal Threat: Preventing Overheating
Overheating might disrupt your display. Make sure your laptop’s cooling vents aren't blocked. Ensure your laptop sits on a hard, flat surface. Consider investing in a cooling pad for more intensive tasks. Regular maintenance will greatly reduce the potential for thermal issues.
The Final Fix: Professional Intervention
If you've exhausted these steps without success, consider seeking professional help. A qualified laptop repair technician has the expertise and tools to diagnose and repair your screen. While it may seem daunting, a professional can quickly assess the root cause of the problem. They can also provide a lasting solution, possibly even extending the life of your laptop.
Prevention is Key: Maintaining Your Screen’s Health
Finally, prevent future problems. Clean your screen regularly with a soft, damp cloth. Avoid direct sunlight and extreme temperatures. Keep your laptop protected during transport. All these small steps help protect your laptop's display.
So, there you have it! You now have the tools to battle those screen maladies. Whether it's a simple driver update or a deeper hardware investigation, you're equipped to restore your laptop's visual brilliance. Remember, you can solve these color glitches. Therefore, go forth and conquer!
Lenovo Legion Laptop Camera DEAD? FIX IT NOW!Laptop Screen's DEAD ZONE? Fix That Color Glitch NOW!
Ever stared at your laptop screen, feeling like you're watching a faded photograph from your grandpa's attic? That, my friends, is a classic sign that something's amiss. We're talking about those frustrating color glitches, the dreaded "dead zones," and everything in between that can turn your vibrant digital world into a muted, pixelated mess. But don't despair! Fixing these issues is often simpler than you think. Let's dive in and resurrect your laptop's visual performance.
1. The Ghost in the Machine: Recognizing the Symptoms
Before we start playing tech-savior, let's make sure we're diagnosing the right problem. Color glitches manifest in myriad ways. Maybe your screen looks like a watercolor painting that's been left out in the rain. Or perhaps you're seeing bands of distorted colors, a sort of digital rainbow gone wrong. Dead zones are even more obvious, often appearing as solid black or discolored patches that refuse to refresh.
- Color Banding: Think of it like a poorly graded sunset. Smooth gradients become abrupt, jagged steps of color.
- Pixelation: The image breaks down into blocky squares, making everything look less detailed.
- Dead Pixels/Zones: These are the most noticeable – black, white, or discolored spots that don't respond to changes on the screen.
- Flickering: The screen might flicker on and off, or the brightness might fluctuate erratically.
- Distorted Colors: Colors might appear washed out, overly saturated, or completely incorrect.
If you're experiencing any of these, congratulations! You've got a screen problem, and we're here to help you fix it.
2. The Usual Suspects: Hardware vs. Software Troubles
Now that we've identified the enemy, we need to figure out what's causing the chaos. Is this a hardware issue, a software glitch, or maybe something in between? The truth is, it could be either. I’ve had experiences with both scenarios. One time, I spilled coffee (don't judge!) near my laptop, and the screen went haywire. Another time, a simple driver update fixed everything.
3. The Simple Stuff: Basic Troubleshooting Steps
Before we crack open our laptops (unless you're comfortable with that), let's try some quick fixes. These are like the warm-up exercises before a marathon, designed to rule out the obvious.
- Restart Your Laptop: This is the digital equivalent of "turn it off and on again." It can clear up minor software glitches and refresh your system.
- Check Your Connections: Are all the cables connecting your laptop to external displays secure? A loose connection can wreak havoc. For example, I once spent an hour troubleshooting a projector, only to realize the HDMI cable wasn't fully plugged in. Facepalm moment!
- Adjust Brightness and Contrast: Sometimes, a simple tweak to these settings can make a world of difference. Too much or too little brightness can accentuate display issues.
- Run a Diagnostic Test: Many laptops have built-in diagnostic tools. Check your laptop's manual or search online for instructions. This can help identify hardware problems.
- Update Your Drivers: Outdated or corrupted graphics drivers are a common culprit. We'll get into that in more detail shortly.
4. Digging Deeper: Software Solutions and Driver Updates
If the simple steps didn't do the trick, it's time to dive into the software side of things. Let's see if we can wrestle those drivers into submission.
- Updating Graphics Drivers: Go to your laptop manufacturer's website (e.g., Dell, HP, Lenovo) or the website of your graphics card manufacturer (e.g., NVIDIA, AMD, Intel). Download and install the latest drivers for your specific laptop model. This is critical! Drivers are what tell your computer how to talk to your hardware.
- Roll Back Driver Updates: If the problems started after a driver update, consider rolling back to the previous version. Sometimes a newer driver introduces new bugs.
- Check Display Settings in Your Operating System: Make sure your display settings (resolution, refresh rate, color profile) are optimized for your screen. Wrong settings can cause all sorts of visual anomalies.
- Run a Malware Scan: Malware can sometimes interfere with your display's functionality. Run a full system scan with your antivirus software.
5. Hardware Headaches: When It's Time to Get Serious
Sometimes, the problem isn't software; it's a hardware issue. This is where things get a little more complicated, and possibly expensive. Don't panic just yet!
- External Monitor Test: Connect your laptop to an external monitor. If the display looks fine on the external monitor, the problem is likely with your laptop's screen or the internal connection to the screen.
- Internal Connection Checks (Advanced): This is for the tech-savvy among us. If you're comfortable with it, you can try opening up your laptop (following your manufacturer's instructions) and checking the cable that connects the screen to the motherboard. Sometimes, a loose connection is the culprit. (Warning: Proceed with caution. Incorrectly disassembling your laptop can void your warranty or cause further damage.)
- Screen Replacement: If the screen itself is damaged (e.g., cracked, dead pixels), the most likely solution is screen replacement. This can be done by a professional or, if you're feeling brave, by yourself (again, following detailed instructions).
- Graphics Card Issues: In rare cases, the graphics card itself might be the problem. This is a more serious and expensive fix, typically requiring professional repair or replacement.
6. Addressing Specific Screen Issues: Dead Pixels' and Color Banding'
Let's get specific. Different issues require slightly different approaches.
- For Dead Pixels: There are a few "tricks" you can try. Search for online tools that flash rapidly changing colors. Sometimes, this can "awaken" a stuck pixel. However, keep your expectations realistic – often, dead pixels are permanent.
- For Color Banding: This can be caused by driver issues, incorrect color profiles, or even screen burn-in (less common on modern laptops). Try updating your drivers, calibrating your color profiles, or, if the banding is severe, considering screen replacement.
7. The Importance of Color Calibration
Getting our laptop screens looking their best isn't just about fixing defects; it's also about accuracy. Color calibration ensures your display accurately represents colors, which is particularly important for photo editing, video editing, and graphic design.
- Using Built-in Calibration Tools: Most operating systems have built-in display calibration tools. Search your settings for "calibrate display."
- Using a Colorimeter: For the most accurate results, you can invest in a colorimeter, a hardware device that measures and calibrates your screen's colors.
8. Preventing Future Glitches: Proactive Measures
Now that we know how to fix the problems, how do we prevent them in the first place?
- Handle Your Laptop with Care: Avoid dropping it or subjecting it to extreme temperatures or humidity.
- Clean Your Screen Properly: Use a microfiber cloth and a screen-cleaning solution specifically designed for laptops. Avoid harsh chemicals or abrasive cleaners.
- Keep Your Software Updated: Regularly update your operating system, drivers, and software to fix bugs and improve performance.
- Monitor Your Laptop's Temperature: Overheating can damage your screen. Make sure your laptop has good ventilation.
9. Battling the Backlight Bleed, And What To Do
Backlight bleed is another common issue. It's where light leaks from the edges of the screen, giving a fuzzy appearance, especially with dark images.
- Reducing Backlight Bleed: Reducing the screen's brightness often helps minimize the problem.
- Screen Angle Matters: Changing the angle of the screen might also change the appearance of backlight bleed.
- Internal Fixes (Advanced): Rarely, you can try tightening screws around the screen bezel, but this is usually not as effective. In more serious cases, you might need a screen replacement.
10. Refresh Rate: More Than Meets the Eye
The refresh rate is how quickly your screen updates the image. While typically not a direct cause of color glitches or dead zones, a low refresh rate can make motion look blurry or jerky, which could exacerbate the perception of other display issues. Most modern laptop screens support at least 60Hz, which is generally sufficient for everyday use.
- Checking the Refresh Rate: You can check your refresh rate in your display settings.
- Increasing the Refresh Rate: If your laptop supports a higher refresh rate (e.g., 120Hz, 144Hz), switching to it can improve the smoothness of motion.
11. Understanding Display Technologies: LCD and OLED
Knowing your screen technology can help when troubleshooting. LCD (Liquid Crystal Display) screens are the most common. OLED (Organic Light Emitting Diode) screens are less common but offer better contrast and color accuracy.
- LCD Screens: Use a backlight to illuminate the pixels.
- OLED Screens: Each pixel emits its own light.
- Impact on Troubleshooting: Problems in LCD screens are sometimes backlight-related, while OLED
How To Fix Monitor Yellow Tint Screen in Windows 11 1087 Solve Yellow Screen Tint Problem

By High Techy How To Fix Monitor Yellow Tint Screen in Windows 11 1087 Solve Yellow Screen Tint Problem by High Techy
How to Reset Color Settings in Windows 10 PC or Laptop

By Discover You How to Reset Color Settings in Windows 10 PC or Laptop by Discover You
Windows 10 Negative colors Display Show, not showing actual color of display

By Technology World Windows 10 Negative colors Display Show, not showing actual color of display by Technology World

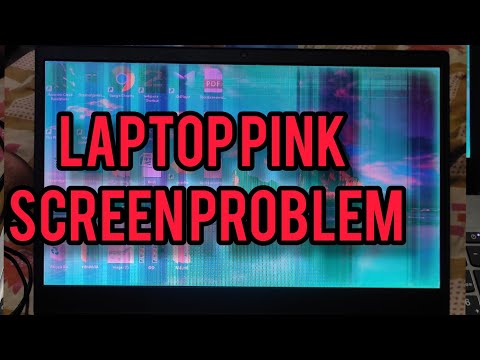
Title: HP Laptop Pink screen display problem solved
Channel: Technical Neel
HP Laptop Pink screen display problem solved by Technical Neel
Laptop Working
Laptop Screen's DEAD ZONE? Fix That Color Glitch NOW!
Is your laptop screen betraying you? That sudden, unwelcome appearance of a dead zone, a color aberration, or a flicker? Don’t despair! This problem is more common than you might think, and in most cases, the solution is within your grasp. We at [Your Company Name] understand the frustration that a malfunctioning display can cause, disrupting your workflow, hindering your entertainment, and ultimately, diminishing your overall computing experience. We'll guide you through comprehensive troubleshooting steps, detailed explanations of potential causes, and actionable solutions, all designed to breathe new life into your laptop's visual output. Get ready to banish the black screen and reclaim your vibrant digital world.
Identifying the Culprit: Pinpointing the Source of the Problem
Before you begin any repair attempts, it's crucial to accurately diagnose the root cause of the issue. Not all screen anomalies are created equal. A systematic approach will prevent wasted time and ensure you address the appropriate problem. Consider these common culprits:
- Hardware Failure: The most alarming possibility, hardware issues encompass everything from a failing LCD panel to internal cable damage.
- Software Conflicts: Drivers, operating system glitches, and conflicting software can all wreak havoc on your display.
- External Devices: Connected peripherals – external monitors, projectors, and docking stations – can sometimes contribute to display problems.
- Environmental Factors: Extreme temperatures, physical impacts, and even excessive moisture can compromise your laptop's screen integrity.
Step-by-Step Troubleshooting: Restoring Your Screen's Clarity
Let's delve into a structured approach to address the problems. We will address the most frequent complaints.
Initial Checks: The Quick Wins
Start with the simplest checks. Many display issues have straightforward solutions.
- Restart Your Laptop: This classic remedy truly is often effective. A simple restart can clear temporary software glitches. If your screen is frozen and unresponsive, you may need to force a shutdown by holding the power button.
- Brightness Adjustment: Sometimes, the screen appears blank because the brightness is set to its lowest level. Use the brightness keys on your keyboard (typically a sun icon) to increase the output.
- External Monitor Test: Connect your laptop to an external monitor. If the external display functions correctly, the problem likely lies with your laptop's screen or its internal connection. If the problem persists on the external monitor, the issue might be related to the graphics card or drivers.
Delving into Drivers: The Software Solution
Drivers are software components that allow your operating system and other programs to communicate with your hardware. Outdated or corrupted drivers are a common source of display problems.
- Driver Updates: Open the Device Manager (search for it in the Windows search bar, or access it through the Control Panel). Expand the "Display adapters" section. Right-click on your graphics card (e.g., Intel HD Graphics, NVIDIA GeForce, AMD Radeon) and select "Update driver." Choose "Search automatically for drivers."
- Driver Rollback: If the problem started after a recent driver update, roll back to a previous version. In Device Manager, right-click on your graphics card, select "Properties," go to the "Driver" tab, and click "Roll Back Driver."
- Driver Reinstallation: If updating or rolling back doesn't work, try reinstalling the drivers. In Device Manager, right-click the graphics card, select "Uninstall device," and follow the prompts. Restart your computer, and Windows will attempt to reinstall the driver automatically. If it doesn't, download the latest driver from the manufacturer's website (Intel, NVIDIA, or AMD) and install it manually.
Screen Brightness, Contrast, and Color Calibration
Sometimes, a simple misconfiguration can cause the screen to appear dim, washed out, or exhibiting unusual colors.
- Windows Display Settings: Right-click anywhere on your desktop and select "Display settings." Adjust the brightness slider.
- Color Profile Calibration: Within Display Settings, look for "Advanced display settings" and then "Color management." From here, you can try to calibrate your screen using the built-in Windows Display Color Calibration tool.
- Manufacturer Software: Many laptop manufacturers (e.g., Dell, HP, Lenovo) provide software with advanced display settings. Explore these tools to customize color profiles, contrast, and other display settings.
Addressing Physical Damage: A More Hands-On Approach
If the previous steps haven't resolved the issue, it’s time for a more comprehensive investigation.
- Visual Inspection: Carefully examine your laptop screen for any visible signs of damage, such as cracks, dents, or pressure marks. Also, inspect the screen bezel (the plastic frame surrounding the screen) for any signs of warping or gaps.
- Internal Cable Check: This step requires some technical expertise, and at the very least, the proper tools. First, ensure the laptop is turned off and disconnected from the power source. Consult your laptop's service manual or online guides to locate the screen's cable. Open the laptop's bottom panel to access the screen cable connection to the motherboard. Check the cable's condition and ensure it's securely connected. Note: If you are not comfortable with this, it's best to take your laptop to a qualified repair technician.
Handling Hardware Issues: The Final Resort
If you've ruled out software and have identified or suspect hardware damage, it's crucial to be aware of the potential cost.
- LCD Panel Replacement: If your LCD panel is faulty, it will require replacement. The cost of a new LCD panel varies depending on the laptop model but can be expensive.
- Backlight Problems: If your screen is dim even with the brightness turned up, the backlight might be failing. In some cases, it is possible to replace the backlight. However, this requires specialized tools and expertise.
- Motherboard Issues: Problems with the graphics card or other components on the motherboard can also cause display problems. Motherboard repairs are complex and expensive.
- Seeking Professional Help: We strongly advise against attempting extensive hardware repairs unless you have the necessary skills and experience. Always consider professional repair services offered by qualified laptop repair technicians.
Preventative Measures: Protecting Your Screen from Future Problems
Once you've resolved the issue, take steps to prevent it from recurring.
Handling the Laptop
- Avoid Physical Impacts: Be extra careful when transporting your laptop.
- Clean Your Screen Regularly: Use a soft, lint-free cloth to wipe down your screen. Avoid harsh cleaning products.
- Protect Against Extreme Temperatures: Avoid exposing your laptop to extreme heat or cold.
- Close the Lid Gently: Don't slam the lid shut; always close it carefully.
Software maintenance
- Keep Drivers Up-to-Date: Make sure that your screen drivers stay up-to-date.
- Monitor Software Installs: Be aware of software installs that are impacting your screen resolution.
Conclusion: A Vibrant Screen is Within Reach
We've equipped you with a comprehensive toolkit of troubleshooting methods. Whether the issue is a simple driver glitch or a more complex hardware problem, these steps will help you diagnose the root cause and take the appropriate action. Remember, a vibrant display is essential for a positive computing experience. With patience and persistence, you can fix that color glitch, restore your screen's clarity, and get back to enjoying your laptop to its fullest potential. If the problems persist please do not hesitate to seek professional help from a qualified technician. We offer full service at [Your Company Name] and we are here to help!
