what to do when your laptop charger isn't working
Title: This Laptop Won't Charge shorts pc computer pcrepair dell
Channel: Matt's Computer Services
This Laptop Won't Charge shorts pc computer pcrepair dell by Matt's Computer Services
what to do when your laptop charger is not working, what to do when your computer charger is not working, what to do when your laptop charger isn't working, what to do if my laptop charger is not working, what do you do when your laptop charger is not working, what to do if your computer charger is not working, what to do if my computer charger is not working, what to do if your laptop charger isn't working, what to do if your hp laptop charger is not working, what to do if my laptop charger isn't working
Laptop Charger DEAD? This ONE Trick Will SHOCK You!
Reviving Your Laptop: The Unexpected Solution to a Dead Charger
That sinking feeling? The one that crashes over you when your laptop, your digital lifeline, suddenly goes dark. The screen flickers, the battery indicator winks accusingly and then…poof! Blackness. Your charger? Stone cold. You might think you are doomed. You're not. Fortunately, there's a secret weapon. Prepare for a shock because it works surprisingly well.
The Problem: Charger Failure and the Modern Dependence
We're all tethered to our laptops these days. They are essential for work, play, and keeping connected. Losing power, especially when you need it most, is a disaster. Charger failure is a common problem. It can happen for a variety of reasons, from wear and tear to power surges. Now, you'd likely assume the expensive, inevitable replacement is the only option. But, wait! There's more.
Recognizing the Symptoms: Is Your Charger Truly Dead?
Before we dive into the mind-blowing trick, let's diagnose the situation. Perhaps your charger isn't completely dead. It's important to rule out other potential issues. First, check the obvious: the power outlet. Make sure it's functional. Test it with another device. Next, inspect the charger cord itself. Look for any visible damage like fraying or cuts. Similarly, examine the connection to your laptop. Is it snug? Sometimes, a loose connection is the culprit. However, if everything seems fine and your laptop still refuses to cooperate, it is quite possible that the charger is at fault.
The Unexpected Solution: The Secret Trick
Let's get to the main event. Now, the big reveal. Are you ready? Here it is: the trick is to… carefully examine the charger itself. This may sound basic. But it’s often overlooked. Unplug the charger from the wall and your laptop. Then, let’s carefully examine the charging brick and the cable.
The Science Behind the Trick: Understanding Internal Components
Okay, so what's happening? The charging brick contains a series of components that are essential for transforming AC power into DC power, which your laptop uses. These components, including capacitors and resistors, can sometimes fail. Consequently, the charger may stop working. However, sometimes, and it's a surprisingly common occurrence, a faulty connection inside the charger itself is the problem. This is often caused by heat or minor manufacturing defects that can cause a break in a circuit.
Step-by-Step Guide: Reviving Your Charger
Here's what you need to do. This is not for the faint of heart, but it can save you money. Firstly, ensure the charger is unplugged from both the wall and your laptop for safety. After that, find the spot where the charger cable connects to the brick. Next, very carefully examine the junction where the cable goes into the brick. You might see a seam. Generally, this is where the charger is assembled. Use a small flathead screwdriver, or even a butter knife. Gently pry open the charger case at this seam. You might need to apply some force. Furthermore, be patient. Try working your way around the perimeter. The case should open.
Inside the Charger: What to Look For
Once you open it, carefully examine the internal components. Look for any loose connections. Any visibly damaged ones. Sometimes, you'll spot a wire that may have detached from a solder joint. Also, look for any components that look burned or scorched. Subsequently, if you see a loose wire or a bad connection, now is the time to be precise. Try to carefully reattach the wire. Or, even better, resolder it. Moreover, if you're not comfortable with soldering, that is fine. You can simply reconnect the wire tightly. In addition, try wrapping it with electrical tape.
Putting it Back Together and Testing
After you’ve addressed any internal issues, it’s time to close the charger. First of all, carefully put the case back together. Make sure everything lines up properly. Then, you can use tape to secure the case. After that, plug the charger back into the wall and your laptop. Now, cross your fingers. Turn your laptop on. If the screen lights up, you've succeeded! Therefore, celebrate your victory. You have saved a charger.
Important Safety Precautions: Before You Begin
It cannot be stressed enough: electricity is dangerous. Therefore, always unplug the charger before you attempt to open it. Never attempt this while the charger is plugged in. If you are not comfortable working with electronics, seek professional help. There is no shame in that. Moreover, while this trick might work, it's not a guaranteed solution. Also, understand you perform this at your own risk.
When to Seek Professional Help: Alternatives to DIY
However, sometimes the damage to the charger could be too advanced. Or, you just might not possess the required tools. Therefore, you might need to seek professional help. A qualified electronics repair technician can evaluate the damage and offer a solution. Also, consider the age of your charger. If it is old, a replacement might be more cost-effective. Furthermore, don’t be afraid to shop around for a new one.
Conclusion: Embrace the Unexpected
So, there you have it. A trick that might just save your laptop from going dark. It's a simple, yet effective, method in an imperfect world. The next time your charger fails, don't despair! Try this trick. You might just be surprised. You're now armed with the knowledge. Go forth and conquer the dead charger blues. And remember: the most successful discoveries often come from the most unexpected places. So go ahead, take a chance, and embrace the possibilities.
Laptop Touchpad DEAD? This SHOCKING Fix Works INSTANTLY!Laptop Charger DEAD? This ONE Trick Will SHOCK You!
Hey everyone, ever find yourself staring at a blank laptop screen, the dreaded red battery icon blinking accusingly? Yeah, we've all been there. That sinking feeling when you realize, "Uh oh, my laptop charger is dead." It's a mini-crisis for the modern digital nomad, the student cramming for exams, or anyone relying on their trusty laptop. But before you start panicking and envisioning a trip to the nearest tech store, let's talk about something that might just save your day.
1. The Grim Reality: When Your Charger Calls It Quits
Let's face it, laptop chargers aren't built to last forever. They're like that favorite pair of jeans – eventually, they develop a hole, or in this case, stop working. They're subjected to constant bending, plugging, unplugging, and all sorts of wear and tear. And when they go, they go! It’s a right pain, isn’t it? But before you throw the lifeless charger in the bin and resign yourself to a day of digital darkness, let's examine a few common culprits that can lead to a charger’s demise.
1.1. The Usual Suspects in Charger Failure
Think of your charger as a small superhero constantly fighting a battle against the evils of power surges, overheating, and good old-fashioned wear and tear. Some usual suspects include:
- Frayed Cables: The most common enemy. Constant bending and twisting can cause the internal wires to break.
- Overheating: Leaving your charger plugged in, especially in a poorly ventilated area, can cause it to overheat and fail. Think of it like a marathon runner hitting the wall.
- Power Surges: A sudden spike in electrical current can fry the delicate components inside your charger.
- Internal Component Failure: Sometimes, things just give out. It's the nature of electronics!
2. Diagnosing the Problem: Is It Really the Charger?
Alright, so you believe your charger is dead. But before you rush to buy a new one, let's do a little detective work. Sometimes, the problem isn't the charger itself but something else entirely. We’ve all been there, jumping to conclusions, right?
2.1. Quick Checks: Is Your Laptop Really Not Charging?
Before assuming the worst, perform these simple checks:
- Check the Outlet: Is the outlet working? Try plugging something else into the same outlet to verify.
- Inspect the Adapter: Look at the charger's brick. Is it getting warm (but not burning hot)? If it's cold, it could signal a problem.
- Examine the Cable: Check the cable where it enters the charger brick and where it connects to your laptop. Are there any visible breaks or kinks?
- Try a Different Outlet: A different outlet might just be the solution. Some outlets have issues themselves.
3. The Magical Reboot: The "One Trick" That Might Save You
Now, here's the moment you've been waiting for. This is the one trick we're talking about, the digital equivalent of a CPR maneuver for your charger. It's a technique that can sometimes, and I emphasize sometimes, revive a seemingly dead charger. It might not work every time, but it’s definitely worth a shot before you give up hope. This trick can be seen as a Power Cycle.
3.1. The Power Cycle Procedure: Breathe New Life into Your Charger
This technique won't magically fix a physical break, of course, but it can often work if the charger has frozen. Here's how to do it:
- Unplug Everything: Unplug the charger from the wall outlet and from your laptop.
- Press and Hold the Power Button: With everything disconnected, press and hold the power button on your laptop for a full 30 seconds. Yes, 30 seconds. Think of it as a digital meditation.
- Wait a Minute: Let the laptop sit unplugged for a few minutes. This gives any residual power a chance to dissipate.
- Plug It Back In: Plug the charger back into the wall outlet, and then connect it to your laptop.
- Turn it On: Try turning on your laptop. Cross your fingers!
This process essentially drains any residual power from the laptop and the charger, allowing it to reset its internal systems. It’s like giving your electronics a fresh start. It's worked for me on a few occasions!
4. Why This "Trick" Works (Sometimes): The Science Behind the Reboot
Think of your laptop and charger as having tiny little brains, complete with software. When a charger malfunctions or overheats, its internal circuits can sometimes glitch or get stuck. The Power Cycle is like hitting the "reset" button on those circuits.
4.1. Explaining the Mechanism of the Power Cycle
- Capacitors Discharge: Holding the power button down drains the capacitors, which are like tiny batteries within your laptop and charger, and stores excess electricity.
- System Reset: This action removes any residual electrical charge, forcing the system to reset and clear any temporary errors.
- Restoring Communication: By allowing the devices to "reboot," it can re-establish communication between the laptop and the charger, allowing it to recharge again.
5. What If the Trick Doesn't Work? Exploring Further Troubleshooting
Okay, so you tried the power cycle, and your laptop still isn't charging. Don't lose hope! There are other things you can try.
5.1. Deeper Dive: More Troubleshooting Tips for a Dead Charger
Explore the following:
- Inspect the Charger Port: Sometimes, dust or debris can accumulate in the port on your laptop, preventing a proper connection. Gently clean it with compressed air or a soft brush.
- Test a Different Charger (If Possible): If you have access to a compatible charger, try using it to see if it charges your laptop. This will help you definitively diagnose whether the problem is the charger or the laptop itself.
- Check Your Laptop's Battery: Even if the charger works, the battery might be the problem. Test with an external battery.
- External Power Bank with Laptop Support: Purchase an external power bank. Some of this can assist with charging the device.
6. The Importance of Prevention: Avoiding Charger Failures
Like any piece of equipment, preventing issues leads to a longer life. Prevention helps to assist in a better experience.
6.1. Protecting Your Investment: Charger Care Tips
- Avoid Extreme Temperatures: Don't leave your charger in direct sunlight or in a freezing cold car.
- Protect the Cable: Avoid bending the cable sharply and try to coil it loosely when storing it.
- Use a Surge Protector: This can shield your charger (and your laptop) from power surges and spikes.
- Unplug When Not in Use: This can help conserve energy and reduce wear and tear on the charger.
7. When to Replace: Knowing When It's Time to Say Goodbye
Knowing when to call it quits on a laptop charger can save you frustration and possible damage to your laptop.
7.1. Recognizing the Signs: Time to Toss the Charger
- Visible Damage: If the cable is frayed, cracked, or split, it's time for a replacement.
- Consistent Overheating: If the charger is consistently getting extremely hot, it's a sign of a problem.
- Inconsistent Charging: If the charger is only working sporadically, or if it charges very slowly, it's likely failing.
- Complete Failure: If the charger is dead as a doornail, then it's time to look for a replacement.
8. Finding a Replacement: Selecting the Right Charger
When buying a replacement charger, it is important to be very careful. Getting the wrong fit can ruin the functionality and damage the laptop further.
8.1. Buying the Right Replacement: Your Guide to Charger Shopping
- Check the Voltage and Amperage: This information is usually printed on your original charger. Make sure to match these specifications (voltage must match exactly).
- Consider the Wattage: A higher wattage charger will charge your laptop faster, but it's okay to use a charger with a wattage equal to or higher than your original.
- Buy from a Reputable Source: Choose a charger from a known brand or a reputable seller to ensure quality and safety.
- Check the Connector Type: Make sure the replacement charger has the correct connector size and shape for your laptop.
- Consider a Universal Charger: These chargers can work with multiple laptop models and may be a good option if you use multiple laptops.
9. Staying Connected: Alternative Power Solutions
If your charger dies, don't worry. There are a bunch of solutions that are designed to keep you working.
9.1. Beyond the Charger: Powering Your Laptop Without a Charger
- External Battery Packs: These can be charged beforehand and used to charge your laptop on the go.
- USB-C Charging: If your laptop supports USB-C charging, you can use a USB-
What To Do If Your Laptop Is Plugged In But Not Charging
By PCMag What To Do If Your Laptop Is Plugged In But Not Charging by PCMag
Dell Inspiron won't charge cheap easy fix tech pc technology shorts

By Salem Techsperts Dell Inspiron won't charge cheap easy fix tech pc technology shorts by Salem Techsperts
Laptop Battery Not Charging Plugged In, Not Charging Solution 8 Fixes

By Online Info Studio Laptop Battery Not Charging Plugged In, Not Charging Solution 8 Fixes by Online Info Studio

Title: Solved Charger light goes off when I plug it into the laptop
Channel: KH COMPUTERS
Solved Charger light goes off when I plug it into the laptop by KH COMPUTERS
Change Wifi Settings
Laptop Charger DEAD? This ONE Trick Will SHOCK You!
We've all been there. That heart-stopping moment when your laptop screen flickers, the battery icon blinks a menacing red, and you reach for your charger – only to find… nothing. Your charger's dead. Panic sets in. Deadlines loom. The digital world grinds to a halt. But before you resign yourself to a productivity-free purgatory, take a deep breath. There's a chance, a surprisingly good chance, you can revive that seemingly lifeless laptop charger. This isn't some vague, aspirational tip. It's a concrete, actionable strategy that could breathe new life into your power adapter and save you a significant headache (and potentially, a sizable expense). Let's dive into the single most effective method to diagnose and, more often than not, resurrect your defunct laptop charger.
Understanding the Enemy: Common Charger Failures
Before we unleash the magic bullet, let's understand the battlefield. Laptop chargers, while seemingly simple, are complex little devices. They're constantly battling heat, electricity fluctuations, and good old-fashioned wear and tear. Knowing the common causes of failure is the first step in the recovery process.
One of the most prevalent issues is internal component failure. This is where the charger’s intricate circuitry, the brains of the operation, simply gives up the ghost. This can be caused by a power surge, prolonged use, or even manufacturing defects. Unfortunately, this is often the most difficult type of failure to remedy, but there are steps we can take to assess the situation.
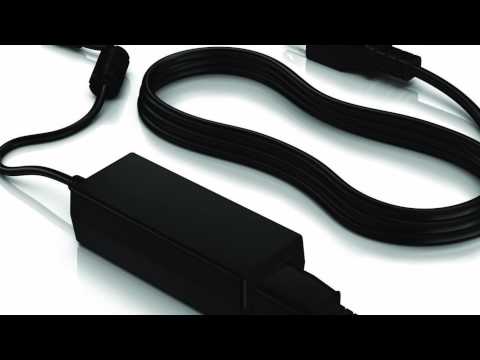
Another common culprit is the power cord itself. This is a deceptively vulnerable part of the charger. Constant bending, twisting, and general mishandling can damage the internal wires, leading to a broken connection. These breaks can be intermittent, meaning the charger might work sometimes and fail at others – a truly frustrating situation. The connector that plugs into your laptop can also be a point of failure.
Finally, there's the often-overlooked issue of overheating. Laptop chargers generate heat. Prolonged use or poor ventilation can cause the internal components to overheat and fail. This is especially true with older chargers or in warmer climates.
The Shocking Truth: The Power of the Reset
The single most effective "trick" to resuscitate a dead laptop charger centers around a simple yet often overlooked procedure: the reset. This isn't a software reset; it's a physical, hands-on reset designed to clear any residual electrical charge that might be interfering with the charger's function. This often fixes the problem immediately.
Here's the step-by-step method:
Unplug Everything: This might seem obvious, but it's crucial. Disconnect the charger from both the laptop and the wall outlet. Make absolutely sure that nothing is connected to the charger.
The Wait: This is the secret ingredient. Let the charger sit, completely unplugged, for a minimum of 30 minutes. This allows any residual charge to dissipate from the capacitors inside the charger. An hour or two is even better, especially if you suspect the charger has been subjected to any kind of power surge.
The Recharge Test: After the waiting period, plug the charger directly into a known working wall outlet. Avoid using extension cords or power strips for the initial test, in case they’re part of the problem. Try plugging the charger into the laptop and see if the charging light illuminates or the laptop starts to receive power.
The Connector Check: While the charger is plugged in, gently jiggle the connector that plugs into your laptop. Pay careful attention. A loose connection here can cause the charger to work intermittently, so a thorough inspection could be required.
If, after following these steps, your laptop is once again drawing power, congratulations! You've successfully revived your charger. But what if the charger remains stubbornly unresponsive? Do not despair. We can delve deeper.
Troubleshooting Beyond the Reset: Digging Deeper
If the reset doesn't work, it’s time to perform a more in-depth diagnostics process.
The Wall Outlet Check: Eliminate the possibility of a faulty outlet by testing the charger in different outlets in your home or office. This seems simple, but it resolves many problems. If the charger operates in a different outlet, then the initial outlet may simply be damaged.
Cable Examination: Carefully inspect the entire length of both the power cord (the one that plugs into the wall) and the charging cable (the one that plugs into your laptop). Check for any visible damage such as cuts, cracks, frays, or exposed wires. Also, pay close attention to the points where the cables enter the charger brick and the connector.
Connector Inspection: Examine the connector that plugs into your laptop. Look for bent or broken pins, corrosion, or debris. A small, soft brush (like a clean paintbrush) can be used to gently clean the connector if necessary.
Beyond Simple Diagnosis: Advanced Troubleshooting
If the initial steps fail to revive your charger, you can progress to the next level of advanced troubleshooting. This involves a more thorough inspection methodology.
Visual Inspection of the Charger Brick: Carefully examine the charger brick itself. Look for any signs of physical damage, such as cracks, bulges, or burn marks. If you see anything suspicious, discontinue use immediately and replace the charger.
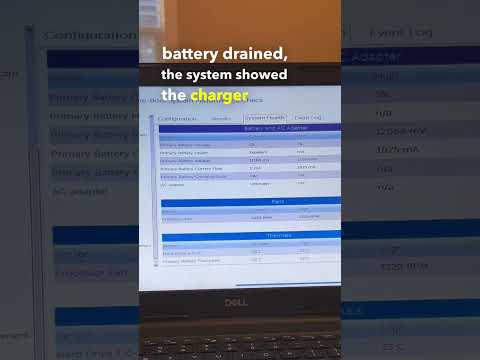
Testing with a Multimeter (For the Tech-Savvy): This step requires a multimeter and some basic electrical knowledge. If you’re comfortable working with electricity, you can use a multimeter to test the output voltage of the charger. Set the multimeter to the DC voltage setting that matches your charger’s output (usually printed on the charger).
- Caution: Ensure the charger is disconnected from your laptop before performing this measurement.
- Procedure: Plug the charger into a wall outlet. Place the multimeter probes on the positive and negative terminals of the charger’s output connector (the part that plugs into your laptop).
- Interpreting the Results: A healthy charger will display a voltage close to its rated output voltage. If the voltage is significantly lower, or if the multimeter reads zero, the charger is likely faulty.
Prevention is Key: Extending Your Charger's Lifespan
Once you've revived your charger, the next step is to prevent future failures.
Proper Care and Handling: Avoid bending or twisting the cables excessively. When storing your charger, avoid wrapping the cables tightly around the brick, which can damage the wires over time.
Ventilation is Crucial: Ensure adequate ventilation around the charger when in use. Avoid placing it on soft surfaces like beds or carpets, which can trap heat.
Power Surge Protection: Invest in a surge protector or a power strip with surge protection to safeguard your charger from power fluctuations.
Temperature Control: Avoid using your charger in extremely hot or cold environments.
When to Give Up and Replace
Sometimes, despite your best efforts, a charger is simply beyond repair. Here are the signs that it's time to bite the bullet and purchase a replacement:
- Visible Physical Damage: Cracks, bulges, burn marks, or exposed wires on the brick or cables.
- Inconsistent Performance: The charger works intermittently or only when jiggled.
- Failed Multimeter Tests: The multimeter readings indicate a significantly low or zero output voltage.
- Repeated Failures: If the charger fails repeatedly after the reset method or basic troubleshooting, this signifies a more profound internal issue.
The Bottom Line: Don't Give Up Too Easily
A dead laptop charger is a common problem, and it can feel like a technological setback. However, before you rush out to buy a replacement, remember the power of the reset. By following these simple steps, you can often bring your charger back to life and save yourself time, money, and the frustration of a dead laptop. With a little bit of patience and a systematic approach, you can conquer the common issues and keep your digital life powered up. Good luck, and happy charging!
