dell laptop screen brightness not working

Title: WINDOWS 10 Brightness Control Not Working QUICK FIX NO RESTART
Channel: Cretizer
WINDOWS 10 Brightness Control Not Working QUICK FIX NO RESTART by Cretizer
dell laptop screen brightness not working, dell inspiron screen brightness not working, dell inspiron 15 screen brightness not working, dell laptop brightness not working, dell laptop brightness control not working, dell screen brightness not working
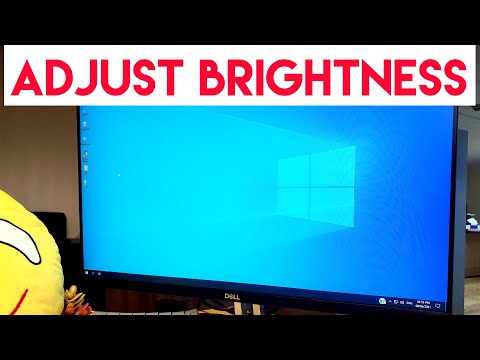
Dell Laptop Screen: FIX Dim Brightness NOW! (Easy Steps)
Dell Laptop Screen: Banishing the Gloom (Easy Steps to Brighter Days)
Have you ever felt like your Dell laptop screen is stuck in a perpetual twilight? It can be incredibly frustrating. Suddenly, everything appears dim. But don't despair. Fixing a dim laptop screen is often simpler than you imagine. Consequently, let's illuminate your digital world. I'll guide you through some remarkably easy fixes.
Is It Really Dim, Or Just Feeling That Way?
Before we dive into troubleshooting, let’s ensure the screen truly is dim. First, examine the screen in a well-lit area. Alternatively, try tilting the screen to eliminate sunlight glare. Similarly, consider the content currently displayed. Dark images often seem dimmer than lighter ones. In addition, external light sources can play tricks. The laptop might be fine. So, check these initial points immediately.
The Obvious Suspects: Brightness Controls and Power Settings
Now, let's assume the screen is truly dim. First and foremost, let’s investigate the most common culprits: brightness settings and power options. Most Dell laptops have dedicated keys to adjust screen brightness. These keys generally feature sun icons. Look for these on your keyboard. Normally, they are function keys (Fn) combined with another key. Specifically, the exact key combination varies. It depends on your specific Dell model. Therefore, consult your user manual if you're unsure.
Furthermore, check your power settings. Dimming the screen conserves battery life. This is often the default setting. So, access your power options. You can usually find them in the system tray. Look for the battery icon. Right-click on it. Select “Power Options.” Alternatively, search for "Power Options" in the Windows search bar.
Within the power options, ensure the screen brightness is set appropriately. Moreover, verify different brightness levels for battery and plugged-in modes. Understandably, you might want a brighter screen when connected to power. Conversely, consider a dimmer setting for extended battery life.
Drivers, Drivers, Everywhere (And Sometimes Nowhere)
Graphics drivers are the unsung heroes of your display. They're also often the source of problems. Outdated or corrupted drivers can cause dimness or other display issues. Hence, you should check your graphics drivers regularly.
To start, open Device Manager. You can find it by searching in the Windows search bar. Then, expand the "Display adapters" section. You should see your graphics card listed there. Right-click on your graphics card. Select "Update driver." Choose the option to search online for updated drivers. Windows will automatically attempt to find and install the latest drivers. As a note, you might need to restart your laptop after updating drivers.
If that fails, go to your Dell support website. Enter your Service Tag or model number. Then, locate the drivers for your specific laptop model. Download and install the latest graphics drivers from there.
Beyond the Basics: Advanced Troubleshooting
If the preceding steps don't work, it's time for more in-depth troubleshooting.
First, try resetting your display settings. This can often resolve temporary glitches affecting the screen. In the display settings (accessible through the Windows settings app), revert any custom colour profiles.
Second, consider an external monitor. Connect your laptop to an external monitor. If the picture is bright on the external monitor, the problem lies with your laptop's display. Alternatively, the issue might be your laptop’s internal components. Therefore, take this into consideration.
Third, thoroughly inspect the screen itself. Look for any physical damage. Cracks or pressure marks might indicate hardware failure. Similarly, look for any debris or dust that might be obstructing light. However, only do this after powering everything off for safety.
The Hardware Hurdle: When It Gets Really Serious
Sadly, sometimes the problem lies with the hardware. A backlight issue. For instance, a failing backlight is a common cause of dim screens. The backlight provides the illumination for your display. If it is not working correctly, your screen will be dim.
Furthermore, the screen cable itself could be faulty. This delicate connection can cause display problems. Therefore, it is possible the cable is the issue.
If you suspect a hardware problem, I would strongly advise against attempting repairs yourself. Laptop repairs can be complex. Attempting them might cause further damage. Instead, consult a qualified technician. Indeed, professional help is often the best route.
Preventative Measures: Keeping Your Screen Sparkling
Prevention is key. To avoid future dim screen woes, take some simple preventative measures. First, keep your laptop away from extreme temperatures and humidity. Heat and moisture can damage internal components. Obviously, this includes your display.
Second, clean your screen regularly. Use a microfibre cloth. Avoid harsh chemicals. These can damage the surface.
Third, handle your laptop with care. Avoid dropping or bumping it. These actions can damage internal components.
Wrapping Up: Enjoy the Brighter Side of Life (Literally!)
I hope these steps guide you. Now you can fix your dim Dell laptop screen. Remember to start with the basics. Check brightness settings and power options. Update your drivers. Then, move on from there.
You should remember that these steps are generally applicable. Your laptop model might have specific quirks. When in doubt, consult your Dell manual or contact Dell support. Enjoy a brighter screen. It will enhance your computing experiences.
Skype Camera Nightmare! Laptop Cam FAIL - FIXED!Dell Laptop Screen: FIX Dim Brightness NOW! (Easy Steps)
Hey there, fellow tech travelers! Ever felt like your Dell laptop screen is stuck in permanent nighttime mode, even when the sun's blazing outside? We've all been there. That frustrating dimness can turn a productive workday into a squinting contest and make streaming movies a blurry, shadowy experience. But fear not! We're diving deep to uncover the secrets behind a stubbornly dim Dell laptop screen, empowering you with swift, easy fixes. Let's get that brightness roaring back to life!
1. The Problem: Why is My Dell Laptop Screen So Dim?
Think of your laptop screen’s brightness like a muscle. Sometimes, it just needs a little… well, a lot, of a boost! There are numerous reasons why your Dell screen might be playing the disappearing act. From accidental button presses to software glitches and even hardware issues, the culprits can be sneaky. We'll explore the most common offenders, shedding light on the darkness and equipping you to diagnose the root cause.
2. The Quickest Fix: The Brightness Keys - Your First Line of Defense
Before we embark on a technical odyssey, let’s start with the obvious and the quickest fixes: the brightness keys! These are usually located at the top of your keyboard, either on the function keys (F1, F2, etc.) or with dedicated brightness symbols (a sun-like icon). Sometimes, you need to press the "Fn" (Function) key along with the brightness key. It's like a secret code! Play around with these keys; they're your immediate brightness boosters. This is your first checkpoint, and if the screen springs back to life, consider yourself victorious!
3. Power Mode Shenanigans: Optimizing for Brightness
Your Dell laptop's power settings significantly influence screen brightness. Think of it as a balancing act: maximizing performance (and brightness) usually means sacrificing battery life. To check your power mode, click the battery icon in your system tray (bottom right corner of your screen). You'll see different modes like "Balanced," "Power Saver," and "High Performance."
- Power Saver: This mode, as you might guess, dims the screen to conserve battery.
- Balanced: A good middle ground, optimizing for both performance and battery life.
- High Performance: Crank up the brightness and get that screen gleaming, but be warned – your battery will drain faster than a magician’s disappearing act.
Experiment with these modes; see what suits your needs. If your screen is consistently dim on battery power, check your settings to ensure you haven’t accidentally enabled maximum dimming.
4. Windows Mobility Center: Your Central Brightness Hub
Windows Mobility Center is like the control panel for your laptop's mobility features. To access it, you can simply type "Mobility Center" in the Windows search bar. Once open, you'll find a brightness slider front and center. Slide it to the right, and watch that screen light up! This is a straightforward way to adjust your screen brightness without fiddling with keyboard shortcuts.
5. Graphics Driver Glitches: The Silent Screen Saboteurs
Your graphics drivers, akin to the conductors of an orchestra, manage how your laptop displays images. Outdated or corrupted drivers can wreak havoc, including dim screens. Here’s how to check and update them:
- Open Device Manager: Type "Device Manager" in the Windows search bar and open it.
- Expand "Display adapters": You'll likely see your graphics card listed here (e.g., Intel HD Graphics, NVIDIA GeForce).
- Right-click your graphics card: Select "Update driver."
- Choose "Search automatically for drivers": Let Windows search for the latest drivers online.
- Restart your laptop: Once the driver is updated.
These steps can frequently resolve display issues, giving your graphics card a new lease on life.
6. The Screen Settings: Digging Deeper into Display Options
Windows Display settings hold a wealth of customization options. Right-click anywhere on your desktop and select "Display settings." Here, you will find a dedicated brightness slider. Also, explore options like “Night Light.” This feature applies a warmer color filter to your screen, which, while it might sound counter-intuitive, can sometimes affect the perceived brightness. Turn it off to see if it helps.
7. Ambient Light Sensor: A Smart, But Sometimes Tricky, Feature
Some Dell laptops are equipped with an ambient light sensor. Think of it as a tiny detective that adjusts the screen brightness based on the surrounding light. While it’s designed to be a convenience, it can sometimes be overly sensitive or miscalibrated, resulting in a persistently dim screen. You can often disable this sensor in your system's settings (search for "Display" in the Windows search bar).
8. External Display Interference: Is an External Monitor the Culprit?
Are you connected to an external monitor? Sometimes the settings from an external monitor can strangely influence the settings on your laptop's internal display. Disconnect the external monitor and see if this fixes the issue.
9. BIOS Settings: Deep Dive into System Configuration
BIOS (Basic Input/Output System) settings are the foundation of your laptop's functionality. While they aren’t the first things to check, sometimes, screen settings within the BIOS may be amiss. Restart your laptop and repeatedly press the key that enters the BIOS (Dell laptops often use F2, F12, or Delete). Navigate the BIOS menus to look for display or brightness settings. Be cautious here, as incorrect changes can potentially cause more significant problems. If in doubt, consult Dell's support documentation or a tech expert.
10. The Display Adapter is Not Working Correctly
If the problems persist, it might be a deeper issue. Navigate to the device manager (as we previously mentioned). Ensure your Display adapters are working correctly and not showing any errors. If any errors are present, it might be hardware-related.
11. Hardware Blues: When It’s Not Just Software
Sometimes, a dim screen is a sign of a hardware issue.
- Backlight Failure: The backlight, which illuminates your screen, could be failing. This is often indicated if the screen is dim but you can still barely see the display.
- Screen Cable Issues: The cable connecting the screen to the motherboard may be loose or damaged.
- Inverter Board (for Older Laptops): Older laptops used an inverter board to power the backlight. Failure of this part can cause dimness.
If you suspect a hardware problem, the best course of action is to contact Dell support or take your laptop to a qualified repair technician.
12. Troubleshooting Steps Summary: A Checklist to Conquer Dimness
Let's recap the troubleshooting steps:
- Brightness Keys: The quick win!
- Power Mode: Experiment with different power settings.
- Windows Mobility Center: Use the brightness slider.
- Graphics Driver Updates: Check for updates.
- Display Settings: Explore display options.
- Ambient Light Sensor: Disable if necessary.
- External Monitor: Disconnect and test.
- BIOS Settings: Proceed with caution.
- Device Manager: Check for errors.
- Hardware Check: When all else fails.
13. Preventing Future Screen Dimness: Proactive Measures
Once you’ve fixed the dimness, let's prevent it from happening again. Consistent software updates are crucial. Similarly, maintain optimal power settings to avoid battery drain. Finally, avoid extreme temperatures and direct sunlight, as these can impact your screen’s performance over time.
14. Seeking Professional Help: When to Call in the Experts
If you've tried all the steps above, and your Dell laptop screen remains stubbornly dim, it's time to seek professional help. Dell’s support website, or a trusted local computer repair shop, would be great places to start. They have the tools and expertise to diagnose and fix more complex hardware issues.
15. Conclusion: Say Goodbye to the Shadows!
We've journeyed through the land of dim screens, armed with knowledge and easy fixes. By understanding the potential causes and following these steps, we hope we've rekindled your laptop's visual brilliance. Now you can return to streaming movies, working on projects, and video calling with confidence, knowing you’ve conquered the darkness. Go forth and enjoy the brighter side of computing!
FAQs
Q1: My Dell laptop screen is still dim after trying everything. What should I do?
A: It's time to consider a hardware issue. Contact Dell support or a certified repair shop for diagnostics and repair.
Q2: How do I update my graphics drivers?
A: Open Device Manager (search in Windows), expand "Display adapters," right-click your graphics card, and select "Update driver." Choose "Search automatically for drivers."
Q3: Where can I find the Windows Mobility Center?
A: Type "Mobility Center" in the Windows search bar.
Q4: What are the brightness keys on my Dell laptop?
A: They are typically the function keys at the top of your keyboard (F1, F2, etc.) or keys with dedicated brightness symbols (a sun icon). You may need to press the "Fn" key along with them.
Q5: Can a dim screen be caused by a virus?
A: While
Can Your Tablet REPLACE Your Laptop? (Shocking Truth!)HOW TO FIX DIM DISPLAY FOR ALL LAPTOP LCD LED PANEL NO BACKLIGHT PROBLEM FOR ALL LAPTOP LCD LED

By immi info HOW TO FIX DIM DISPLAY FOR ALL LAPTOP LCD LED PANEL NO BACKLIGHT PROBLEM FOR ALL LAPTOP LCD LED by immi info
How To Fix Brightness Control Slider Is Missing In Windows 10 11

By How To Fix Tech How To Fix Brightness Control Slider Is Missing In Windows 10 11 by How To Fix Tech
How to Adjust Dell Monitor Brightness Dell 24 Monitor S2421HN
By Tips And Trick How to Adjust Dell Monitor Brightness Dell 24 Monitor S2421HN by Tips And Trick

Title: Keyboard Brightness Button Not Working Problem in Windows 11, 10 Brightness OnOff Shortcut Key
Channel: Mac Nitesh
Keyboard Brightness Button Not Working Problem in Windows 11, 10 Brightness OnOff Shortcut Key by Mac Nitesh
Laptop Working
I will provide you with the title.
Title: The Ultimate Guide to Crafting the Perfect Sourdough Starter
Let's begin.
The Ultimate Guide to Crafting the Perfect Sourdough Starter
The ethereal beauty of a perfectly risen loaf of sourdough, with its tangy, complex flavor and airy crumb, begins not in the oven, but at the heart of the process: the sourdough starter. This living culture, a symbiotic community of wild yeasts and beneficial bacteria, is the engine that drives the magic. Crafting a robust and vibrant starter is a journey, a dance between patience, observation, and understanding. This definitive guide will provide everything you need to embark on that journey, transforming you from a novice baker to a confident sourdough artisan. Forget the trials and tribulations of inconsistent results; with these detailed instructions and insights, success is not just possible, it's inevitable.
Understanding the Fundamentals: The Science Behind the Starter
Before diving into the practical steps, a fundamental grasp of the underlying science is crucial. A sourdough starter is essentially a microcosm of the natural environment, a carefully cultivated ecosystem. The flour you use provides the readily available carbohydrates, the fuel for the yeast and bacteria to thrive. Naturally occurring yeasts indigenous to flour and the air are captured and multiplied in this environment. These yeasts, different from those bakers' yeast uses, produce carbon dioxide, the gas that leavens the dough. Simultaneously, lactic acid bacteria, naturally present in the flour and promoted by the moist environment, produce lactic acid. This acid not only adds that signature sourdough tang but also inhibits the growth of undesirable bacteria, ensuring the health and longevity of your culture. The bacteria also contribute to the flavor profile, adding complexity as they process the flour. Temperature plays a crucial role. Warmer temperatures accelerate fermentation, leading to faster activity, while cooler temperatures slow it down – a key factor to control the process. The type of flour also significantly impacts the starter's development. Whole grain flours, particularly rye, are rich in nutrients and microbial life, often leading to faster fermentation and robust starters. White flour, though slower, still serves as a foundation, and the balance of flours used is largely down to your personal preference and requirements for baking.
Gathering Your Ingredients and Equipment: Setting the Stage for Success
The journey of creating a sourdough starter doesn’t require a complex arsenal. However, certain considerations ensure a smooth and successful process.
- Flour: The choice of flour is paramount. While you can start with all-purpose flour, incorporating whole-wheat or rye flour will accelerate the process, providing a broader spectrum of nutrients for the microorganisms to feed on. Start simple, with a 50/50 mix of all-purpose and whole-wheat, and adjust as needed. Experimenting with different flour types throughout the life of your starter can expand the flavor profile.
- Water: Use filtered, non-chlorinated water. Chlorine in tap water inhibits yeast activity, hindering the starter's development. Room temperature water (approximately 70-75°F or 21-24°C) is ideal for optimal activity.
- Container: A clean, clear glass jar or container with ample space is essential. The transparency allows you to observe the starter's activity, and the wide mouth makes feeding and cleaning easier. Ensure the container is large enough to accommodate the starter's expansion; a quart-sized jar is usually ample.
- Cover: A loose-fitting lid or a piece of cheesecloth secured with a rubber band allows for airflow while preventing contamination. Avoid tightly sealing the container, as this can lead to a buildup of pressure and potential explosions.
- Scale: While not strictly necessary, a kitchen scale is invaluable for accuracy in measuring flour and water proportions. This consistency is crucial for consistent results.
- Spoon or Scraper: A non-reactive utensil (plastic, silicone, or wood) is best for stirring the starter. Avoid metal utensils as they can potentially interfere with the microbial activity.
The Initial Feeding Process: Cultivating the Microcosm
The initial days of starter creation are crucial for establishing a healthy and active culture. The process requires patience and consistent attention. Day by day, you nurture this living organism until you get a culture that doubles in size.
Day 1: In your clean jar, combine 50 grams (approximately 1/4 cup) of flour with 50 grams (approximately 1/4 cup) of room temperature water. Mix thoroughly until a thick, batter-like consistency is achieved. The exact amount might vary with the flour's hydration (the capacity of the flour to absorb water), and you want a pancake batter consistency. Cover loosely and let sit at room temperature (ideally between 70-75°F or 21-24°C).
Day 2: You might see a few tiny bubbles at this stage, but don't be concerned if there's no noticeable activity. Discard half of the mixture (approximately 50 grams). Add 50 grams of fresh flour and 50 grams of fresh water, stirring until combined. Replace the lid loosely and return to room temperature.
Days 3-7 (and beyond): These days are the core of the process. Repeat the discard and feeding routine every 24 hours. Observe the starter closely. In the beginning, you could see activity, but it might be inconsistent. It could also have an unpleasant odor or some surface liquid, which are normal. The key is to be consistent with feeding. As the days progress, you'll notice changes, the start will become bubbly, it will expand, and its appearance is more airy. The smell will change, evolving from something less pleasant to a slightly sour, yeasty aroma. After a week, if your starter is consistently doubling in size within 4-8 hours after feeding, it’s ready.
Troubleshooting Common Issues: Navigating the Unexpected
The sourdough journey isn't always smooth. During starter development, you might encounter various challenges. Being prepared to navigate these obstacles is part of the learning curve.
- No Activity: If your starter is not bubbling or expanding, there are several potential causes. Ensure you're using fresh flour and non-chlorinated water. The temperature might be too cold; move the starter to a warmer location. It could also be from a lack of yeast growth; be patient, and continue regular feedings. In some cases, the starter might be too dry or too wet. Fine-tune the flour-to-water ratio based on the texture.
- Unpleasant Odors: An overly acidic or even foul-smelling starter can be due to the breakdown of undesirable bacteria. Continue the feeding schedule, ensuring that you are discarding a portion of the starter each time. A robust, healthy starter will eventually overcome the initial issues. If the odor persists, start over with fresh ingredients, using the same equipment
- Mold: If you notice mold (usually appearing as fuzzy or colorful patches), discard the entire starter. Mold indicates contamination, and the starter is best created again. Properly cleaned containers and a clean working environment are essential. The mold could also be caused by the starter getting wet.
- Surface Liquid (Hooch): The formation of a dark, often alcoholic-smelling liquid on the surface (known as "hooch") indicates that the starter is going hungry or that the environment is too cold. Stir the hooch back into the starter to reincorporate the nutrients or discard it if you like a more sour starter flavor. Adjust the feeding schedule or move the starter to a warmer place.
Maintaining Your Starter: Long-Term Care and Management
Once the starter is active and reliable, maintaining its health and vitality is a straightforward process. The feeding schedule, storage methods, and flour types influence the starter's qualities.
- Feeding Schedule: Frequency depends on your baking needs and storage conditions. For starters stored at room temperature and fed daily, feed daily. If you bake less frequently, store the starter in the refrigerator, and feed it once a week. Before baking, take the starter back out to room temperature and feed it at least once or twice.
- Feeding Ratios: A 1:1:1 ratio (starter:flour:water) is a common and effective method. For example, discard 50 grams of starter, and feed with 50 grams of flour and 50 grams of water. Adjust the ratios based on the starter's consistency and desired fermentation time. A lower ratio (e.g., 1:2:2) may lead to a faster rise.
- Storage: For daily or frequent use, store the starter at room temperature. For longer-term storage, transfer it to the refrigerator. The cooler temperature slows down the activity, reducing the frequency of feedings.
- Reviving a Refrigerated Starter: To revive a refrigerated starter, remove it from the refrigerator and feed it as usual. Allow it to sit at room temperature and feed it again as it begins to double its size. This process can take a few days.
- Adjusting Flour Types: Experiment with different flour combinations to refine the flavor profile. Introduce small amounts of rye, whole wheat, or other grains to enhance the complexity.
Understanding the Signs of Readiness: Recognizing Peak Performance
Knowing when your starter is ready for baking is crucial for consistently successful results. Several visual and sensory indicators will help you determine the ideal time to use your starter.
- Doubling (or Tripling) in Size: A healthy starter will typically double or triple in size within 4-8 hours after feeding. This expansion demonstrates that the yeast
