samsung laptop dvd drive not working

Title: CDDVD Drive Is Not Detected in Windows 10
Channel: TechFixIT
CDDVD Drive Is Not Detected in Windows 10 by TechFixIT
samsung laptop dvd player not working, laptop dvd drive not working
Samsung Laptop DVD Drive Dead? 😱 FIX IT NOW!
Samsung Laptop DVD Drive Gone Silent? Don't Panic!
So, your Samsung laptop's DVD drive decided to take an unscheduled vacation? That's frustrating, right? Because let’s face it, we still use those optical discs. It can be a real pain when that trusty drive refuses to cooperate. But before you start mourning the loss of your favorite DVDs, let's explore some solutions. We are going to bring that drive back to life.
Step One: The Obvious Checks (But Don't Skip Them!)
First things first. Let's start with the simplest things first. Sometimes the easiest fixes are the best ones. Check the basics before panicking. Examine the physical connection. Is the disc properly inserted? Is it clean?
Because dust and debris can sometimes cause issues. Also, make sure the drive hasn't been accidentally disabled. Head to your "Device Manager" to confirm this.
You can access Device Manager through the Start menu. Look under "DVD/CD-ROM drives." Now, is your drive listed there? If not, that's a big clue.
If there's a yellow exclamation mark, there's a driver problem. In that case, right-click on the drive. Then, select "Update driver." Windows will try to find the correct driver.
If that fails, try uninstalling the drive and restarting your laptop. Windows will then re-detect and reinstall it. This simple step resolves many issues.
Step Two: Diving into the Software Side of Things
Alright, so the hardware seems okay. Now, let's look at the software. Corrupted software sometimes causes problems. This causes the system to malfunction.
Often, conflicts can arise. Occasionally, the drive is locked by another application.
To rule this out, close any programs that may be using the drive. These can include any media players or virtual drive software. Next, restart your laptop.
Still no luck? Consider a system restore. Roll back your operating system to a previous point. Choose a restore point before the problem began. This might fix the problem.
Step Three: Hardware Troubleshooting – A More In-Depth Look
Now that we've eliminated the easy fixes, let's get a bit technical. Are you comfortable opening up your laptop? If not, consider seeking professional help. But, if you're tech-savvy, proceed with caution.
Remember to disconnect the power adapter. Also, remove the battery before opening the laptop. This increases safety.
Examine the drive's connection to the motherboard. Is it secure? Reseating the drive might resolve any loose connection.
Then, check for any signs of physical damage. Look for bent pins or loose components inside the drive. If you find any damage, replacing the drive might be necessary.
Step Four: Driver Related Troubles
Drivers are essential for hardware functionality. They act as the middleman. Sometimes, these drivers become problematic. The driver could be outdated or corrupted.
Check again in Device Manager. Navigate to "DVD/CD-ROM drives." Make sure you see the drive listed.
If it’s there, right-click it. Next, choose "Update Driver." Select "Search automatically for drivers." Let Windows search for the latest version.
Moreover, visit the Samsung support website. Search for your laptop model. Download the latest DVD drive drivers from there. Follow the installation instructions.
Step Five: The Ultimate Solution - External Alternatives
Okay, so you've tried everything above. Still no luck, right? It's possible your internal drive is beyond repair. It can be frustrating, but there's still hope.
Consider using an external DVD drive. These drives connect via USB. They are easy to use and relatively inexpensive.
Many brands offer reliable external drives. Shop around and read reviews. Then, compare prices and features.
In addition, an external drive lets you continue using DVDs. It's a good option. This avoids replacing the entire laptop.
Step Six: Preventive Measures for the Future
Hopefully, you've got your DVD drive working again. Now, let's discuss preventing future problems. Because prevention is key.
Treat your laptop with care. Don't drop it or expose it to extreme temperatures. These steps ensure longevity.
Keep the drive clean. Periodically, remove dust and debris. Use compressed air to clean the drive.
Finally, consider switching to digital media. Downloads and streaming are convenient options. This reduces the reliance on physical discs.
So, if your Samsung laptop's DVD drive is dead, don't despair! By following these steps, you can hopefully get it working again. This should work. If not, consider the external drive route. You've got options. Good luck, and happy viewing!
Laptop Password Rejecting? This SHOCKING Trick Fixes It INSTANTLY!Samsung Laptop DVD Drive Dead? 😱 FIX IT NOW!
Hey everyone! Let's be honest, in this age of streaming and cloud storage, a DVD drive on a laptop sometimes feels like a relic from a bygone era, right? But then BAM! You’re hit with a need to watch that old favourite movie, install software, or, you know, access that important data archive you painstakingly burned years ago. And… nothing. Your Samsung laptop's DVD drive is dead. Panic sets in. But before you chuck your laptop out the window, take a deep breath. We've all been there. Consider it a battle scar of the digital age! Today, we're diving headfirst into the frustrating, often hilarious, world of defunct DVD drives and how to resurrect yours. Think of this as your digital CPR course for your Samsung. Ready? Let's go!
1. The Silent Assassin: Recognizing the Symptoms of a Dead DVD Drive
First things first, how do you know your Samsung laptop's DVD drive is actually deceased? It’s like diagnosing a computer cold – you need to spot the tell-tale signs. Here's a checklist:
- No Response to Insertion: You slide in a disc, and…nothing. No whirring, no spinning, just a silent, black hole.
- Drive Not Recognized: Your laptop doesn't even see the drive. You can’t find it in File Explorer. It’s like it's vanished into thin air.
- Error Messages Galore: Often, you'll get an error message like "Device not found," "Unable to read disc," or the cryptic "Drive E: is not accessible." (Remember, the drive letter might differ on your machine.)
- Eject Button Goes AWOL: Even the ejection button refuses to cooperate, leaving your disc trapped inside like a digital prisoner.
- Inconsistent Behaviour: Sometimes it works, sometimes it doesn’t. This could point to a mechanical issue.
If you're nodding along to any of these, chances are your DVD drive is on the fritz. Don't worry, we'll get it sorted!
2. The Software Side: Troubleshooting Logic Before Physical Fixes
Before you grab the screwdriver, let's rule out any software-related culprits. It’s like checking if your car battery is dead before you start replacing the engine.
Restarting Your Laptop: I know, I know, it sounds silly. But honestly, a simple reboot can sometimes fix glitches and reset confused drivers. Trust me, it's the digital equivalent of taking a nap!
Driver Detective Work: Outdated or corrupted drivers are often the sneaky villains causing DVD drive problems. Here's how to update them:
- Search for "Device Manager" in the Windows search bar and open it.
- Expand the "DVD/CD-ROM drives" section.
- Right-click on your drive (it might be listed as "Samsung DVD Drive" or something similar) and select "Update driver."
- Choose "Search automatically for drivers."
- If an update is found, install it and restart your laptop.
- If that doesn’t work, try uninstalling the drive and restarting. Windows should automatically reinstall the driver.
Registry Repair (Proceed with Caution!): Tweaking the registry can be an advanced fix. Back up your registry before making any changes!
- Press the Windows key + R, type "regedit," and press Enter.
- Navigate to
HKEY_LOCAL_MACHINE\SYSTEM\CurrentControlSet\Control\Class\{4D36E965-E325-11CE-BFC1-08002BE10318} - Look for "UpperFilters" and "LowerFilters" on the right-hand side. If they're present, delete them.
- Restart your laptop.
3. The Disc Dilemma: Is the Problem Really YOU?
Sometimes, the problem isn't your drive, but the disc itself. It’s like blaming the chef when it's the rotten ingredient.
- Try Different Discs: Test a variety of DVDs and CDs. Some discs might be scratched, dirty, or damaged. Others might have been burned incorrectly.
- Clean Your Discs: Use a soft, lint-free cloth to gently wipe the disc from the center outwards.
- Check the Disc Format: Make sure your laptop's drive supports the disc format (DVD-R, DVD+R, CD-R, etc.). Older drives might not handle all formats.
4. Hardware Headaches: Potential Physical Problems Unveiled
Okay, so software is ruled out, and the discs are fine. Time to delve into the hardware. This is where things get a little more intimate with your Samsung.
External Drive Rescue: The simplest solution? Buy an external USB DVD drive. They're relatively inexpensive and a fantastic workaround. Plug-and-play simplicity at its finest!
Loose Connections (For the Brave): If you’re comfortable opening up your laptop (and have the right tools – remember, safety first!), you could check the drive's connection to the motherboard. Caution: This voids your warranty!
- Turn off and unplug your laptop.
- Remove the battery.
- Consult your Samsung laptop's service manual (search online using your model number). This may not be required if the drive can be ejected from the service panel on the bottom of most laptops.
- Carefully remove the back panel.
- Locate the DVD drive (usually easy to identify).
- Check the cables connecting the drive to the motherboard; make sure they're secure.
The Ultimate Sacrifice: Drive Replacement: Sometimes, the drive is just plain dead. Replacement is necessary.
- Again, consult your laptop's service manual (it's your bible!).
- Identify the drive type and model.
- Purchase a compatible replacement drive online.
- Remove the old drive and install the new one, following the service manual instructions carefully.
5. Cleaning the Lens: Giving Your Drive a Fresh Start
A dirty lens can be a common culprit for DVD drive woes. Think of it like having smudged glasses – you can’t see clearly!
- The Cleaning Disc Approach: Buy a DVD drive cleaning disc (it's a disc with tiny brushes). Insert it and follow the instructions.
- The DIY Method (For the Optically Inclined): If you're feeling adventurous, you can try cleaning the lens manually (again, at your own risk!)
- Remove the drive from your laptop (following the steps in section 4).
- Carefully locate the lens (usually small and clear).
- Use a cotton swab lightly dampened with isopropyl alcohol to gently clean the lens.
- Let it dry completely before reassembling the drive.
6. Power Supply Issues: Could It Be the Juice?
Sometimes, the DVD drive isn't getting enough power. It’s like the drive is trying to run a marathon on an empty tank.
- Check Your Power Settings: Go to your power settings and ensure your laptop is set to "High Performance," especially while plugged in.
- Run on AC Power: Some drives might struggle with battery power alone. Plug your laptop into a power outlet and try again.
7. Firmware Fiddling: Is Your Drive Up-to-Date?
Firmware updates can sometimes fix compatibility issues and improve drive performance.
- Check Samsung's Website: Go to the Samsung support website and search for firmware updates for your laptop model.
- Follow Instructions Carefully: Install the firmware according to Samsung's instructions. Make sure your laptop stays powered on throughout the update process.
8. Malware Mishaps: Could a Virus Be the Culprit?
Sometimes, malware can interfere with hardware functions.
- Run a Scan: Use your antivirus software to scan your system for malware.
- Isolate and Remove: If malware is found, quarantine and remove it.
9. Physical Damage: The Accidental Misadventures of Life
Life happens. Sometimes, a bump, drop, or spill can damage your DVD drive.
- Assess the Damage: Look for any visible signs of damage, such as cracks, dents, or liquid spills.
- Professional Help: If the damage is severe, it's best to take your laptop to a qualified repair technician.
10. Is Your Drive Region-Locked? The Global Perspective
DVDs are often region-locked to prevent playback in certain geographical areas.
- Check the Region Code: Make sure your DVD drive's region code matches the region code of the DVD you're trying to play.
- Changing Region Codes (Proceed With Caution!): Some drives allow you to change the region code a limited number of times. Search online for instructions specific to your drive model. Be aware that exceeding the limit can render your drive unusable.
11. The Software Wars: Conflicts and Compatibility
Sometimes, a software conflict can cause
HP Laptop Camera Nightmare? FIX IT NOW!DVD CD-ROM drives not showing in device manager fix DVD drive not listed in device manager

By troubleshooterrors DVD CD-ROM drives not showing in device manager fix DVD drive not listed in device manager by troubleshooterrors
Samsung Laptop DVD Drive not Detected

By Hit Short Films Samsung Laptop DVD Drive not Detected by Hit Short Films
How to repair dvd writer . How to Repair DVD drive step by step in Bangla.
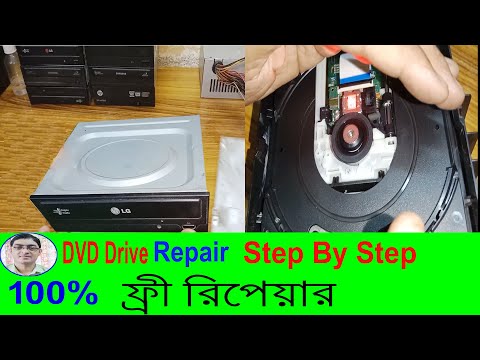
By Bapi G Technology How to repair dvd writer . How to Repair DVD drive step by step in Bangla. by Bapi G Technology

Title: CD DVD Drive Not Reading Discs in Windows 10 11 Fixed
Channel: Tips Howto
CD DVD Drive Not Reading Discs in Windows 10 11 Fixed by Tips Howto
Laptop Working
Samsung Laptop DVD Drive Dead? 😱 Revive It! A Step-by-Step Guide
A dead DVD drive on your Samsung laptop – it's a frustrating glitch, isn't it? Especially when you're eager to watch a movie, install software, or retrieve precious data. But before you resign yourself to expensive repairs or a complete laptop overhaul, hold on. We're here to guide you through a comprehensive troubleshooting journey, offering concrete solutions designed to bring that optical drive back to life. Forget the despair; let's get your Samsung laptop's DVD drive functioning again.
Initial Assessment: Pinpointing the Problem
Before diving into complex fixes, let's establish the nature of the issue. Is your drive completely unresponsive, failing to read any discs? Or are you encountering intermittent errors, such as discs being ejected unexpectedly or read errors occurring? By identifying the specific symptoms, we can more effectively pinpoint the root cause and tailor the solution.
- Drive Not Recognized: When the drive isn't even visible within your Windows operating system, it’s the most basic symptom. This indicates a failure at a fundamental hardware or software level.
- Disc Not Reading: The drive is detected, but it refuses to read any discs. This suggests issues with the laser, lens contamination, or software compatibility.
- Ejecting Discs Unexpectedly: The drive attempts to read the disc then immediately ejects it. It may be a sign of a damaged or incompatible disc, or a problematic drive mechanism.
- Error Messages: You may see clear error messages (e.g., "Cannot read from the disc," "Disc not recognized"). These errors can be very useful.
Once you identify the exact problem behavior, you can go further with investigating the issue.
Software Troubleshooting: The Digital Doctor
Sometimes, the problem resides not in the physical drive itself but within the software that controls it. Let's perform essential software checks to ensure that your Samsung laptop's operating system is correctly interacting with the DVD drive.
1. Driver Verification and Reinstallation: The DVD drive relies on device drivers to communicate with your operating system. Outdated, corrupted, or missing drivers can lead to malfunctions.
- Access Device Manager: Press the Windows key + R, type "devmgmt.msc," and press Enter. This opens the Device Manager, where all connected hardware devices are listed.
- Locate and Inspect the DVD/CD-ROM Drives Section: Expand this section to find your DVD drive's name (e.g., "TSSTcorp DVD-ROM").
- Check for Errors: Look for any yellow warning icons or red "X" marks next to your drive, indicating driver issues.
- Update the Driver: Right-click on the DVD drive, select "Update driver," and choose "Search automatically for drivers." Let Windows search for and install any available updates.
- Uninstall and Reinstall: If updating doesn't work, right-click the drive and select "Uninstall device." Then, restart your laptop. Windows should automatically reinstall the driver upon reboot.
2. Registry Tweaks (Use with Caution!): The Windows Registry stores vital system settings. Incorrect modifications can be harmful, so proceed with extreme care, backing up your registry before making changes.
- Open Registry Editor: Press the Windows key + R, type "regedit," and press Enter.
- Navigate to the Upper Filter and Lower Filter keys: In the Registry Editor, browse to
HKEY_LOCAL_MACHINE\SYSTEM\CurrentControlSet\Control\Class\{4D36E965-E325-11CE-BFC1-08002BE10318}. - Delete the Upper Filter and Lower Filter entries: In the right panel, look for entries named "UpperFilters" and "LowerFilters." If present, right-click each and choose "Delete."
- Restart Your Laptop: After deleting the entries, restart your Samsung laptop. This action can resolve certain conflicts that prevent the drive from functioning correctly.
3. DVD Region Code Verification: If you're trying to play a DVD that was created for a different region, your drive might refuse it unless it has been configured correctly.
- Check the Region Settings: In the Device Manager, right-click the DVD drive, select "Properties," and navigate to the "DVD Region" tab.
- Set the Correct Region: Check if the region code is set to match the region of the DVD you are trying to play. If not, select the correct region. Note that you have a limited number of region changes.
Hardware Inspection: The Hands-On Approach
If software solutions prove ineffective, the issue might lie within the drive itself or its physical connections. Caution and care are paramount when working with internal components. Consult your laptop's manual for disassembly instructions specific to your Samsung model.
1. External Connections: Sometimes the simplest problems have the simplest solutions.
- Check the USB Connection (for external drives): If you are using an external DVD drive, ensure the USB cable is connected securely to both your laptop and the drive. Try a different USB port to rule out port-specific problems.
- Try a Different USB Cable (for external drives): Occasionally, a faulty USB cable is the culprit. Replace the existing cable with a known working one.
2. Internal Connection: Most internal DVD drives in Samsung laptops are connected via SATA (Serial ATA). Loose connections or damage to this interface can cause failure.
- Open the Laptop: Carefully remove the screws from the bottom panel and open your Samsung laptop. Consult your laptop’s manual for the specific steps.
- Locate the DVD Drive: Identify the DVD drive and the SATA connector where it connects to the motherboard.
- Check the Connection: Gently press on the SATA data cable that plugs into the drive and the motherboard to check if it is securely seated.
- If the problem persists: It is recommended to seek a professional to replace the drive.
3. Physical Drive Inspection (Advanced Users Only): Inspecting the drive internally requires more advanced tech skills, so it’s best left to professionals. However, advanced users might attempt the following:
- Dust Removal: Dust buildup can interfere with the drive's laser and mechanical components. Use compressed air to gently remove dust from the drive's interior.
- Lens Cleaning: If you are confident in the process, you could use a cotton swab lightly moistened with isopropyl alcohol to clean the laser lens. Be exceedingly gentle and avoid touching other components.
Disc-Related Issues: The DVD's Perspective
Sometimes, the problem isn't the drive itself, but the discs you're trying to read. Troubleshooting these issues is simple.
1. Disc Quality and Compatibility: Ensure you're using high-quality, unblemished discs. Scratches, dirt, and damage can prevent the drive from reading the disc.
- Try Other Discs: Test with several different DVDs and CDs. If all discs fail, the drive is the likely culprit. If some discs work, the problem is with the specific discs.
- Check the Disc Type: Make sure your drive supports the type of disc you're trying to read (e.g., DVD-R, DVD+R, Blu-ray).
2. Burning and Formatting Issues: Incorrectly burned or formatted discs can cause read errors.
- Test Commercially Produced Discs: Try playing a commercially produced DVD movie or music CD. If those work, the problem is most likely with the discs you've burned yourself.
When to Seek Professional Help
If you've exhausted all these troubleshooting steps and your Samsung laptop's DVD drive remains dead, it's time to consider professional assistance. Attempting further repairs yourself might cause more damage. Here are some situations where seeking professional help is recommended:
- Persistent Hardware Problems: If the drive is not detected or can't read any discs, and you've eliminated software issues and checked physical connections, the drive itself may be faulty.
- Complex Internal Issues: Attempting to disassemble and repair a DVD drive is risky. It might be best to leave it to qualified technicians.
- SATA Connection Issues: If the SATA connection to the motherboard is damaged, a professional repair is most advisable, involving soldering or component replacement.
Prevention: Extending Your DVD Drive's Life
While DVD drives have become less crucial with the rise of digital media, keeping your drive in good working order can be done.
- Handle Discs with Care: Handle discs by the edges and avoid touching the shiny surface. Store them in protective cases when not in use.
- Keep the Drive Clean: Periodically clean your drive’s lens using a cleaning disc or by gently blowing compressed air into the drive.
- Avoid Extreme Temperatures and Humidity: Never operate your laptop in harsh conditions, as these can lead to premature drive failure.
- Eject Discs Properly: Always eject discs before moving or shutting down your laptop.
By following these detailed troubleshooting steps and preventative measures, you can significantly improve your chances of reviving your Samsung laptop's DVD drive. Remember to proceed cautiously, especially when handling hardware components. If all steps fail, don't be afraid to seek professional assistance for a lasting resolution.
