clevo p650sg laptop keys not working

Title: 1 Key Not Working How to Fix100 Laptop Keyboard One Key Not Working Problem Solvedmacnitesh
Channel: Mac Nitesh
1 Key Not Working How to Fix100 Laptop Keyboard One Key Not Working Problem Solvedmacnitesh by Mac Nitesh
Clevo P650SG Keyboard Disaster: FIX Your Broken Keys NOW!
Clevo P650SG Keyboard Catastrophe: Resurrecting Your Typing Experience
That sinking feeling. You're in the zone, immersed in a crucial task, and then-- click… dead. A key on your Clevo P650SG keyboard has surrendered. Panic sets in, right? Fear not, fellow digital warriors! You are not alone. Many have weathered this storm. So, we'll navigate this keyboard crisis together.
The Initial Shock: Identifying the Keyboard's Distress Signals
First, acknowledge the problem. Recognize the keyboard's cries for help. Is it just one key, or are multiple keys refusing to cooperate? Maybe it's random key failures, or perhaps certain keys fail consistently. The severity matters, for sure. Also, the diagnosis is important. Try to pinpoint the exact problematic keys. Understanding the extent of the damage is step one. Therefore, start your investigation now.
Troubleshooting 101: Gentle Nudges Before Radical Surgery
Before you reach for the toolbox, try these less invasive measures. First, is your system up-to-date? Rebooting the system could resolve a software glitch. Sometimes, the simplest solution is the best. Also, check your drivers. Ensure the keyboard drivers are current. Furthermore, a simple driver update can make all the difference.
Next, inspect the keyboard itself. Look for stuck keys. These are the usual suspects. Gently clean around the affected keys. Use compressed air for this. It often works wonders. Do so carefully to avoid further damage. In addition, examine the keycaps. Are they properly seated? In essence, make sure everything is buttoned up tight.
The Deep Dive: Unveiling the Internals (Proceed with Caution!)
If the superficial solutions fail, we delve deeper. This step is for the intrepid. Before dismantling anything, disconnect the power. Also, remember this warning: Proceed with caution. You'll need the right tools. A small Phillips head screwdriver is essential. In addition, you'll need a keycap puller.
Carefully remove the keycaps. Expose the switches beneath. Sometimes, debris can cause issues. Gently clean the switch mechanism. Use a cotton swab and isopropyl alcohol. Be very careful not to damage the mechanical components. Furthermore, check the switch contacts. Are they clean and intact?
Switch Replacement: A Keyboard's Lifeline
If cleaning doesn't save the day, maybe a switch replacement is needed. Mechanical keyboards typically have removable switches. This is fortunate news. Find the correct replacement switches for your Clevo P650SG. Research online forums. Identify the switch type. Purchase the replacements.
Now, carefully desolder the faulty switch. This requires a desoldering tool and patience. Then, install the new switch. Solder it securely. Be sure to avoid overheating the components. Afterward, test the switch thoroughly. It should function flawlessly.
The Membrane Keyboard Conundrum: A Different Ballgame
If you have a membrane keyboard, the repair process differs. These keyboards are usually sealed units. Repairing them can be tricky. However, you might still try cleaning the contact pads. Use a cotton swab and isopropyl alcohol. But remember, success is not always guaranteed.
If cleaning fails, you may face a decision. The cost of membrane keyboard replacement could actually be low. Replacing the entire keyboard may be more practical. In short, weigh your options carefully.
Preventative Measures: Safeguarding Your Keyboard's Future
Prevention is essential. Keep future disasters at bay. Regularly clean your keyboard. Prevent dust and debris buildup. Avoid eating or drinking near your keyboard. These habits will serve you well. Consider purchasing a keyboard cover. It protects against spills. These simple steps greatly extend your keyboard's life.
Seeking Professional Help: Knowing When to Wave the White Flag
Sometimes, the DIY approach isn't enough. Don't hesitate to seek professional help. A qualified technician can diagnose complex issues. They have the expertise. They also have the tools. There's no shame in admitting defeat.
Consult local computer repair shops. They may be able to provide service for a reasonable price. Also, consider contacting Clevo support. They may offer repair services, as well. In the end, a functioning keyboard is more crucial than pride.
Conclusion: Triumph Over The Typed Troubles
So, there you have it. The path to keyboard recovery. You are now equipped to battle keyboard woes. Remember, take action. Tackle the problem head-on. However, whether you troubleshoot or seek professional help, regain your typing freedom. Your Clevo P650SG can once again become a reliable tool. Go forth and type!
Fallout 4 Refusing to Launch on Your HP Laptop? FIX IT NOW!Clevo P650SG Keyboard Disaster: FIX Your Broken Keys NOW!
Hey there, fellow gamers and Clevo P650SG enthusiasts! Let's be honest, that beautiful, powerful beast of a laptop has a few… quirks. And one of the most frustrating (and often overlooked) is the potential for a keyboard disaster. You’re in the middle of an epic raid, typing furiously, and BAM! A key goes rogue, refusing to register your frantic commands. Been there, felt that. It's like hitting a brick wall when you need to be dodging fireballs. But fear not, because we (yes, we—because we're all in this together) are going to delve deep into the Clevo P650SG keyboard woes and, more importantly, how to fix those blasted broken keys and get you back in the game!
1. The Unfortunate Reality: Why Your Clevo P650SG Keyboard Might Be Failing
Let's face it. Technology, even the high-end stuff like the P650SG, isn't perfect. Keyboards, in particular, are prone to issues. Think of them as the workhorses of your digital life. They get hammered, they get crumbs in them, and sometimes, they just give up. The Clevo P650SG, with its sleek design and focus on power, unfortunately isn't immune to these keyboard gremlins. A variety of factors can lead to those frustrating broken keys.
2. The Usual Suspects: Common Culprits Behind Keyboard Malfunctions
So, what's causing this keyboard chaos? Let's break down the usual suspects:
- Dust and Debris: The bane of any keyboard's existence. Crumbs, dust bunnies, pet hair – they all love to sneak in and wreak havoc. Think of them as tiny ninjas, disabling your keys one by one.
- Liquid Damage: A spilled energy drink or a stray coffee splash can be a keyboard's worst nightmare. Fluids short circuit the circuit board, leading to all sorts of malfunctions. It's like pouring water into a fire, only the fire is your keyboard's functionality.
- Physical Wear and Tear: Constant use, especially during intense gaming sessions, puts a lot of stress on the keys. The switches beneath the keys can wear out over time, leading to responsiveness issues. Imagine your keys getting tired, needing a nap after every battle.
- Manufacturing Defects: Occasionally, there might be a faulty keyboard module straight from the factory. This is less common, but still a possibility.
- Driver Issues or Software Glitches: Sometimes, the problem isn't physical at all. A corrupted driver or a software conflict can also lead to keyboard problems. This is like having a traffic jam on the highway of your computer.
3. First Steps: The Initial Keyboard Troubleshooting Checklist
Before we dive into complex solutions, let's start with the basics. Think of this as your keyboard's first aid kit.
- Restart Your Laptop: This seems simple, but it's surprising how often it fixes the issue. It can clear up temporary software glitches. It’s like a digital reset button.
- Check Your Drivers: Make sure your keyboard drivers are up to date. You can find them in the Device Manager in Windows. Outdated drivers can cause all sorts of weirdness.
- Clean Your Keyboard: Gently blow out any dust or debris. A can of compressed air is your best friend here. Avoid using a vacuum cleaner unless you’re very careful, as it can pull off keycaps.
- External Keyboard Test: Plug in an external USB keyboard to see if the problem persists. If the external keyboard works, the issue is almost certainly with your laptop keyboard.
- Check Sticky Keys Settings. Sometimes the Sticky Keys setting can cause issues where keys appear to be sticking. Make sure this is turned off.
4. Deep Cleaning: The Art of Keyboard Disassembly (Proceed with Caution!)
Okay, you've tried the basics, and the keys are still stubbornly unresponsive. It's time for a more serious intervention. This involves taking your keyboard apart. IMPORTANT NOTE: This can void your warranty, and you should be comfortable handling small electronic components. If you're unsure, consider professional repair.
- Power Down and Unplug: Always unplug your laptop and remove the battery before opening it up. Safety first!
- Locate Screws: Find the screws holding the keyboard in place. They are usually on the underside of the laptop, and often hidden behind rubber feet or under stickers.
- Careful Removal: Gently pry up the keyboard (usually from the top edge). Be extremely careful not to break any clips or flex the keyboard too much.
- Keycap Removal (Optional): You can remove the keycaps individually for a thorough cleaning. Use a keycap puller (easily found online). Take photos before you start so you know how to put them back!
- Clean the Circuit Board: Use isopropyl alcohol (90% or higher) and a cotton swab to gently clean the circuit board beneath the keycaps. Be very gentle and avoid excessive liquid.
- Reassemble: Carefully put everything back together, making sure all the clips and screws are in place.
5. Keycap Replacement: When a Key Just Won't Cooperate
Sometimes, cleaning isn't enough. A keycap might be cracked, or the switch underneath it might be broken. Replacing these is often the best solution.
- Identify the Keycap Type: Most keyboards are mechanical, but the Clevo P650SG might have a specific type of switch (e.g., Cherry MX). Knowing this is crucial for buying the right keycaps.
- Purchase Replacement Keycaps: You can find replacements online. Make sure they're compatible with your specific model and switch type.
- Install the New Keycap: Carefully hook the new keycap onto the switch. It should snap into place.
6. Switch Replacement: More Advanced Keyboard Surgery
If the switch itself is broken, you might need to replace it. This is a more advanced procedure, so proceed with extreme caution. It involves soldering and desoldering.
- Identify the Switch Type: Again, knowing the type of switch (Cherry MX etc.) is crucial for finding a replacement.
- Desolder the Old Switch: You'll need a soldering iron, desoldering braid, and some skill. Carefully remove the solder from the pins holding the switch in place.
- Remove the Old Switch: Gently pull the old switch out.
- Solder in the New Switch: Position the new switch and solder it into place.
- Test the Key: Before reassembling everything, make sure the key works!
7. The Software Side: Troubleshooting Driver and Software Glitches
Sometimes, the issue isn't physical. A software conflict or incorrect driver can cause havoc.
- Uninstall and Reinstall Drivers: Go to Device Manager, find your keyboard, and uninstall the driver. Then, restart your laptop, and Windows should automatically reinstall the correct driver.
- Roll Back Drivers: If a recent driver update caused the problem, roll back to a previous version.
- Check for Software Conflicts: Some software, particularly gaming-related apps, can interfere with keyboard functionality. Try closing them one by one to see if it resolves the issue.
8. Hardware Replacement: When All Else Fails
If nothing else works, and the problem is widespread, you might need to replace the entire keyboard module. This is often the most expensive and involved solution.
- Research Replacement Parts: Find a replacement keyboard module specifically for your Clevo P650SG model.
- Watch a Tutorial: Find a video tutorial on how to replace the keyboard on your specific model. This will guide you through the process.
- Professional Help: If you're not comfortable with hardware replacement, consider taking your laptop to a professional repair shop.
9. Preventing Future Keyboard Crises: Proactive Maintenance
Prevention is always better than cure, right? Let's talk about keeping your Clevo P650SG keyboard in tip-top shape.
- Regular Cleaning: Clean your keyboard regularly with compressed air and a microfiber cloth.
- Avoid Eating and Drinking Over the Keyboard: This is a cardinal rule! Spills are the enemy.
- Use a Keyboard Cover (Optional): A keyboard cover can protect against spills and debris. However, they can sometimes interfere with the key feel.
- Moderate Your Gaming Intensity: While we all love a good gaming session, excessive key mashing can wear down the switches faster.
10. Understanding the Components: Knowing Your Keyboard's Anatomy
Knowing how your keyboard works can help you troubleshoot issues.
- Keycaps: The plastic or metal caps you press.
- Switches: The mechanical components that register your key presses.
- PCB (Printed Circuit Board): The circuit board that houses the switches and connects everything.
- The Keyboard Module: The entire assembly.
11. The Cost Factor: Weighing Repair vs. Replacement
Repairing a keyboard can range from a simple keycap replacement (relatively inexpensive) to a full module replacement (more costly). Consider the value of your laptop and whether the repair cost is worth it.
#
Laptop Work Hacks: Boost Productivity & Conquer Your To-Do List!How to Do When PC Laptop Keyboard Not Working - Problem O Key keyboard shorts

By TonaziTube How to Do When PC Laptop Keyboard Not Working - Problem O Key keyboard shorts by TonaziTube
F1-F4 Keys Not Working Try This Fix TechTips

By Study time F1-F4 Keys Not Working Try This Fix TechTips by Study time
Clevo Keyboard Key Repair Guide P Series P650SE P651 P670SG NP8657 N170RF
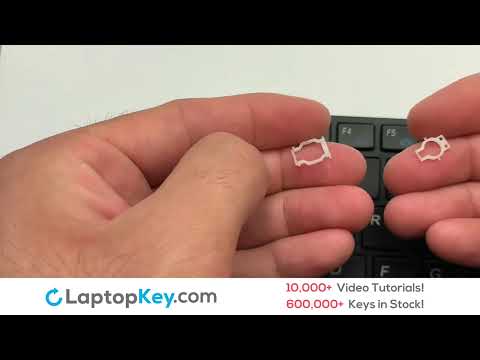
By laptopkeycom Clevo Keyboard Key Repair Guide P Series P650SE P651 P670SG NP8657 N170RF by laptopkeycom

Title: Laptop keyboard keys fix keyboardproblem laptop shorts
Channel: THE TECH INDIA
Laptop keyboard keys fix keyboardproblem laptop shorts by THE TECH INDIA
Wifi On Laptop Phone
Clevo P650SG Keyboard Disaster: Reclaiming Your Typing Sanctuary
The Clevo P650SG, a powerhouse of a laptop, is renowned for its performance. Yet, a common lament amongst its devoted users surfaces: keyboard key failure. Sticky keys, unresponsive keys, and complete key detachment can transform a precision machine into a frustrating obstacle. We understand the anguish of facing an unusable keyboard, hindering your workflow, and compromising your gaming experience. Fear not, as we present a comprehensive guide to diagnosing, addressing, and ultimately resolving the Clevo P650SG keyboard woes. We'll help you reclaim your typing sanctuary.
Identifying the Root Cause: Unmasking the Keyboard's Affliction
Before embarking on repairs, accurate diagnosis is paramount. The symptoms of a malfunctioning keyboard can mimic various underlying problems. Here’s a breakdown of common issues and how to identify their origin:
- Sticky Keys: This frequently results from the intrusion of foreign substances. Crumbs, dust, or even spilled beverages can seep beneath the keycaps, causing them to stick or become unresponsive. Observe which keys are affected. Are they concentrated in a specific area, like the space bar or around the number pad? This suggests a localized contaminant issue.
- Unresponsive Keys: This problem can stem from several sources. A software glitch, a driver malfunction, or a hardware failure within the keyboard itself can cause keys to cease functioning. To isolate the cause, attempt these troubleshooting steps:
- External Keyboard Test: Connect an external USB keyboard. If all keys on the external keyboard function correctly, the problem almost certainly resides within the laptop’s internal keyboard or its associated connector.
- Driver Reinstallation: Access Device Manager (search for it in the Windows search bar). Locate "Keyboards," right-click on your P650SG's keyboard, and select "Uninstall device." Restart your laptop. Windows should automatically reinstall the drivers. If this resolves the issue, a corrupted driver was the culprit.
- System Restore: If the problem surfaced recently, consider a system restore to a point before the issue began. This rolls back your system to a previous working state, potentially undoing changes that caused the keyboard malfunction.
- Physical Damage and Key Detachment: This is often the easiest type of problem to identify. Keys that have physically detached, are loose, or are visibly damaged indicate a hardware failure. Physical damage can vary, from a keycap popping off due to rough handling to more serious damage such as a broken hinge or key switch.
Deep Cleaning: Resurrecting Your Keyboard From Contamination
Often, a thorough cleaning resolves many sticky key or unresponsive key problems. Never underestimate the power of a meticulous cleaning regime. Here is a step-by-step guide:
- Power Down and Disconnect: Completely shut down your Clevo P650SG. Disconnect the power adapter and, if possible, remove the battery. This ensures electrical safety throughout the cleaning process.
- Air Blast: Use a can of compressed air specifically designed for electronics. Hold the can upright and direct short bursts of air between the keys and around the keyboard's surface. Focus on areas where you see (or suspect) debris. Be particularly attentive to the spacebar, Enter key, Shift keys, and any keys near the top of the keyboard, as these are typically more prone to crumbs.
- Keycap Removal (Optional, but Recommended): For more thorough cleaning, consider removing the keycaps. Use a keycap puller (inexpensive and readily available from online retailers). Hook the puller beneath the keycap and gently but firmly lift straight upwards. Some keycaps might require a bit more force if they are held in place by stabilizers.
- Surface Cleaning: Once the keycaps are removed (or if you're not removing them), use a soft, lint-free cloth, lightly dampened with isopropyl alcohol (70% or higher concentration). Gently wipe the keyboard surface, focusing on the areas around the key switches. Avoid dripping or excessive liquid, as this can seep into the keyboard and cause further damage.
- Keycap Cleaning: Clean the removed keycaps in a similar manner; using the isopropyl alcohol solution. Make sure they are thoroughly dry before replacing them.
- Reassembly: If you removed keycaps, carefully reattach them. Align the keycaps with the switch stems and press firmly until they snap into place. Make sure each key is properly seated.
Hardware Solutions: When Cleaning Isn't Enough
If cleaning doesn't solve your Clevo P650SG keyboard problems, it’s time to investigate hardware solutions.
- Keycap Replacement: Damaged or missing keycaps can be replaced individually. Search online for replacement keycaps specifically designed for the Clevo P650SG. Ensure you purchase the correct key size and profile (the height and shape of the key).
- Key Switch Replacement: Underneath each keycap is a switch that registers your keystrokes. If a key switch is faulty, the corresponding key will likely be non-responsive. Replacing a key switch is more complex than replacing keycaps.
- Identification: Before you begin, positively identify the type of key switch used in your Clevo P650SG. Generally, this model used Cherry MX switches or similar. The type of switch you have will determine the replacement parts needed.
- Disassembly (Carefully): You'll need to disassemble the laptop to access the underside of the keyboard. Follow a detailed disassembly guide (search online for "Clevo P650SG disassembly").
- Soldering: Carefully desolder the faulty key switch from the keyboard's circuit board. A desoldering pump is essential.
- Soldering (Re-Soldering): Solder the new key switch into place, ensuring proper alignment and connection.
- Keyboard Replacement: If multiple key switches are faulty, or if the keyboard is severely damaged, replacing the entire keyboard assembly may be the most practical solution. Replacement keyboards are available online from various vendors. Match the model number of your Clevo P650SG to the replacement keyboard's specifications to ensure compatibility. These replacements are typically a complete assembly, making installation relatively straightforward.
Software Considerations: Beyond the Hardware
While primarily a hardware issue, software can influence keyboard functionality.
- Keyboard Configuration: Verify that your keyboard settings are correctly configured in Windows. Go to "Settings" > "Time & Language" > "Language." Ensure that your preferred input language is selected. If there are multiple keyboards configured, make sure the correct one is enabled.
- Accessibility Settings: Occasionally, accessibility settings can interfere with keyboard behavior. Check "Settings" > "Ease of Access" > "Keyboard." Disable any settings that might affect key behavior, such as "Sticky Keys," "Filter Keys," or "Toggle Keys."
- BIOS Update: Outdated BIOS firmware can sometimes cause compatibility problems with hardware. Check the Clevo website for BIOS updates for your P650SG. Be extremely cautious during BIOS updates. Follow Clevo’s instructions precisely. A failed BIOS update can render your laptop unusable.
Preventive Measures: Safeguarding Your Future Keystrokes
Preventative measures can significantly extend the lifespan of your Clevo P650SG keyboard.
- Regular Cleaning: Maintain a regular cleaning schedule. Wipe down your keyboard at least weekly. Consider a deep clean (described above) every few months, or more frequently if you eat or drink near your laptop.
- Protective Cover: Use a keyboard cover, especially during use. These inexpensive covers protect against spills and debris. Choose a cover specifically designed for the Clevo P650SG to ensure a proper fit.
- Gentle Handling: Avoid striking the keyboard with excessive force. Rough treatment can damage keycaps, key switches, and the keyboard's underlying structure.
- Avoid Liquids: Keep liquids away from the keyboard.
Troubleshooting Flowchart: Your Personalized Guide
To aid in your troubleshooting, consider this simple flowchart:
- Key Problem Detected: Is a key sticky or unresponsive?
- Yes: Proceed to Deep Cleaning.
- No: Proceed to Hardware Solutions.
- Deep Cleaning Completed: Did cleaning resolve the problem?
- Yes: Success! Monitor for recurrence.
- No: Proceed to Hardware Solutions.
- Hardware Solutions: Has the keycap or key switches been replaced?
- Yes: Test keyboard. If it works, the problem is solved.
- No: Replace the entire keyboard.
- Keyboard Replacement: Install the new keyboard. Test keyboard thoroughly to see if it functions.
The Path to Resolution: Restoring Keyboard Harmony
Addressing Clevo P650SG keyboard issues can seem daunting, but with careful diagnosis, a systematic approach, and the right information, you can successfully repair and restore your laptop's functionality. By diligently following these steps and applying the preventative measures listed, you can secure the longevity of your keyboard and avoid these frustrations in the future. Remember to back up your crucial data before undertaking any hardware repairs. Follow all safety guidelines.
